Vendor Lien Waiver Config
If Track Lien Waivers is enabled at the company and job level, you can enable it at the vendor level as well. Complete the following steps to configure the lien waiver tracking settings for this vendor:
From My Paperless, click .
In the ClearToPay™ navigation bar, click .
From the Jobs page, select a job from the list to access its vendors.
Note
All operations vendors to do not track lien waivers.
Click .
Select the vendor whose lien waivers you want to configure.
Click .
A page similar to the following displays:
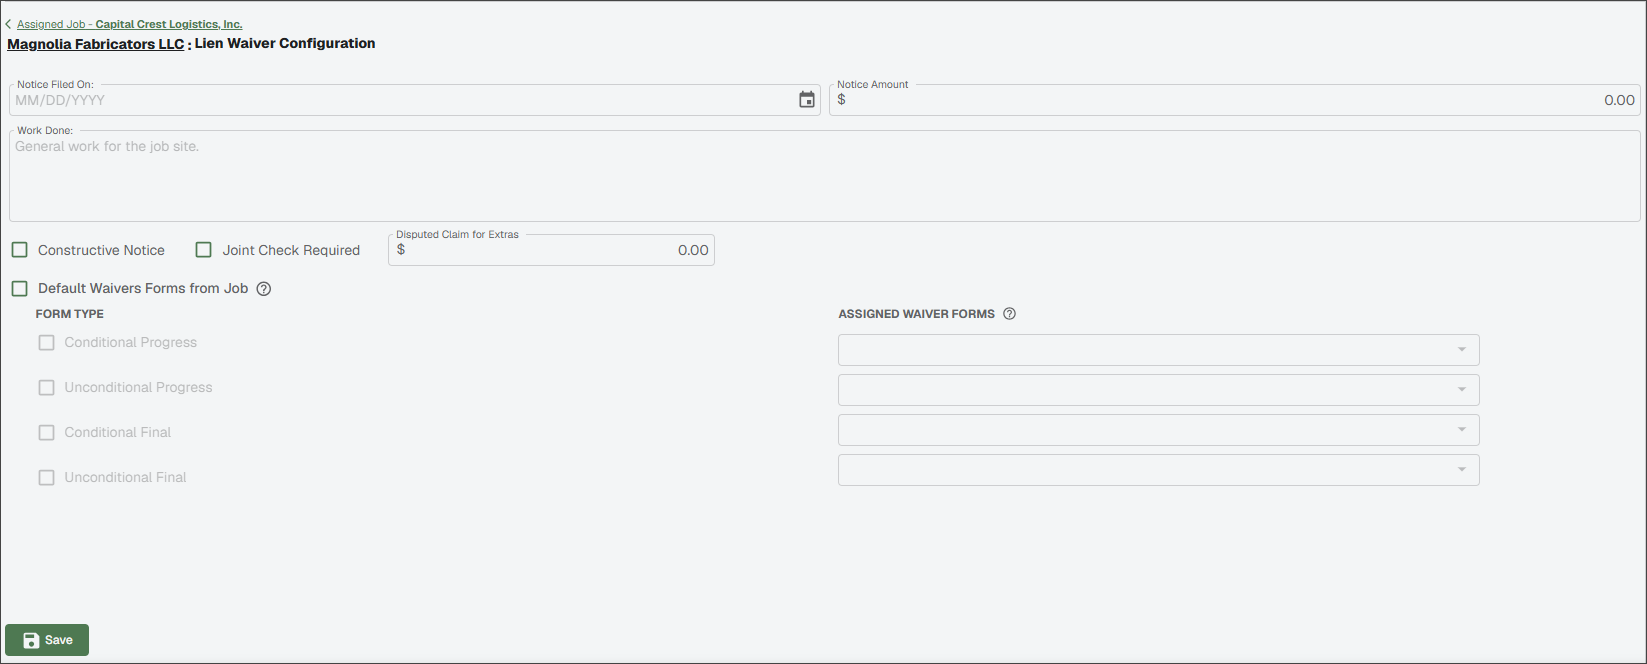
Enter the date provided for use on the waiver form template in the Notice Filed On field.
Enter the currency value provided for use on the waiver form template in the Notice Amount field.
Enter a description of the labor, services, equipment or materials provided by this vendor for the job in the Work Done field.
Select the check boxes below to enable following requirements, if needed. These options are strictly informational and do not effect the lien waiver tracking process.
Constructive Notice
Joint Check Required
(If applicable) Enter a limit in the Disputed Claims for Extras field.
If the Default Automatic Waivers Forms from Job check box is selected, the Form Type and Assigned Waiver Forms are populated systematically. When selected, the forms that are assigned on the job's Settings page for are used this vendor.
Note
You can override the default form selection on a per-vendor basis by deselecting the check box and selecting the applicable form types and associated options from the dropdowns in the Assigned Waiver Forms section.
Click .