Invoice Routing
When the invoice information is entered, and the related documents are matched, the invoice is ready for the next step in the process.
From My Paperless, click .
From the APFlow™ navigation bar, click Invoice Entry.
In the APFlow™Queues field, use the dropdown to select the appropriate queue.
Note
My Queue should display as the default.
In the Document Status field use the dropdown to select Unprocessed.
Enter an invoice in Invoice Entry.
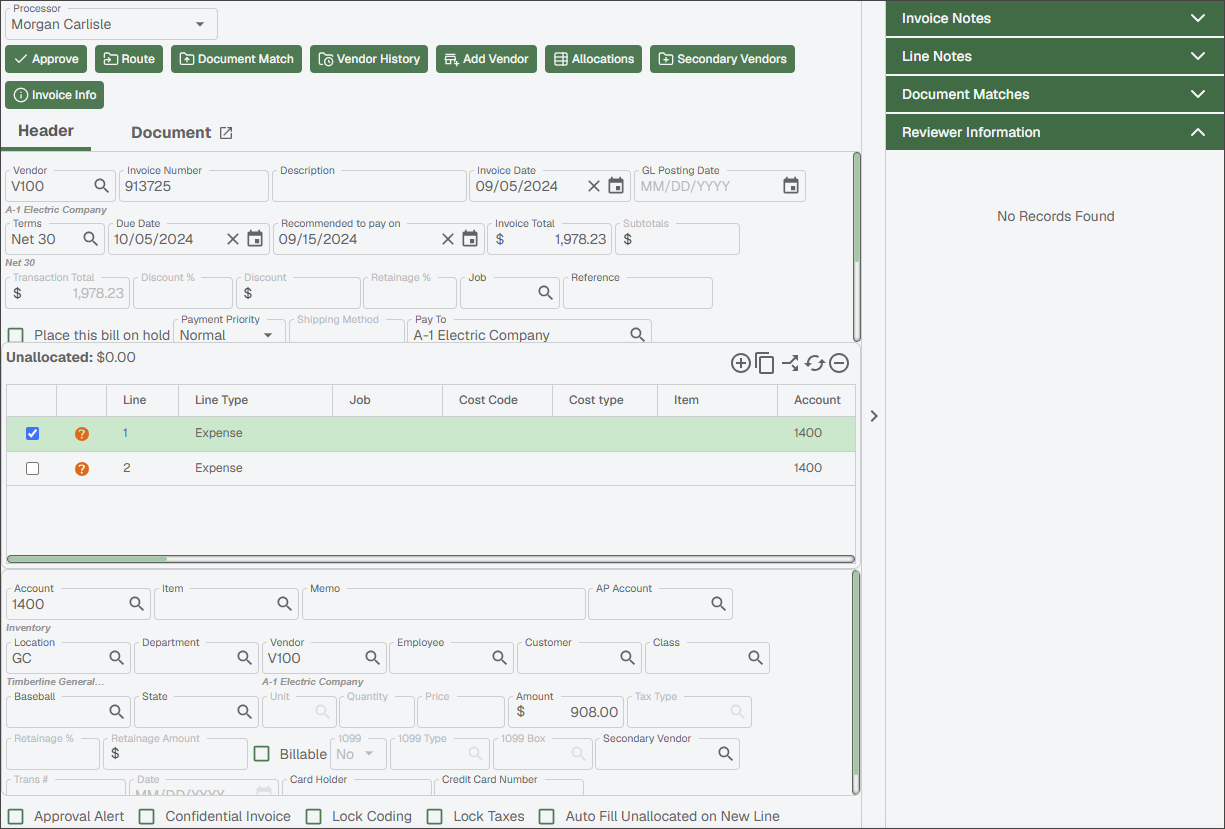
If the invoice is not ready to be sent to Reviewer(s) for approval, close the Invoice Entry page.
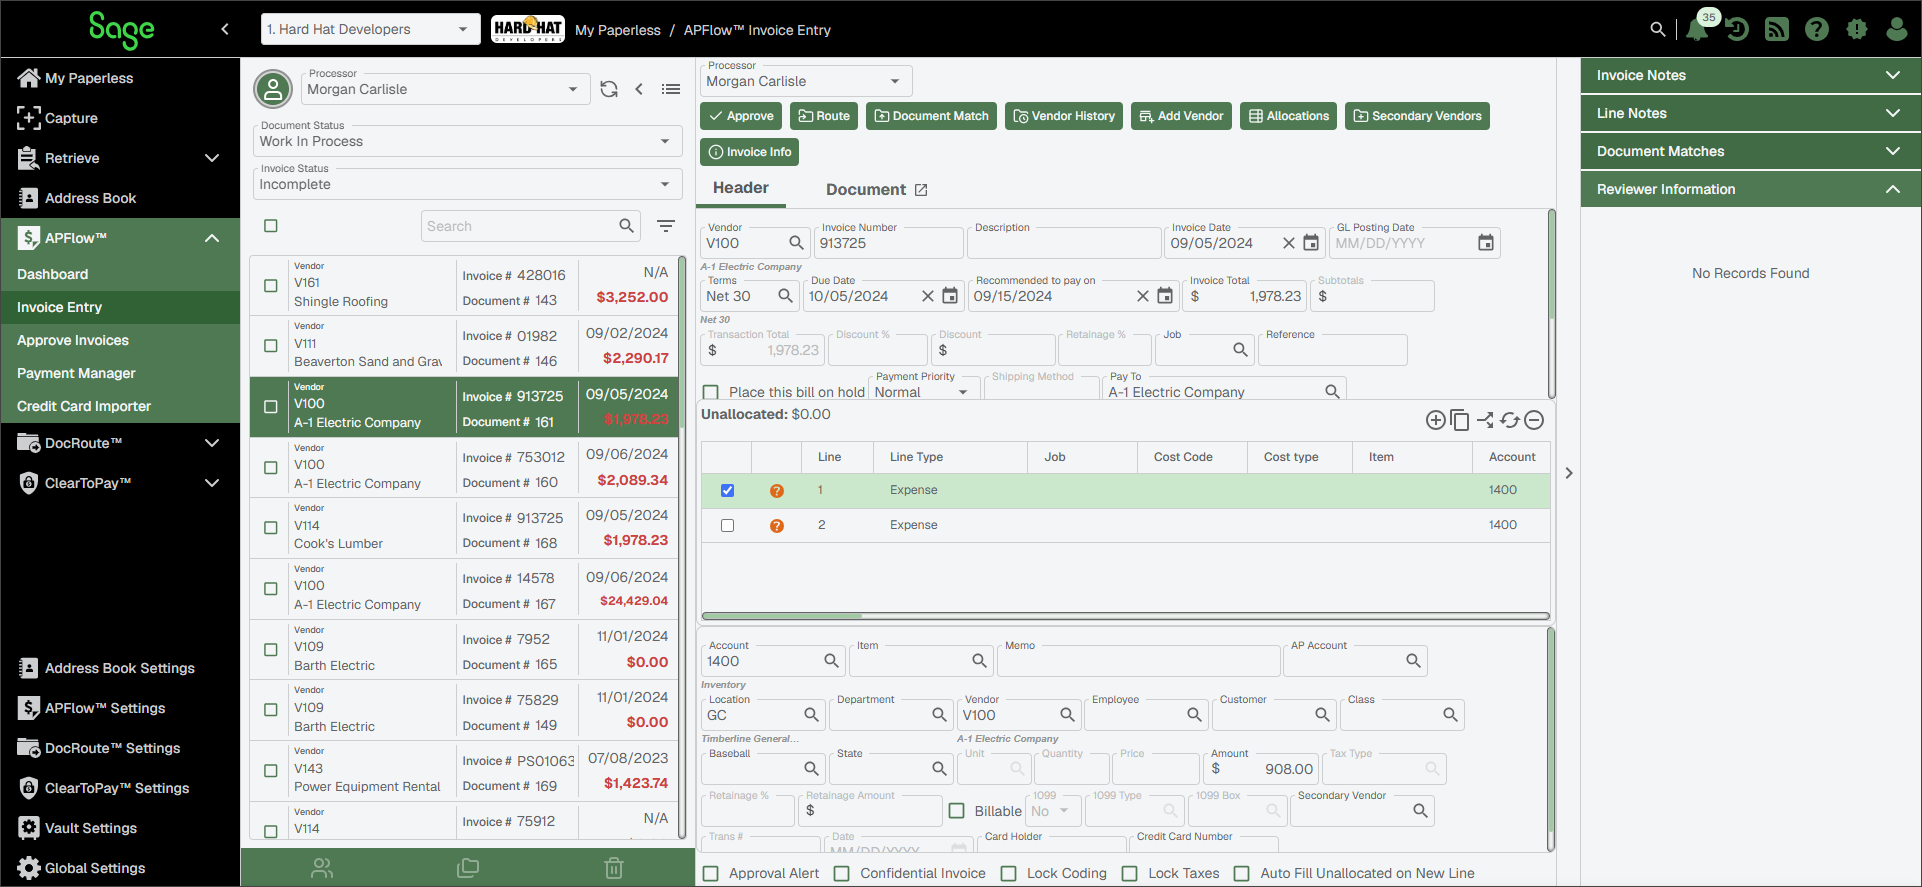
To re-access the invoice and prepare it for Reviewer approval, select Work In Process in the Document Status dropdown.
In the Invoice Status dropdown, select Incomplete.
The list of invoices that displays should include the invoice you partially completed.
Click the invoice to display it.
For information on Routing Rule fields and grids, see APFlow™ Routing Rules.
For information on adding Routing Rules, seeAdd APFlow™ Routing Rules.
For information on editing existing Routing Rules, see Edit APFlow™ Routing Rules.
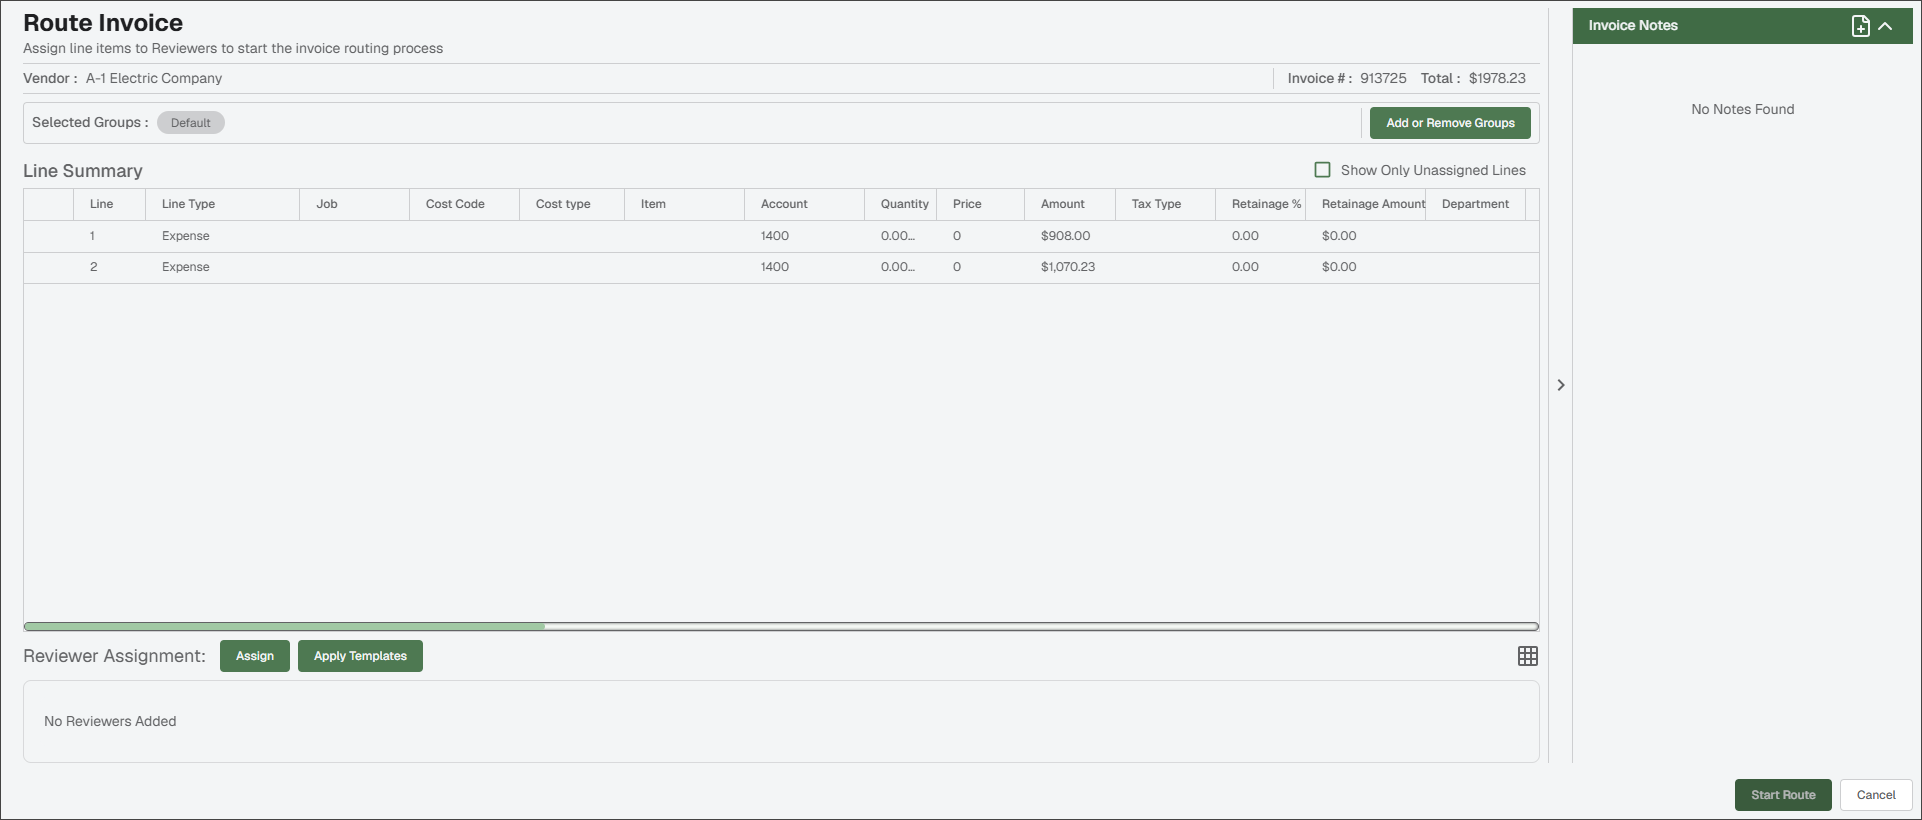
From the Invoice Entry page, click Route.
The Route Invoice page similar to the following displays:
Click .
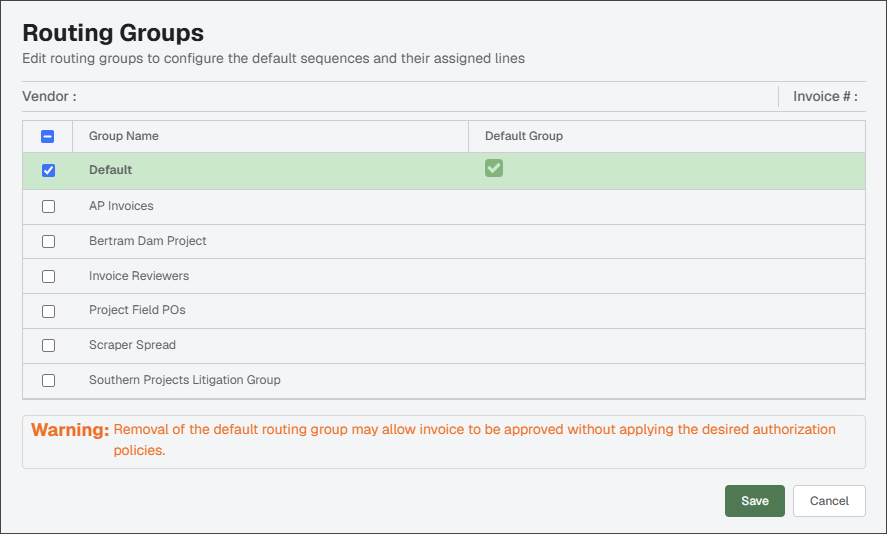
The Routing Groups dialog displays:
Note
The Default group is identified by the checkmark in the Default Group column.
See APFlow™ Rule Groups for information on the Default group.
The warning message only displays if you have the additional permission to turn the Allow Override Route Group off.
In addition to the preselected default group, you can click to select one or more other routing group as appropriate.
Click .
The routing group(s) you select displays in the Selected Groups grid.
If a previously created route template applies to this route, click .
The Choose Route Templates dialog similar to the following displays:
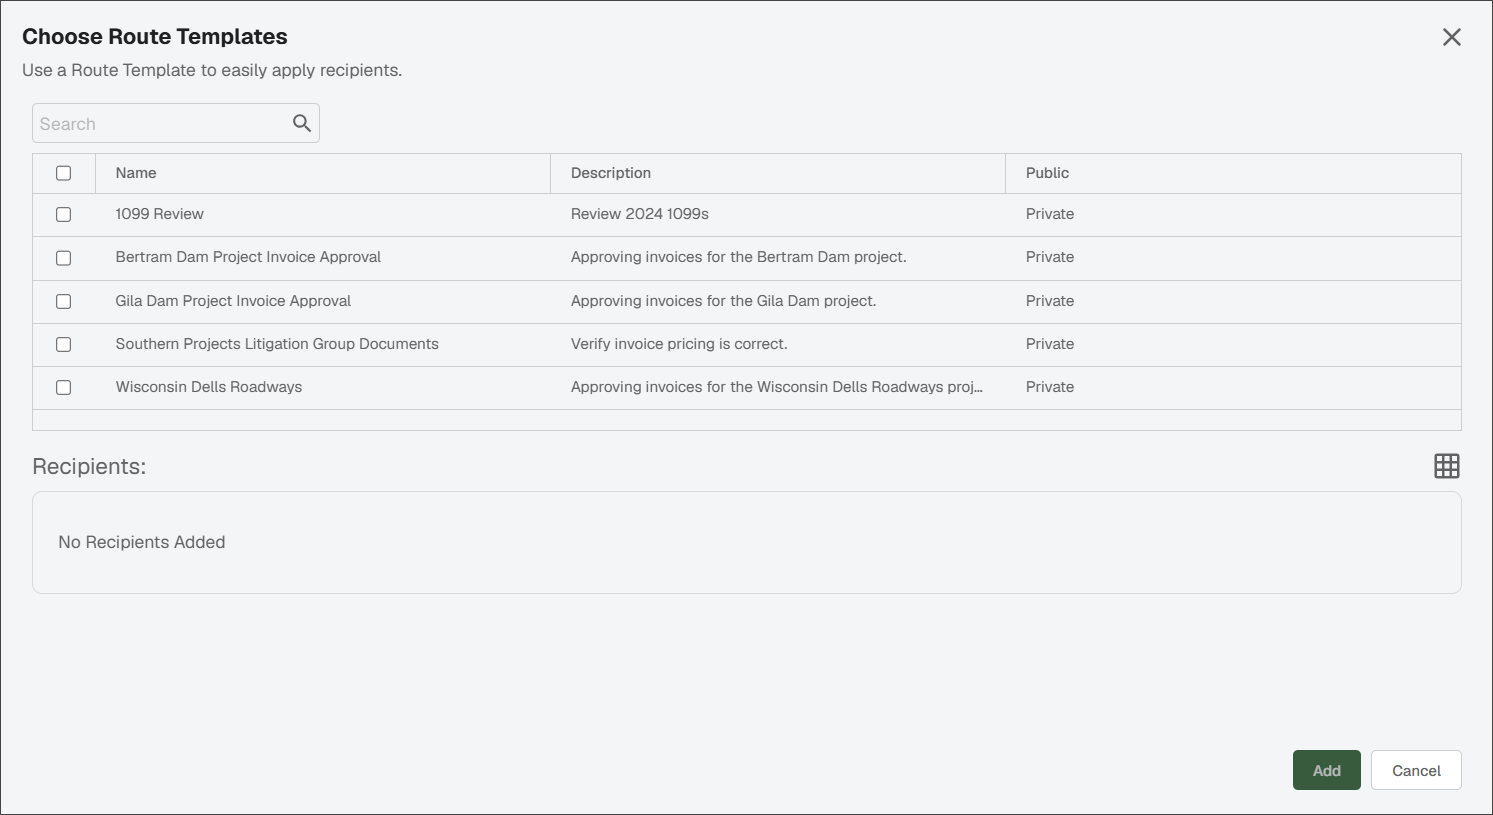
Click to select the Route Templates.
The Recipients associated with the route template you selected populates the Recipients pane.
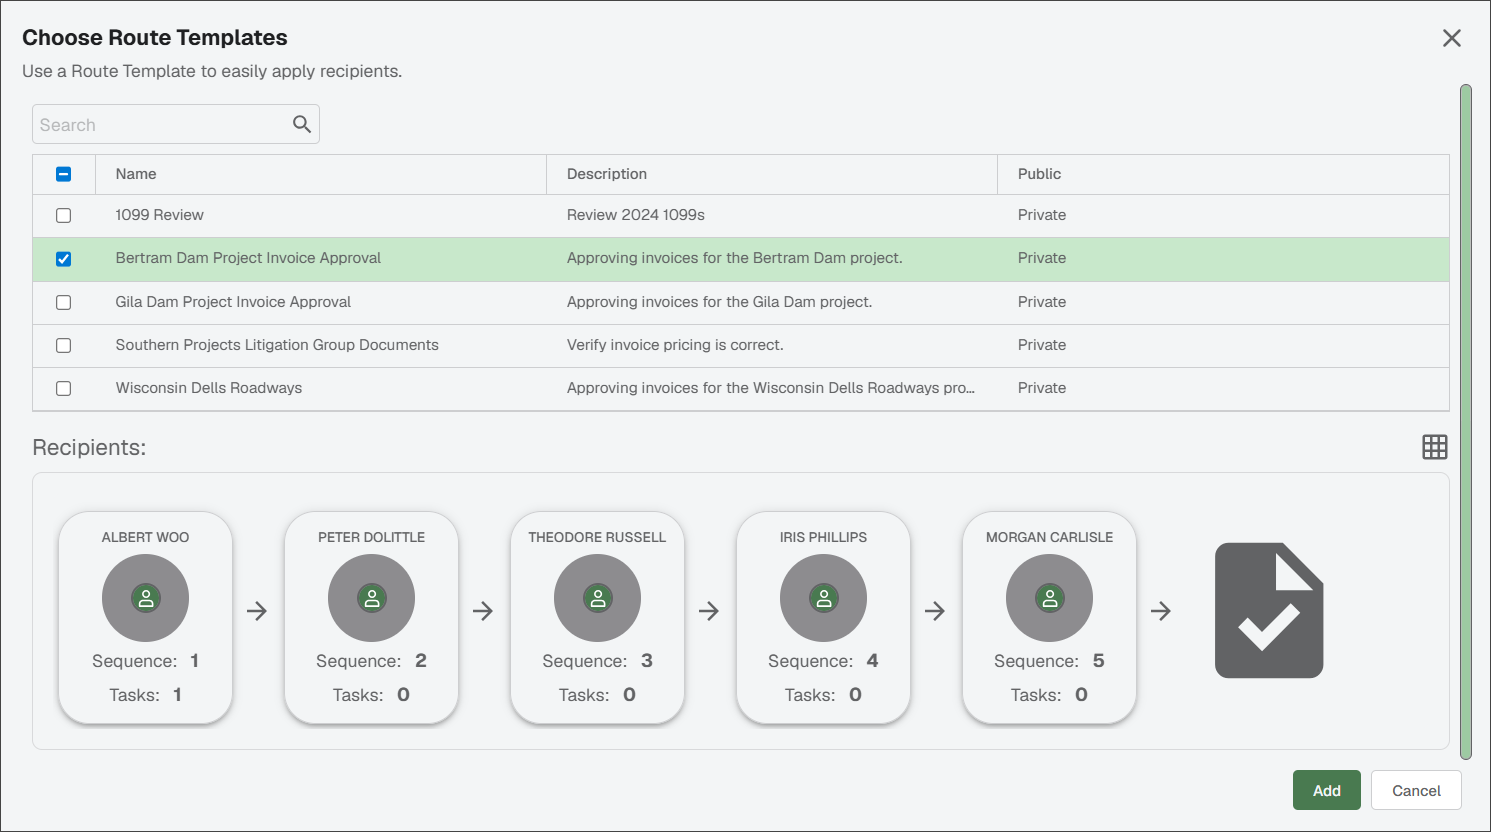
Important
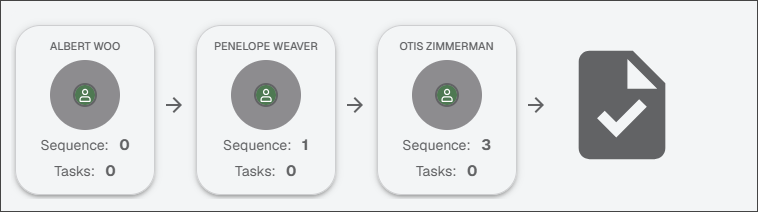
The same reviewer can display more than once in your route. When the route template was created, specific reviewers were identified and route sequences assigned. Those reviewers with their route sequences systematically display.
If you manually add the same reviewer with a different route sequence outside the route template to this route, that reviewer displays twice—based on the order of their route sequences.
Your Review Assignment for your route could resemble the following:
Note
If you have a reviewer who was previously a recipient to a route through a routing rule (see APFlow™ Routing Rules for information) but has since been removed from that routing rule, their reviewer assignment card indicates that they no longer have the appropriate access and permissions to approve the route.
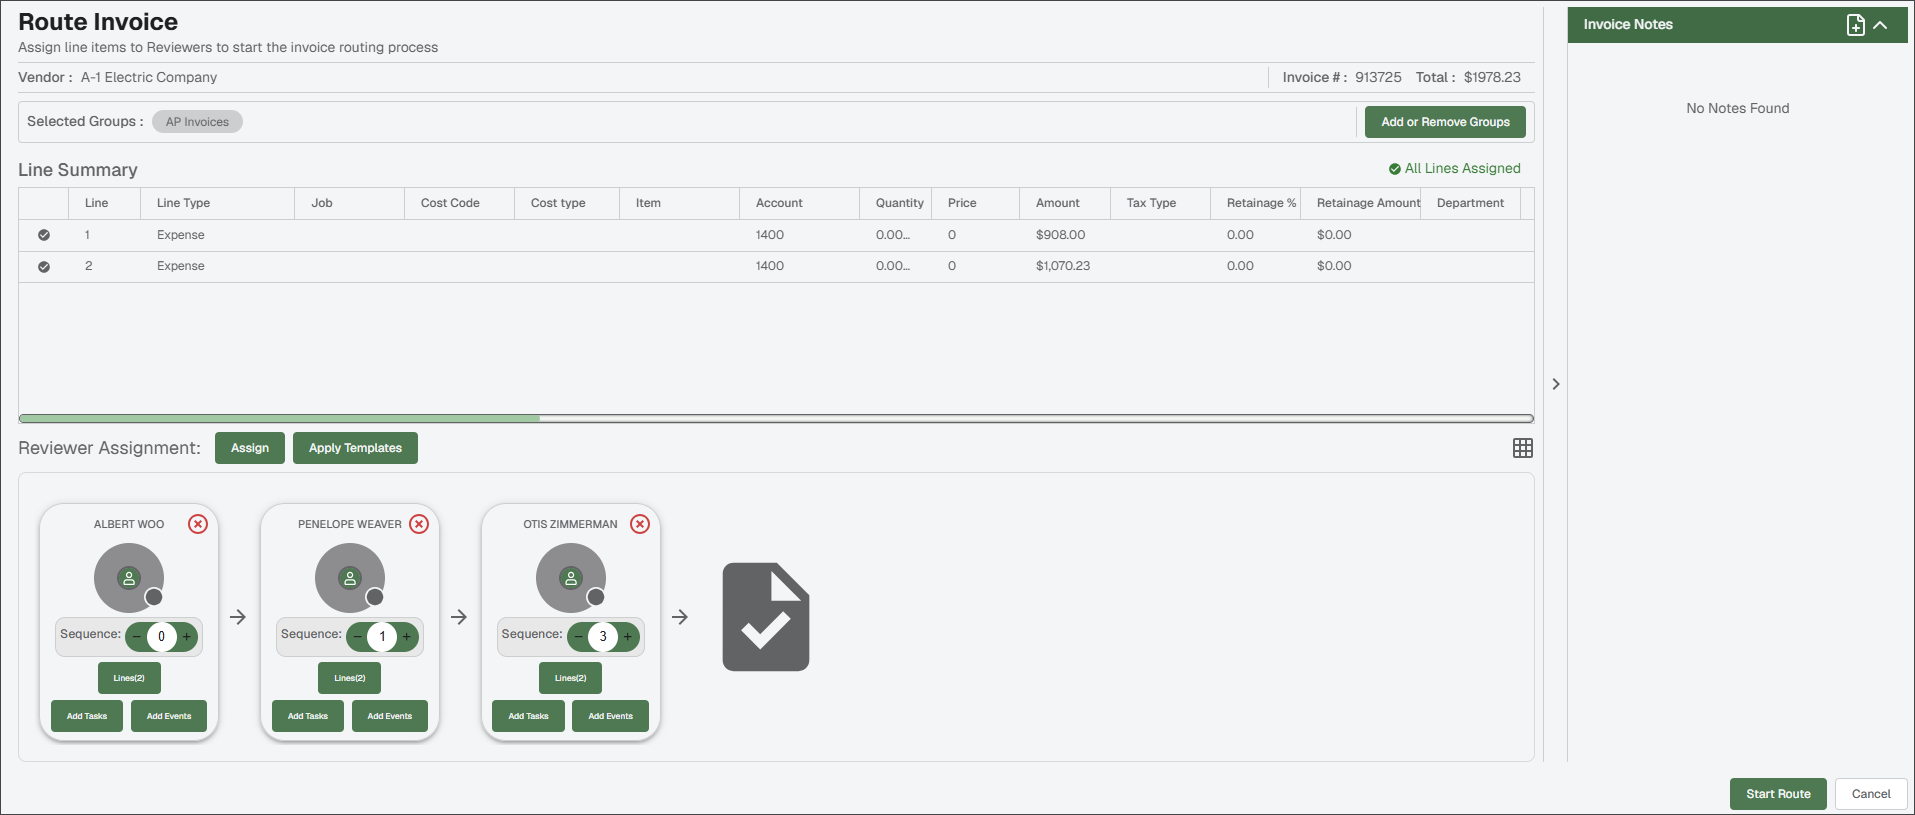
Click .
A partially completed Route Invoice page displays:
Note
The highlighted card is a visual indicator of where in the sequence is currently. This can help you identify where the route may be relayed.
To add more reviewers to the route, click in the Reviewer Assignment grid.
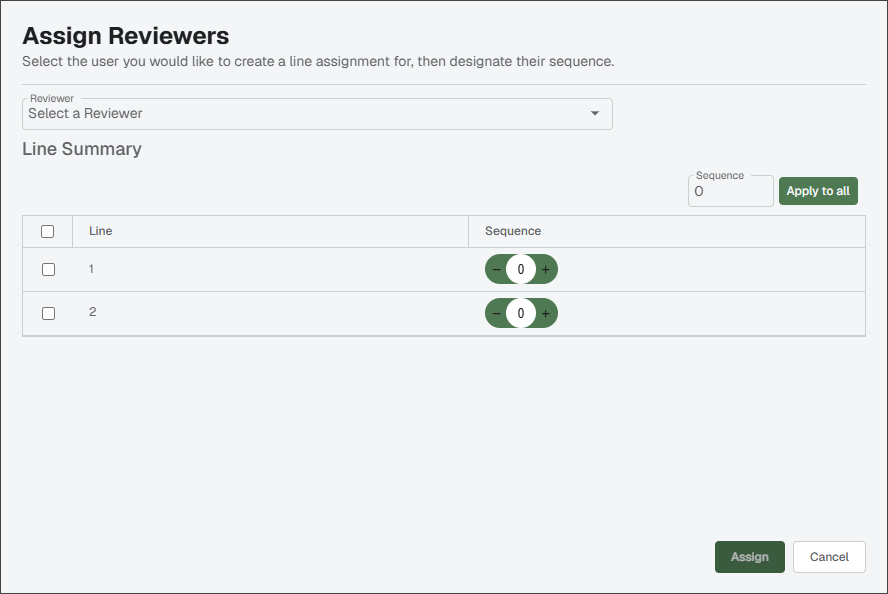
Use the Reviewer dropdown to select a reviewer.
Note
If reviewers have already been assigned, you can click in a reviewer card to access the Assign Reviewers dialog. Based on the reviewer card you select, that reviewer's name displays in the Reviewer field.
If all sequences should be the same for all lines displaying in the Line Summary grid, enter the sequence number in the Sequence field (or use the field arrows). Click to update.
In the Line Summary grid, select the line(s) that the identified reviewer should review.
Click .
The recipients you selected populate similar to the following:
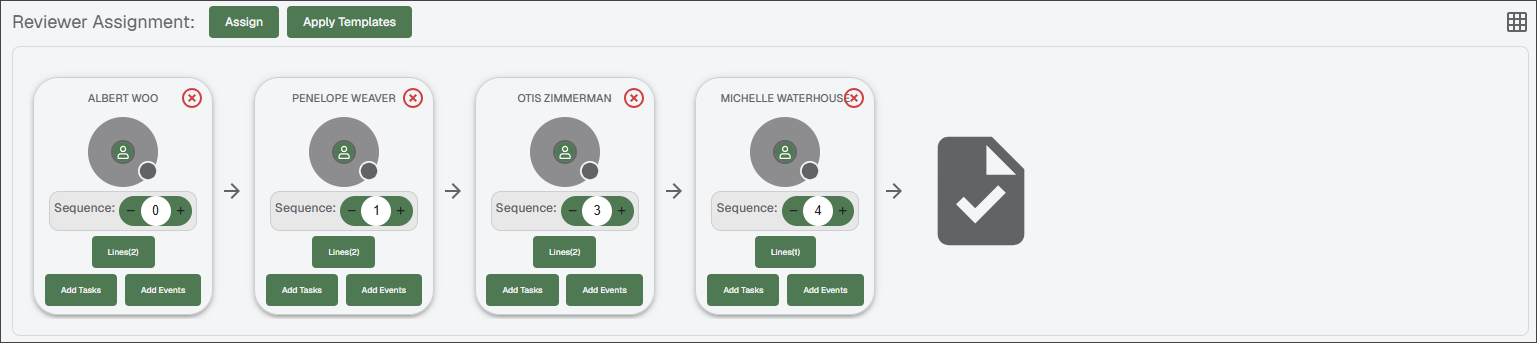
Repeat the steps above until all lines are assigned to reviewers.
(Optional) Click the Invoice Notes
 title bar icon to open an Add Note text box. Here you can enter a note associated with the invoice you are getting ready to route.
Click . The note is included when the invoice is sent to review. Additionally anyone looking at the invoice is able to read any associated Invoice Notes.
(Optional) Should Tasks and/or Events need to be added, click or on the reviewer card.
For more information about Tasks and Events, see Configure APFlow™ Tasks or APFlow™ Events.
Click .
This invoice displays in the Pending Invoice Status.
Note
Once a route is initiated, you can re-access the Invoice Route page to make changes. When your changes are complete, click .