Vaults
When the Sage Paperless Construction system is initially configured, every company is assigned at least one vault. While important information is set up elsewhere, Document Types and Queues for instance, that information is consolidated for use in a specific vault.
If needed, a company can have more than one vault. Adding more vaults to Sage Paperless Construction enables documents to be stored from another company or department separately. A vault can only be integrated with one back-end ERP system.
Note
Every vault requires its own license.
While vaults can be added, copied and have some high-level information edited from within , most vault information is configured in Vault Settings. See Vault Settings for more information on setting up and bridging company vaults.
From My Paperless, click .
In the Global Settings navigation bar, click .
A page similar to the following displays:
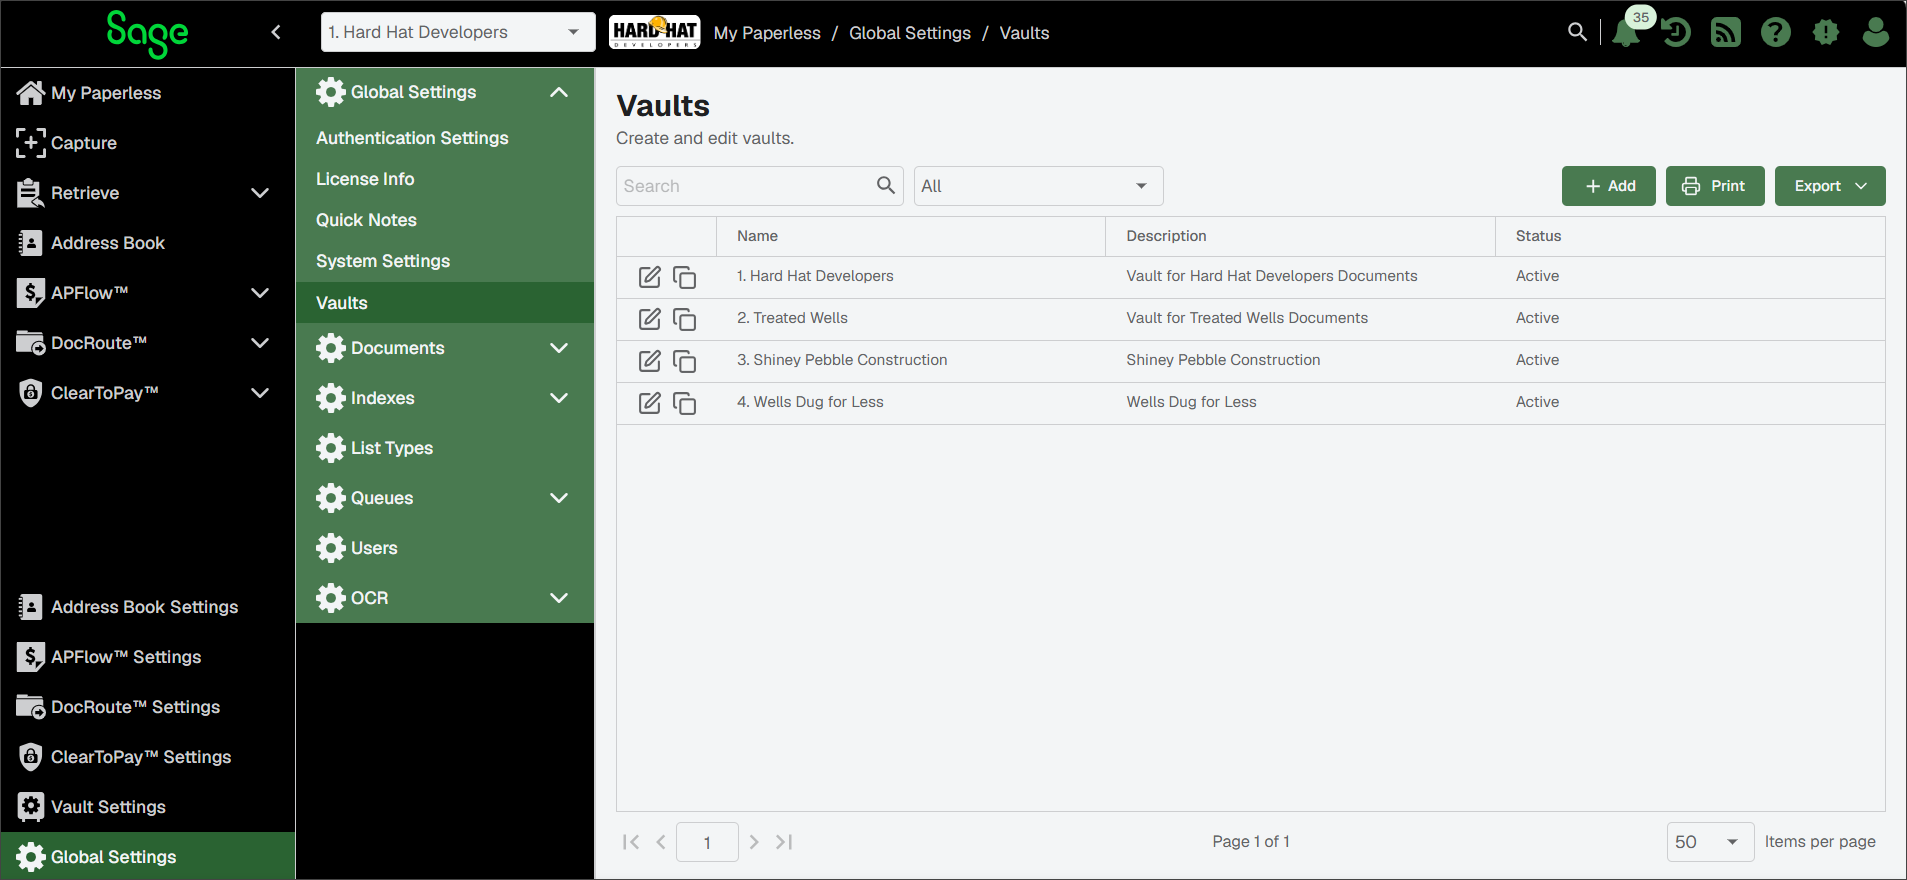
Adding more vaults to the Sage Paperless Construction system enables documents to be stored from another company or department separately. Users with permission to do so can switch between different vaults while performing their day-to-day tasks.
From the Vaults page, click .
Note
If the ADD button does not display in the toolbar on the Vaults page, it is because you have reached your vault limit. Contact Paperless Environments if you need to purchase additional vaults.
On the Vault Properties page, enter the following:
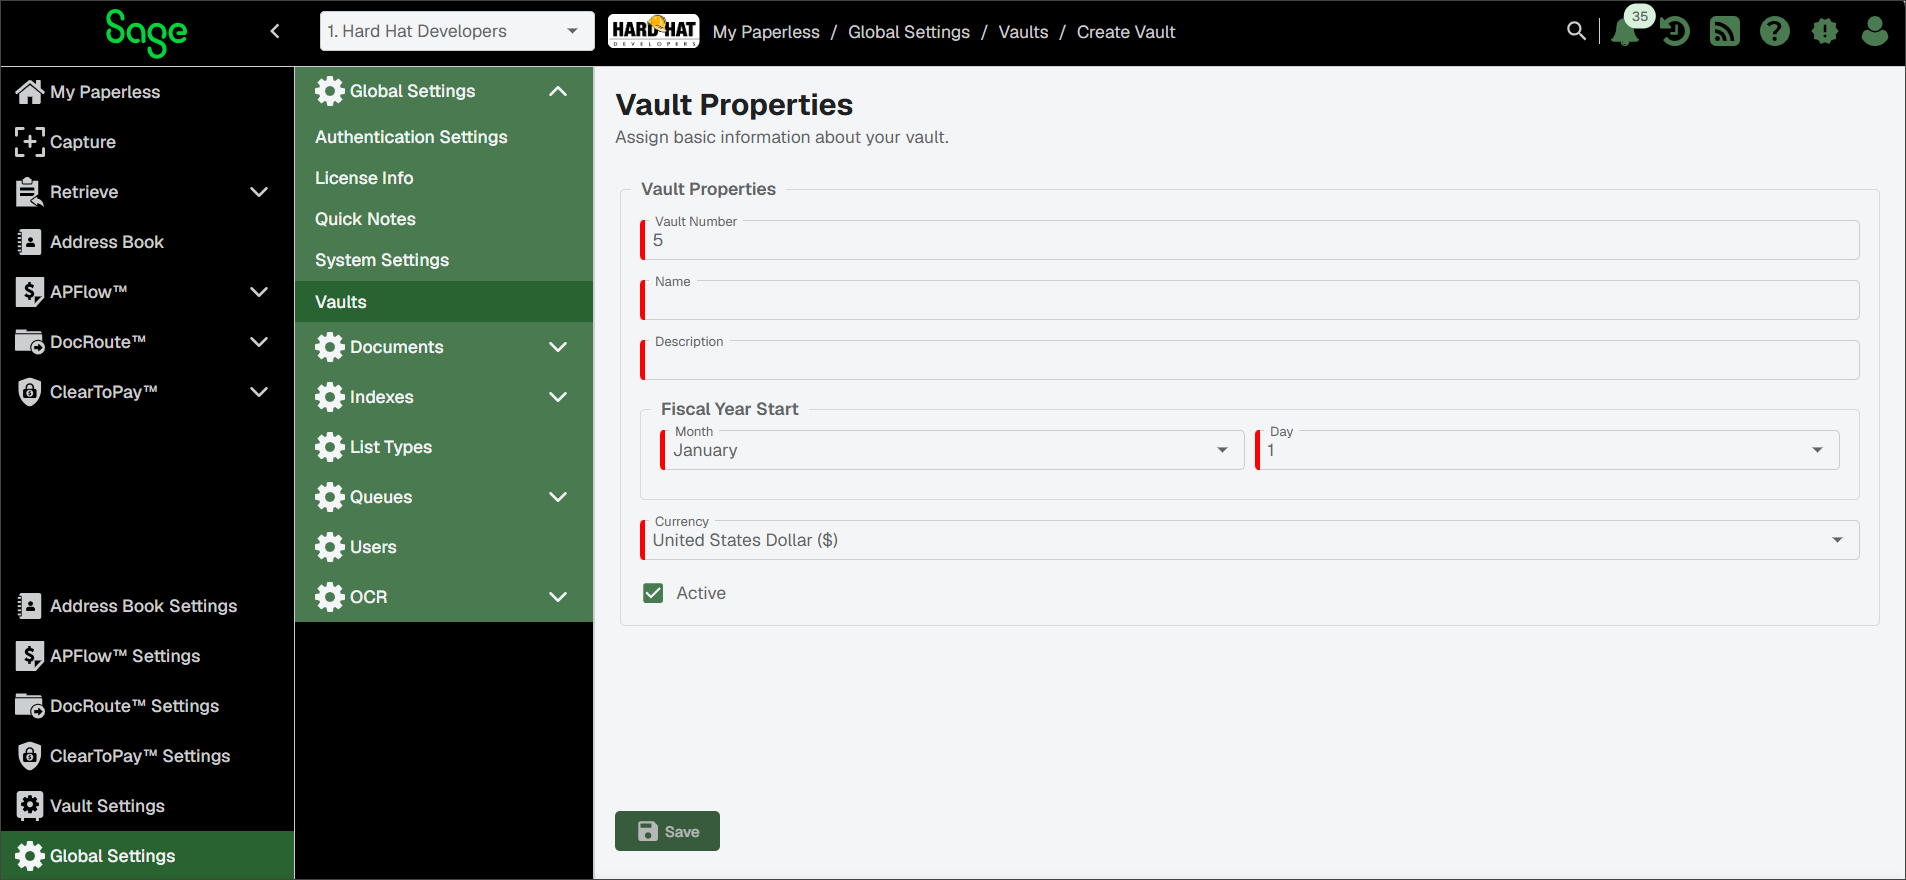
In the Vault Number field, keep the system-generated number or enter a meaningful company number to assign to the vault.
In the Name field, enter the company name.
In the Description field, enter a description of the vault or re-enter the company name.
In the Fiscal Year Start area, pick the month and day of the first day of the associated company's fiscal year.
Note
This information is used for document retention purposes.
Make sure the Active check box is selected.
The completed page resembled the following:
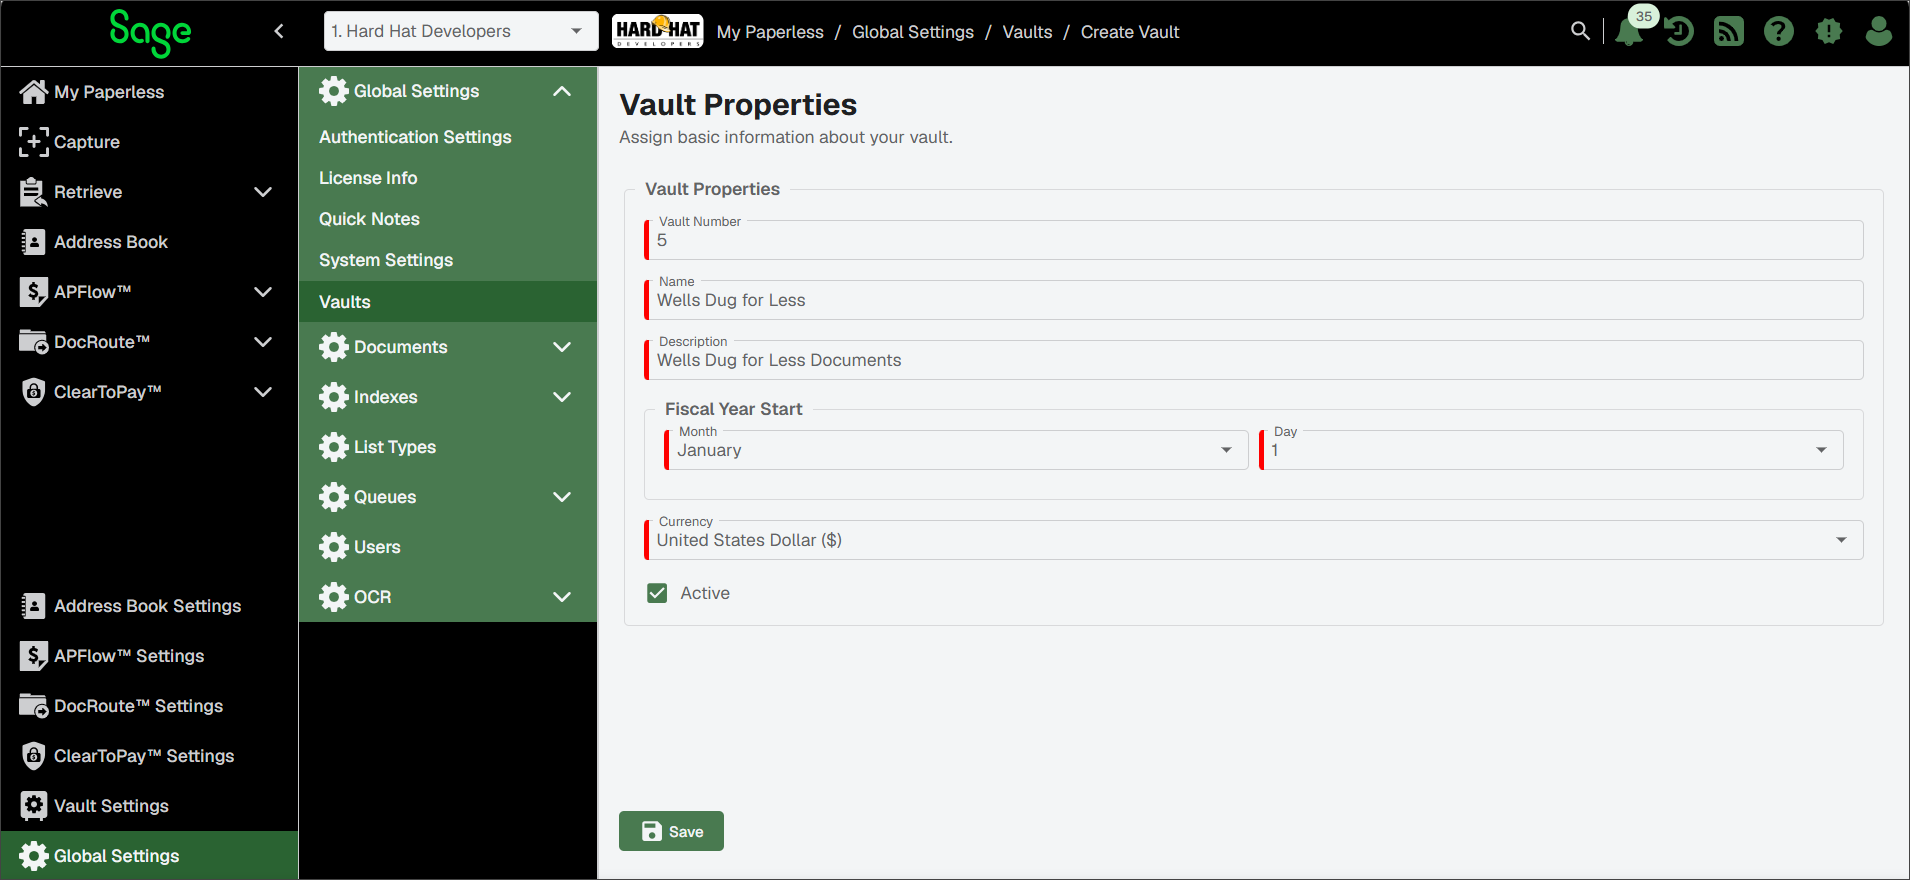
Click .
After clicking , you are taken to Vault Settings where you can continue setting up the new vault's security groups, theme and a vault image. See Security Groups for more information.
If the settings of a new vault can mirror settings from an already established vault, complete the following steps to use the Copy Vault to Vault functionality:
From the Vaults page, click the Copy
 icon for the vault you want to duplicate.
The Copy Vault to Vault dialog displays:
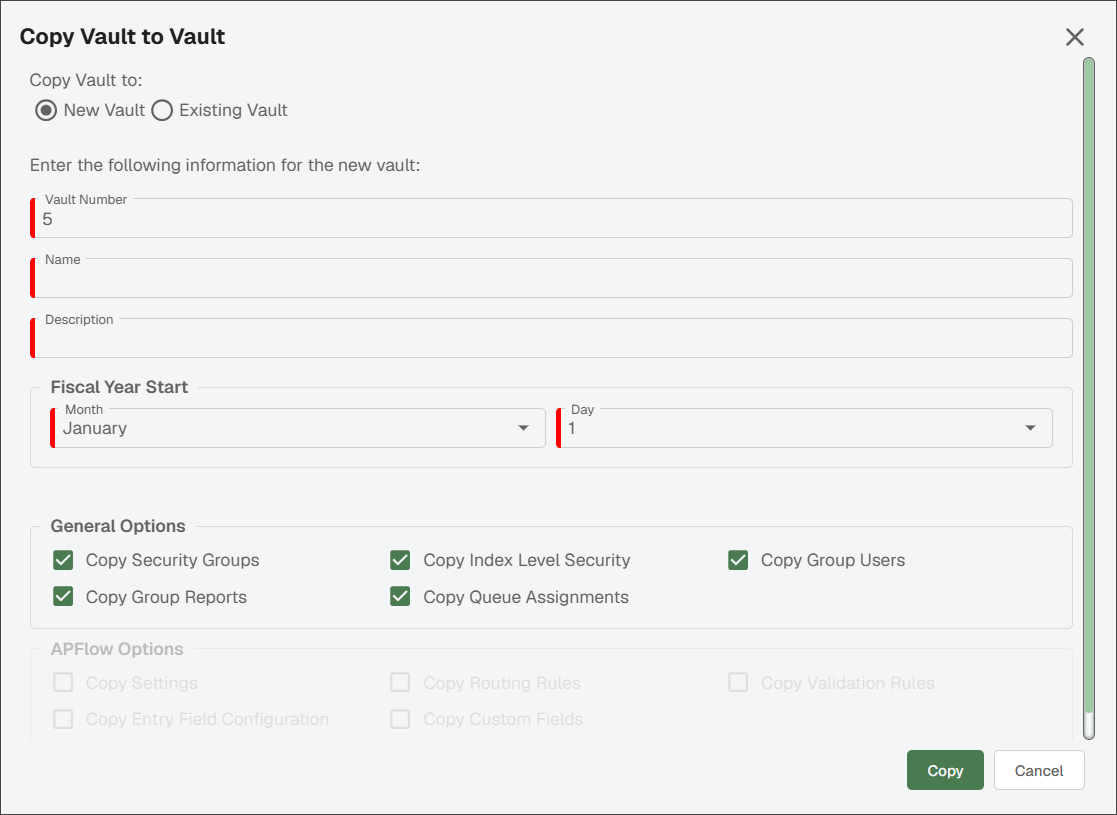
Copy Current Vault Specifics to a New Vault
With the New Vault radio button selected, complete the steps below to copy the vault that you are in, to a new vault.
In the Vault Number field, keep the system-generated number or enter a meaningful company number to assign to the vault.
In the Name field, enter the company name.
In the Description field, enter a description of the vault or re-enter the company name.
In the Fiscal Year Start area, pick the month and day of the first day of the associated company's fiscal year. This information is used for document retention purposes.
Check any or all of the following check boxes to copy specific information from the existing vault to the new vault:
General Options
Copy Security Groups
Select to copy the security groups and document types associated with those security groups.
Copy Index Level Security
Select to copy index level security to the target vault. See Index Security for more information.
Copy Group Users
Select to copy the users assigned to the security groups to the groups in the target vault.
Copy Group Reports
Select to copy the report security setup for each group.
Copy Queue Assignments
Select to copy any queue assignments to the target vault.
Important
To activate the check boxes located in the APFlow Options grid, the vault being copied and the target vault must both be bridged to the same accounting system. If bridged to different accounting systems, the check boxes in the grid are inactive and cannot be selected.
APFlow Options
Copy Settings
Select to copy the settings for all users to the target vault. All processor, reviewer, supervisor permissions copy to the target vault and are identical to the source vault. The Invoice Route sequence and approval limit values are identical as well.
Note
The Copy Group Users option to access the Copy Settings option must be selected.
Copy Routing Rules
Select to copy the APFlow routing rules to the target vault. All rules from the source vault replace all the rules from the target vault. Tasks and events present on routing rules are copied to the target vault too.
When active, this check box is selected by default.
Note
If you copy routing rules without the Copy Custom Field option selected, a message displays stating that rules with custom fields are not copied, but the copy without those rules should still occur.
Copy Validation Rules
Select to copy any validation rules based on your bridged accounting system. If you copy validation rules, your target vault is identical to your source vault.
These are the validation rules that exist in . See Validation for more information.
Note
If you copy validation rules without the Copy Custom Field option selected, a message displays stating that rules with custom fields are not copied, but the copy without those rules should still occur.
Copy Entry Field Configuration
Select to copy any field settings configured on the Entry Fields. See APFlow™ Entry Fields for more information.
Note
If you select this check box without the Copy Custom Field option selected, a message displays stating that rules with custom fields are not copied, but the copy without those rules should still occur.
Copy Custom Fields
Select to copy any field settings configured on the Entry Fields. See APFlow™ Entry Fields for more information.
If the Copy Custom Fields option is checked along with the Copy Entry Field Configuration option, all settings copy over for all the fields with the order maintained.
Click .
Copy Current Vault Settings to an Existing Vault
With the Existing Vault radio button selected, complete the steps below to copy the settings of the vault that you are currently in to another existing vault.
Select the vault to which you want to copy the current vault's settings from the Target Vault list:
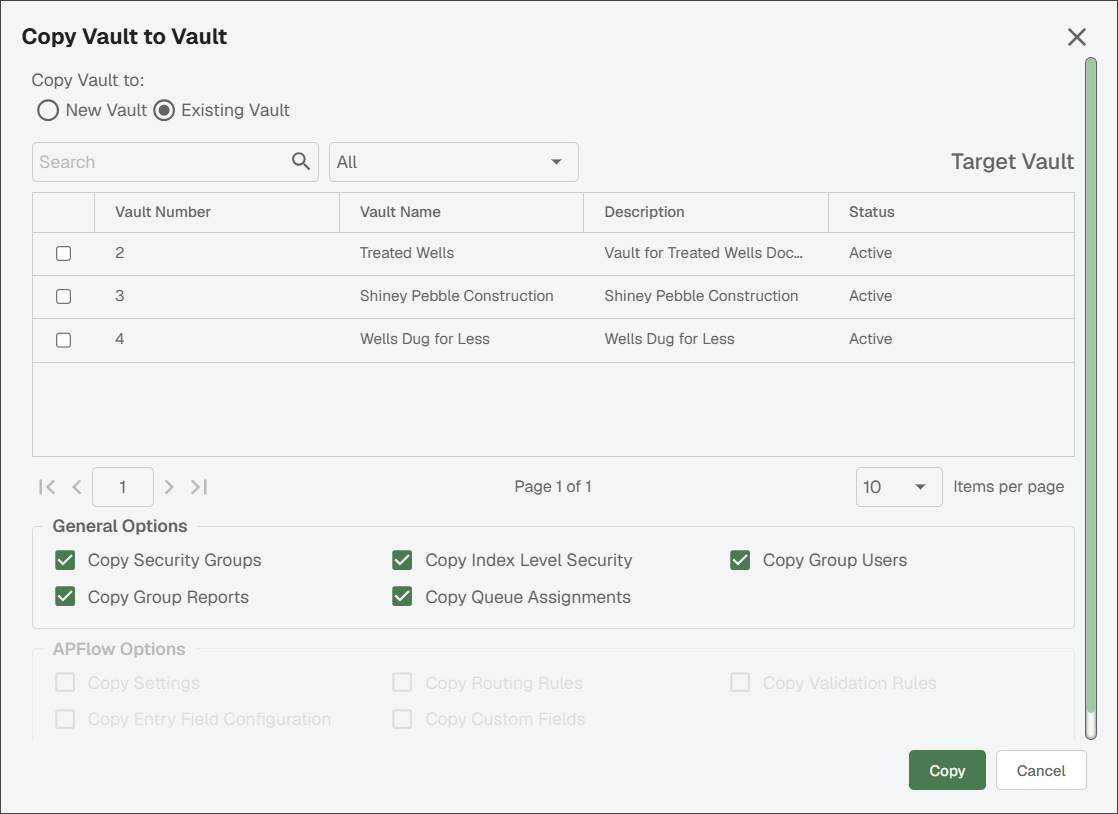
Check any or all of the following check boxes to copy specific information from the existing vault to the target vault:
General Options
Copy Security Groups
Select to copy the security groups and document types associated with those security groups.
Copy Index Level Security
Select to copy index level security to the target vault. See Index Security for more information.
Copy Group Users
Select to copy the users assigned to the security groups to the groups in the target vault.
Copy Group Reports
Select to copy the report security setup for each group.
Copy Queue Assignments
Select to copy any queue assignments to the target vault.
Important
To activate the check boxes located in the APFlow Options grid, the vault being copied and the target vault must both be bridged to the same accounting system. If bridged to different accounting systems, the check boxes in the grid are inactive and cannot be selected.
APFlow Options
Copy Settings
Select to copy the settings for all users to the target vault. All processor, reviewer, supervisor permissions copy to the target vault and are identical to the source vault. The Invoice Route sequence and approval limit values are identical as well.
Note
The Copy Group Users option to access the Copy Settings option must be selected.
Copy Routing Rules
Select to copy the APFlow routing rules to the target vault. All rules from the source vault replace all the rules from the target vault. Tasks and events present on routing rules are copied to the target vault too.
When active, this check box is selected by default.
Note
If you copy routing rules without the Copy Custom Field option selected, a message displays stating that rules with custom fields are not copied, but the copy without those rules should still occur.
Copy Validation Rules
Select to copy any validation rules based on your bridged accounting system. If you copy validation rules, your target vault is identical to your source vault.
These are the validation rules that exist in . See Validation for more information.
Note
If you copy validation rules without the Copy Custom Field option selected, a message displays stating that rules with custom fields are not copied, but the copy without those rules should still occur.
Copy Entry Field Configuration
Select to copy any field settings configured on the Entry Fields. See APFlow™ Entry Fields for more information.
Note
If you select this check box without the Copy Custom Field option selected, a message displays stating that rules with custom fields are not copied, but the copy without those rules should still occur.
Copy Custom Fields
Select to copy any field settings configured on the Entry Fields. See APFlow™ Entry Fields for more information.
If the Copy Custom Fields option is checked along with the Copy Entry Field Configuration option, all settings copy over for all the fields with the order maintained.
Click .