Importer Jobs
Use Importer Jobs to systematically bring in emails, email attachments, documents or accounting records to reduce manual entry. Sage Paperless Construction can look for new emails in identified accounts on a regularly scheduled basis and directly import them into the system. This eliminates the need for company personnel to monitor emails and then drag and drop them or their attachments into Sage Paperless Construction.
Sage Paperless Construction integrates with both Outlook and Gmail to access emails in primary mailboxes as well as in shared mailboxes. This integration supports any email account in the cloud on Exchange Online as part of Office 365 or on Exchange on premises in hybrid deployments.
From My Paperless, click .
In the Vault Settings navigation bar, click .
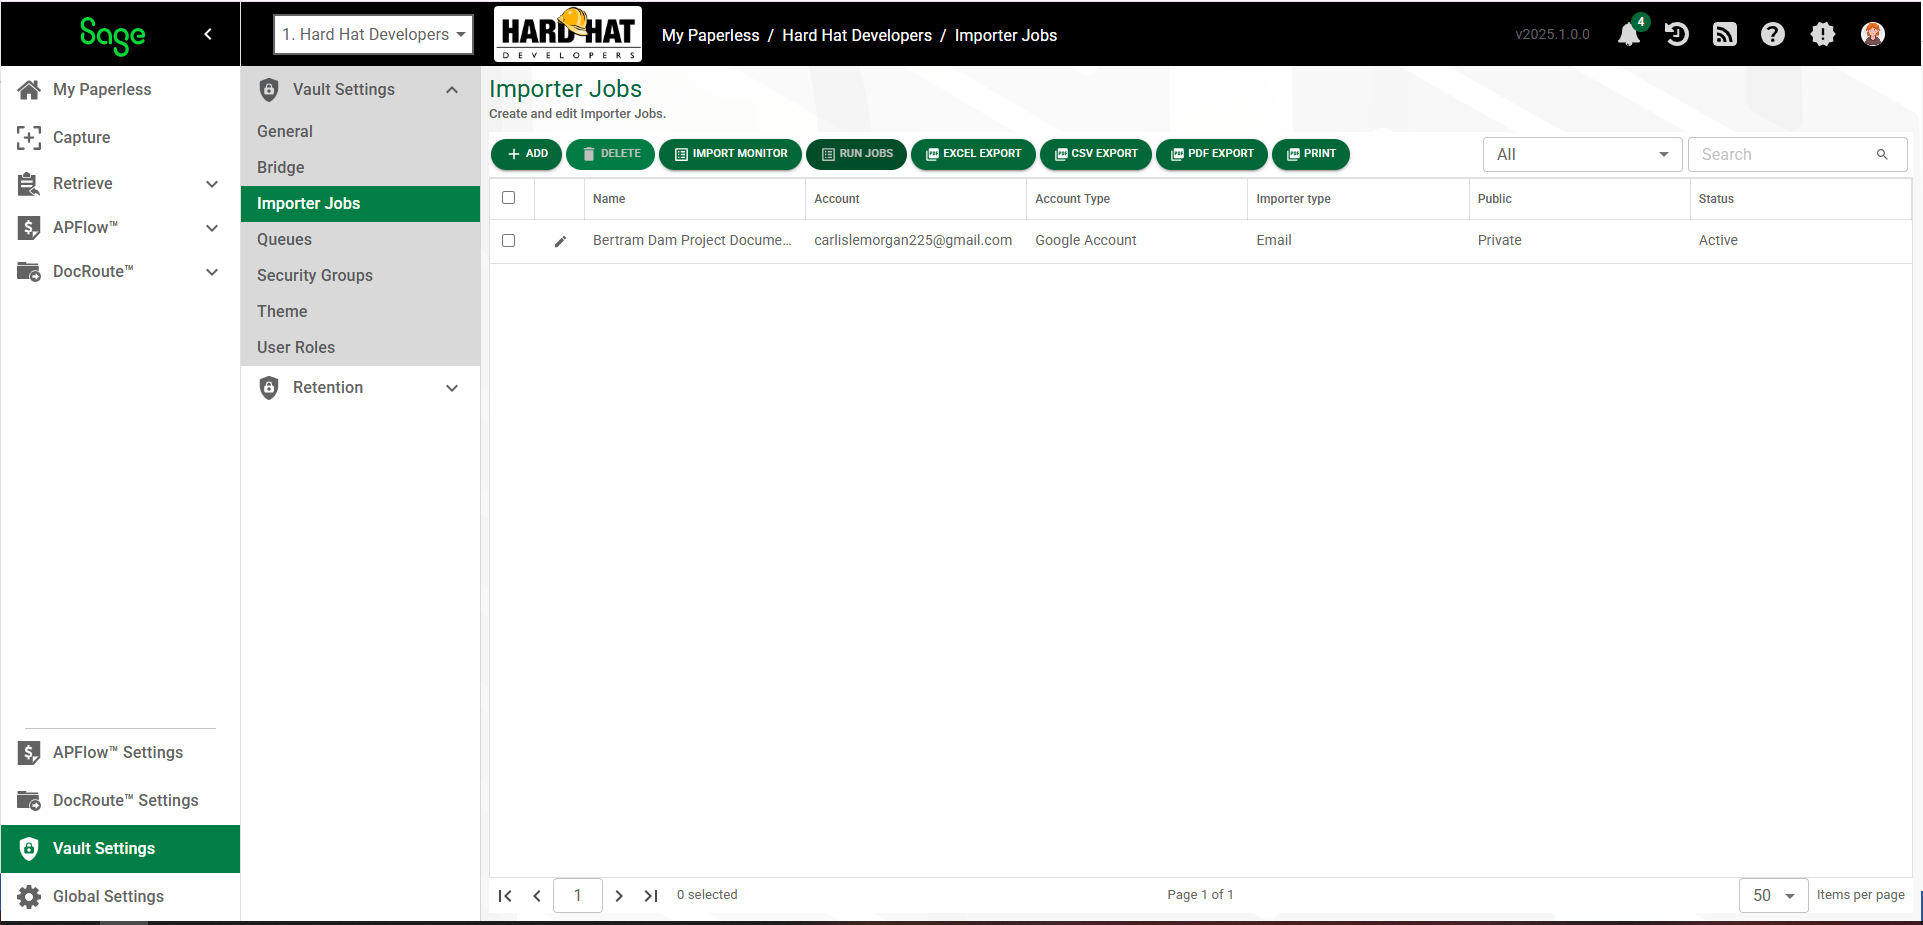
The following page displays:
Important
There are five tabs listed on the Importer Jobs Account Properties page. All five tabs must be accessed, with all fields populated, for each new job.
Click .
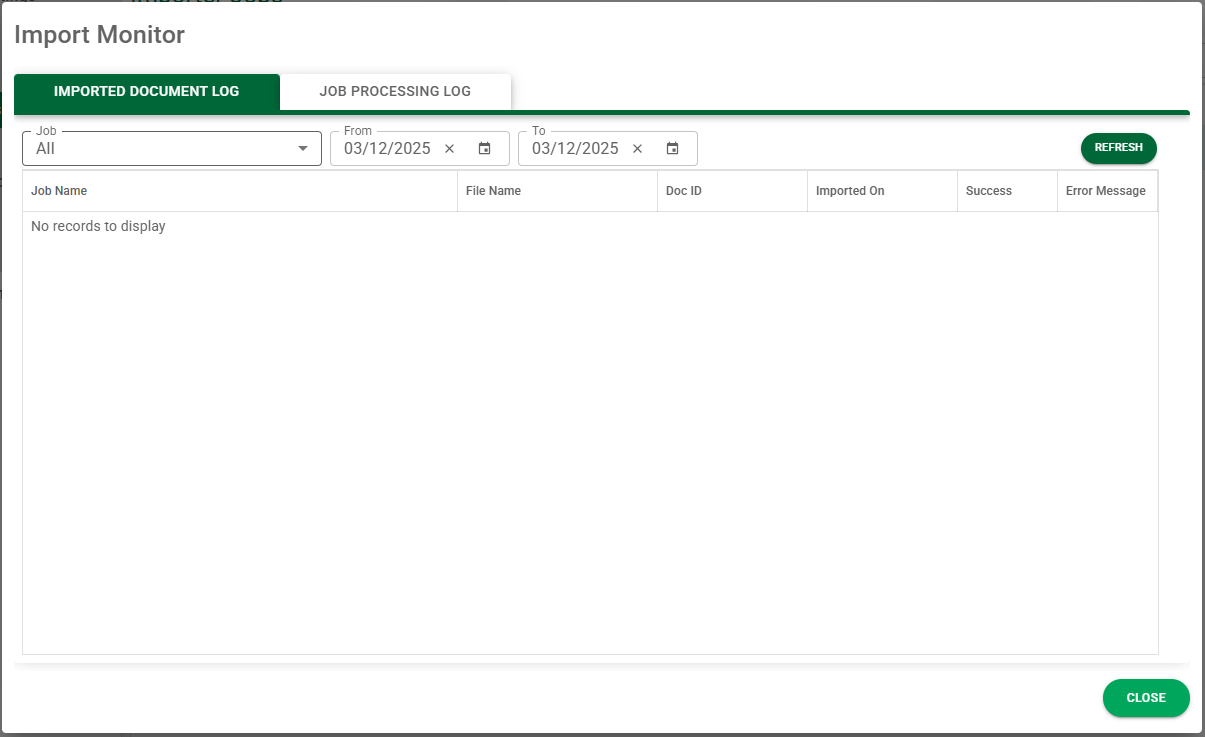
The Import Monitor dialog displays with the Imported Document Log tab active:
Note
This is where documents imported using the Importer Jobs functionality display. You can use the calendars in the From and To fields to list imported document entries for specific time frames.
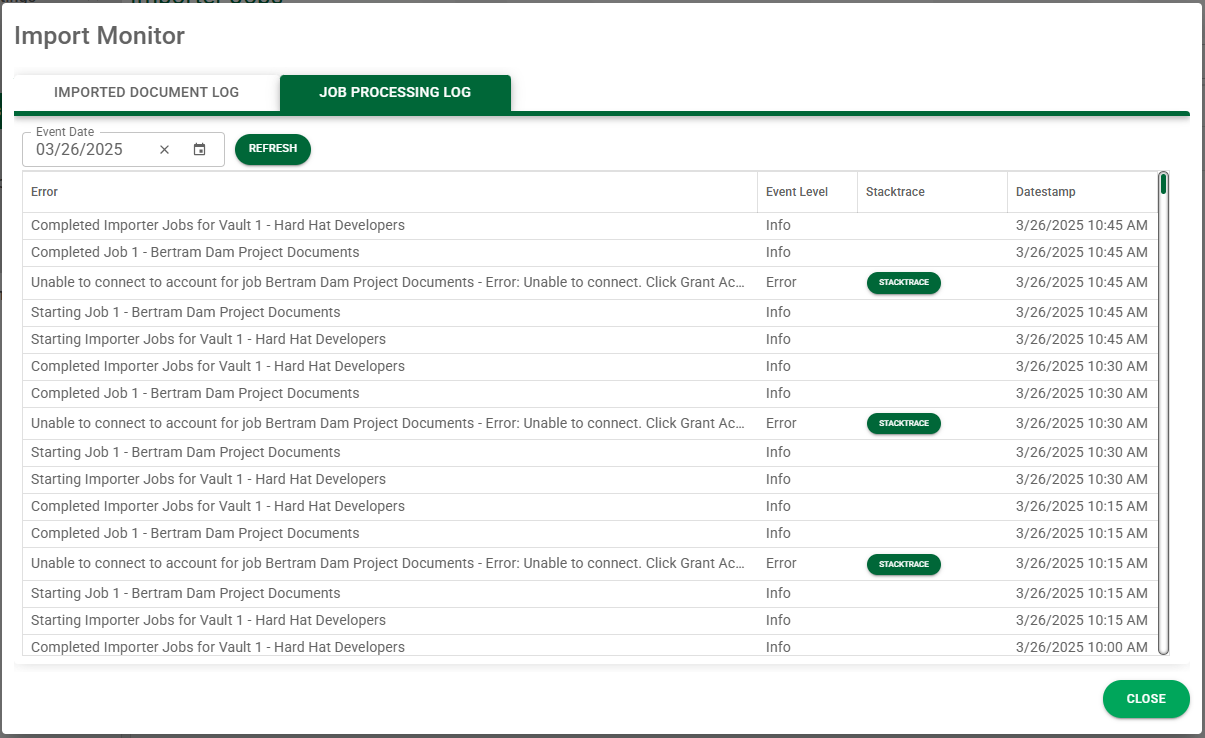
Click the tab to review all jobs processing through importer jobs. This is particularly helpful if you were waiting for job that did not process as expected. You can click the button for a description of the issue.
The page resembles the following:
Note
The Event Date field defaults to today's date. Use the calendar to modify.
Click .
On the Importer Jobs page, click .
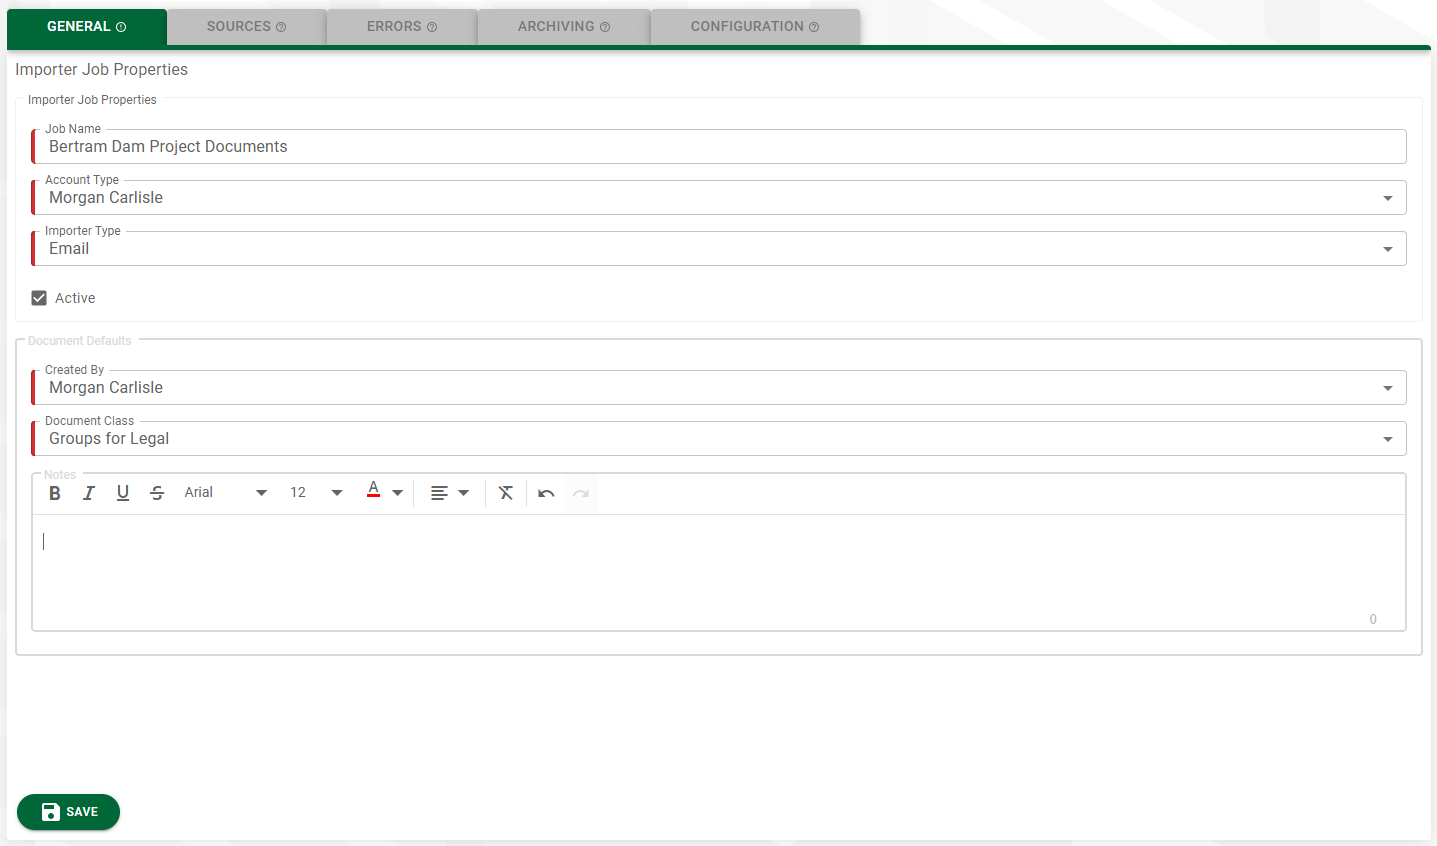
The Importer Job Properties page displays with the General tab active:
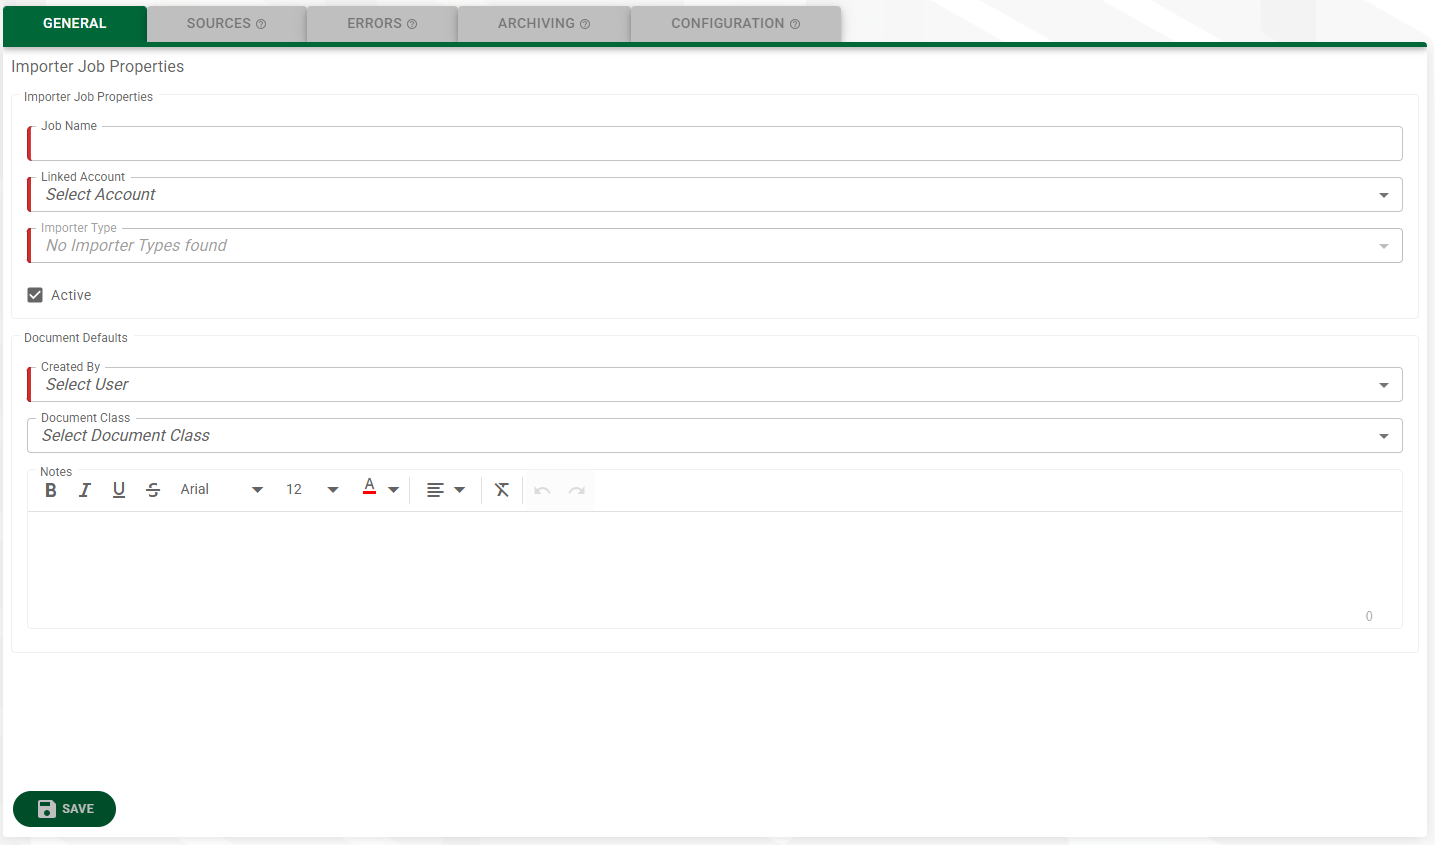
In the Job Name field, enter a meaningful name for the import job.
Note
For example, "Morgan Carlisle Outlook Inbox."
In the Account Type field, use the dropdown from which to select the account.
Select the appropriate account from the Linked Account dropdown.
Note
For more information on linked accounts, see Set Up Linked Accounts.
In the Importer Type dropdown, select the appropriate importer type.
The Active check box is selected by default. If this importer job should not be active, deselect the check box.
In the Document Defaults section:
Select the individual's name who is credited with setting up this template from the Created By dropdown.
Select the appropriate document class from the Document Class dropdown.
Enter a description information about the function this job performs in the Notes field. You can add text to this field at any time.
Note
For example, "This job imports emails and email attachments."
Click .
The completed page resembles the following:
Continue to the tab.
The Sources tab contains the path of the email.
Important
Email jobs are locked down so an individual cannot access another person's email account or make changes to the Email Import job.
Jobs set up under one account and then logged in to with a different account generate a message indicating that the job cannot be viewed or edited. Only if no options were assigned to the job is editing be permitted.
Only email accounts you have configured under your account are visible to you.
Only options in the Sources, Error and Archiving tabs assigned to your email accounts are visible to you.
Only email options are available under the Email Job Type. No other Job Types should be able to view any of the Email Options.
Only one email account per user per job. For example, Source, Error and Archiving all must point to the same email account.
Click the tab.
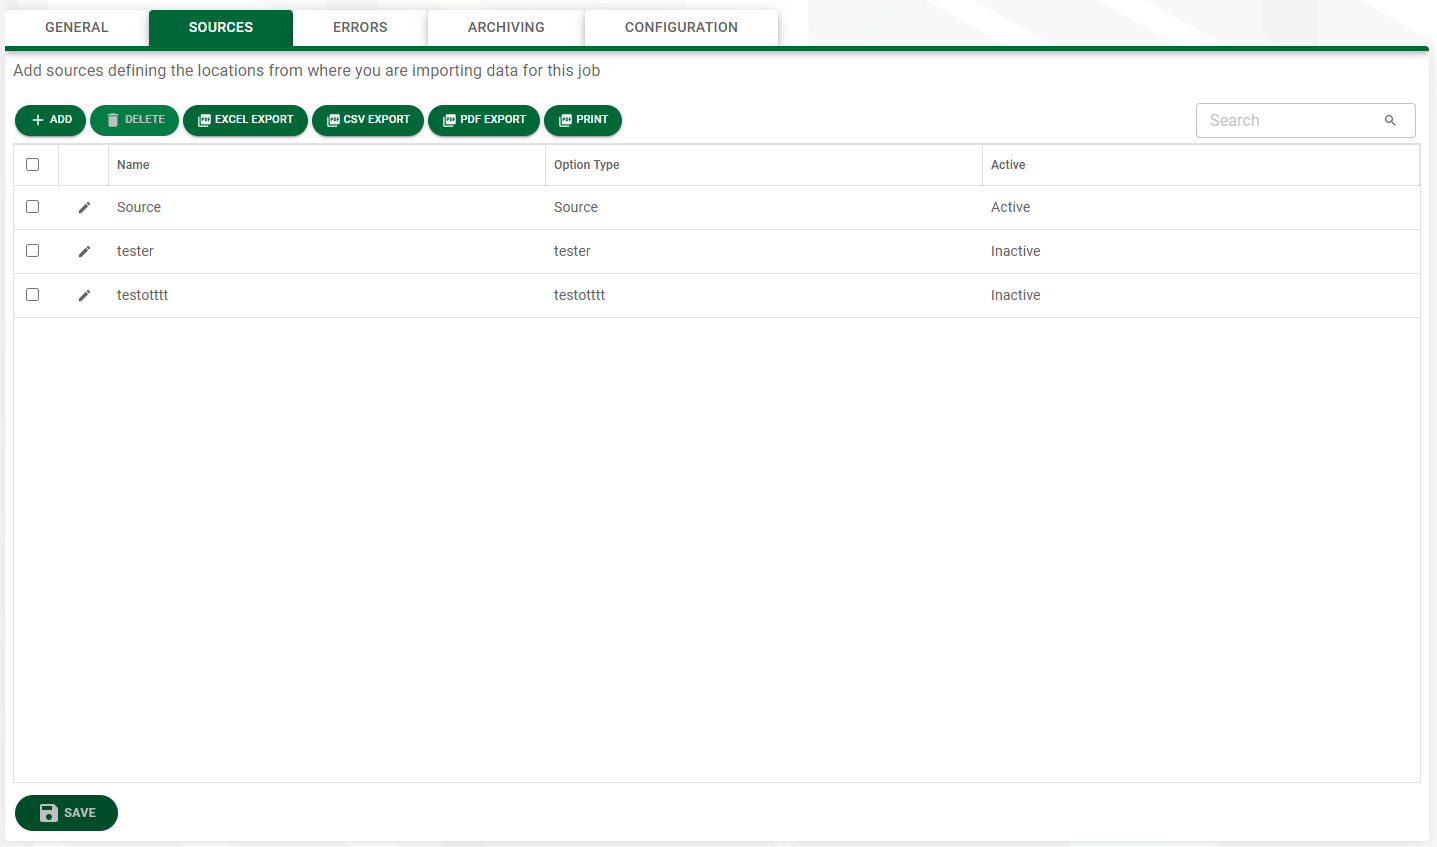
Click .
The Add a Source dialog displays:
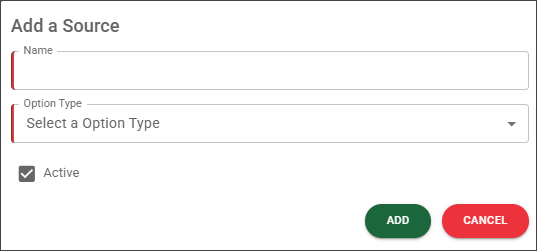
In the Name field, enter a meaningful name for the email source.
Depending on the Option Type you select, continue with either the Option Type = Mailbox Folder or the Option Type = Shared Mailbox Folder step, below.
Option Type = Mailbox Folder:
Click from the dropdown.
The Folder field becomes visible.
In the Folder field, either type the name of the folder or click .
If you clicked the SELECT FOLDER button, the following dialog displays:
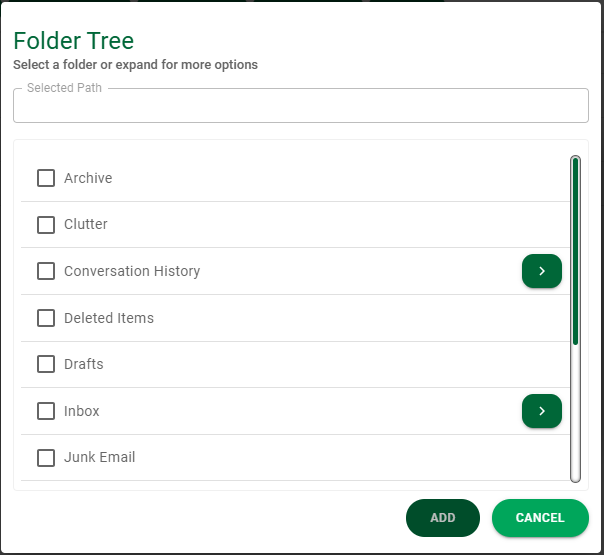
Click the appropriate check box to select the folder.
Click .
Option Type = Shared Mailbox:
Click from the dropdown.
Two additional fields becomes visible.
In the Email field, enter the appropriate email address for the shared mailbox.
In the Folder field, either type the name of the folder or click .
If you clicked the SELECT FOLDER button you can choose the folder from the list and click .
Click the check box.
Click .
On the Add a Source dialog, click .
Continue to the Errors tab.
Error handling options are configured on the Error tab.
Click the tab.
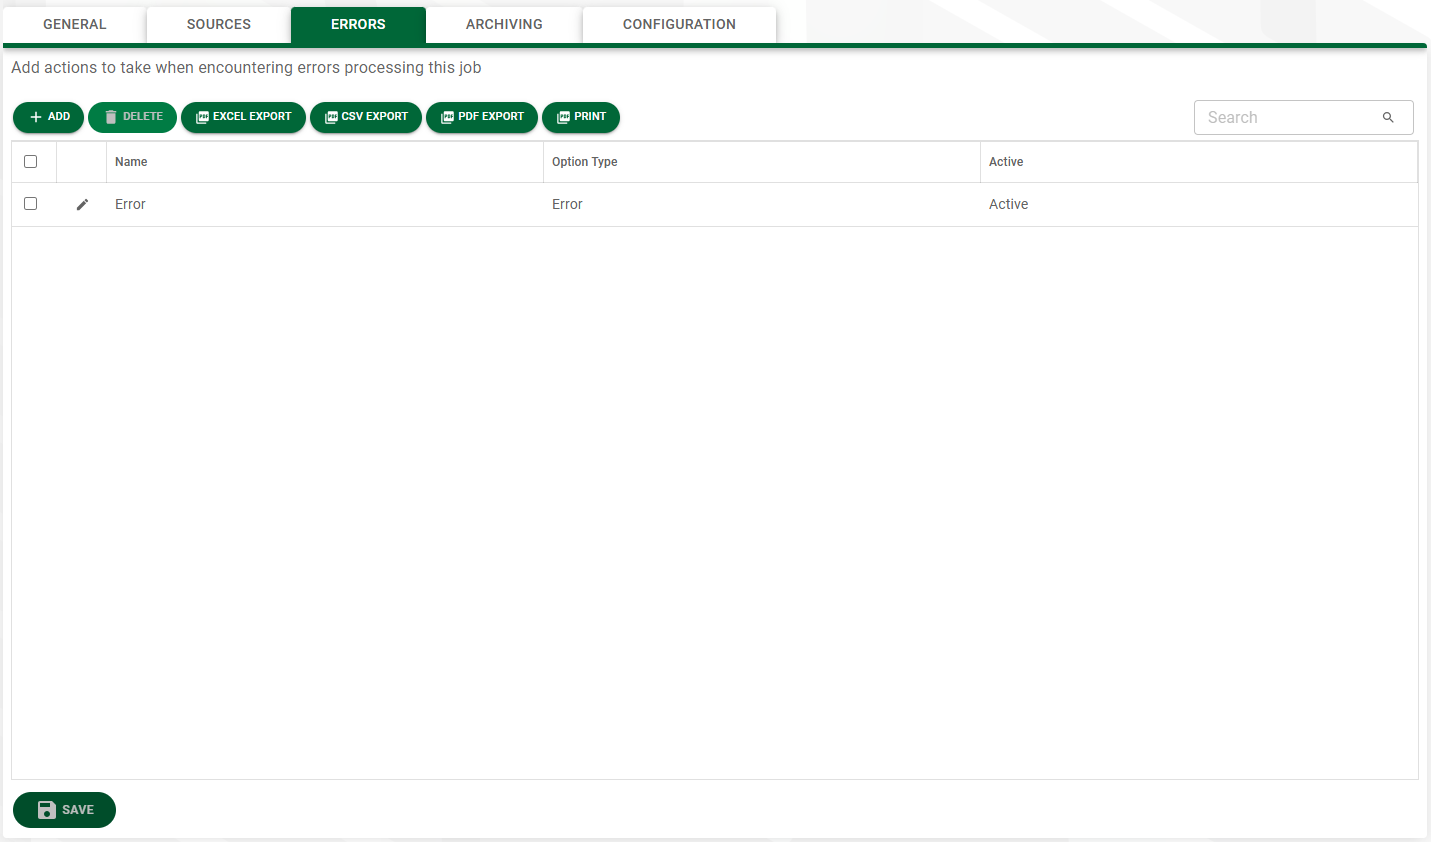
Click .
The Add an Error dialog displays:
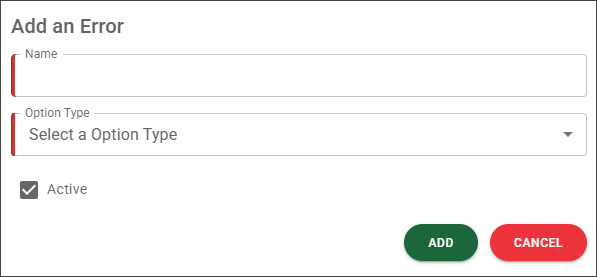
In the Name field, enter a name for this error.
In the Option Type dropdown, select one of the following actions for when the system encounters an error processing the job:
Email Notification: Send an email to a specified email address with details of the import error.
Move To Mailbox Folder: Move the files that generated the error to a specified email folder.
Move To Shared Mailbox Folder: Move the files that generated the error to a specified shared mailbox folder.
Click .
Continue to the Archiving tab.
Use the Archiving tab to instruct the system on how to handle successfully imported files.
Click the tab.
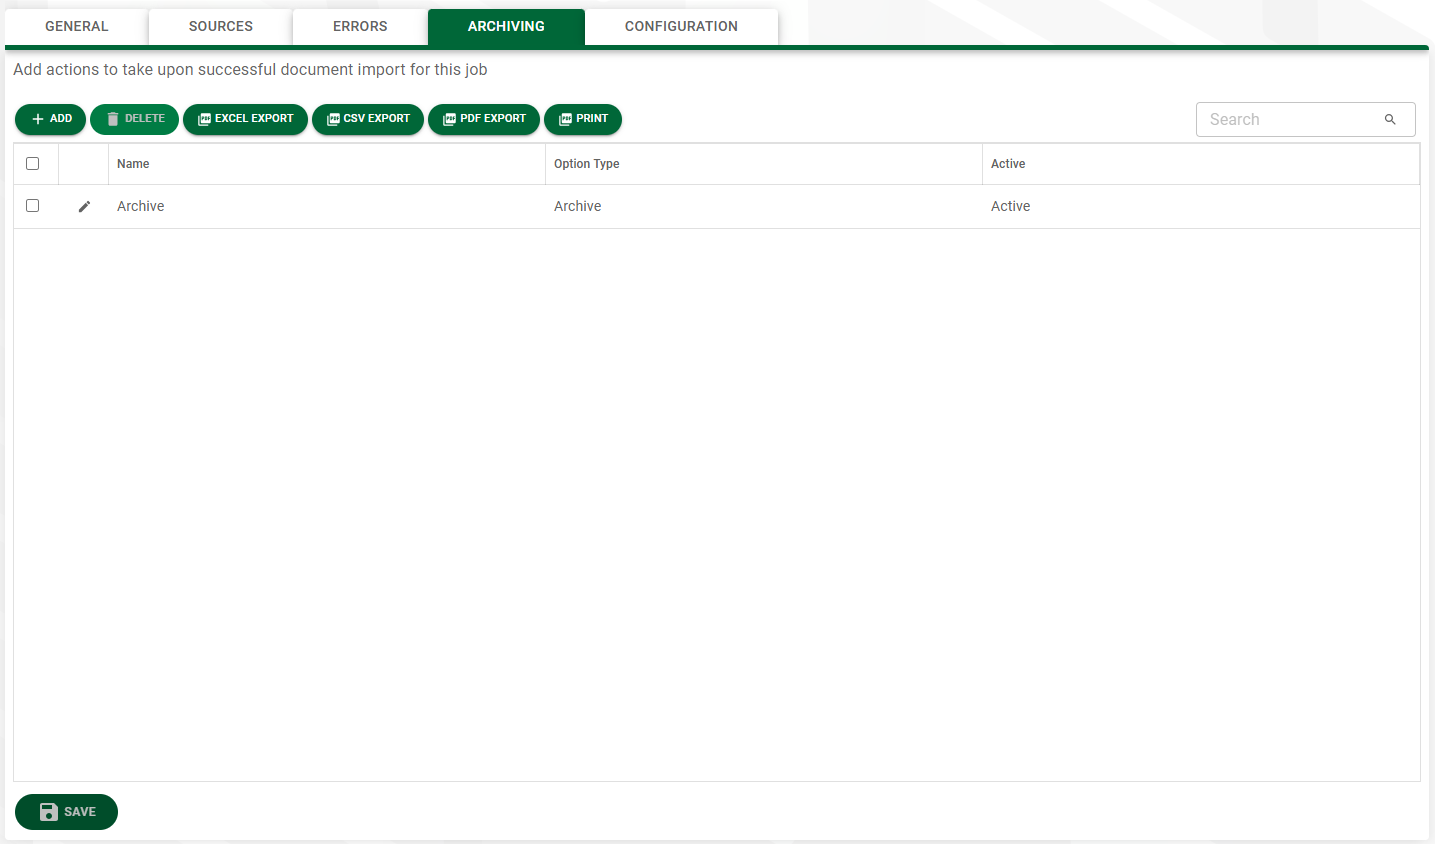
Click .
The Add an Archive dialog displays:
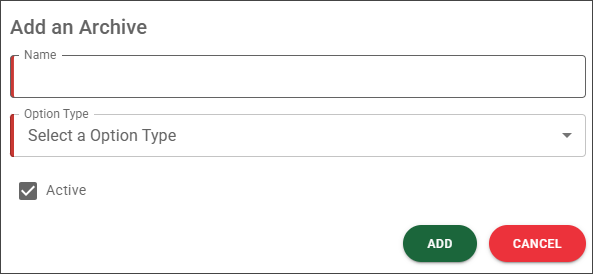
In the Name field, enter a name for this archive.
In the Option Type dropdown, select one of the following actions for when the system successfully imports documents for this job:
Delete: Delete the files after successful import.
Move To Mailbox Folder: Indicate a folder where imported files should move.
Move To Shared Mailbox Folder: Indicate a shared mailbox folder where imported files should move.
Click .
Continue to the CONFIGURATION tab.
Use the Configuration tab to select the user queue for importing the email files and attachments.
Click the tab.
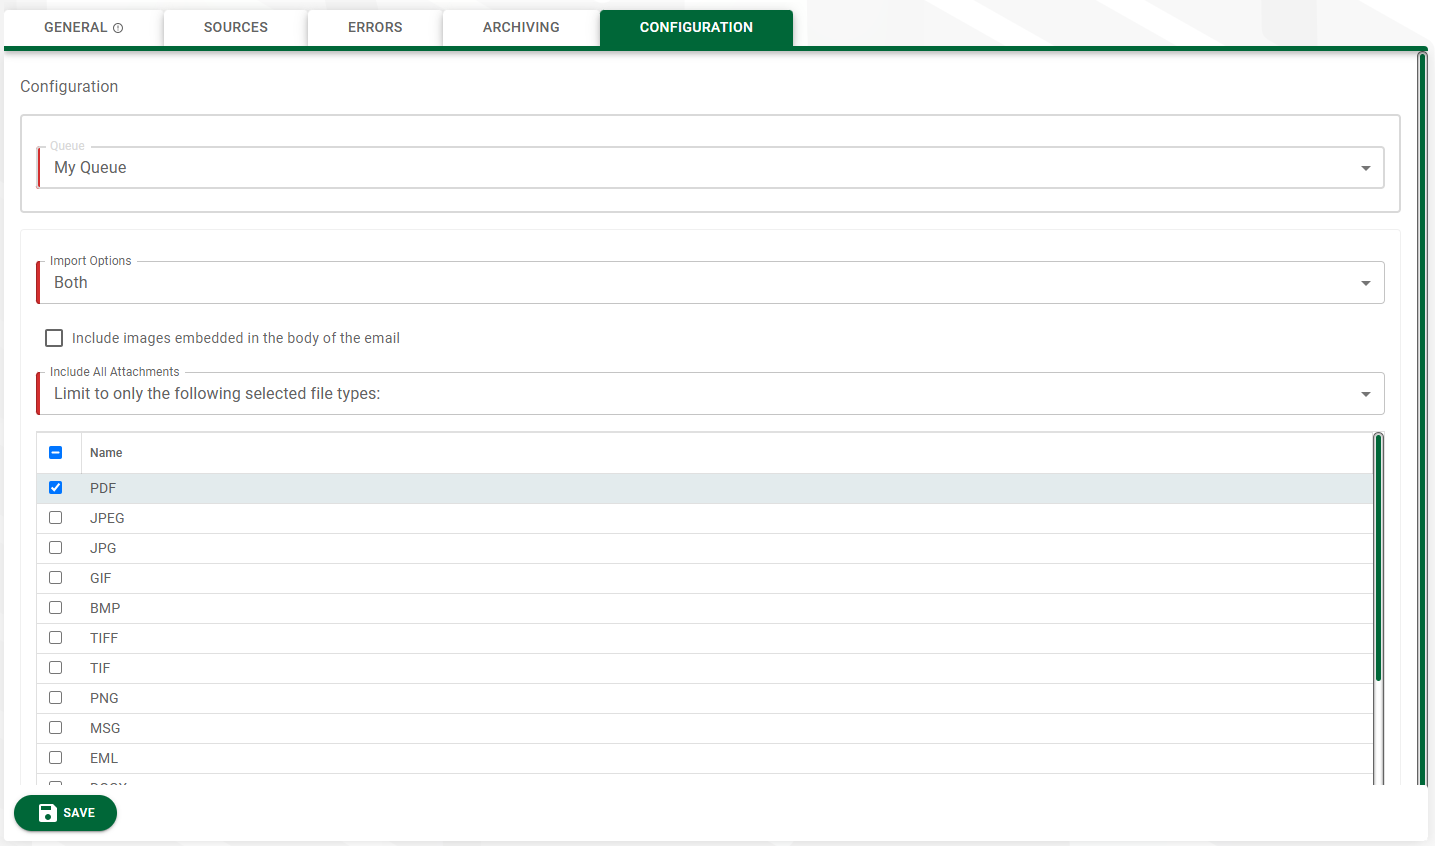
Select the appropriate queue from the Queue dropdown.
In the Import Options dropdown, select one of the following:
Email with embedded attachments (1 document)
Attachments only (each as a separate document) (this is the default)
Both
If you want to include images embedded in the body of the email, click to select this check box. Otherwise, leave the check box blank.
In the Include All Attachments dropdown, select one of the following:
Note
Selecting this option generates a list of attachment file types. Choose the types you want to allow.
Once all the job tabs (General, Sources, Errors, Archiving and Configuration) are complete, click to save the email import job template.