Vault Bridge Settings (Sage 300 CRE)
Important
Be sure to set up the bridge prerequisites in Sage 300 CRE Bridge Prerequisites prior to starting the procedure below.
Log in to Sage Paperless Construction to set up the connection or "bridge" between a particular vault in your Sage Paperless Construction system and your Sage 300 CRE accounting system.
This "bridge" provides data lookups for indexing documents and throughout APFlow™ Invoice Entry (including Routing and Approval).
Note
The APFlow™ Bridge page in APFlow™ Settings has the same functionality as the Vault Settings page discussed below.
Important
Make sure you are working in the vault you want to bridge to Sage 300 CRE. Before you successfully bridge to an accounting system, None displays in the visible fields.
From My Paperless, click .
In the Vault Settings navigation bar, click .
The following page displays:
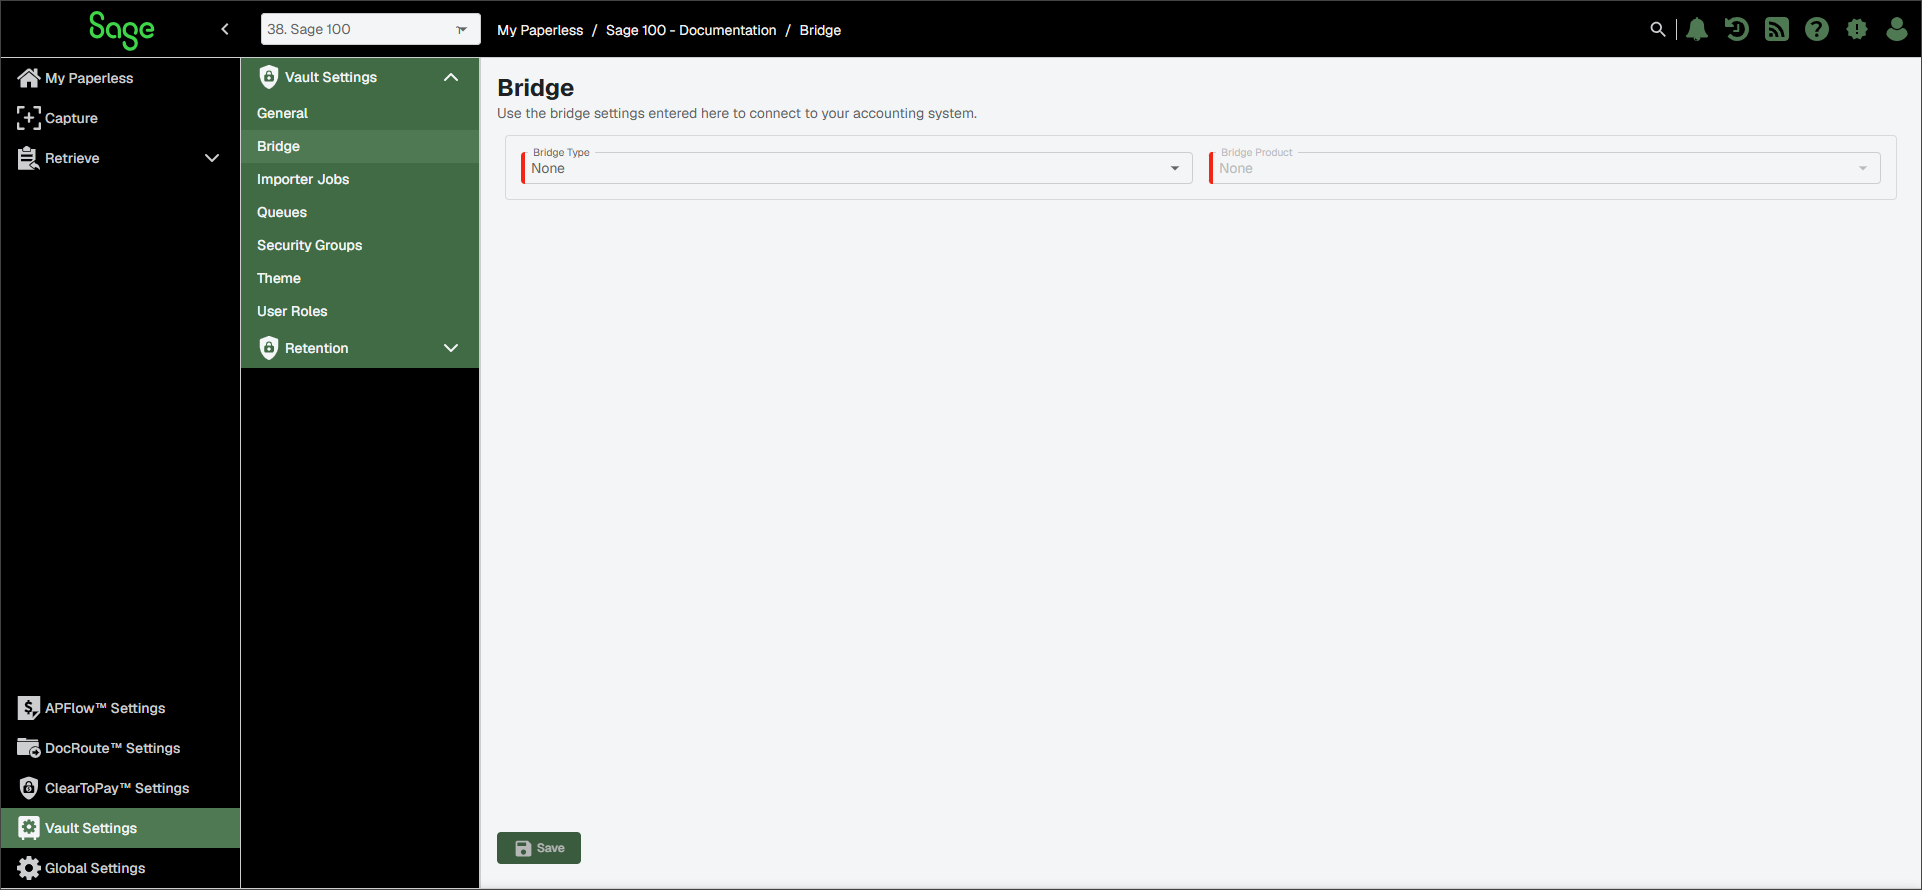
From the Bridge Type dropdown, select .
Note
The Bridge Type dropdown reflects the different business categories Sage Paperless Construction is integrating with. If the Bridge Type field is set to , the Bridge Product field is inactive.
From the dropdown, select .
Continue to Bridge a Vault to Sage 300 CRE.
Bridge a Vault to Sage 300 CRE
Once the Bridge Type and Bridge Product fields are populated in Vault Bridge Settings (Sage 300 CRE), the remaining configuration fields become accessible.
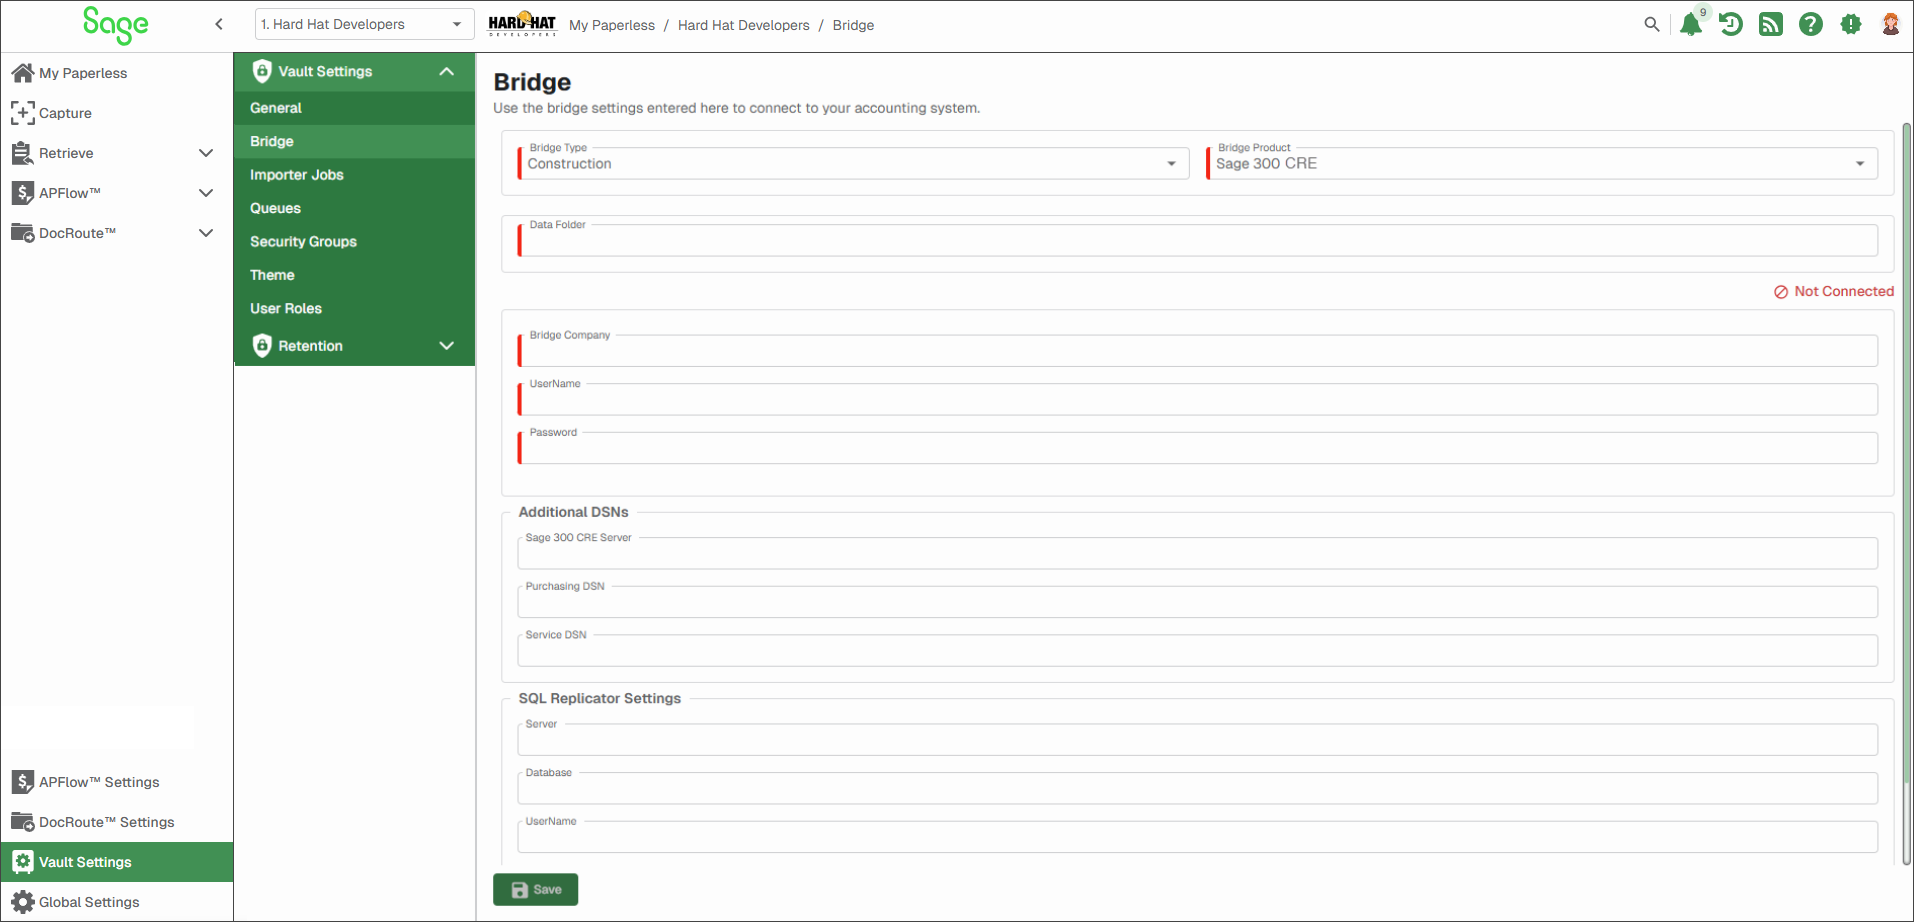
Complete the following steps to bridge Sage Paperless Construction to Sage 300 CRE:
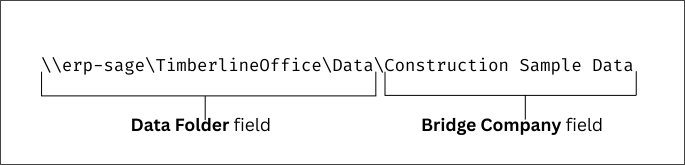
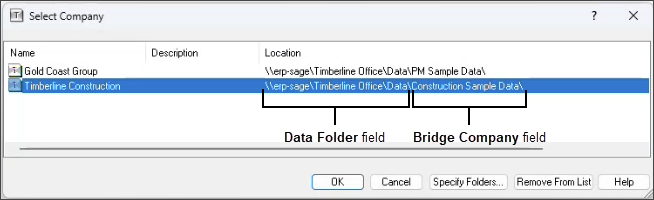
In the Data Folder field, enter the file path for the data folder that contains your Sage 300 CRE instance.
For example:
Note
The file path must exactly match the location for your bridged company, excluding the company folder. This file path displays in the Select Company dialog when you log in to Sage 300 CRE:
Tip
It is recommended that your Sage 300 CRE data folder is set up as an UNC (not relative) file path.
In the Bridge Company field, enter the name of your company exactly as it is displayed for the folder name in your file path.
In the UserName field, enter the username for the service account you created in Create an Accounting System Service User in Sage 300 CRE.
In the Password field, enter the password you created for the account described above.
Click .
The Not Connected indicator changes to Connected if the set up was successful.
Proceed through the two optional sections (skipping them if they do not apply). Then, download and configure the server agent.
(Optional) Configure Additional DSNs if you use the SM or PO modules in Sage 300 CRE.
(Optional) SQL Replicator Settings if your company uses the optional SQL replicator.
Configure Server Agent to complete the bridging process and begin importing data.
(Optional) Configure Additional DSNs
If you use the SM or PO modules in Sage 300 CRE, you need to enter the ODBC connection strings in the Additional DSNs section. Each module requires its own string.
Important
The Purchasing Module Interface and/or Service Module Interface bridge settings must be enabled in to use this functionality. See Sage 300 CRE Bridge Settings for more information.
Complete the following steps to enter the required string(s):
In the Sage 300 CRE Server field, enter the name of the folder that hosts the Sage 300 database.
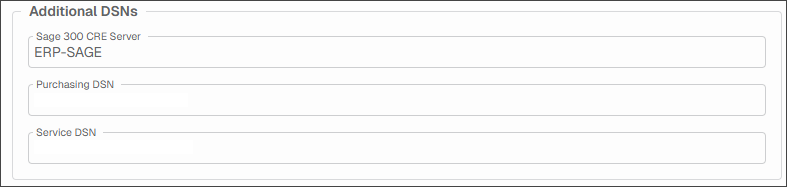
To locate the value for the Purchasing DSN field:
From the server that hosts the Sage 300 database, sign in to the PO module.
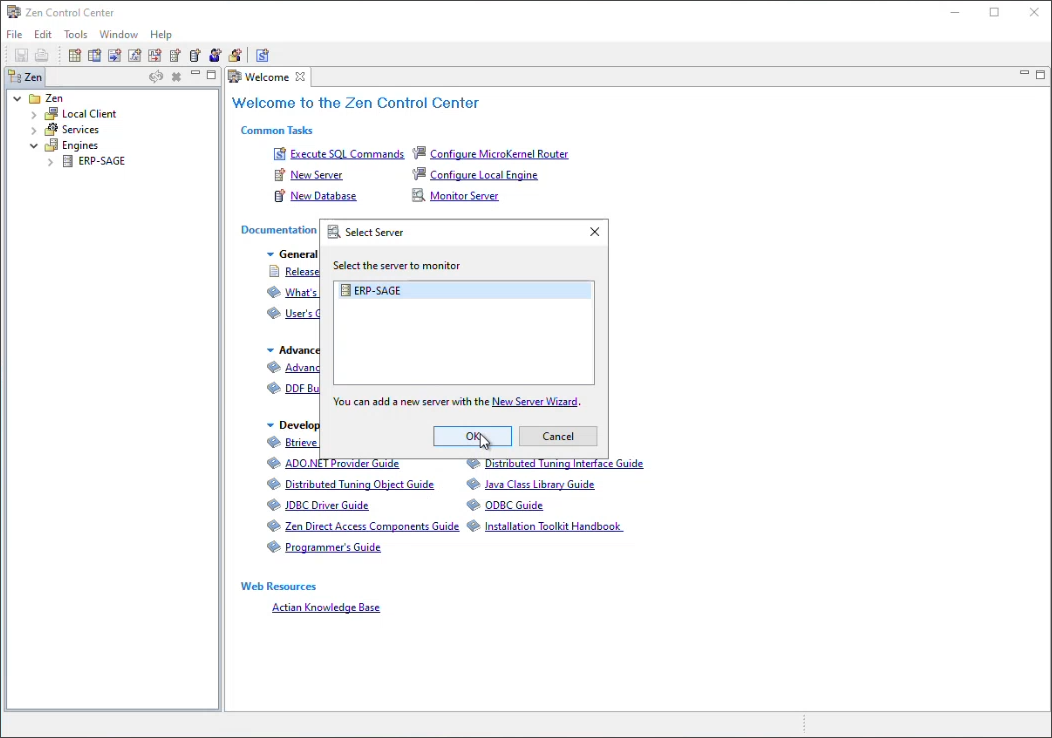
Open Zen Monitor.
Select the server and click :
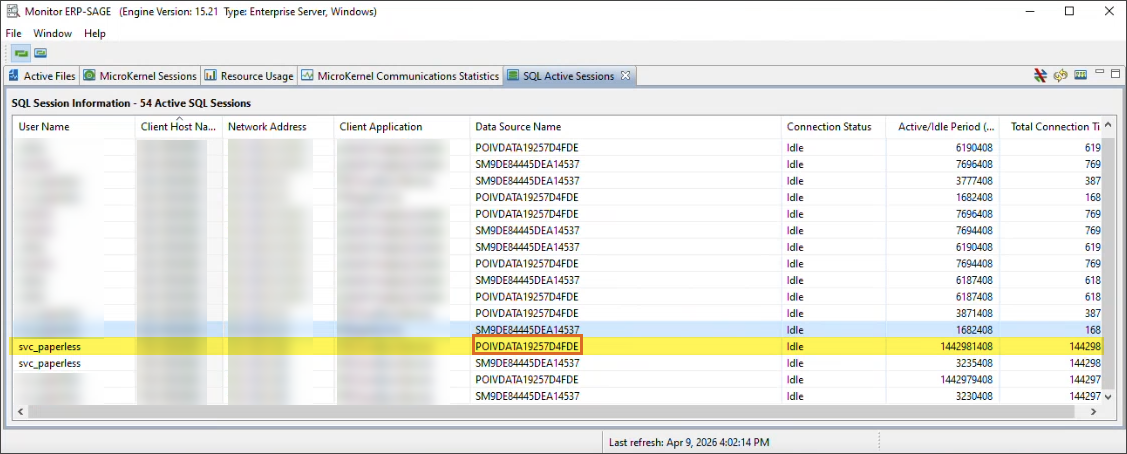
Locate the POIVDATA string in the Data Source Name column.
To locate the value for the Service DSN field:
From the server that hosts the Sage 300 database, sign in to the SM module.
Open Zen Monitor.
Select the server and click :
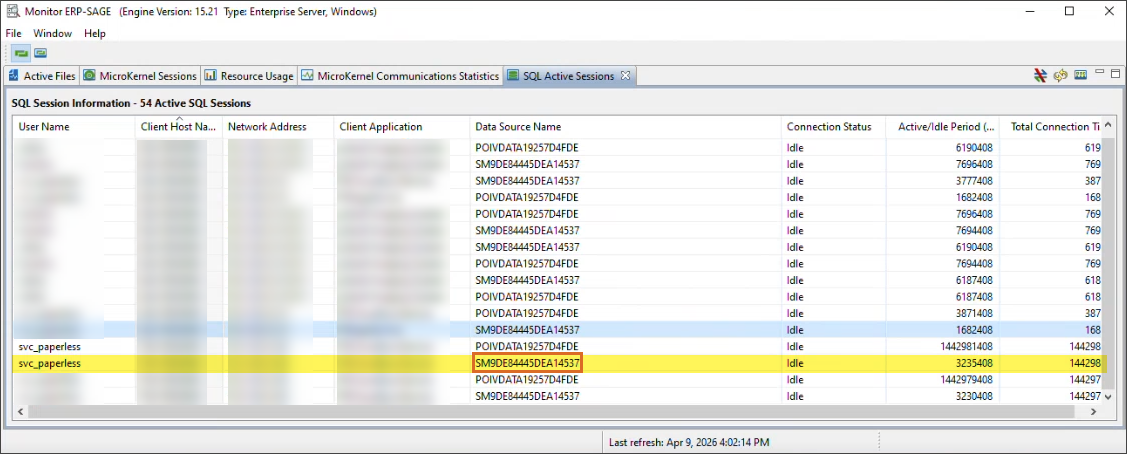
Locate the SM string in the Data Source Name column.
Type the string(s) into the appropriate DSN field(s) in the Additional DSNs section in Sage Paperless Construction.

Click .
(Optional) SQL Replicator Settings
Sage stores data and folders in a file system database. This information is moved from Sage to Sage Paperless Construction and back to Sage through an ODBC driver. The Sage 300 SQL Replicator tool replicates all data into a SQL database. The SQL server database is unique to your company, with an exact copy of your company's data.
The replicator is recommended to fix GL, Job and Phase formatting issues when customers have multiple vaults with different formats.
Important
The SQL Replicator is in addition to the regular bridge.
On the Bridge page, proceed to the SQL Replicator Settings section.
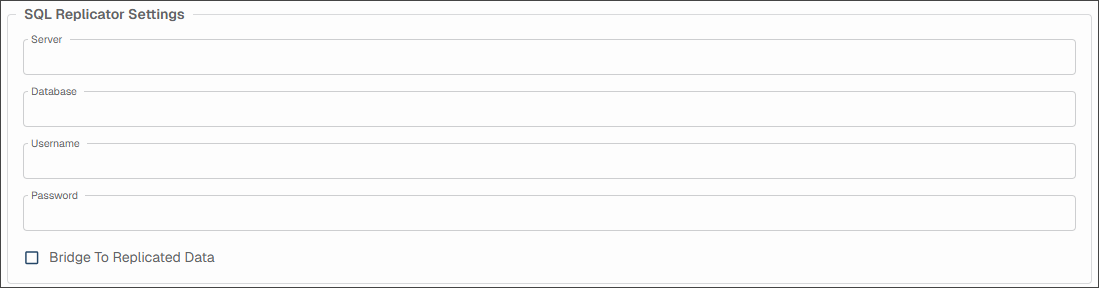
In the Server field, enter the replicator server.
In the Database field, enter the name of the Sage database.
In the Username field, enter the username for the user that has access to the replicated Sage SQL database as configured in (Optional) Create a SQL User.
In the Password field, enter the password you created for the account described above.
Select the check box to enable the replicator.
Important
Verify that the connection is successful in the prompt. When connected to the replicator, changes to the data are not in real time. This is because changes still need to go through the replicator process to be available in the program.
Click .
Configure Server Agent
Complete the bridging process by downloading and configuring the server agent:
Click .
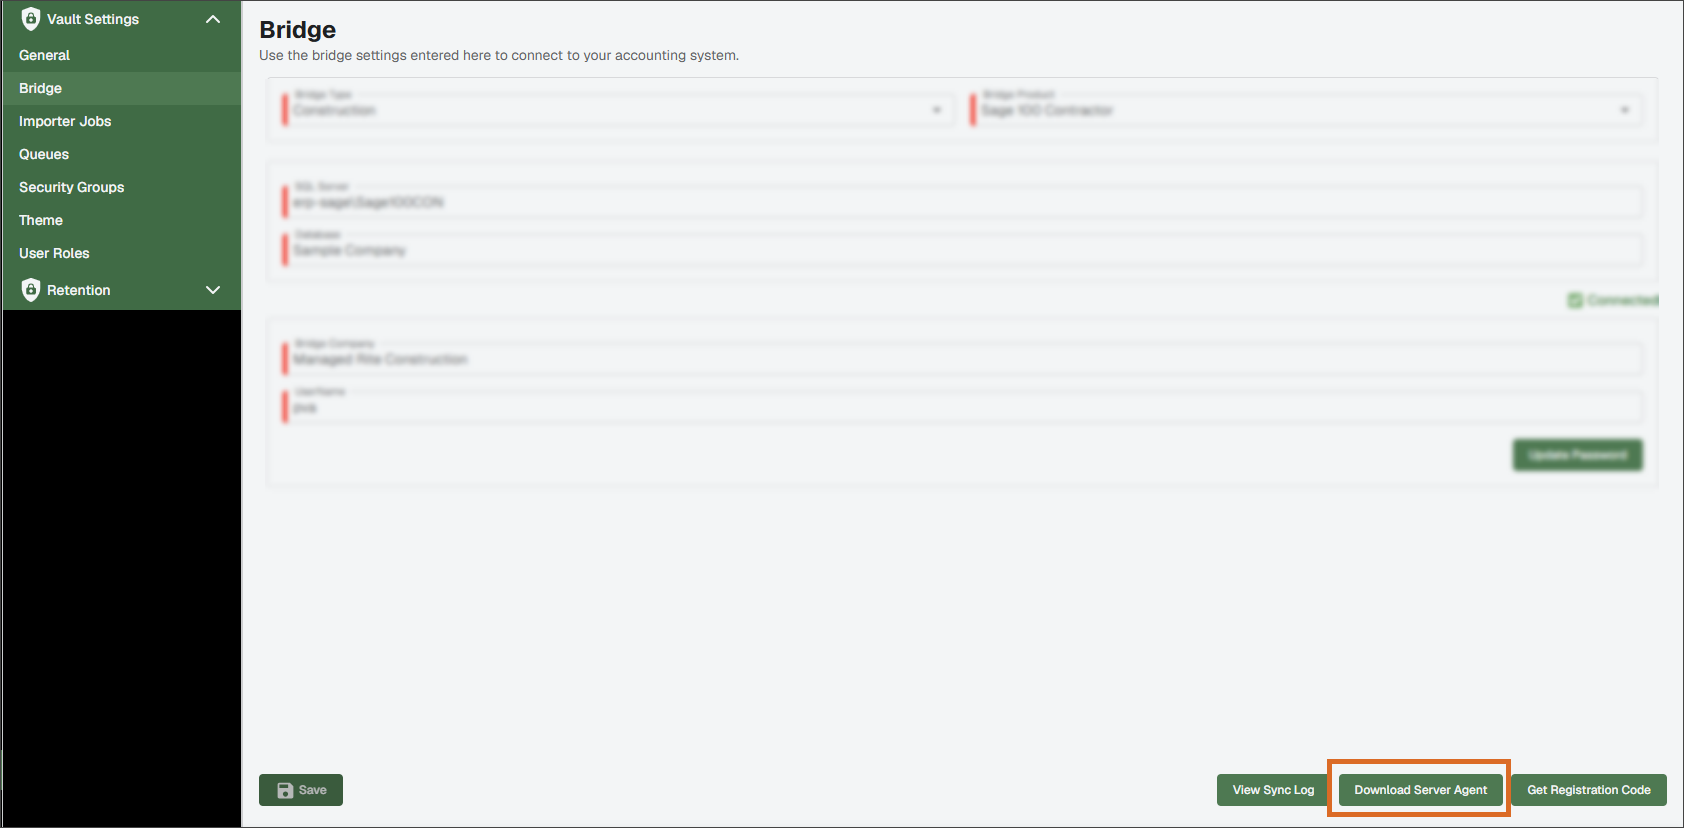
Access the file from your local drive and move to an appropriate shared network folder.
Note
Windows defaults the location to your Downloads folder. The file must be relocated to a shared network drive to make it accessible to others at your company. It is recommended that the server agent is installed on the same server as your Sage 300 CRE/Sage 100 Contractor instance.
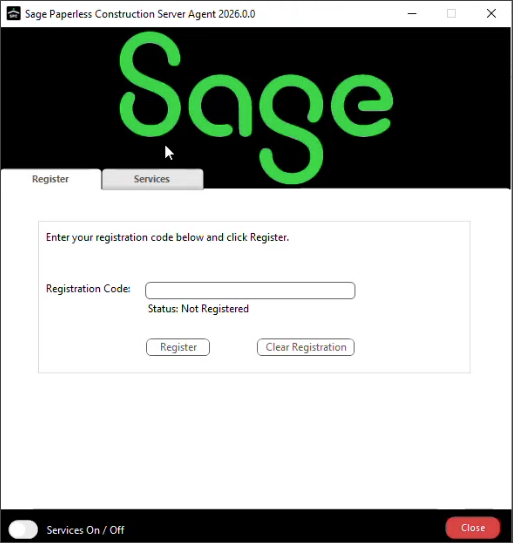
Run the ServerAgent.exe file that downloaded.
If needed, right click to unblock the .exe file. The server agent opens and prompts you for a registration code:
Return to the Bridge page and click .
The code is copied to your clipboard.
Return to the server agent dialog and paste the code in the Registration Code field.
Click .
A Success dialog displays and the status displays as Registered.
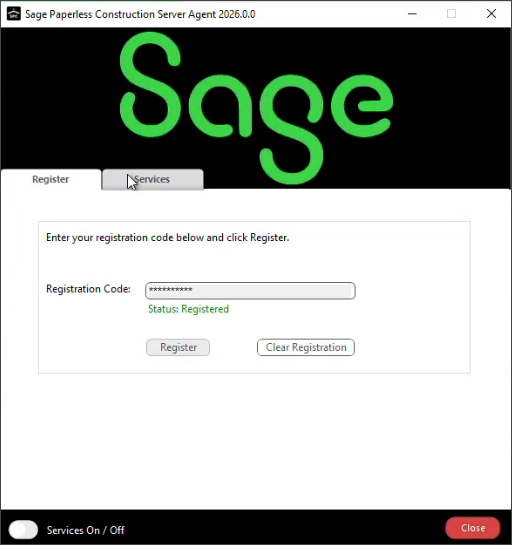
Click the tab.
Click .
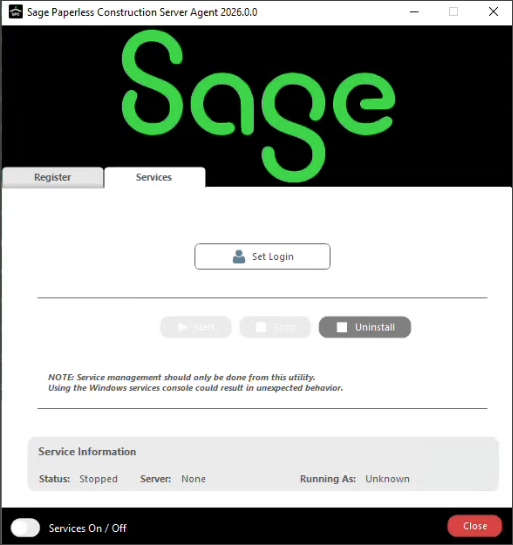
Enter the username and password for the domain service account described in Create a Domain Service Account to complete the installation of the Server Agent.
Click .
The Services On/Off toggle at the bottom left displays as on.
Once the server agent is up and running, the bridge process is complete. To verify that the sync process is underway and the system is ready for you to begin entering data, you can click . It may take up to fifteen minutes to complete the sync process.
View Bridge Sync Logs
As data is added to the Sage 300 CRE accounting system, that information is systematically synced to Sage Paperless Construction. The Bridge Sync Logs dialog is where you can view data sync progress, configure syncing frequency, manually initiate the sync process and check for errors.
From the `Bridge page, click .
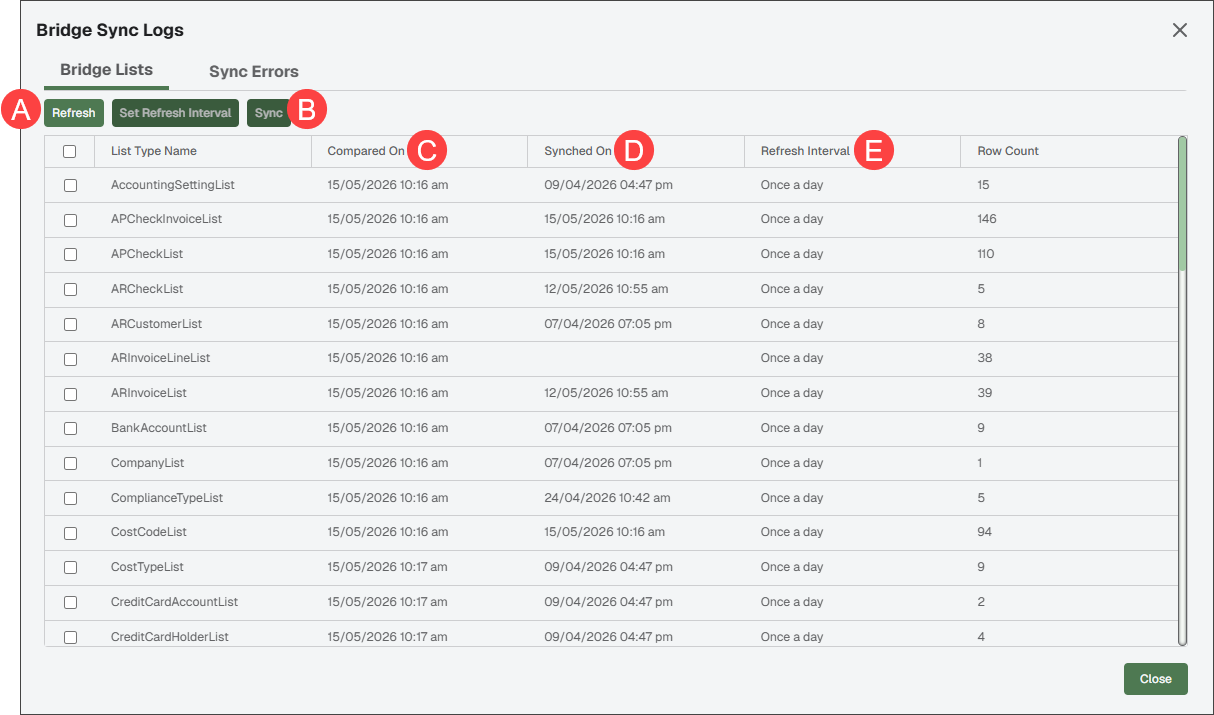
The Bridge Sync Logs dialog displays with the Bridge Lists tab active.
Make sure the expected lists populate, then review their syncing frequency in the Refresh Interval column. To make changes to the refresh intervals:
Note
The default refresh internal is once a day.
Select the check box(es) for the lists you want to update.
Click .
In the Refresh Interval dialog, select the radio button, then enter list sync frequency in the Hours and Minutes fields.
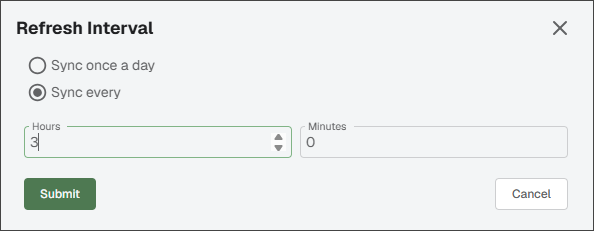
Click .
From the Bridge Lists tab, you can also do the following:
A: Click to update all items in the grid to reflect changes or display the latest information. B: Select one or more List Types, then click to manually initiate a data sync for the selected lists. C: View the last time the agent compared data to check for updates. D: View the date and time in this column to see when lists synced most recently. E: View the information in this column to see the current data refresh settings. (Optional) Click the tab to view the data that support personnel use to troubleshoot issues. This tab shows when a list is encountering issues while syncing.