Job Lien Waivers
Lien waiver documents must be provided by the general contractor to the job's appropriate vendors and tier vendors so they can be signed and returned by the subcontractor. Using the templates created in Waiver Forms, general contractors can ensure the use of correct wording. When documents are generated for distribution, ClearToPay™ uses these templates to produce the final copy which includes the job record, the subcontractor’s record, associated commitment records to provide the required information and signature requirements.
After the lien release is sent, it must be signed and received back. ClearToPay tracks the receiving and review process for the lien release to be accepted and considered received. During the compliance check process, verification that a lien release has been signed and received is the only requirement.
Via the portal, vendors have the ability to download, manually sign and upload a copy of the lien release. See ClearToPay™ Portal for more information.
From My Paperless, click .
In the ClearToPay™ left navigation, click .
Choose the job from the list.
Click .
A page similar to the following displays:
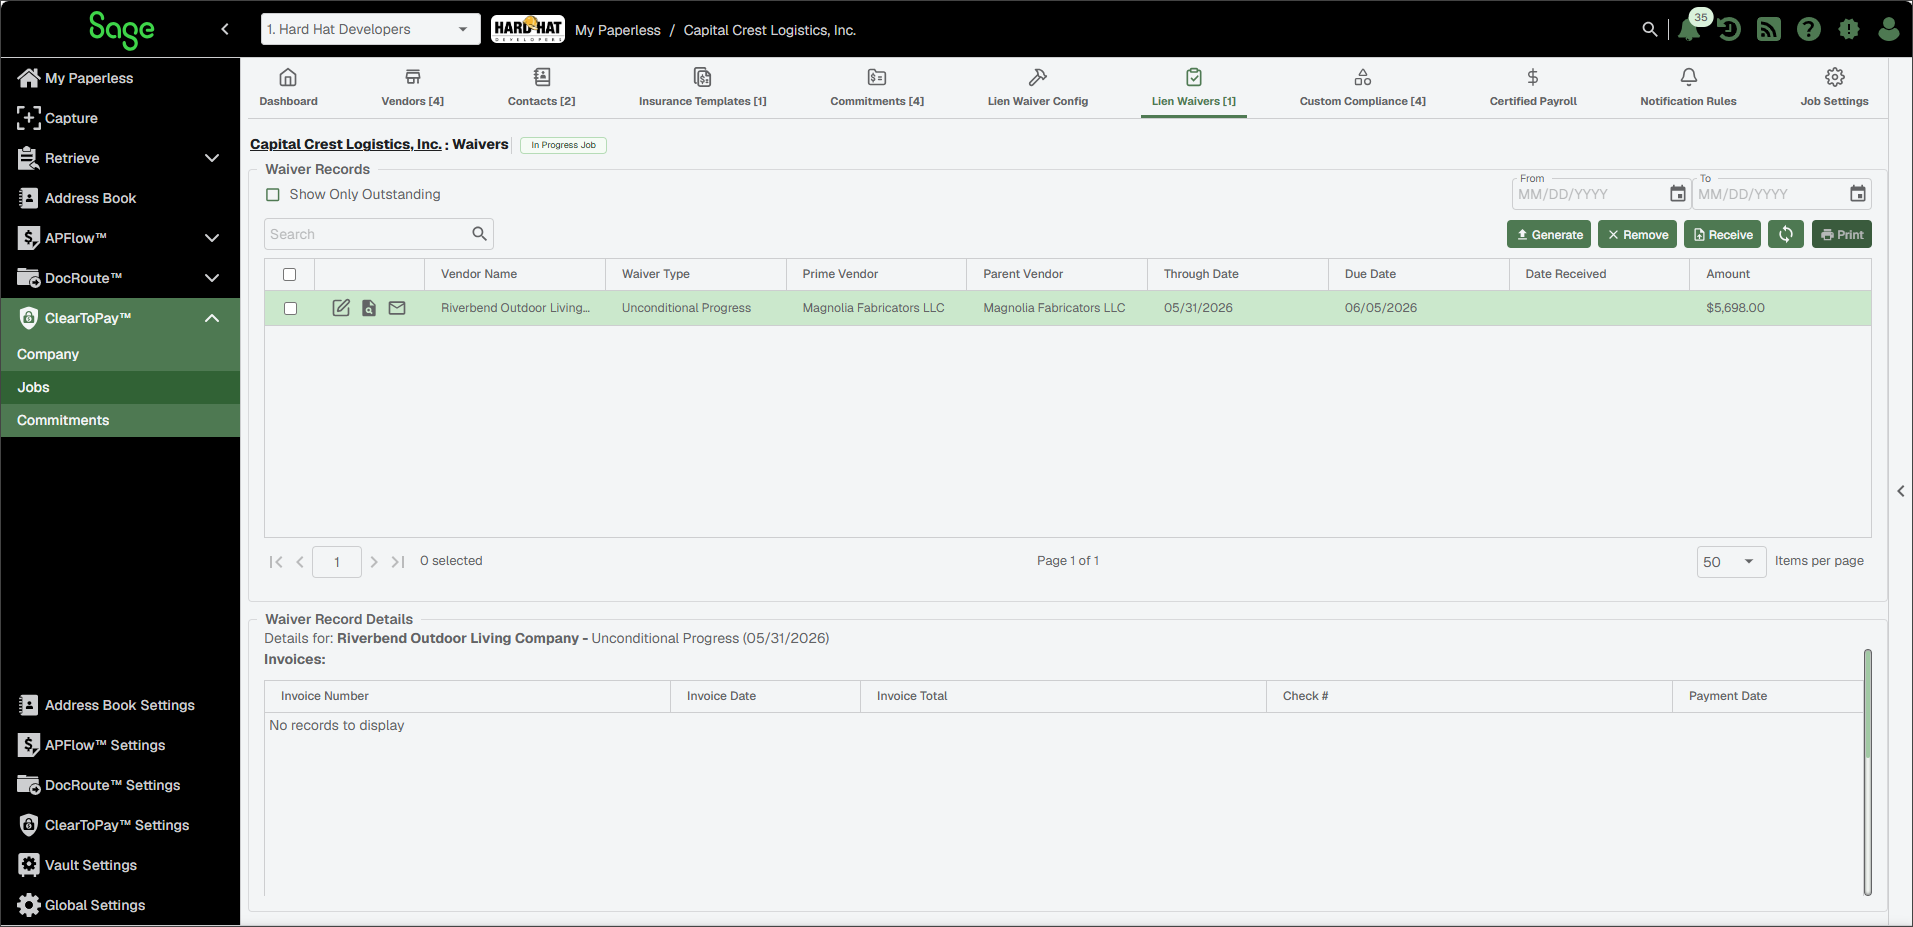
From a job's Lien Waivers page, you can do the following:
Note
The ability to generate waivers, edit waivers and what you can see in the system varies based on your ClearToPay™ permissions. See ClearToPay™ Access Permissions for more information.
Show Only Outstanding | Select the check box to show only the lien waivers that have not yet been received. | |
| Use the From and To filter fields to narrow the list down by Through Date. | |
| Search for a waiver record by vendor information, waiver type or amount. | |
 | Click to add one or more new lien waivers for this job. See Generate Lien Waivers for more information. | |
 | Select one or more waiver records from the list, then click to stop tracking these waivers. | |
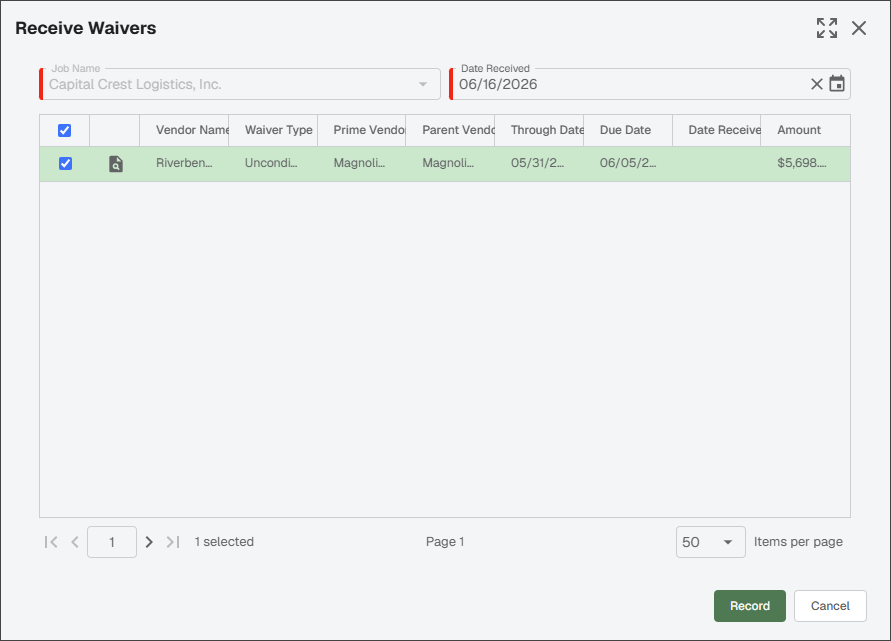
 | Click to mark waivers as received for this job. In the Receive Waivers dialog, you can select one or more of the outstanding waivers from the list and set the appropriate received date. Then click . This applies the Date Received value to each record to quickly mark waiver records across vendors as received instead of navigating to each vendor's page individually. NoteIf needed, you can Expand
Once the lien waivers have been recorded, the Lien Waiver page updates to include the appropriate values in the Date Received column for the recorded waivers. | |
 | Click to refresh the list manually to include changes made in the Portal and at the vendor level. | |
 | Click to print the Lien Waivers grid. | |
 | Click Edit to make necessary updates to an existing record. See Edit Lien Waivers for more information. | |
| Click to view the lien waiver document with the template applied and all variable fields replaced with the correct job, vendor and waiver information. | |
 | Click Send Email to select an email template and send an email reminder. This could include an email to vendors reminding them to return the lien release, send project managers a vendor compliance report or remind accounts payable to withhold payment. Lien waiver email templates are created and managed within . | |
Waiver Record Details | When a waiver is selected from the list, the Waiver Record Details section displays details for that waiver, including invoice information, a list of exceptions, miscellaneous notes and payment information. 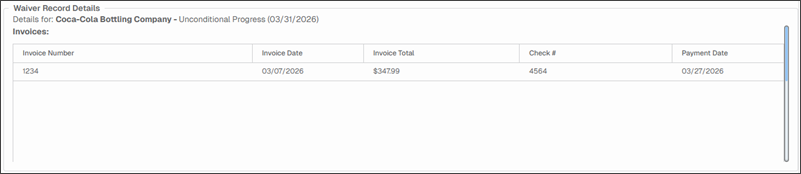 |



Complete the following steps to add one or more new lien waivers for this job:
From the job's Lien Waivers page, click .
The Generate Waiver(s) dialog displays with the Job field populated based on your currently selected ClearToPay job.
Note
If needed, you can Expand
 and Minimize
  the Generate Waiver(s) dialog using the icon in the upper right.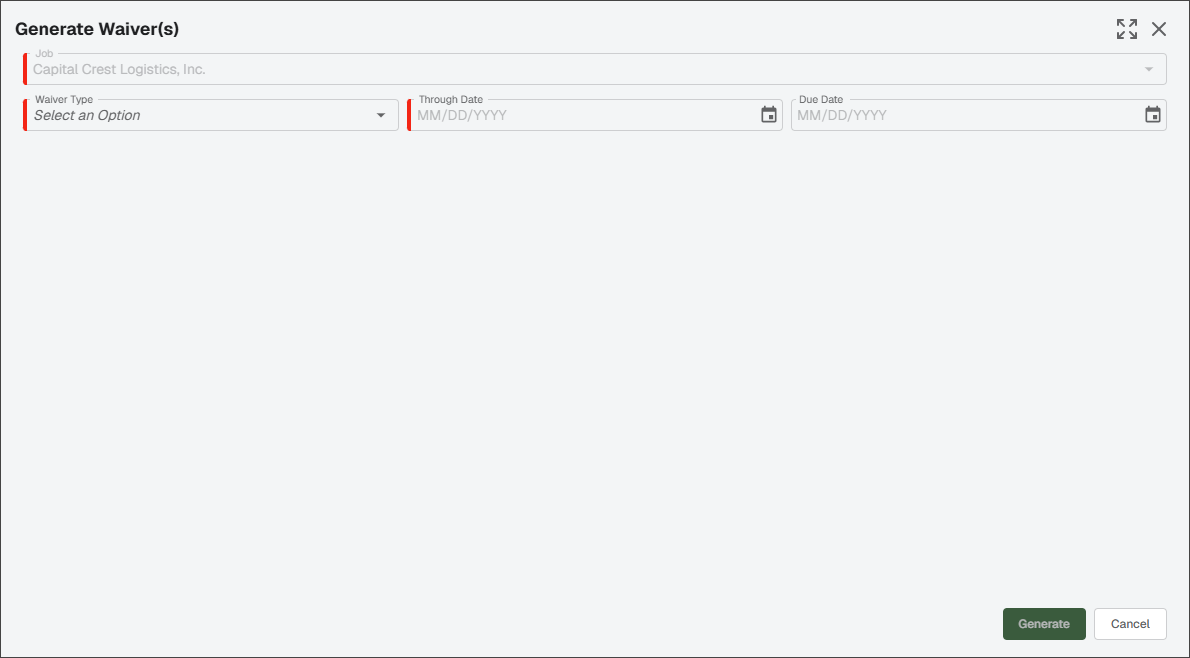
Select the appropriate waiver type:
Conditional Progress: Sent prior to payment and while the job is still active and work is being performed. They must be signed before the subcontractor receives payment. Then, it waives lien rights only if the payment is paid, effective upon the receipt of the payment.
Unconditional Progress: Sent after (or with) payment to the subcontractor while the job is still active and work is being performed. Then, it waives lien rights immediately, effective upon signing.
Conditional Final: Sent prior to payment when the job is complete. They represent a full release of lien and are signed before the subcontractor receives payment. It waives all remaining lien rights if the final payment is made, effective upon the receipt of the final payment.
Unconditional Final: Sent after (or with) payment to the subcontractor when the job is complete, and represents a full release of lien. It waives all lien rights permanently, effective immediately upon signing.
Enter a value in the Through Date and Due Date fields.
Note
Through Date represents the end of the work billing period, and the waiver should cover all work performed since the previous waiver and through date. Due Date is the deadline for the vendor to sign the waiver or be considered out of compliance.
Once you have entered the information above, the dialog expands. Click and choose which vendor(s) need to sign the waiver.
Click .
The selected vendor(s) display in the Generate Waiver(s) dialog. From here you can choose to select additional vendors, reset the list, add invoices or generate waivers.
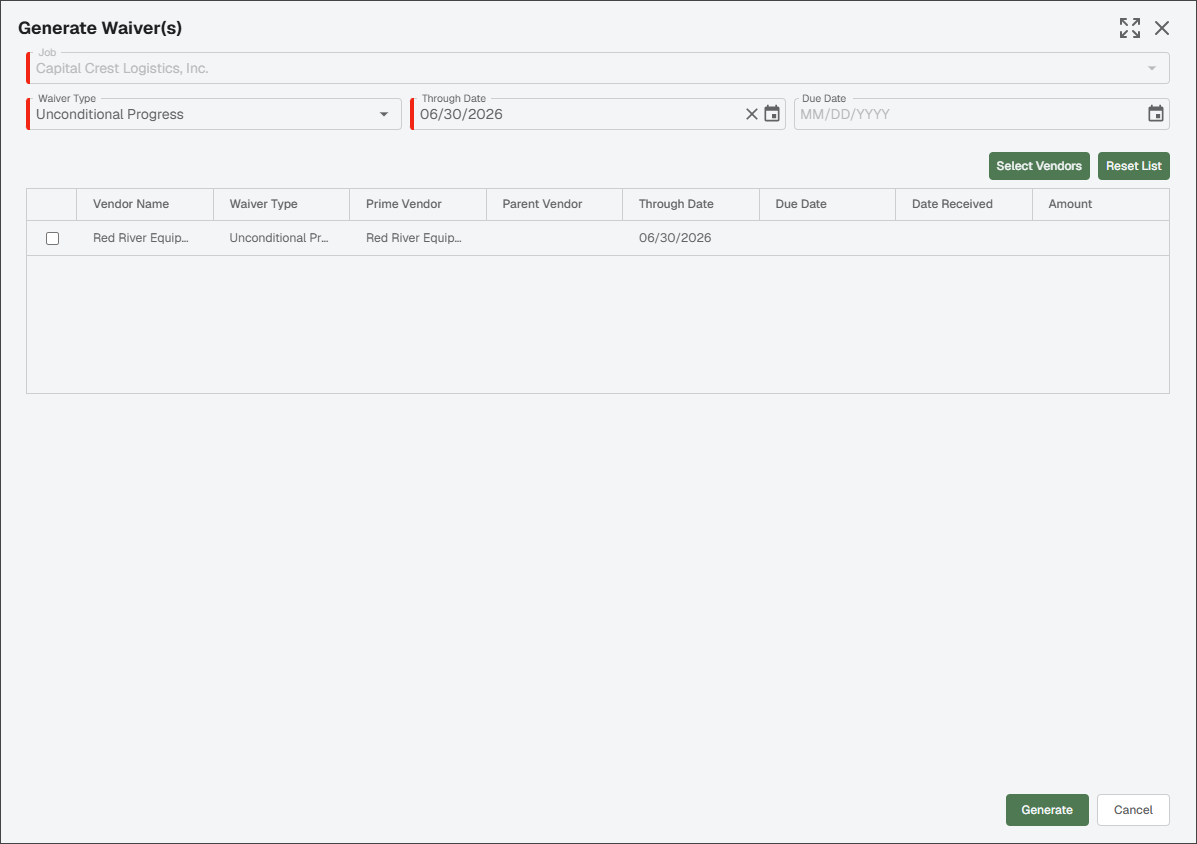
Do one or more of the following:
To select more vendors: Click and choose additional vendors from the list. Then click .
To start over: Either click to close the dialog or click to remove all selected vendors from the grid.
To add or remove invoices: Select a vendor from the grid, the Add Invoice, Lookup Invoices and Clear Invoices buttons become available. You may want to add an invoice to a lien waiver to ensure that the legal release of lien rights is linked to specific financial transactions. Tying invoices to a waiver provides a clear audit trail. See Add Invoices Manually, Lookup Invoices or Clear Invoices for more information.
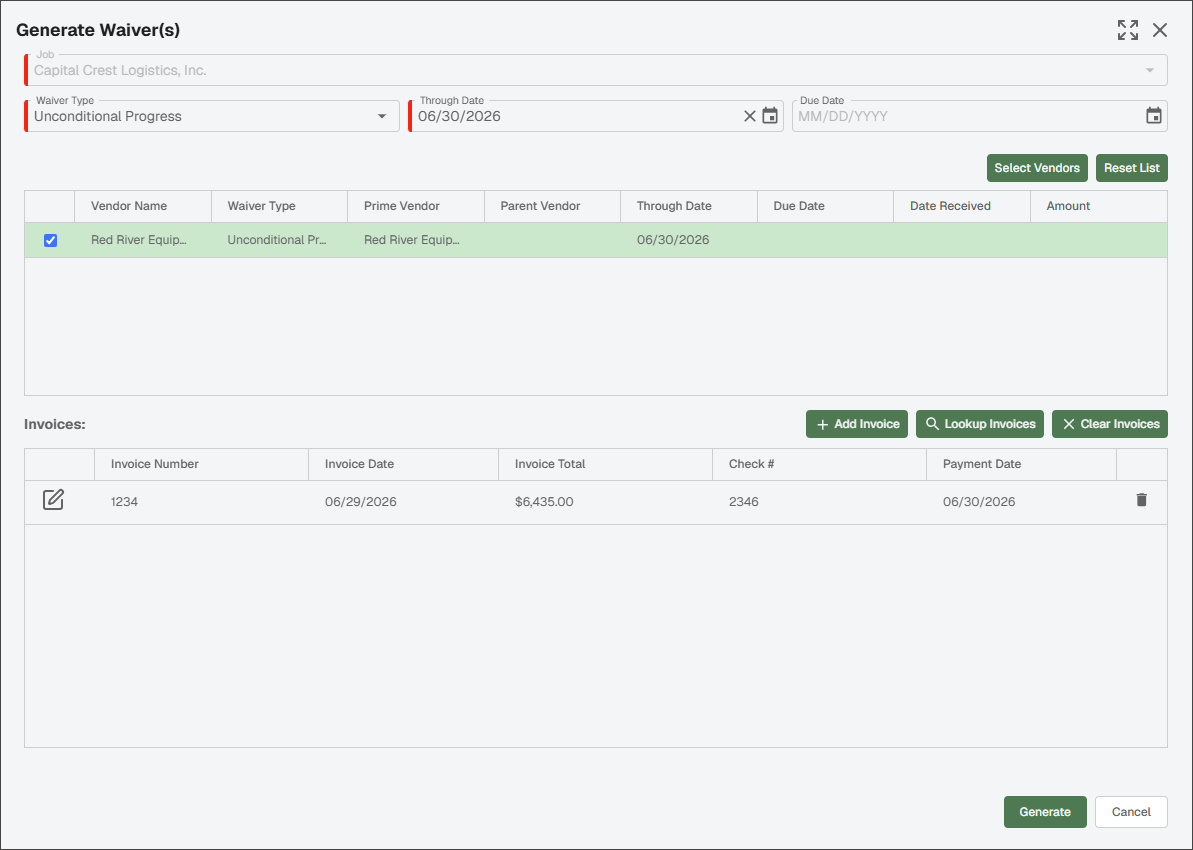
To generate the waiver: You can generate waivers with or without adding invoices for the vendor(s). Click .
After the waivers have been generated, the Print and Email buttons are enabled in the dialog.
Add Invoices Manually
Complete the following steps to enter invoice information manually to tie to a particular vendor's lien waiver:
Click .
An invoice line is added to the Invoices grid:

Click the Edit
icon to begin editing, then enter the applicable information for Invoice Number, Invoice Date, Invoice Total, Check # and Payment Date.Click the
 to save your changes for that line.
(Optional) You can click Revert Changes
 to remove your latest updates to the line or click again to add more invoices to the vendor.
Lookup Invoices
Complete the following steps to add an invoice from Sage Paperless Construction or your bridged accounting system to a lien waiver:
Click .
The Lookup Invoices dialog display with the Job Name and Vendor Name fields populated:
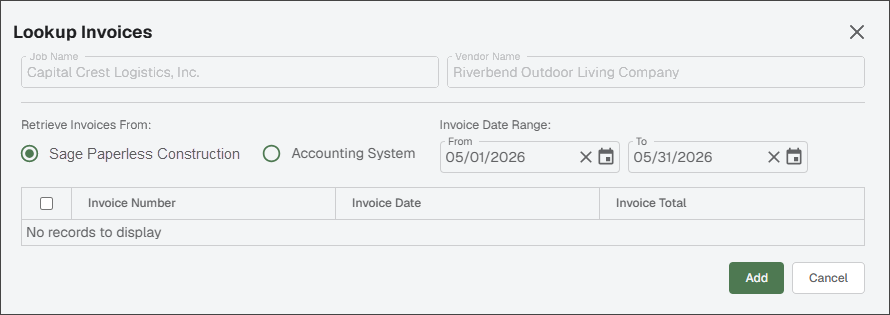
In the Retrieve Invoices From section, select either or as the location the invoices should be pulled from.
In the Invoice Date Range section, type or use the calendar option to enter the From and To dates for the invoice.
Invoices that meet your selected criteria display in the grid.
Select one or more invoices from the grid.
Click .
Click when you have added all invoices to all associated vendors.
Clear Invoices
You can remove invoice data that was entered in error or needs to be replaced.
Click . All invoices are removed from the Invoices grid.
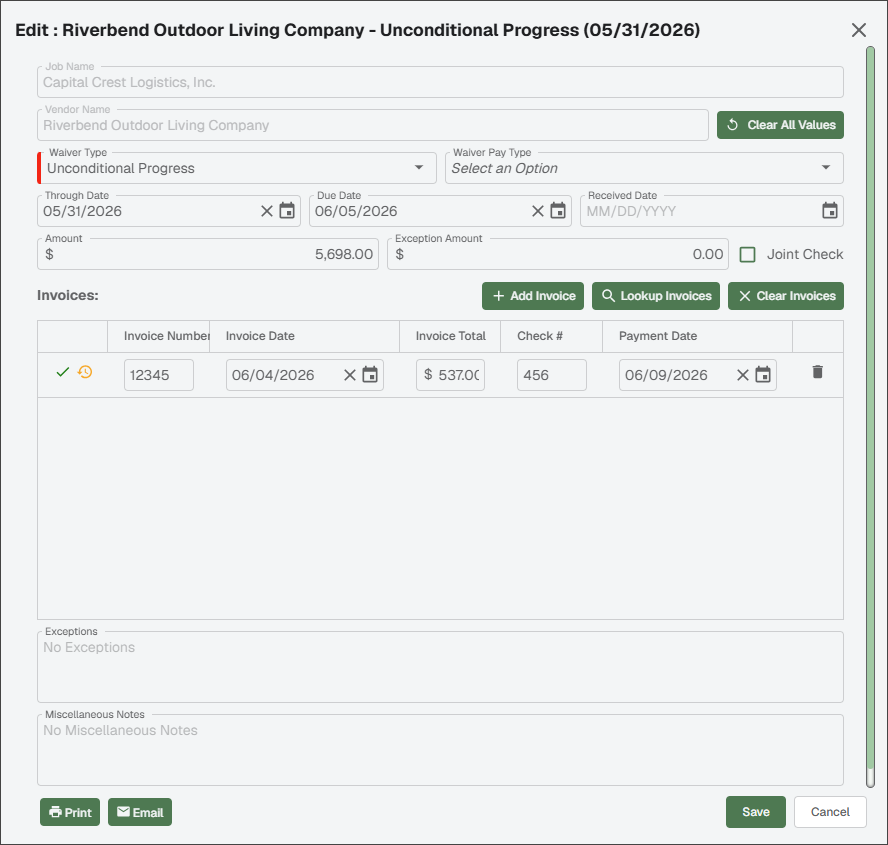
From the job's Lien Waivers page, find the waiver you want to edit.
Click the Edit
icon.In the Edit Waiver dialog, make any necessary updates.
Note
All fields except the Job Name and Vendor Name can be edited. You can also add, edit or remove invoices from this dialog.
Click .