APFlow™ Rule Groups
The routing groups created and managed on this page are used within your invoice routing process. For each rule, you can specify routing the invoice to one or more reviewers and include defining the routing sequence. You can define routing rule groups and on the invoice at the time of routing you can specify which routing group(s) apply.
The Default group is the default routing group that is initially assigned when you go to route invoices. You can delete this group; however, should you choose to remove the default routing group, invoices may be approved without applying the appropriate authorization policies.
Once you have created a rule, you can add one or more individuals to be part of the group associated with this newly created rule. If this is a rule that you use routinely, you can assign the Default group if that is appropriate or create an entirely different group.
From My Paperless, click .
In the APFlow™ Settings navigation bar, click .
A page similar to the following displays:
Warning
If you choose to delete the default routing group, invoices may be approved without applying the appropriate authorization policies.
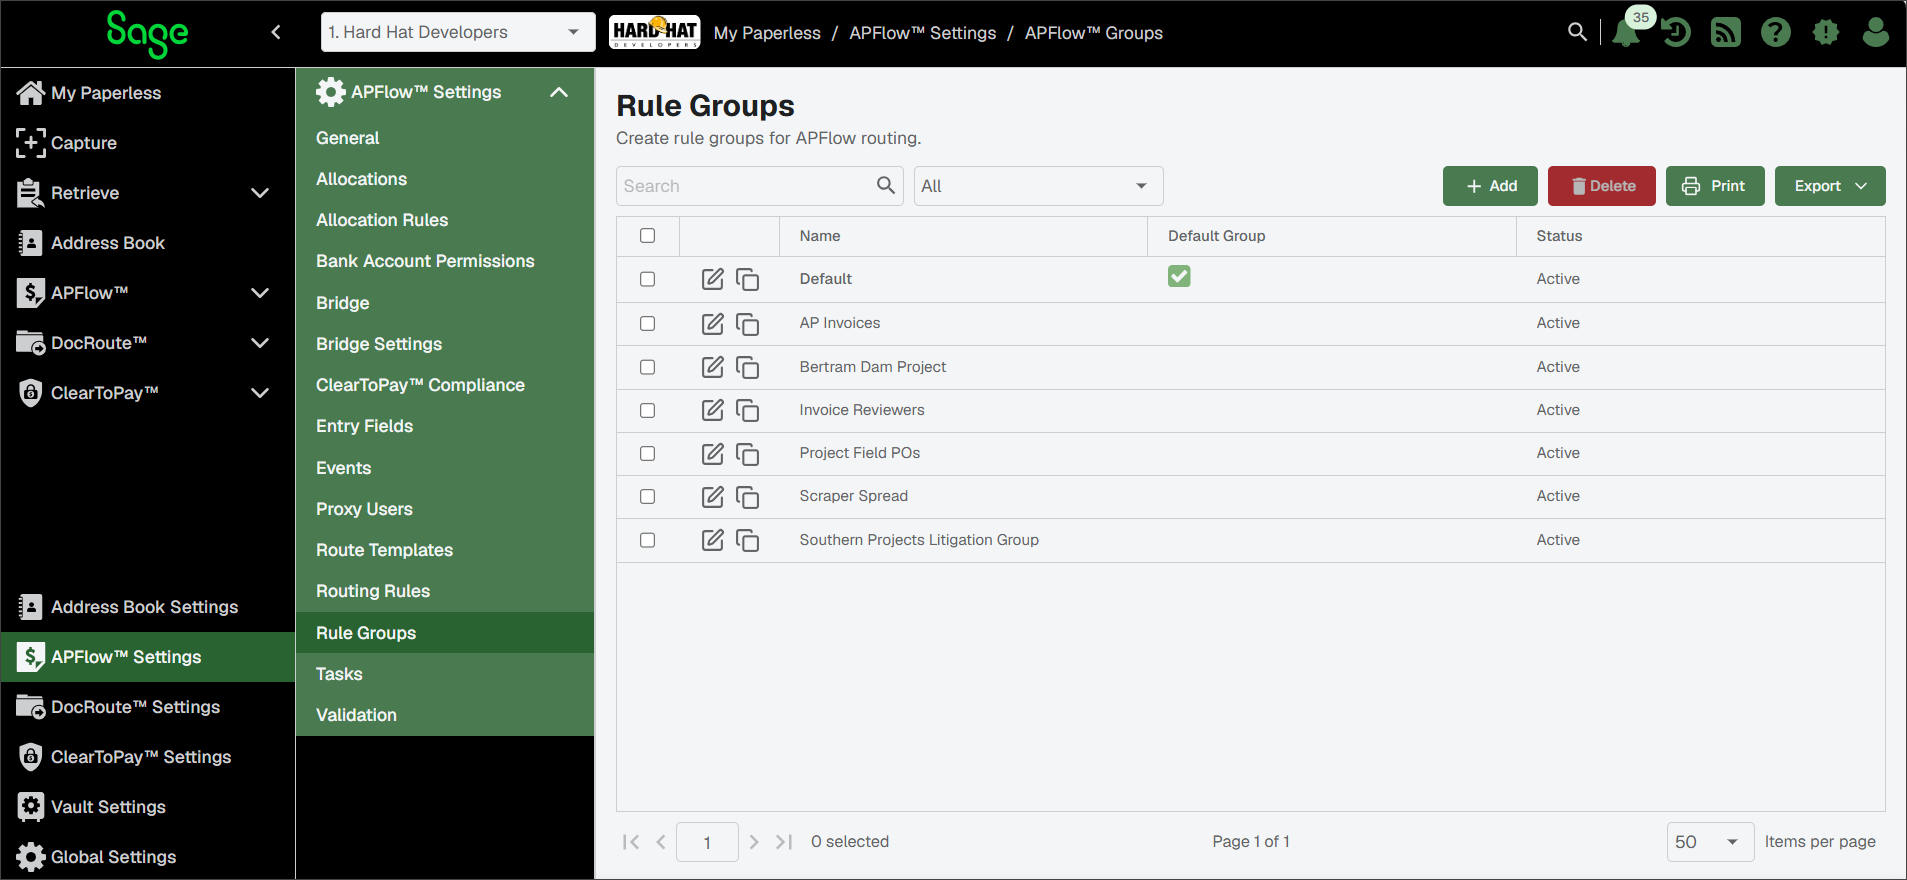
You can use the Rule Group page to do the following:

To create a rule group, click . For more information, see Add APFlow™ Rule Groups.

To delete one or more groups from the list, select their check box and click .

To search for a specific rule group, enter a portion of its name. Then, press or click the Search
 icon.
icon.
Click Copy
to duplicate a rule group.
Click Edit
to update a rule group. See Edit Rule Groups in APFlow™ for more information.
Click .
The following page displays with the General tab active:
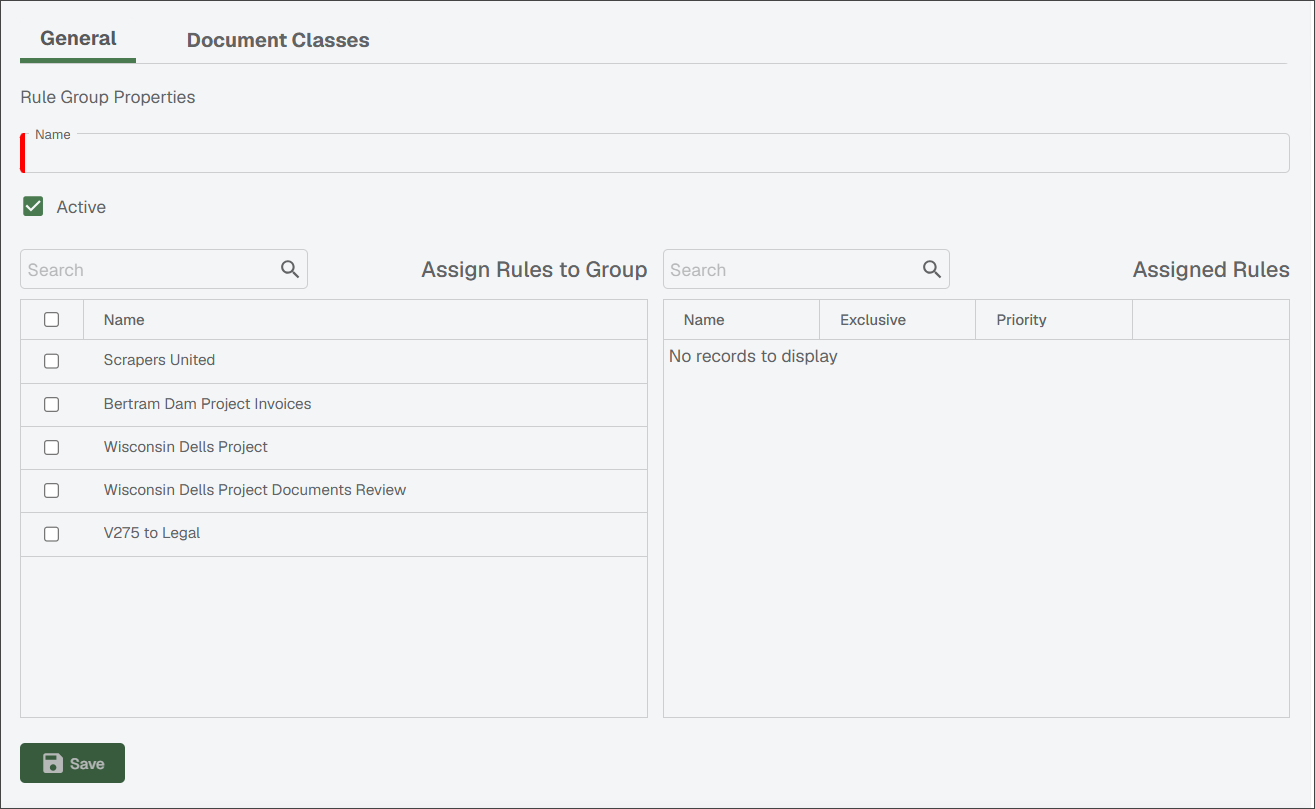
In the Name field, enter the name of the rule group. This field is required.
The Active check box is selected by default. If the rule group should not be active, deselect the check box.
In the Assign Rules to Group grid, select the appropriate rules.
Note
The rules you have assigned to this new group display in the Assigned Rules grid.
Click the tab.
The following page displays:
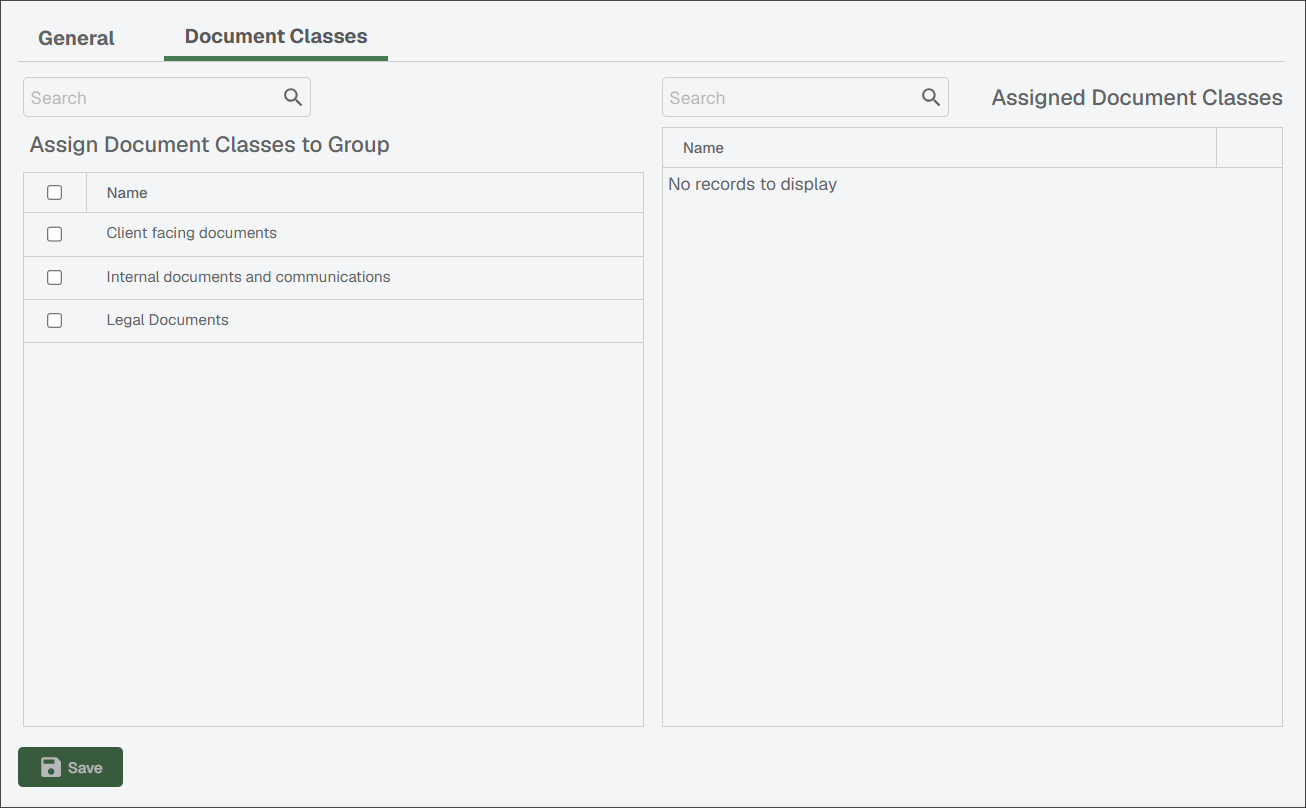
From the list that displays in the Assign Document Classes to Group grid, select the appropriate document class.
Note
The document class you assign here should systematically be added to the invoice route. For information on invoice routing, see Routing Internally Within APFlow™.
Click .
Warning
Be mindful that if you delete the Default group, invoices may be approved without applying the appropriate authorization policies.
From the Rule Groups page, find the group you want to edit.
Click the Edit
 icon.
icon.On the General and Document Classes tabs, make any necessary updates.
Note
See Add APFlow™ Rule Groups for more information of how the fields and tabs should be configured.
Click .