APFlow™ Entry Fields
The settings on the Entry Fields page are company-wide and only apply to the current vault. Complete the following steps to configure the way fields function in invoice entry:
From My Paperless, click .
In the APFlow™ Settings navigation bar, click .
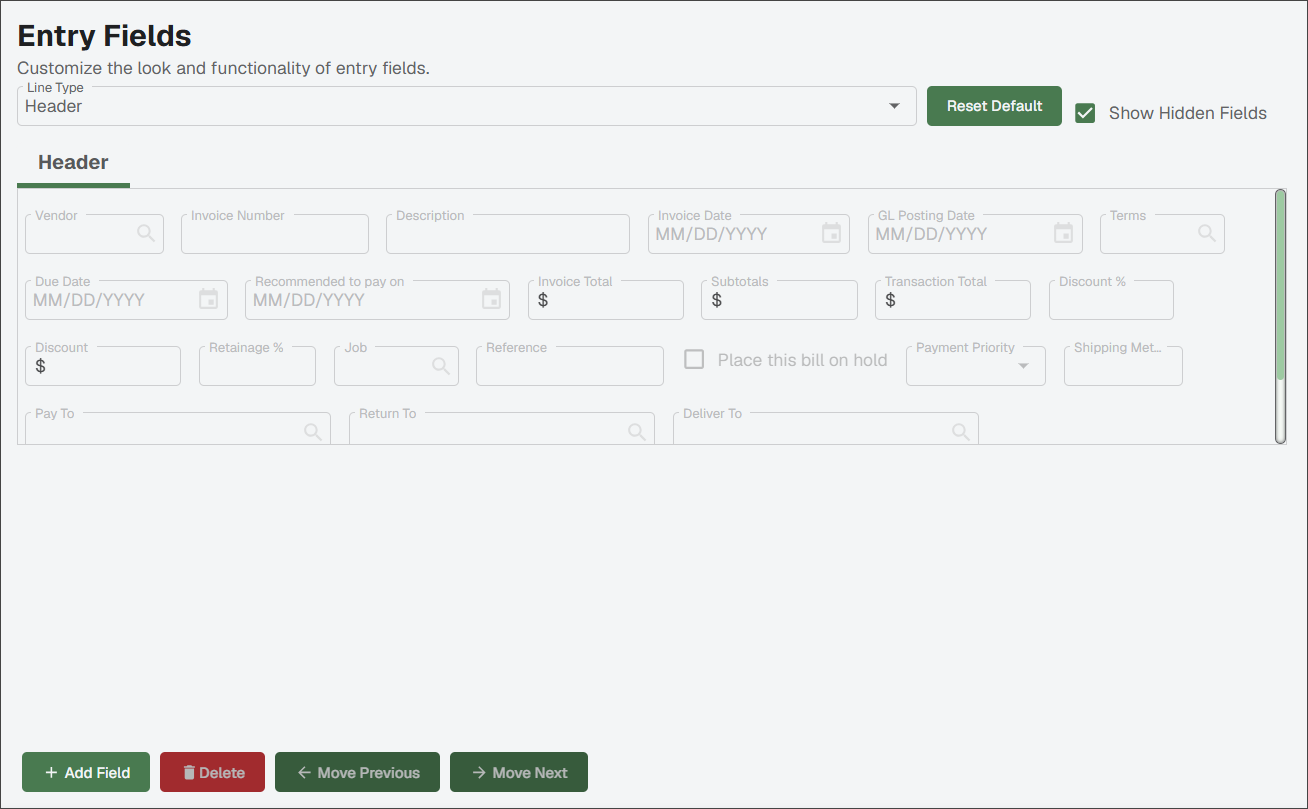
The Entry Fields main page displays.
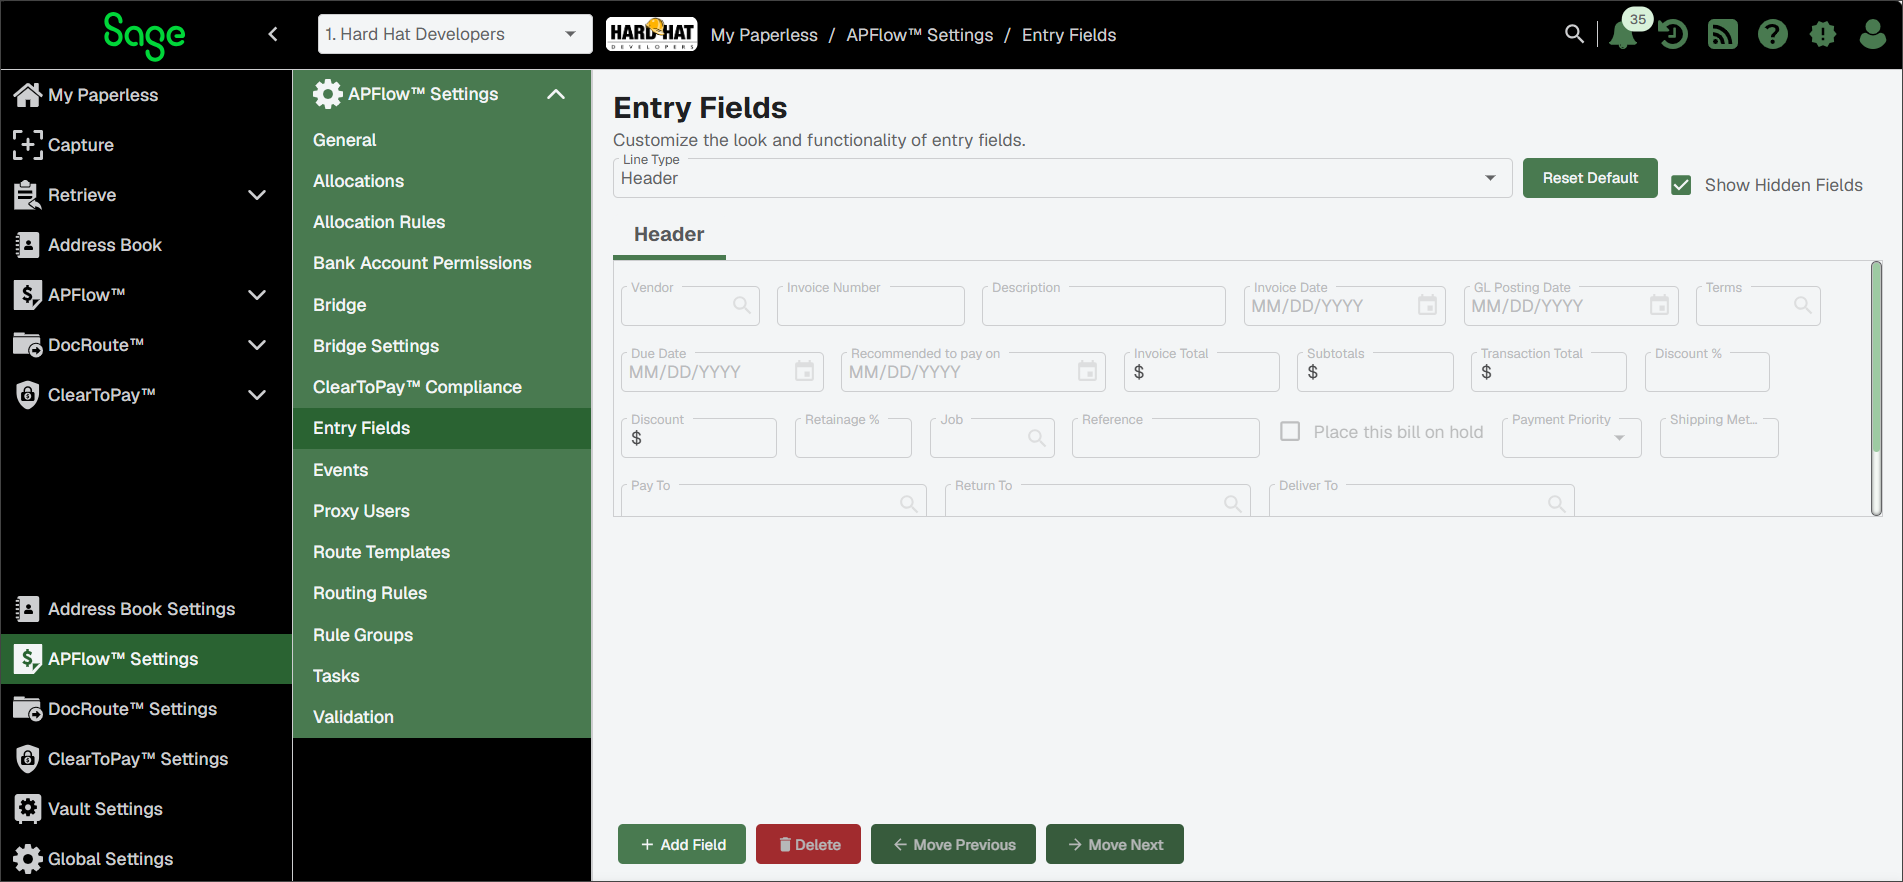
Use the Line Type dropdown to select which line detail fields you need to configure.
Note
The options in the dropdown correspond to line detail fields and are based on the bridged accounting system.
The bottom detail pane populates based on the line type you selected.
(Optional) Click to return all fields for the selected Line Type back to their original properties.
Warning
If a custom field for the current Line Type was used in invoice routing rules, and was clicked, the Administrator must remove the custom field from the routing rules first and then return to the Entry Fields page to remove that custom field. As a precaution, if is clicked and a custom field was used in invoice routing rules, a dialog displays advising that the custom field was used in invoice routing rules and that the custom field must be removed from invoice routing rules before being removed.
Decide if the identified fields should be visible on the Invoice Entry page:
Select the check box if field should be hidden.
Leave the check box blank if the field should be visible.
Important
Options in the Field Properties section vary based on the Line Type selected. Not every field listed below is valid for every line type.
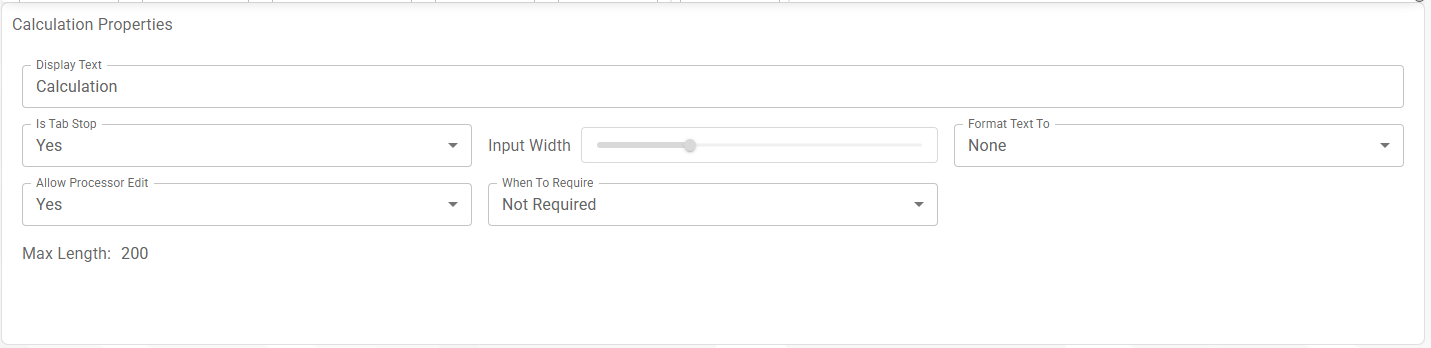
Field | Function | |
|---|---|---|
Display Text | Use to change the field name. | |
Is Tab Stop (Yes / No) | Use to determine if the cursor should stop at this field when tabbing through the Invoice Entry page fields.
| |
Hide (Yes / No) | Use to determine if a custom field should be hidden.
| |
Display Description (Yes / No) | Use to determine if field description should display. If it is visible, the italicized text displays below the field.
| |
Input Width | This field determines the length or size of the field, in pixels. Move the slider forward (to lengthen) or backward (to shorten) the field. NoteIf the field is a check box, the Input Width field does not display. | |
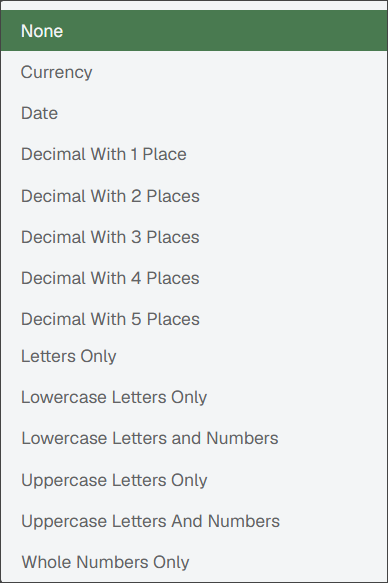
Format Text To | Use this field to identify how the text in the selected field should be formatted. The dropdown lists the formats you can choose from. NoteNone is the default.
| |
Allow Processor Edit (Yes / No) | Use to set if Processors should have write or read-only access.
| |
Allow Reviewer Edit (Yes / No) | Use to set if Reviewers should have write or read-only access.
ImportantA field may be set to allow modification; however, there may be instances when logic within the form does not allow for modification. For example: A tax code must be entered in the Tax Code field before the Tax Amount field is enabled, even if the Tax Amount field is set to . | |
When To Require | Beginning with the Description field, the Administrator can determine which fields are not required, which fields are required and if required, when.
Any field that the Administrator has determined to be required displays in the Validations Results dialog if it is left blank. NoteVendor and Invoice # fields are not configurable because they are pre-defined. | |
Max Length | This field identifies the number characters you can have in the field. This field is read-only and for informational purposes. |
Use the buttons shown below to configure and rearrange Invoice Entry fields.
Field | Function |
|---|---|
Add Field | Click to generate a new field to the Invoice Entry page. All available configurable settings display in the Properties pane. Custom fields can be used in the construction of invoice routing rules. See Add an Entry Field for APFlow™ for more information. |
Delete | Use the button to remove a custom field. |
Move Previous | Every field can be moved to change its position to facilitate order entry. With the field highlighted, click to move the field backwards through the previous fields. |
Move Next | Every field can be moved to change its position to facilitate order entry. With the field highlighted, click to move the field forwards through the subsequent fields. |
Click .
The Add Entry Field dialog displays:
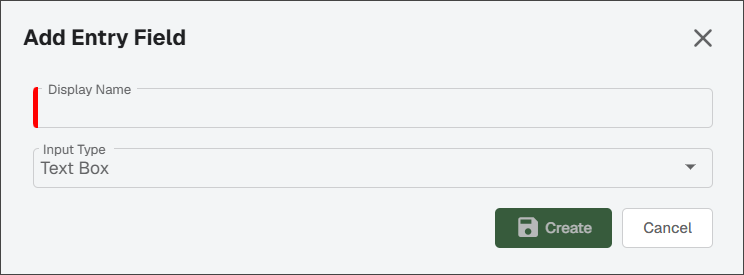
Enter the name to display as the field label in the Display Name field.
Select either or from the Input Type dropdown.
Click .
The newly added field displays in the top grid (in this case, Calculation) similar to the following:
Click the new field to access the Properties grid.
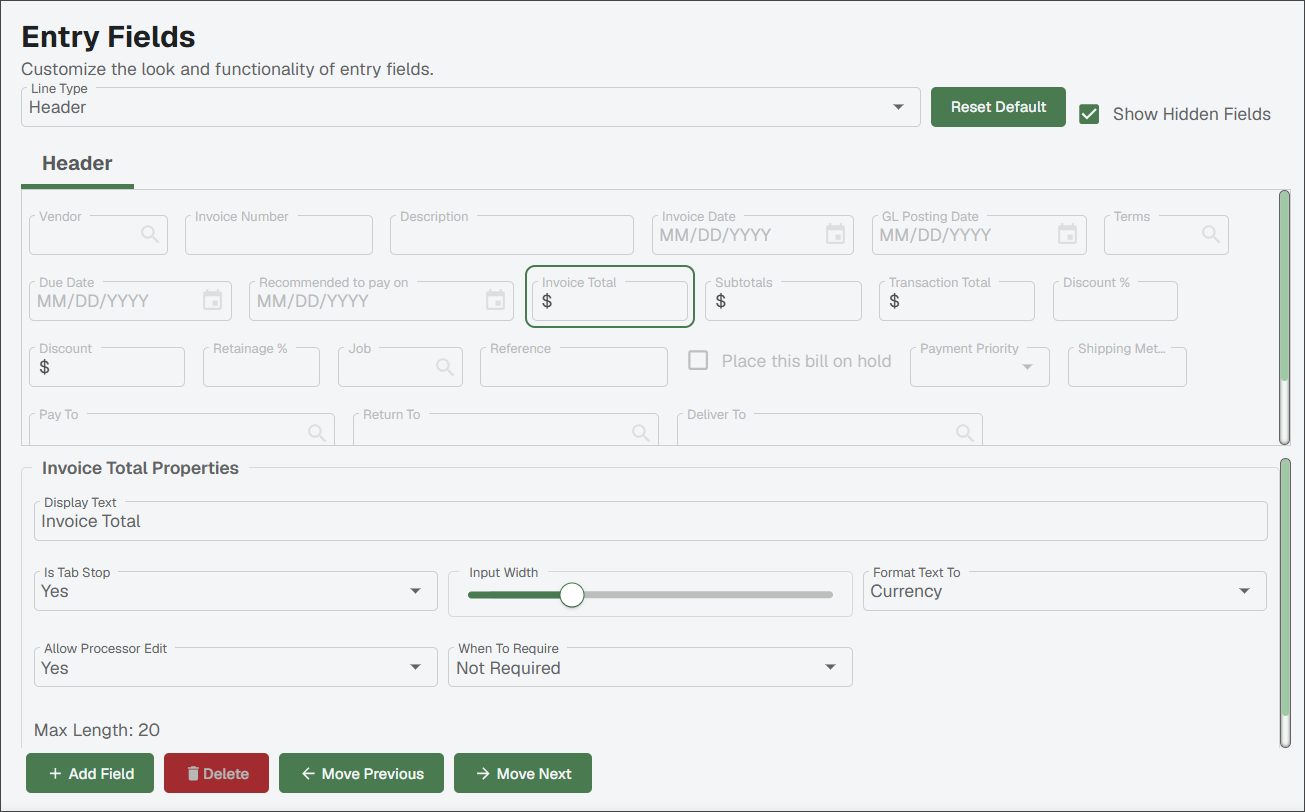
Proceed through the grid, updating field settings as appropriate.