Company
The Company page contains your company's records and configuration. From this page, you can:
View and edit company information
Review configurations issues
Access jobs, contacts, insurance templates, insurance policies and notification rules for this company
Important
You must be configured as with Compliance Manager or Auditor access permissions for the current vault to be able to view the Company pages within ClearToPay. Only a user with Compliance Manager permissions can edit this page.
Complete the following steps to access the main Company page:
From My Paperless, click .
In the ClearToPay™ navigation bar, click .
A page similar to the follow displays:
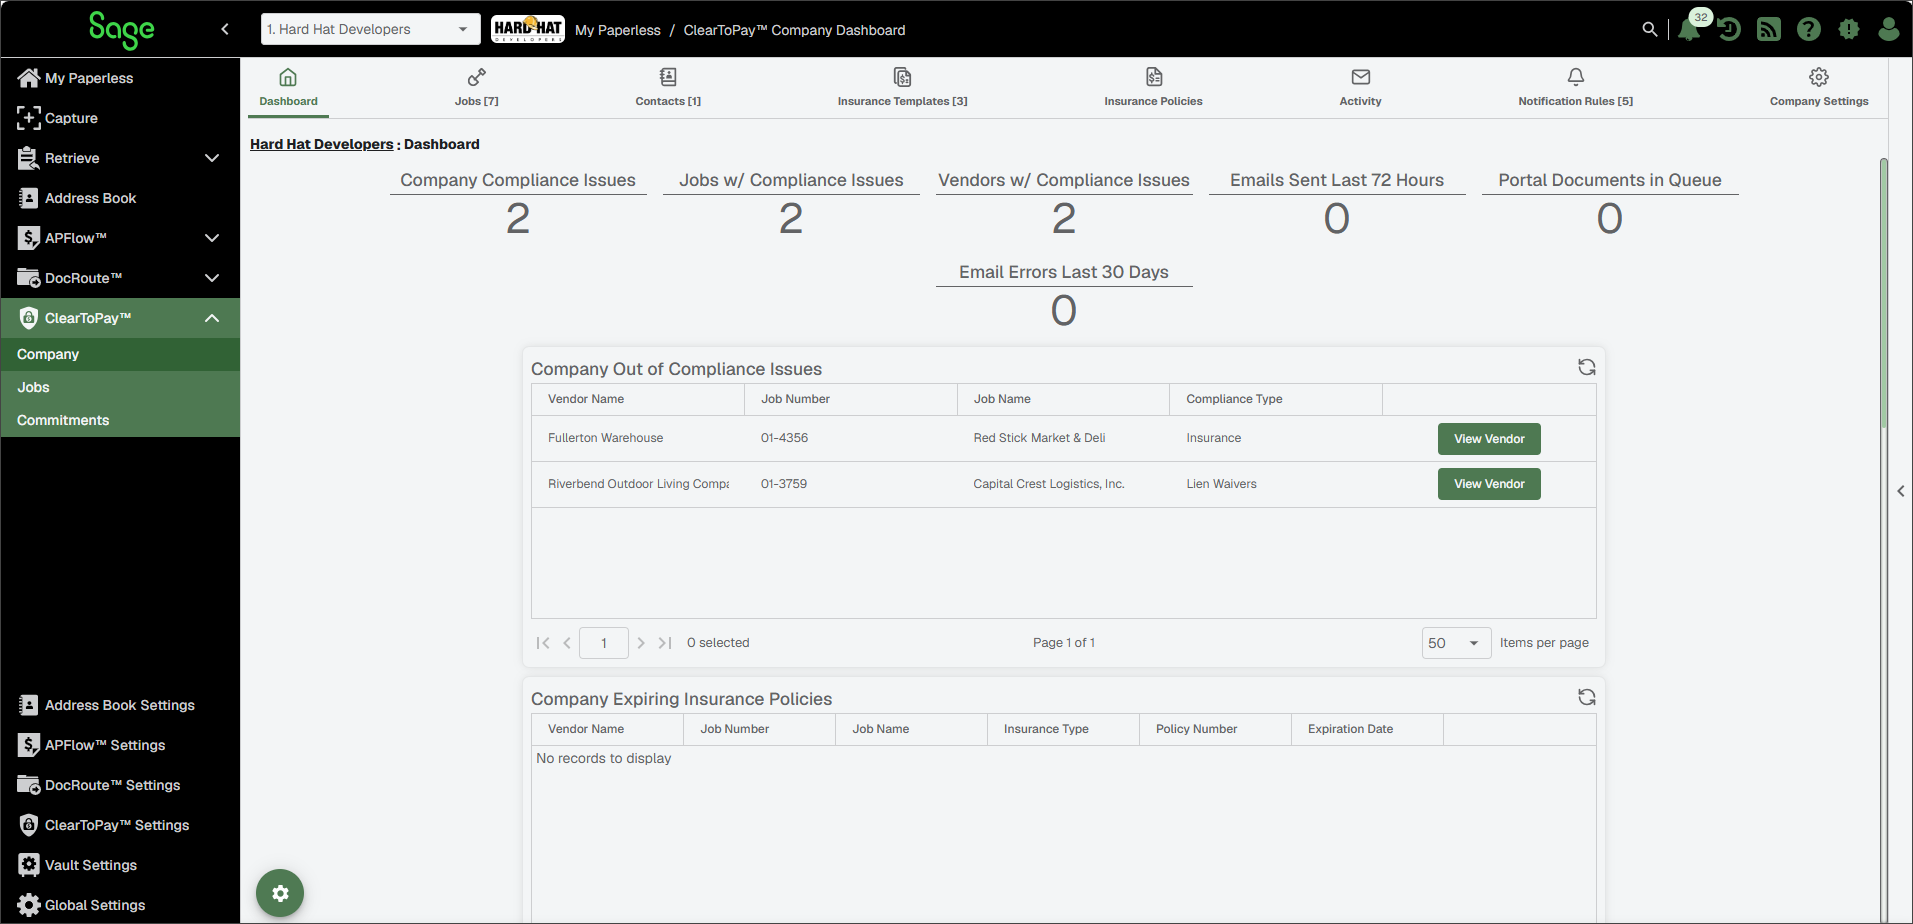
You can use the Company Dashboard page to access important company features using the icons located at the top of the page, review and edit company information or check on configuration issues.
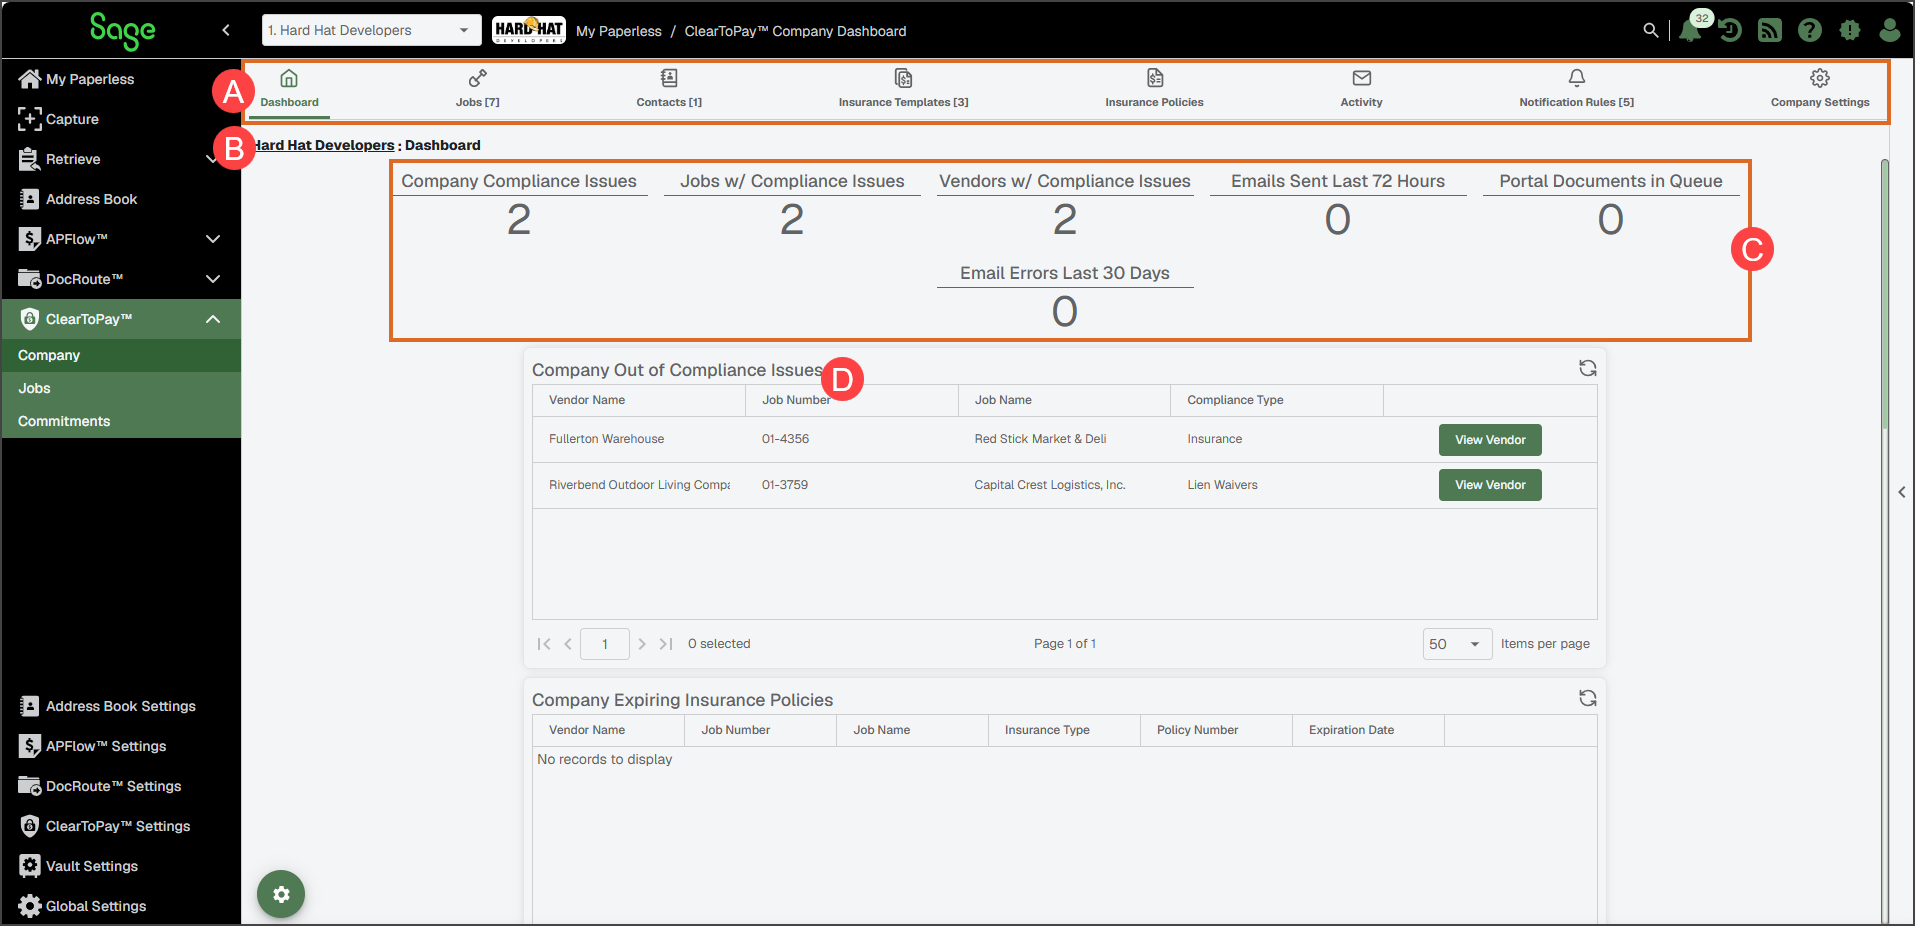
| A: Quick links to access company information and settings. |
| B: Company address and contact information. See Edit Company Information for detail on updating this information. |
| C: Configurable mini widgets. See ClearToPay™ Widgets for more information. |
| D: Configurable grid widgets. See ClearToPay™ Widgets for more information. The buttons in the grid widgets take you to the area of concern (such as an out of compliance vendor's dashboard), display messages with an option to resend them, or open a dialog where you can view and address specific issues. |
To edit the company information, click the Edit
 icon that displays when you hover over the company name:
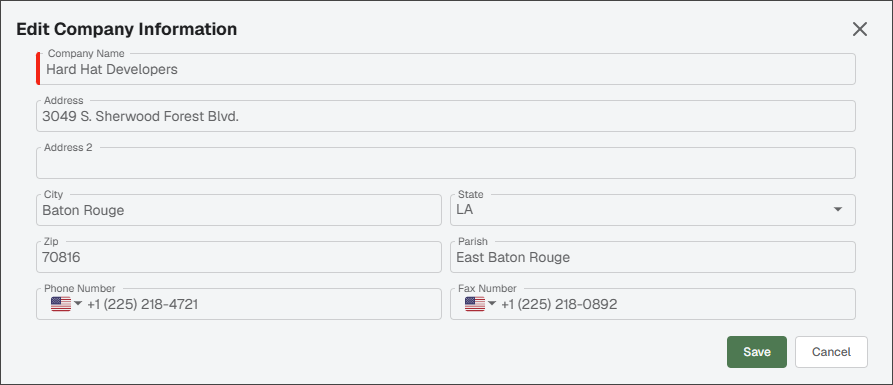
In the Edit Company Information dialog, make any necessary updates.
Note
If you type the zip code in the Zip field, the City, State and County (Parish if the state is LA) fields populate automatically. If there is more than one city with the entered zip code, you can choose the proper city from a prompt.
Click .
You can make modifications to the widgets that display on your various ClearToPay dashboards. ClearToPay provides various grid and mini widgets that help you quickly view and access relevant information like compliance issues, expiring policies, configuration issues and emails.
Just like other dashboards in Sage Paperless Construction, the system remembers your widget settings (by user, by widget, by vault).
To access the available widgets, click the Widget Configuration
 icon.
icon.The Select Widgets to Display dialog displays:
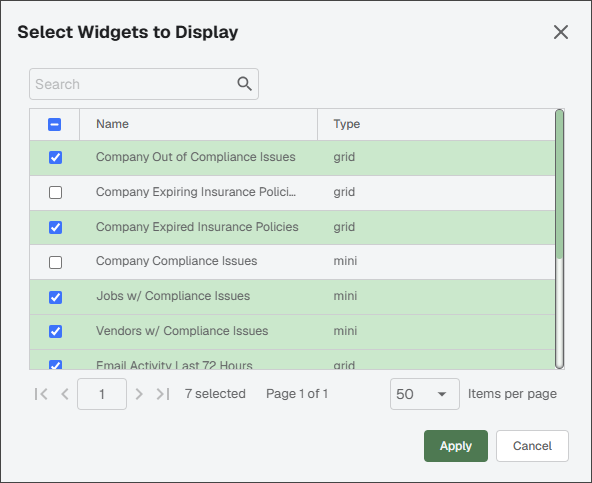
Select which widgets you want to display.
Note
The widgets that are available vary depending on if you are configuring widgets on the company, job or vendor dashboard.
Click .
Note
If you want to display all the listed widgets, click the check box in the header. This populates every check box with a checkmark.
To "unpin" a widget so that a particular widget does not display on your Dashboard page, remove the checkmark for that widget. Remember to click to save your changes.
For additional information on updating dashboard widgets in Sage Paperless Construction, see Use Widgets and Grids.
Click on any of the Refresh
 icons that display on each widget to refresh them individually.