Security Groups
Security Groups are vault-level classifications that define which uses can access specific document categories, document types and reports. These groups often represent departments and other operating units of the company that process documents, such as Accounts Payable, Payroll, Purchasing or Project Management.
While vaults represent the overall "electronic file rooms," security groups organize and protect the documents stored within them to ensure data integrity and confidentiality by controlling what users can do with those documents (i.e., indexing, distributing, etc.).
From My Paperless, click .
In the Vault Settings navigation bar, click .
The following page displays where you can view existing security groups and add new ones:
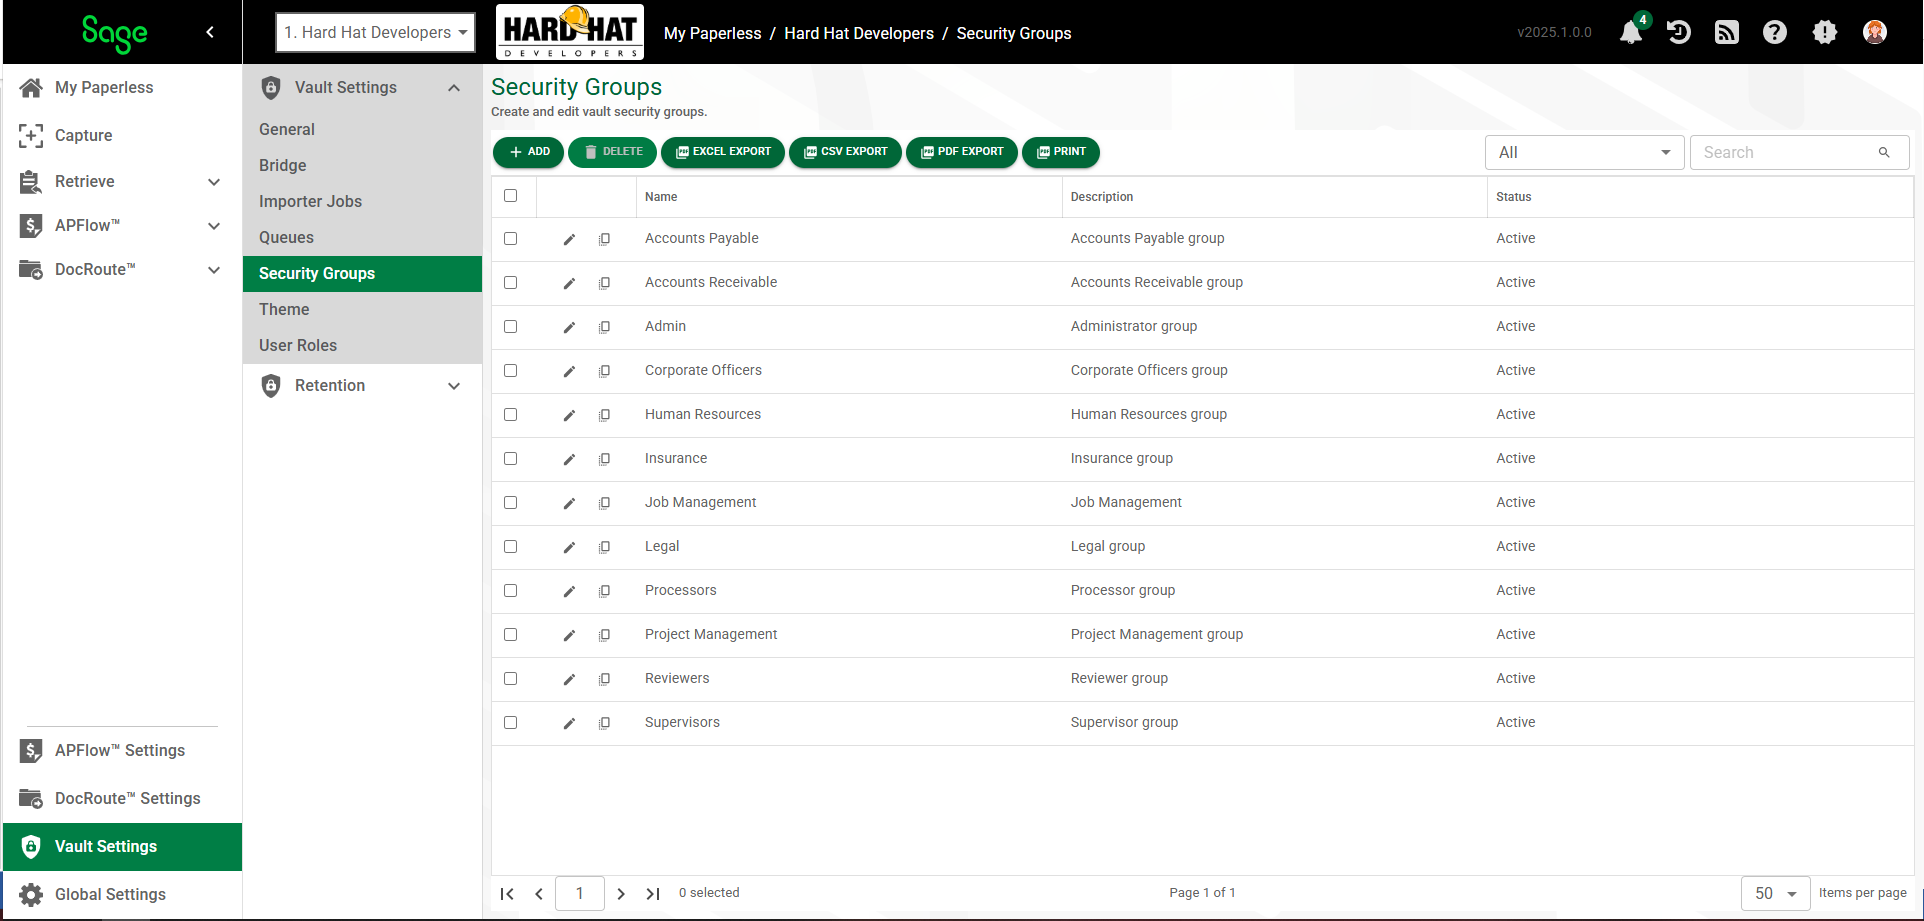
Complete the following steps to begin creating a new security group and enable vault administrator permissions, if applicable:
Click .
The following page displays with the GENERAL tab active:
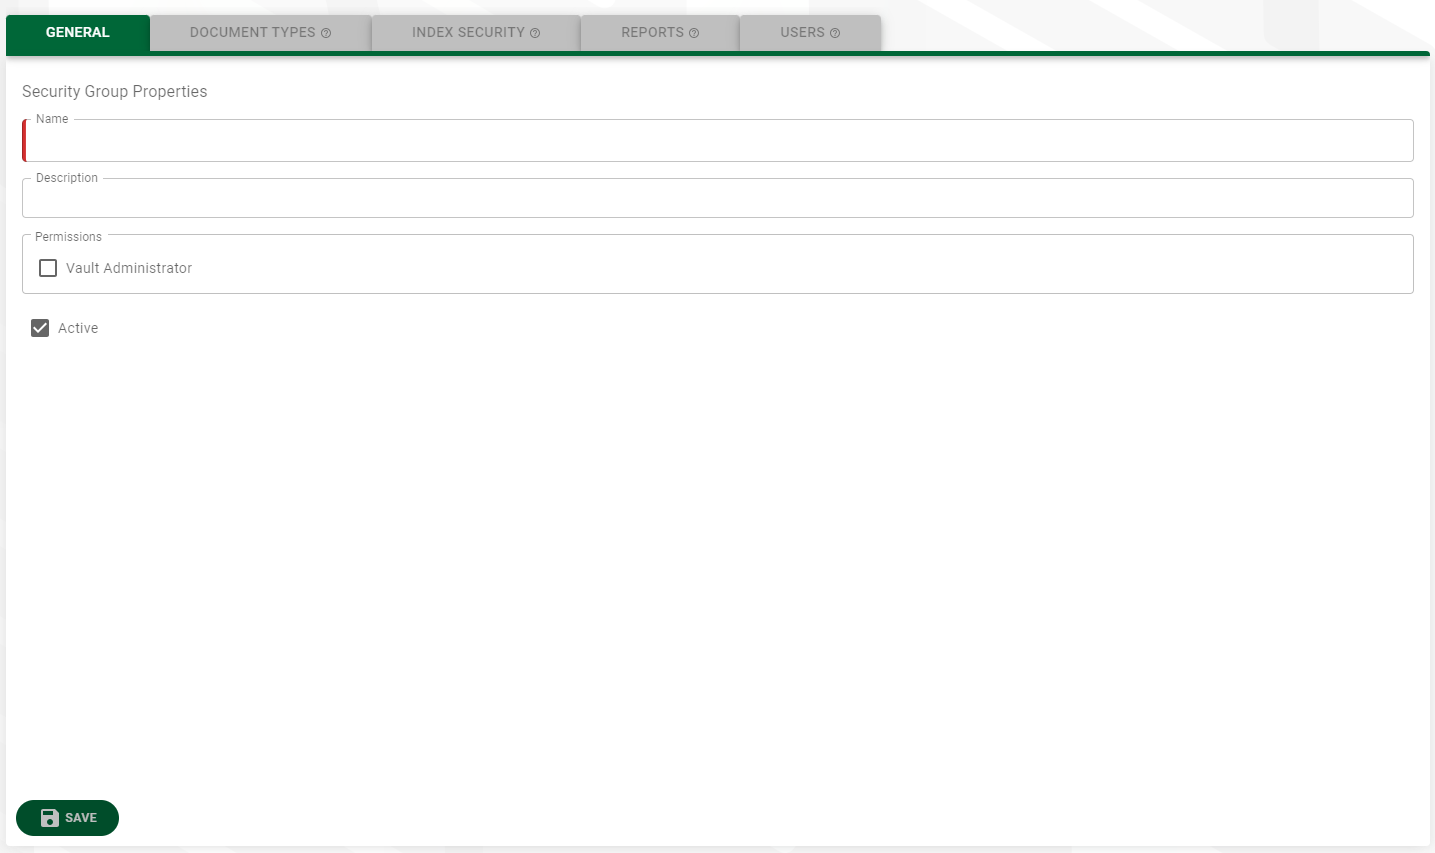
In the Name field, enter the name of a new security group.
In the Description field, enter a description to further identify the group.
To grant the users in the new security group Vault Administrator permissions for Sage Paperless Construction, click to select the check box. If this level of access is not appropriate, leave it blank.
Warning
Vault Administrators can make vault level changes that could impact the way your company information is set up.
Make sure the Active check box is selected if this security group is ready for use.
Click .
The remaining tabs become available.
Your Sage Paperless Construction system was installed with many predefined document types.
Note
If new document types need to be added to Sage Paperless Construction, see Add Document Types. If a document type needs to be edited to fit your company's needs, see Edit Document Types. You must have System Administrator permissions to perform these tasks.
Within Vault Settings, the DOCUMENT TYPES tab is where you select those document types that individuals in this security group have permission to view or interact with in specific ways.
Once you have selected the applicable document types, Sage Paperless Construction systematically grants global permissions for the members of this security group to index, add pages, distribute and delete pages. You can decide to keep these global permissions or restrict them for each document type. Additionally, you can decide—per document type—if the members of this security group should only be able to read certain document types but not manipulate them.
Click the tab.
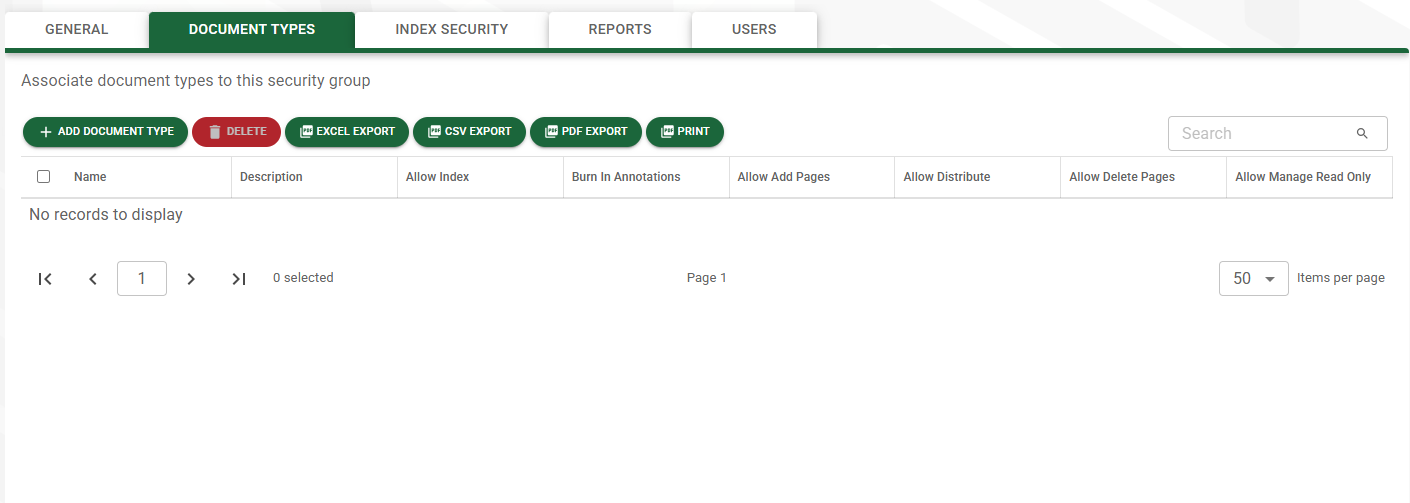
A page similar to the following displays:
Click .
The Add Document Types dialog displays:
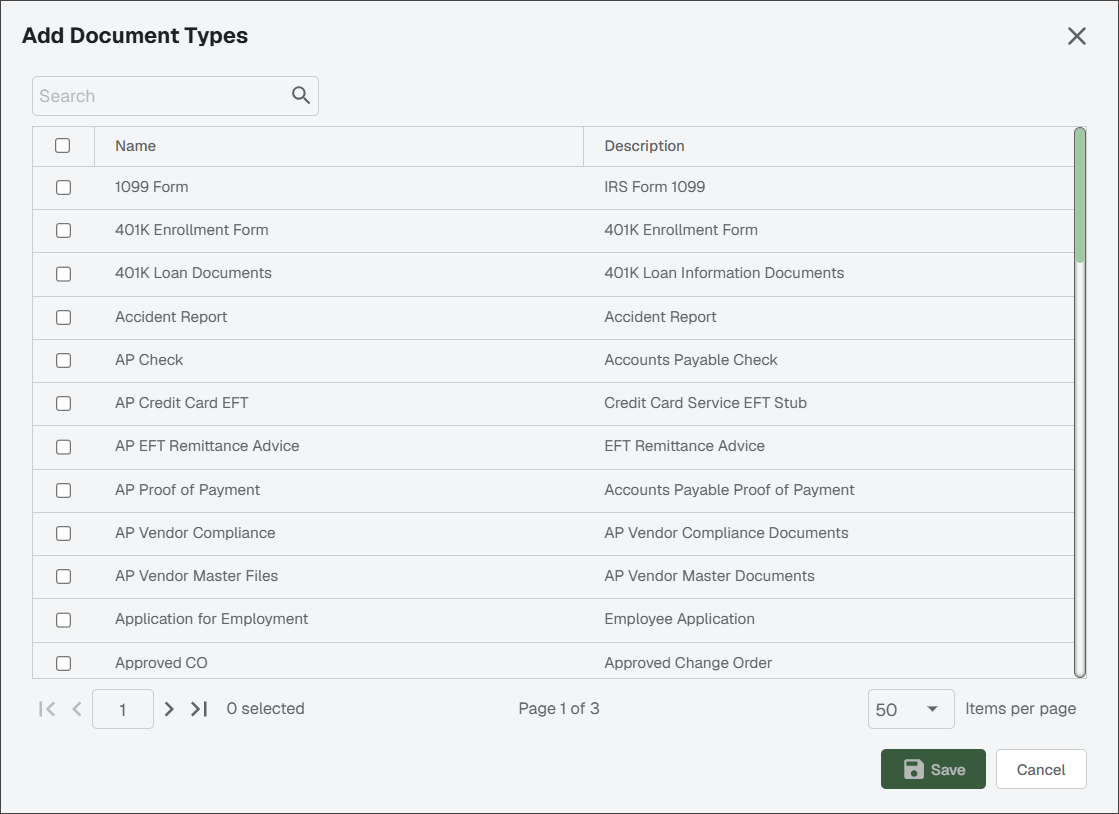
Use the scroll bar to go through the list of available document types.
Click the check box for every document type this security group should have permissions for.
Click .
The DOCUMENT TYPES tab redisplays with the selected document types listed.
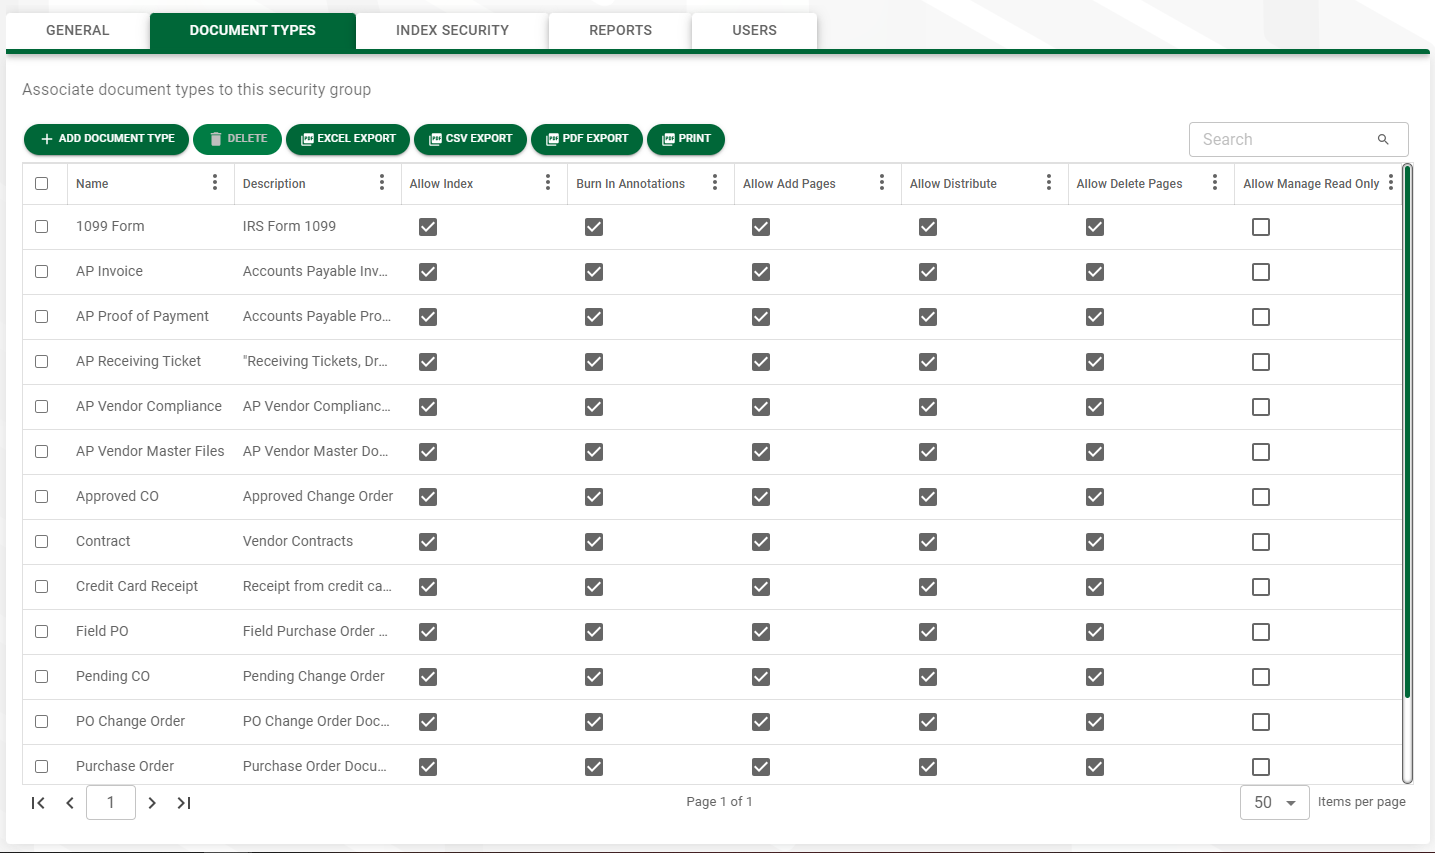
Determine permissions to this group for each assigned document type based on the descriptions in the table below. If you do not want security group members to be able to perform any of those tasks on a particular document type, you must manually mark a document type as Allow Manage Read Only. Any permission may be selected or deselected for any document type.
Note
By default, Sage Paperless Construction allows security group members to index, add pages, distribute and delete pages.
Column
Description
System Default
Allow Index
The members in this security group can index documents of this document type, or change the indexes of a previously stored document.
Yes
Burn In Annotations
The members in this security group can burn annotations in documents.
Yes
Allow Add Pages
The members in this security group can add pages to existing documents.
Yes
Allow Distribute
The members in this security group can distribute documents of this document type (i.e. printing, emailing, or saving to a file).
Yes
Allow Delete Pages
The members in this security group can delete pages from previously indexed documents of this document type.
Yes
Allow Manage Read Only
If manually clicked, the members in this security group can mark a particular document type as read only. Document types that are read only for this security group must be selected individually.
The system administrator can turn on or off the “read only” flag on documents as appropriate.
No
Index level filters for document types assigned to vault security groups can be selected in Sage Paperless Construction. Essentially, this filters the search results of users assigned to the security group.
For instance, to limit who can see documents with “Job Number = 200” as an index value on the documents, set up a filter with that limit in place.
Caution
If done incorrectly, setting up security group filters can cause serious difficulties with document searching.
Consult with Paperless Environments' customer support if unsure how Index Level Security works.
Remember that once a Sage Paperless Construction user is placed into a security group with an index level security filter setup, only those documents meeting that document type/index filter combination should be visible.
To view additional combinations, those security groups must be set up with the user assigned to the appropriate groups.
For an administrator-type user who should have access to all documents of a particular type—regardless of the index values are on the document—do not put them into a security group with filters.
Click the tab.
The following page displays:
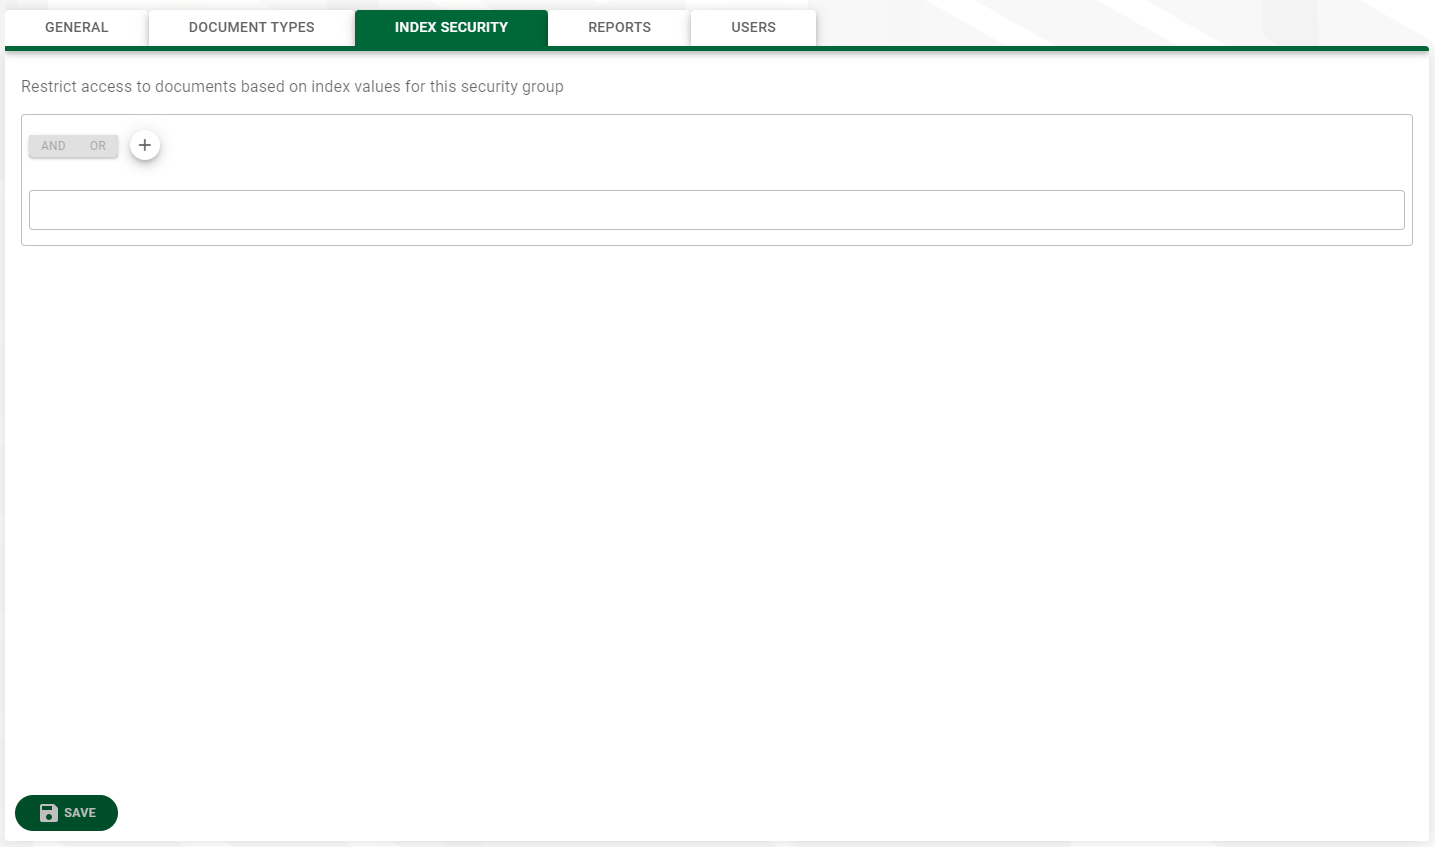
Click the Plus
 icon, then click either or .
If you are only going to have a single condition or a set of conditions that are validated together, choose . See Add a Condition for more information.
If you need to add more levels of conditions, see Add Additional Conditions for more information.
If you are going to have more than one group of conditions to validate, choose . See Add Groups of Conditions for more information.
Add a Condition
Click the
 button and select Add Condition. A condition entry line display.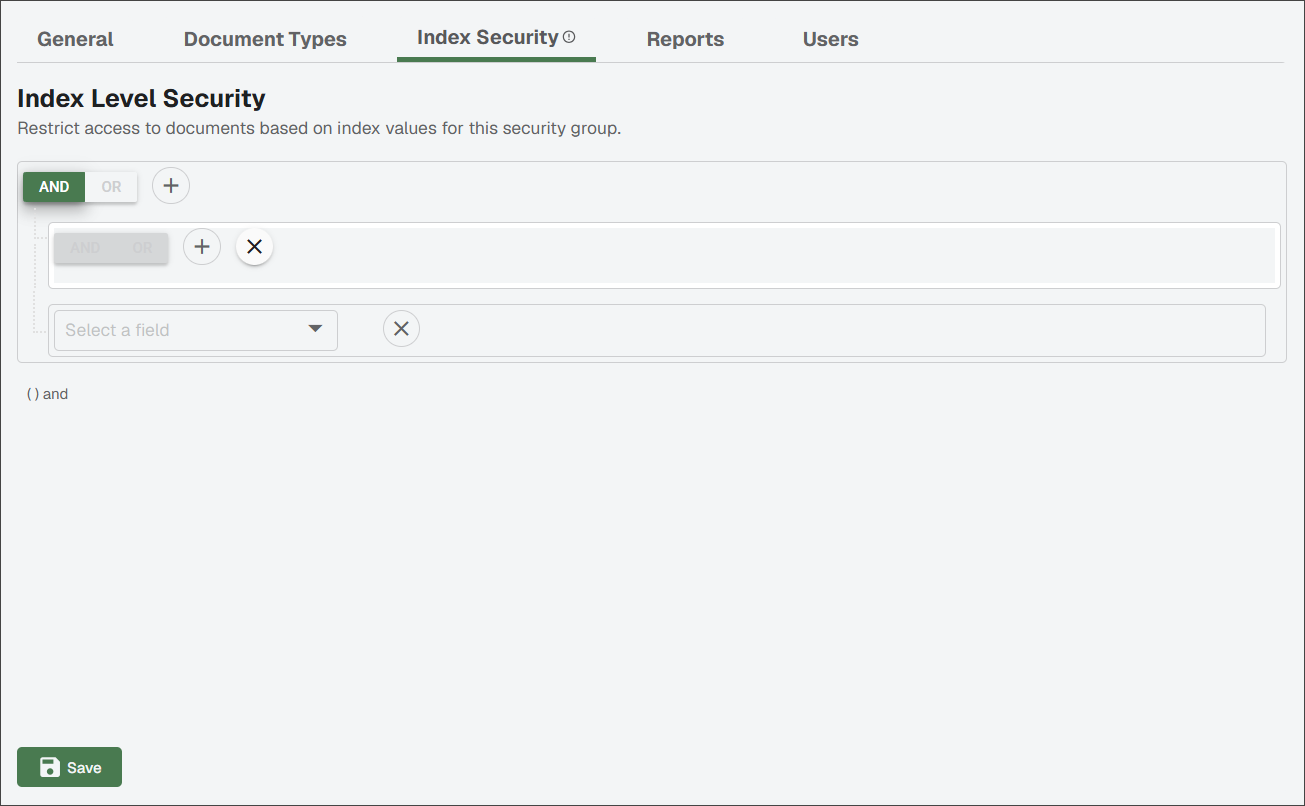
In Select a field, use the dropdown to select an index type. For example, .
The filtering criteria section expands to resemble the following:

The center field is where you select the operation to use. The available dropdown list varies depending on what you selected as the index type (string, number, date).
String Options
Contains
Value includes the letters or numbers entered.
Starts With
Acceptable value must start with the letter or number entered.
Ends With
Acceptable value must end with the letter or number entered.
Equal To
Exact match. For example, if 100 is entered, only 100 is returned. There cannot be a space before the 100 or a minus sign behind (100-).
Not Equal To
Not equal. This could be anything but the value entered in the field.
In
Included in the specified list.
Not In
Not included in the specified list.
Is Empty
This field is blank by design.
Is Not Empty
This field cannot be blank.
Number Options
Equal To
Exact match. For example, if 100 is entered, only 100 is returned. There cannot be a space before the 100 or a minus sign behind (100-).
Not Equal To
Not equal. This could be anything but the value entered in the field.
Is Empty
This field is blank by design.
Is Not Empty
This field cannot be blank.
Greater Than
The value is greater than the number entered.
Greater Than Or Equal
The value is greater than or an exact match to the number entered.
Less Than
The value is less than the number entered.
Less Than Or Equal
The value is less than or an exact match to the number entered.
Date Options
Equal To
Exact match. For example, if 100 is entered, only 100 is returned. There cannot be a space before the 100 or a minus sign behind (100-).
Not Equal To
Not equal. This could be anything but the value entered in the field.
Is Empty
This field is blank by design.
Is Not Empty
This field cannot be blank.
Greater Than
The value is greater than the number entered.
Greater Than Or Equal
The value is greater than or an exact match to the number entered.
Less Than
The value is less than the number entered.
Less Than Or Equal
The value is less than or an exact match to the number entered.
Select an option.
Note
For example, select .
Type the value or click the Search
 icon to insert for the index type selected.
As filter rules are entered, the filter "equation" is systematically written out in text format below the equation(s) as shown below:

Click to save the index security condition.
Add Additional Conditions
Additional AND or OR conditions can be added to the first index security criteria.
To add an additional AND or OR condition, click the
button.Select from the dropdown.
A new condition line is added below the previous index level condition as shown below:
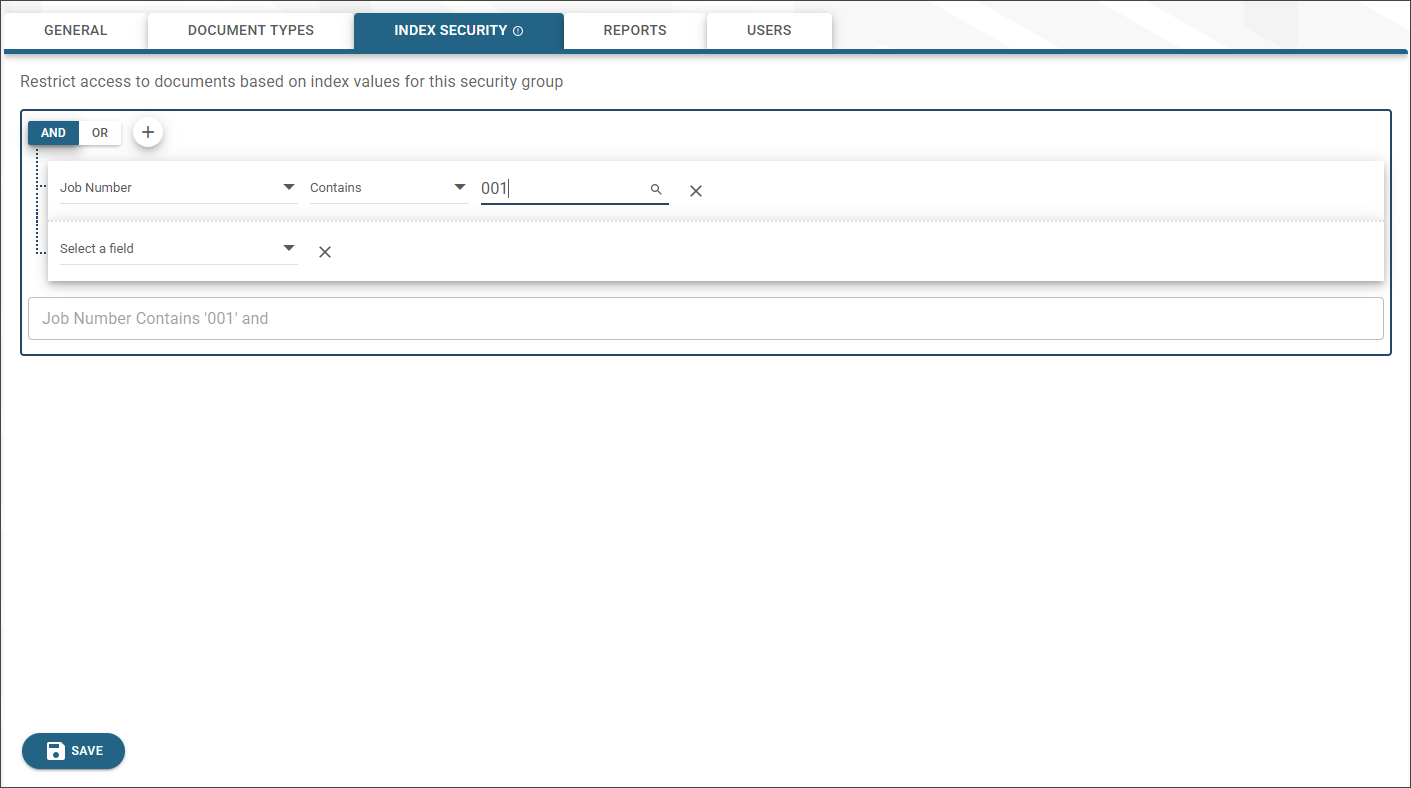
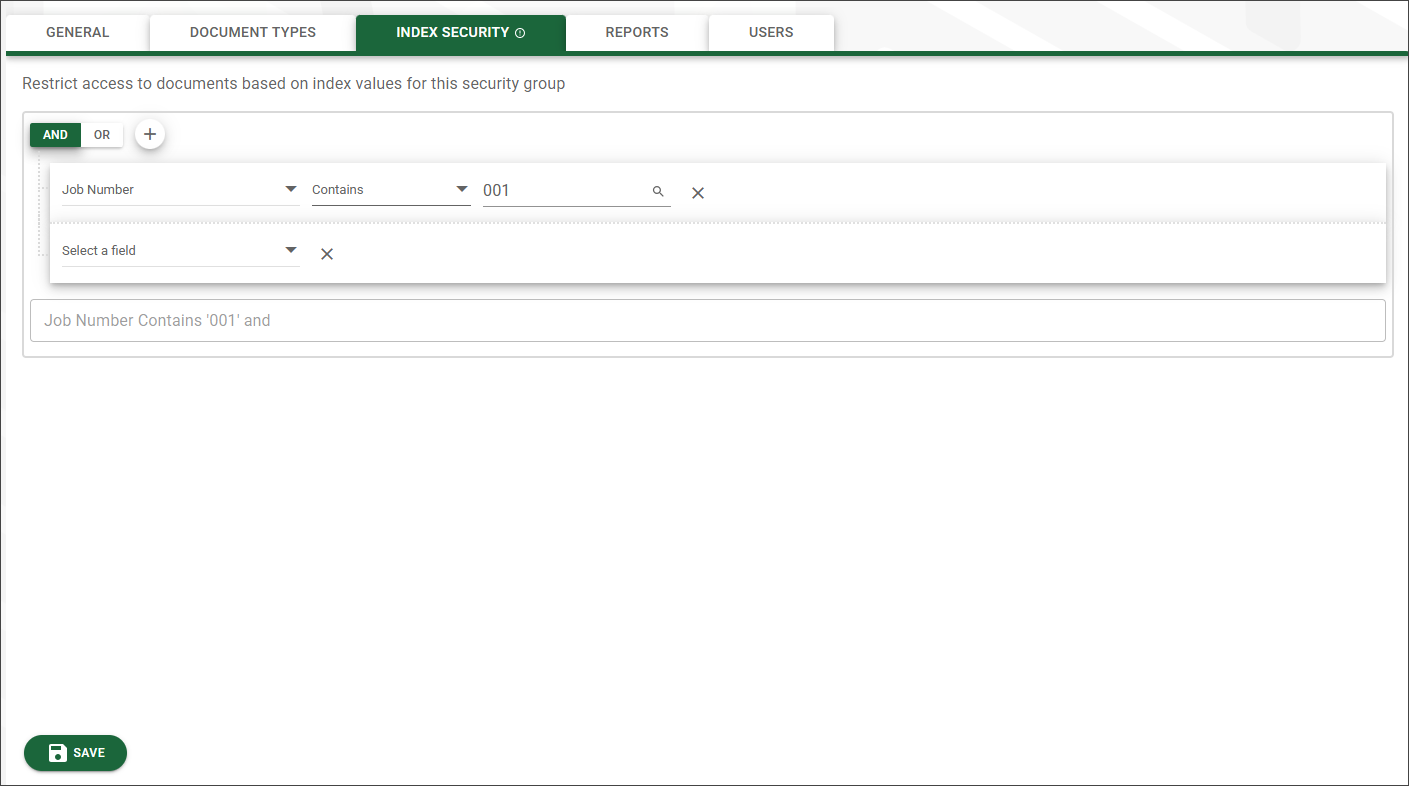
Select AND or OR at the top of the condition grouping to determine if all conditions must be met (AND) or either of the conditions can be met (OR).
Select your index field and conditions as you did in the original criteria.
If needed, add additional conditions by clicking
.Click to save the index security condition.
Add Groups of Conditions
If you have different sets or "groups" of data that you want validated for your security condition, you can begin with a "group" of conditions and then add additional groups to the equation. This instructs the system to validate the criteria on each group entered.
Click the
button and select . A new group of conditions is added.
Add the criteria for the first condition of the group by selecting the index fields and criteria as instructed above.
Add additional conditions for the group by clicking
located just above the first condition of the group and then selecting from the list.To add an additional group, click
on the upper most  group of buttons above the first group of conditions, then select from the list.
A second group to enter conditions is added as shown below.
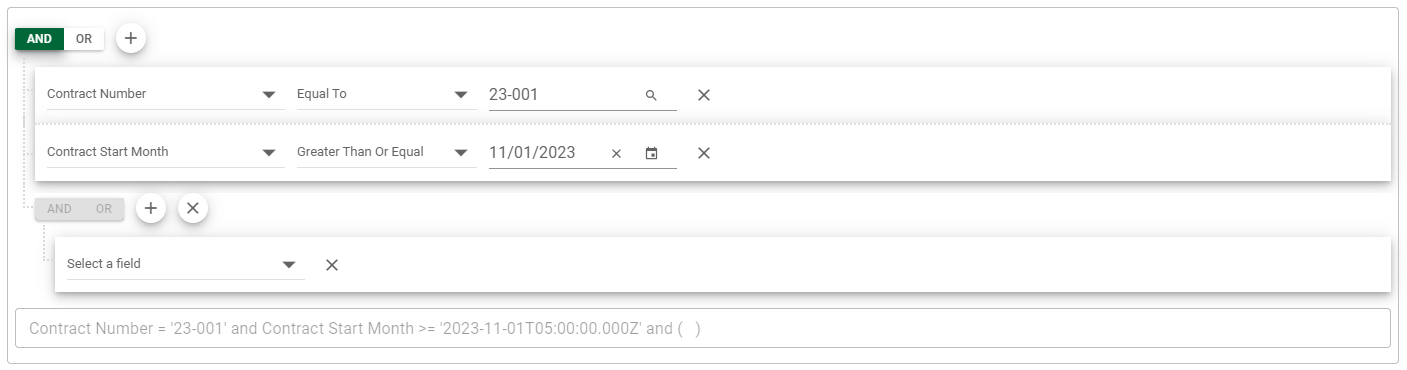
Enter your conditions for the second condition group as instructed above.
Select or at the top of the condition grouping to determine if all conditions must be met (AND) or either of the conditions can be met (OR).
As shown in the equation area of the example below, there are two groups of criteria with job numbers and date criteria. Either group of conditions can validate because of the OR condition between them.
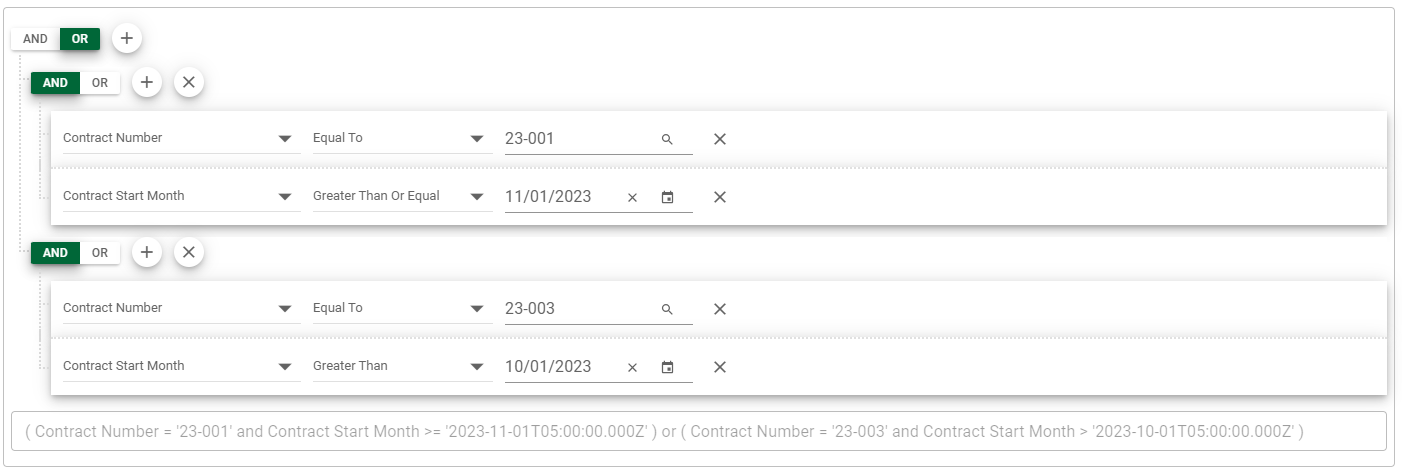
Additional groups of conditions may be added if desired.
Click to save the index security condition.
Complete the following steps to give access to system reports to your security group:
Click the tab.
The following page displays:
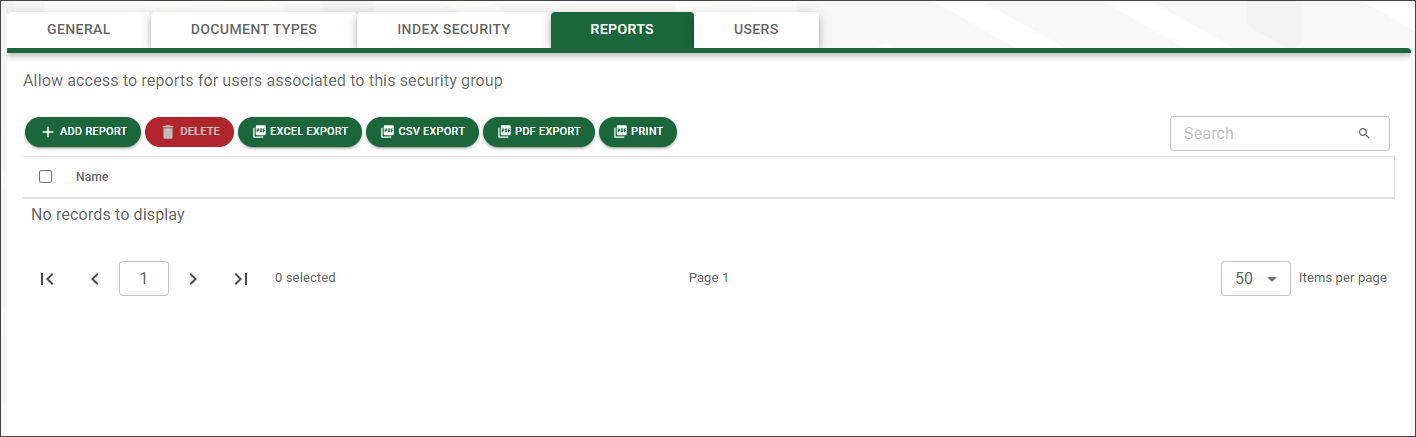
Click .
The Add Reports dialog displays:
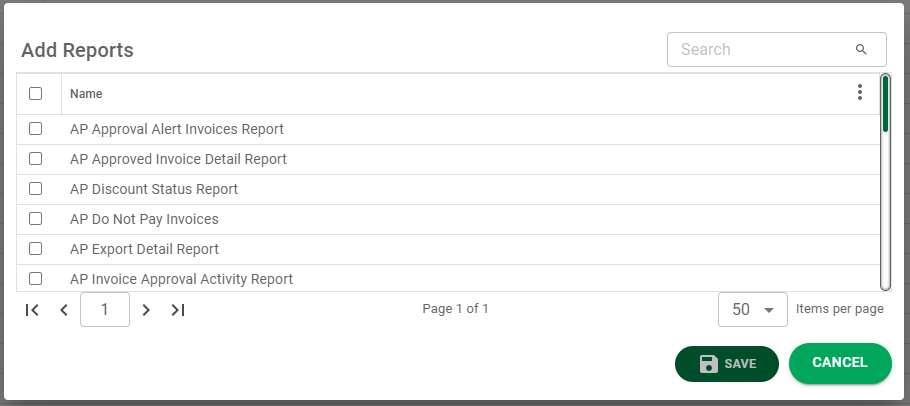
Select the reports to which individuals in this security group should be able to access and generate.
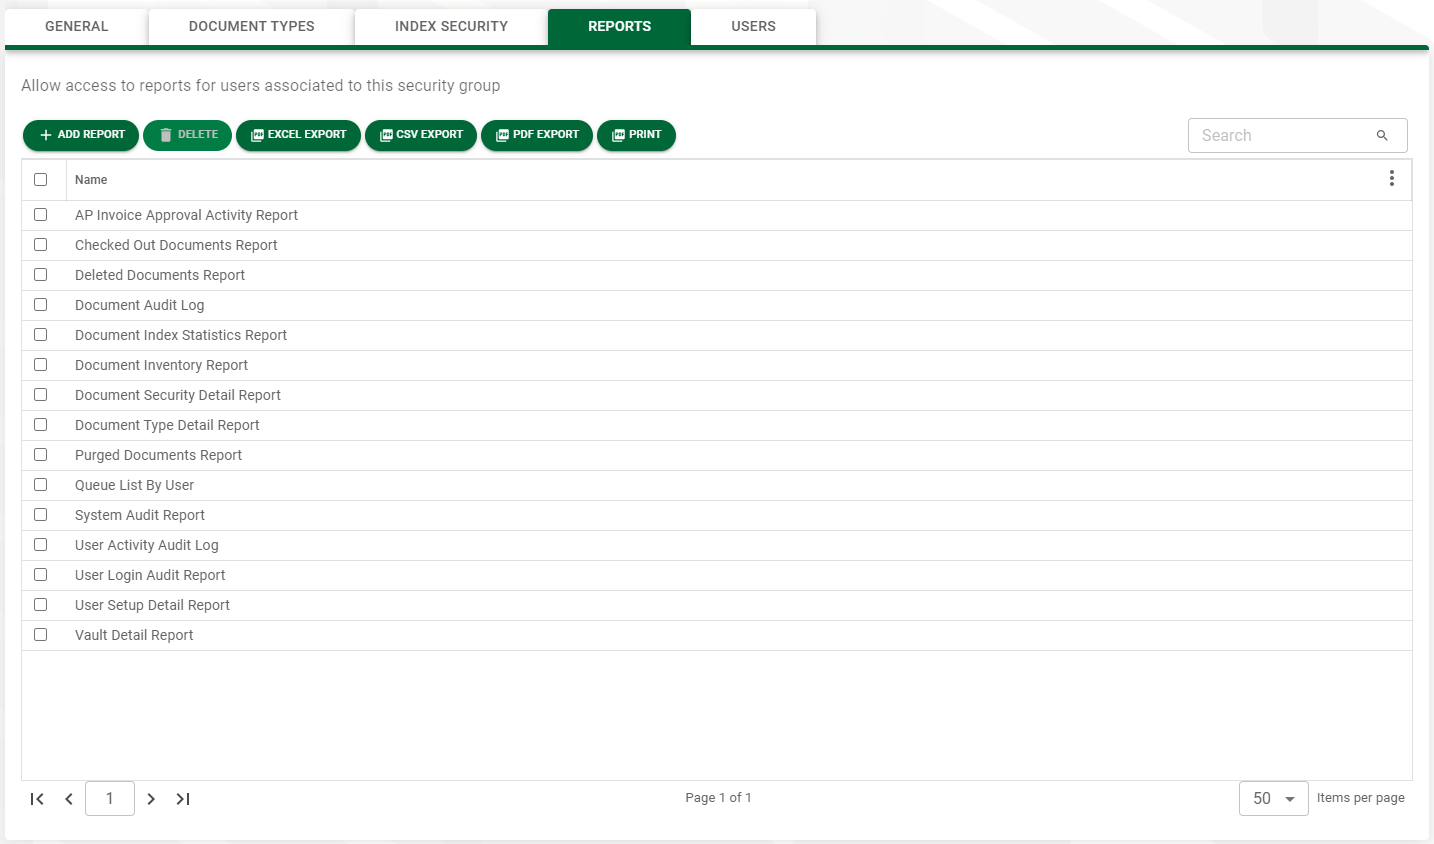
Click .
The REPORTS tab redisplays with the selected reports listed:
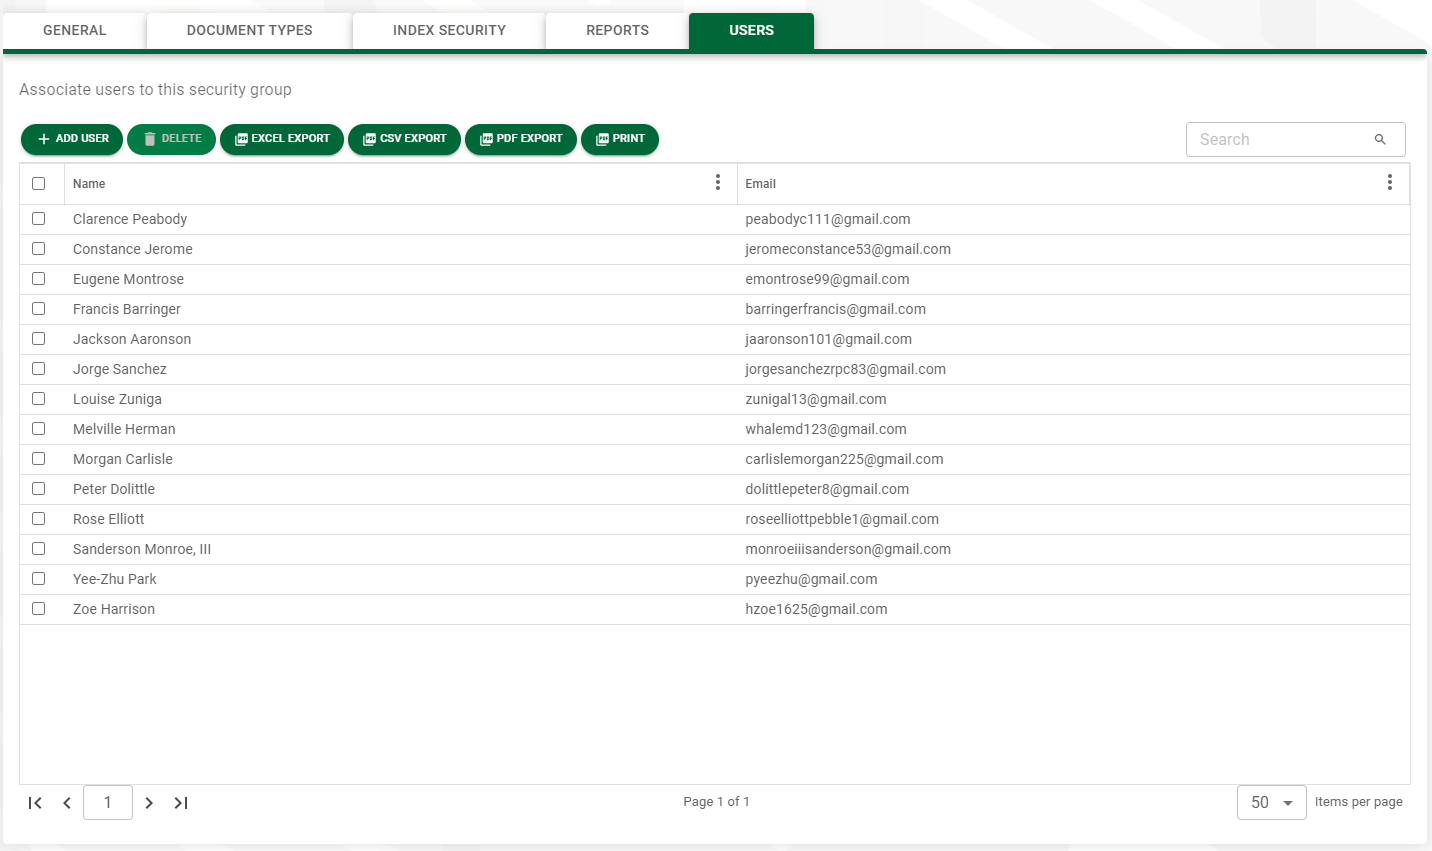
Access to all Sage Paperless Construction system functions are assigned through security rights. Users are added here so individuals may be assigned to security groups with specific permissions in new or existing vaults.
Individuals can be assigned to multiple security groups based on their roles and responsibilities but every user must be associated with at least one security group. Users are added to the system in . See Add New System Users for more information on creating new users.
Click the tab.
The following page displays:
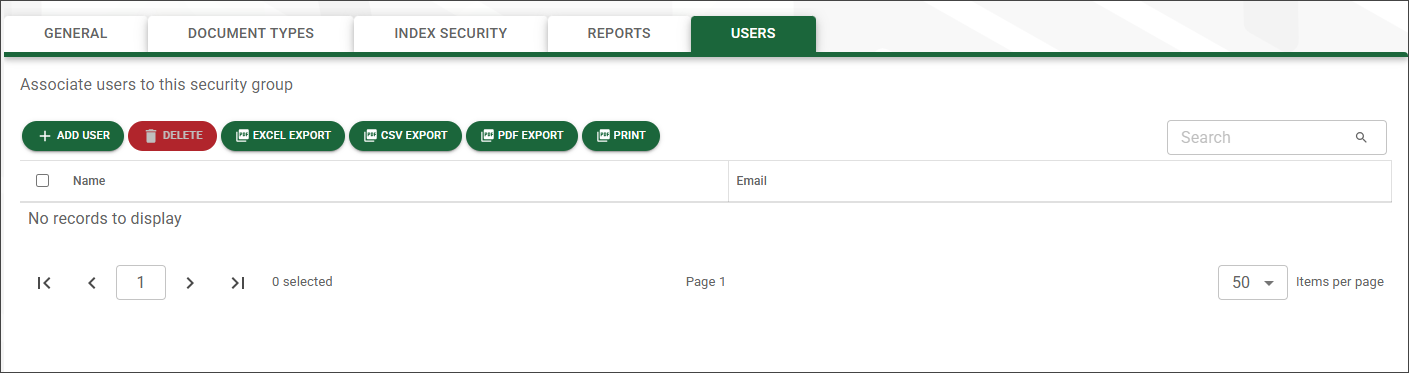
Click .
The Add Users dialog displays:
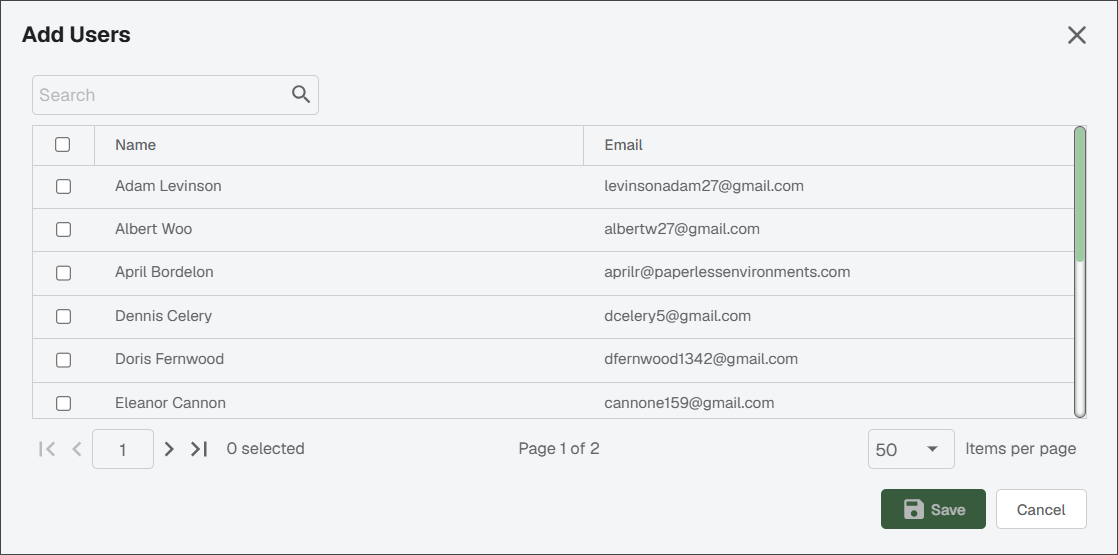
Select the users who should be assigned to this new security group.
Click .
The USERS tab redisplays with the selected reports listed: