Sage 300 CRE Bridge Prerequisites
Before bridging Sage Paperless Construction to Sage 300 CRE, certain accounts need to be configured with the proper permissions. Review the table below to determine which accounts apply to your company's situation.
Account | Required? | Use |
|---|---|---|
Sage 300 CRE Service User Account | Yes | You must have an administrator account configured to serve as a dedicated, non-person account to use to set up the bridge integration with Sage Paperless Construction. |
Domain Service Account | Yes | You must have a username and password for a domain service account that is a local admin to the server where Sage 300 CRE is installed. |
SQL User Account | No | This user account is only necessary if your company uses the optional SQL replicator. |
Complete the steps in the sections below as applicable:
Important
You must be an admin with Security Administrator permissions to complete the following procedure.
Open and sign in to Sage 300 CRE as an administrator.
In the Select Company dialog, select your company and click .
Select .
Note
For the Security Administration option to be available, it must be enabled in Security Settings by selecting the check box and configuring your password security.
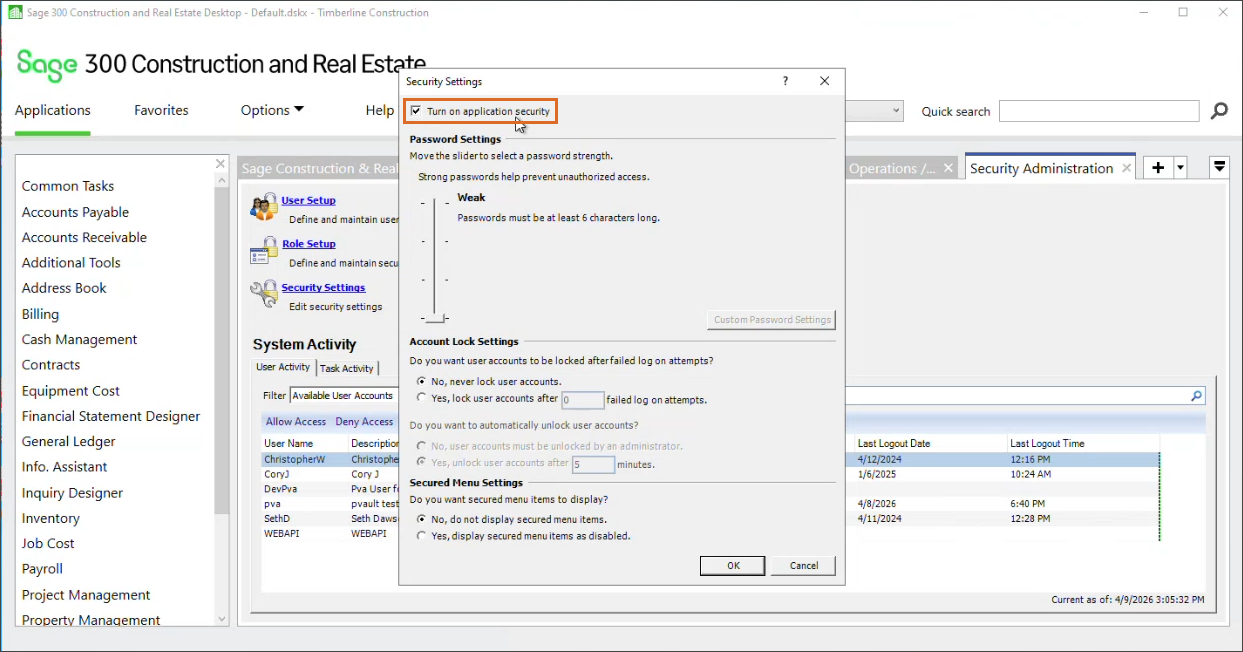
Click .
In the User Setup dialog that displays, click , then fill in the User Details sections:
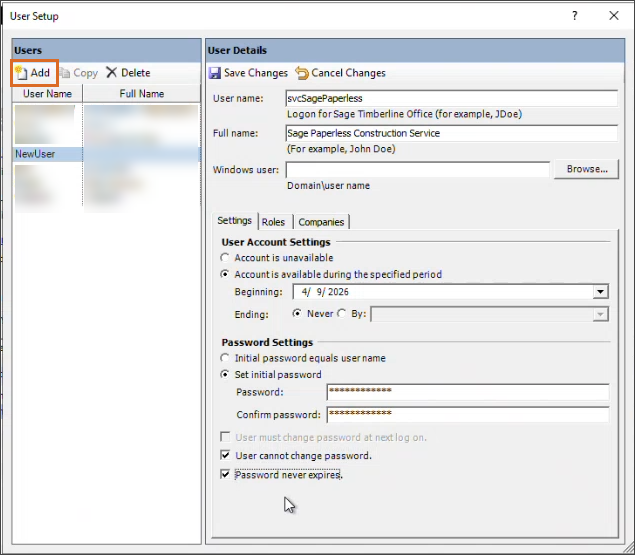
Enter the username for the account in the User name field.
Tip
It is recommended that you indicate it is a service account in the username to prevent it getting disabled.
Enter the full name, such as "ABC Company Service Account".
Select the radio button and set the Beginning field to the current date.
Set the Ending radio button to .
Select the Set initial password radio button, then enter and confirm your password in the applicable fields.
Note
Do not include special characters in the password.
Deselect the check box.
Select the check box.
Select the check box.
Go to the Roles tab and select the and check boxes.
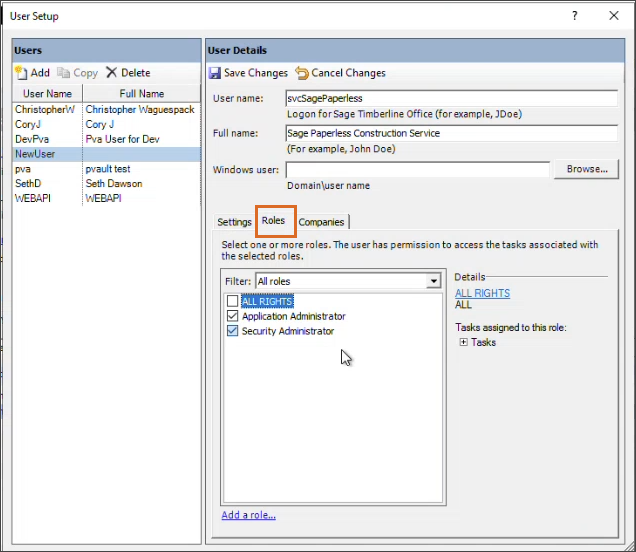
Click at the top of the dialog, then click in the confirmation message.
Close out of Sage 300 CRE entirely.
Using your newly created user account, log in to a Sage 300 CRE module (such as Accounts Payable) at least once and select a company.
If you can successfully sign in, select a company and access the module, your service user account creation was successful. You can then close out of the module.
To install the Server Agent to your Sage 300 CRE or Sage 100 Contractor server, you must have a username and password for an account that meets the following requirements:
Is a domain service account (a standard domain user)
Is configured as a dedicated, non-person account (not tied to any employee)
Is a local admin to the server where Sage 300 CRE or Sage 100 Contractor is installed
Important
This account must have full access to the accounting system's data folders; however, it does not need to be a domain admin account.
Note
It is recommended that you use a naming convention like svc_paperless or spc_paperless to make it clear that this is a service account so it is not deleted by mistake.
If your company uses the optional SQL replicator, complete the steps below prior to bridging to create an SQL user that has access to the replicated Sage SQL database.
Note
This is the central "behind the scenes" user to access all information for data look-up as well as posting transactions back to the Sage database. Entering a user without full rights may cause errors in some areas of the program.
Sign in to the Microsoft SQL Server Manager as an administrator and click .
In the Object Explorer menu, select .
Right-click on Logins and select .
The Login - New dialog displays:
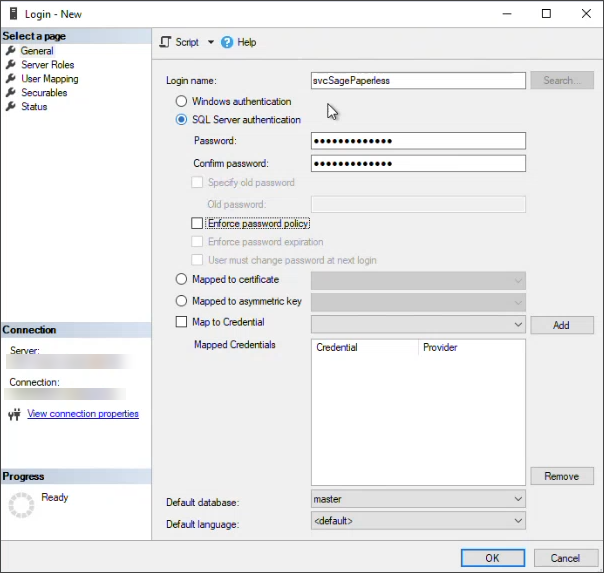
Select the radio button.
Enter a Login name in the Login name field.
Enter and confirm your password.
Select the User Mapping page:
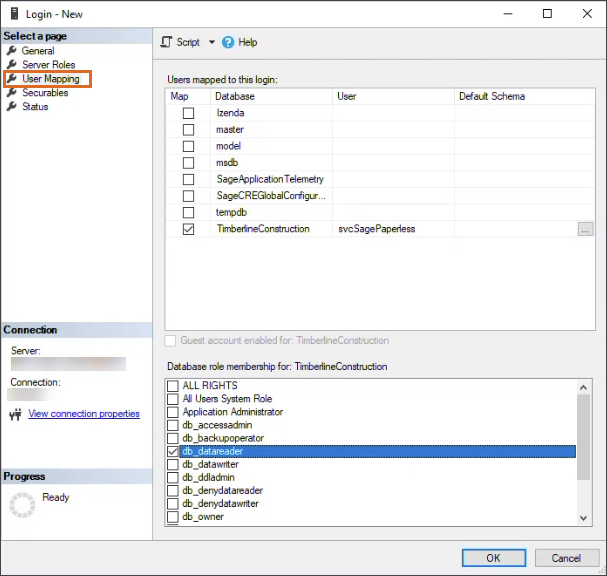
Select the database the user account should be mapped to.
In the Database role membership for: <CompanyName> section, select the check box.
If available, select the and check boxes.
Click .