Vendor Tiers
The Vendor Tiers page provides a list of all the tier vendors working beneath your selected primary or tier vendor.
Important
You must be configured as a Compliance Manager, an Auditor or have Job Level access for the current vault to be able to view this page.
From My Paperless, click .
In the ClearToPay™ navigation bar, click .
From the Jobs page, do one of the following:
Select a job from the list to access its vendors.
Click on (if enabled) to access those vendors.
Click .
A page similar to the following displays:
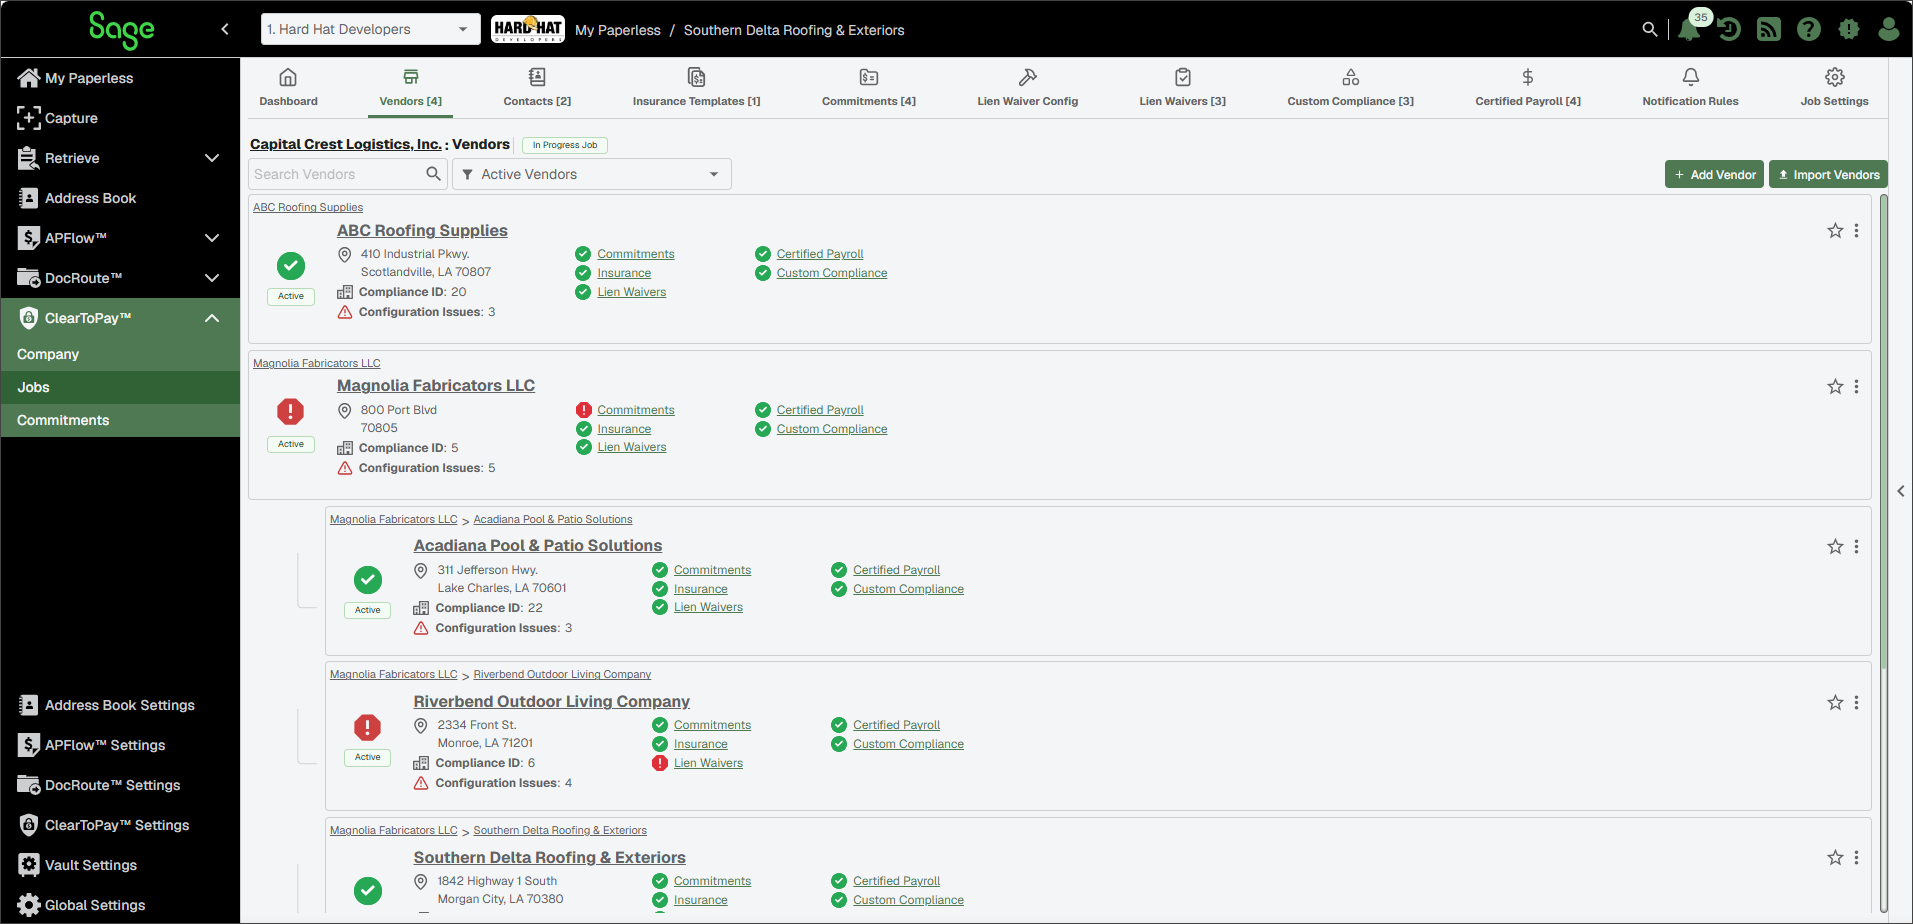
Select the vendor whose tiers you want to see.
Click .

A page similar to the following displays:
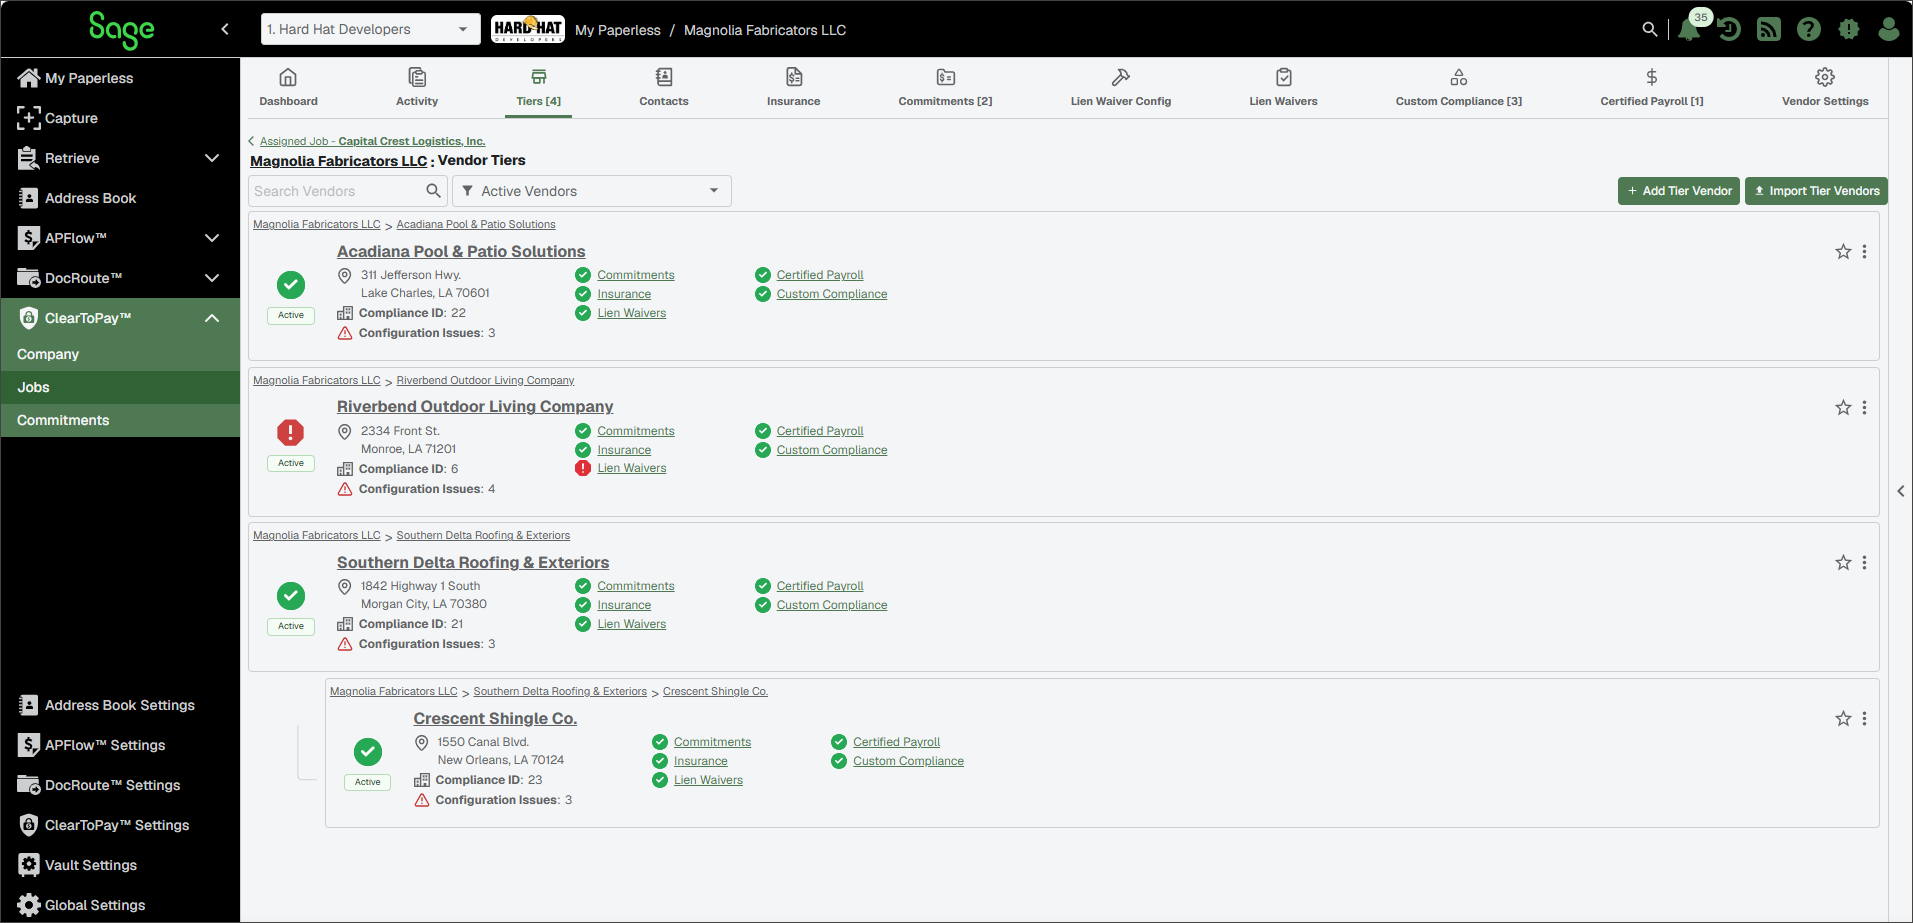
From the vendor Tiers page, you can drill down further to the next levels of vendors to view their dashboards and compliance information, or you can perform the following tasks:

To search for a specific vendor, enter the vendor name or number in the Search Vendors field. Then, press
Enteror click the Search icon.
icon.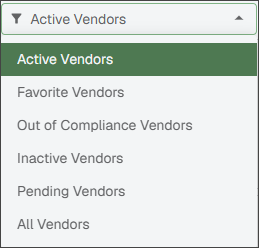
To narrow the list of vendors that display, click the dropdown to display filter options.

To add a new vendor beneath another vendor, click . For more information, see Add New Vendor.

To import vendors beneath another vendor, click . For more information, see Import Vendors.


Each vendor entry includes a primary icon that indicates the vendor's overall compliance.
The green check icon indicates the vendor (and all the vendors beneath it) are in compliance.
The red warning icon indicates the vendor (and all the vendors beneath it) are not entirely in compliance.
Smaller icons are also present to indicate the compliance for each vendor's commitments, licenses, certified payroll, insurance, lien waivers and custom compliance. Not all of these criteria apply to every vendor, but the icons let you know at a glance where issues exist.
Vendor Name and Compliance ID
Click the vendor name link within the grid to access that vendor's dashboard. For more information, see Vendor Dashboard and Navigation.
Vendors have an automatically generated ID number. A vendor number can also be added manually when the vendor is created or edited.
Status Indicators
Each tier vendor displays one of status icons shown to indicate the overall status of the job its associated with.
Active status means that the job is in-progress.
Closed status means that the job is complete.
Pending status means that the job has not yet started, but information is being assembled.
Completed Operations status means that the job is in the time frame when work has been completed but the job still needs to carry insurance to protect the customer from liability.


Click the Star icon for a vendor to indicate this vendor is a favorite. Vendors marked as favorite can be found using the Favorite Vendors filter.
To remove the favorite status, click the Star again.

The vendor breadcrumbs listed at the top of each vendor card indicate the hierarchy and where each vendor and tier falls for this particular job.
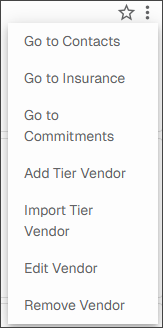
Click the vertical ellipsis
 to display a dropdown of navigable links pertinent to that vendor:
For more information on vendor contacts, see Vendor Contacts.
For more information on this vendor's insurance, see Vendor Insurance.
For more information on vendor commitments, see Vendor Commitments.
For more information on adding a tier vendor, see Add New ClearToPay™ Vendor.
For more information on importing a vendor or tier vendor, see Import Vendors.
For more information on editing an an existing vendor, see Edit Vendor Information.
For more information on removing a vendor from a job or vendor, see Remove a Vendor from a Job.
Complete the following steps to add a new vendor to ClearToPay.
Note
You can add vendors to a job or to another vendor or sub-vendor.
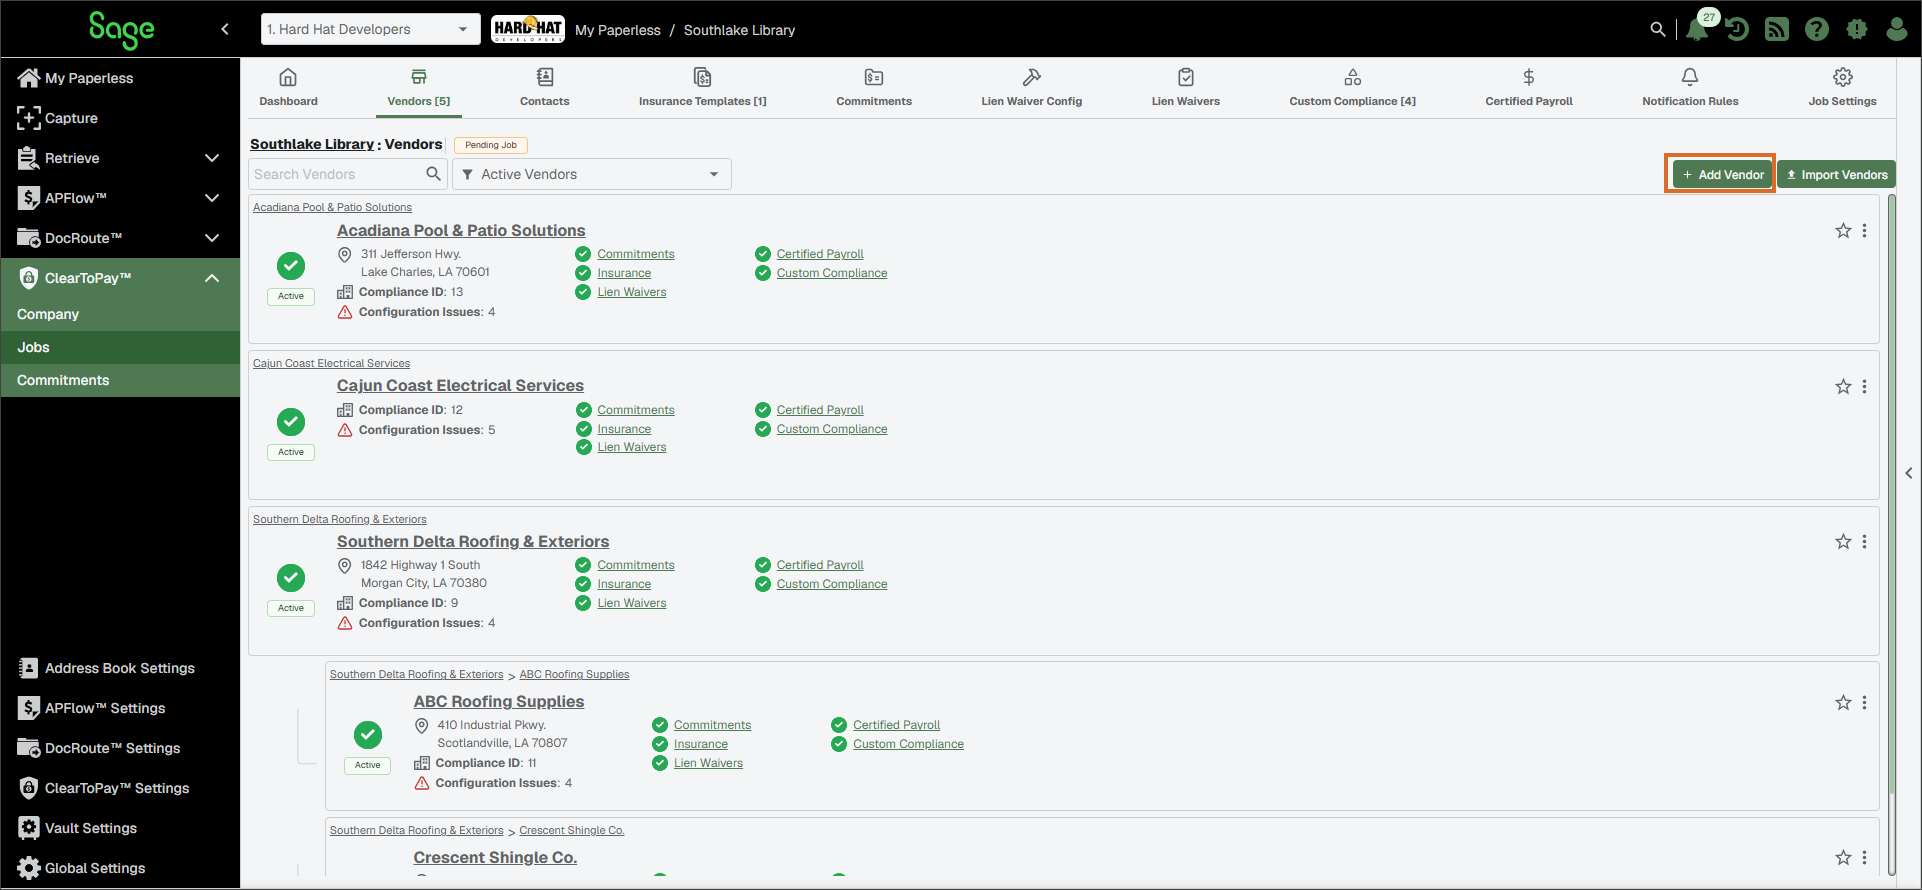
Navigate to the Job Dashboard and click , then do one of the following:
To add a vendor to the job: Click as shown below:
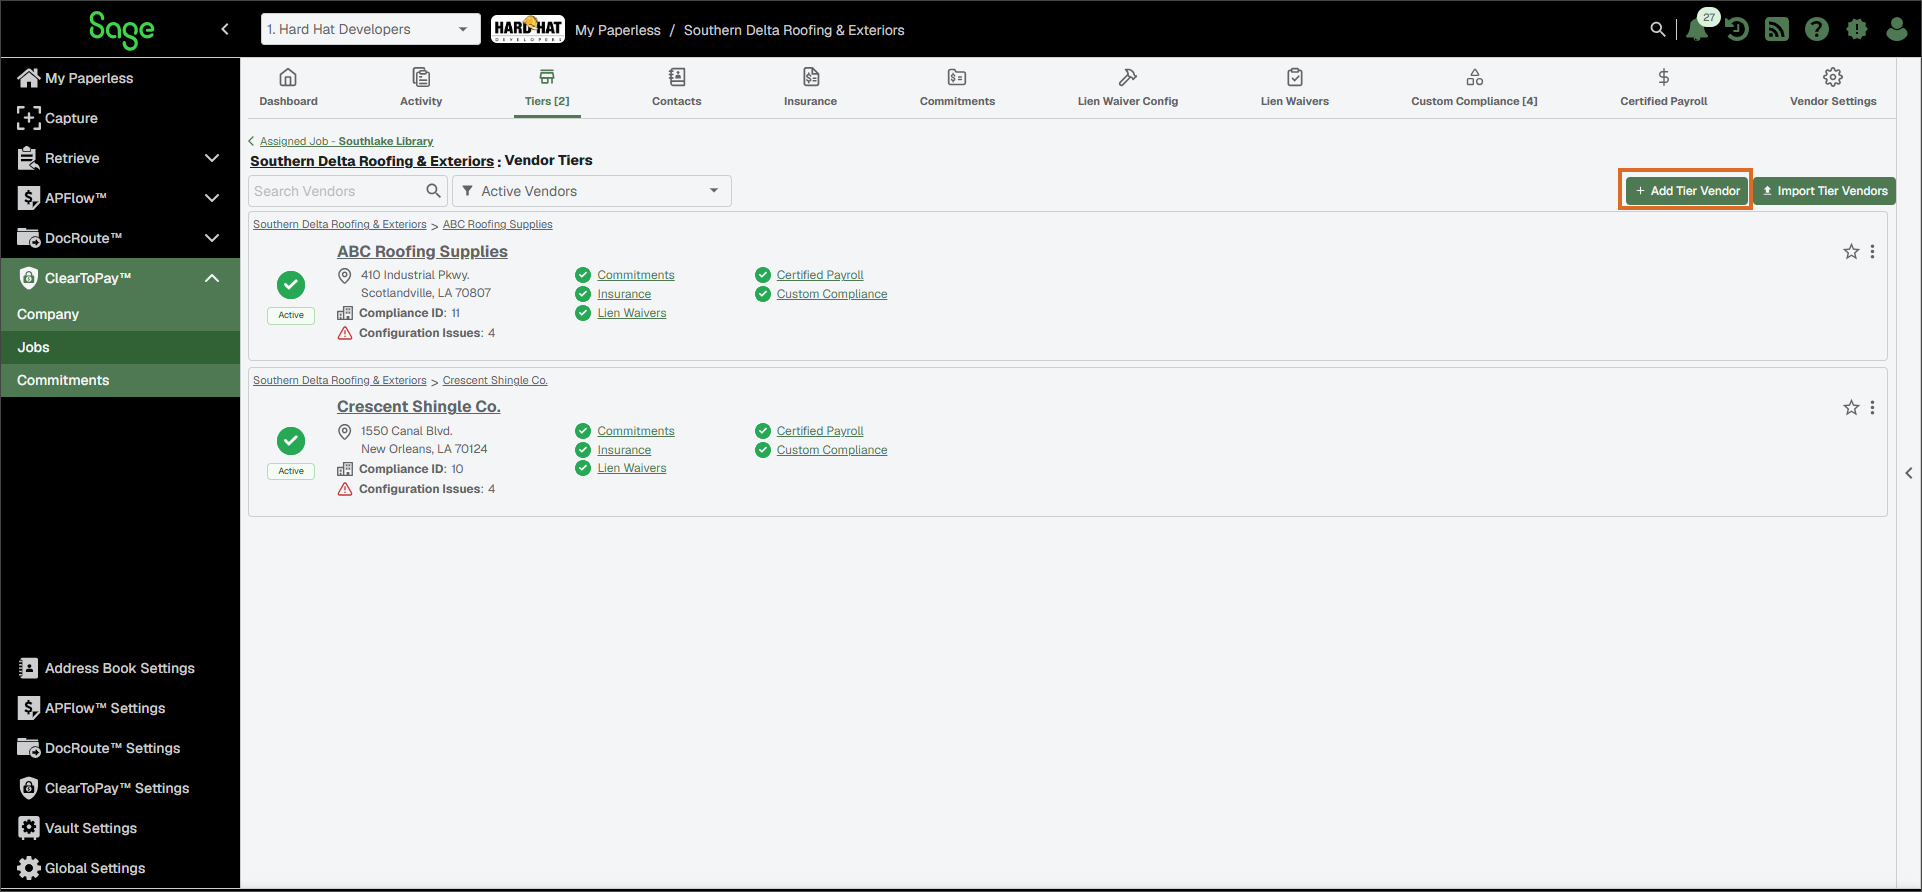
To add a tier vendor beneath another vendor:
Navigate to that vendor's Tier page and click as shown below:
Navigate to the job's vendor list or vendor Tier page and click the vertical ellipsis
 on the vendor you want to add a tier vendor beneath. Then click as shown below: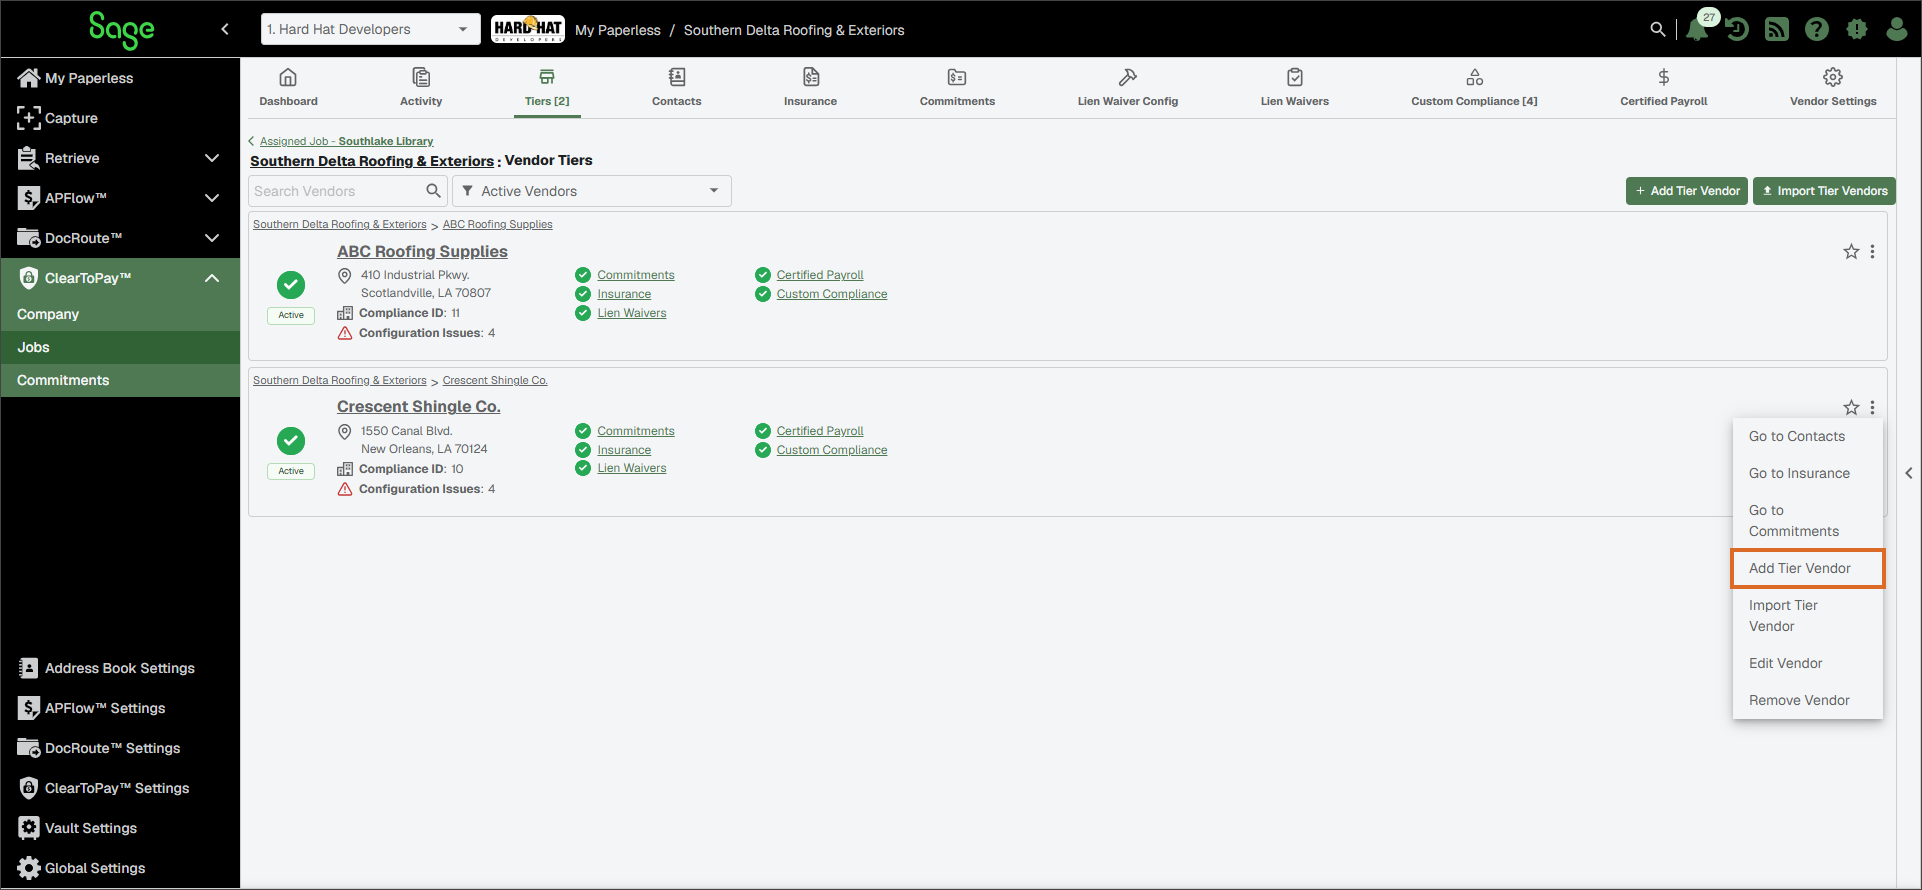
In the Add Company Information dialog, review the sections below:
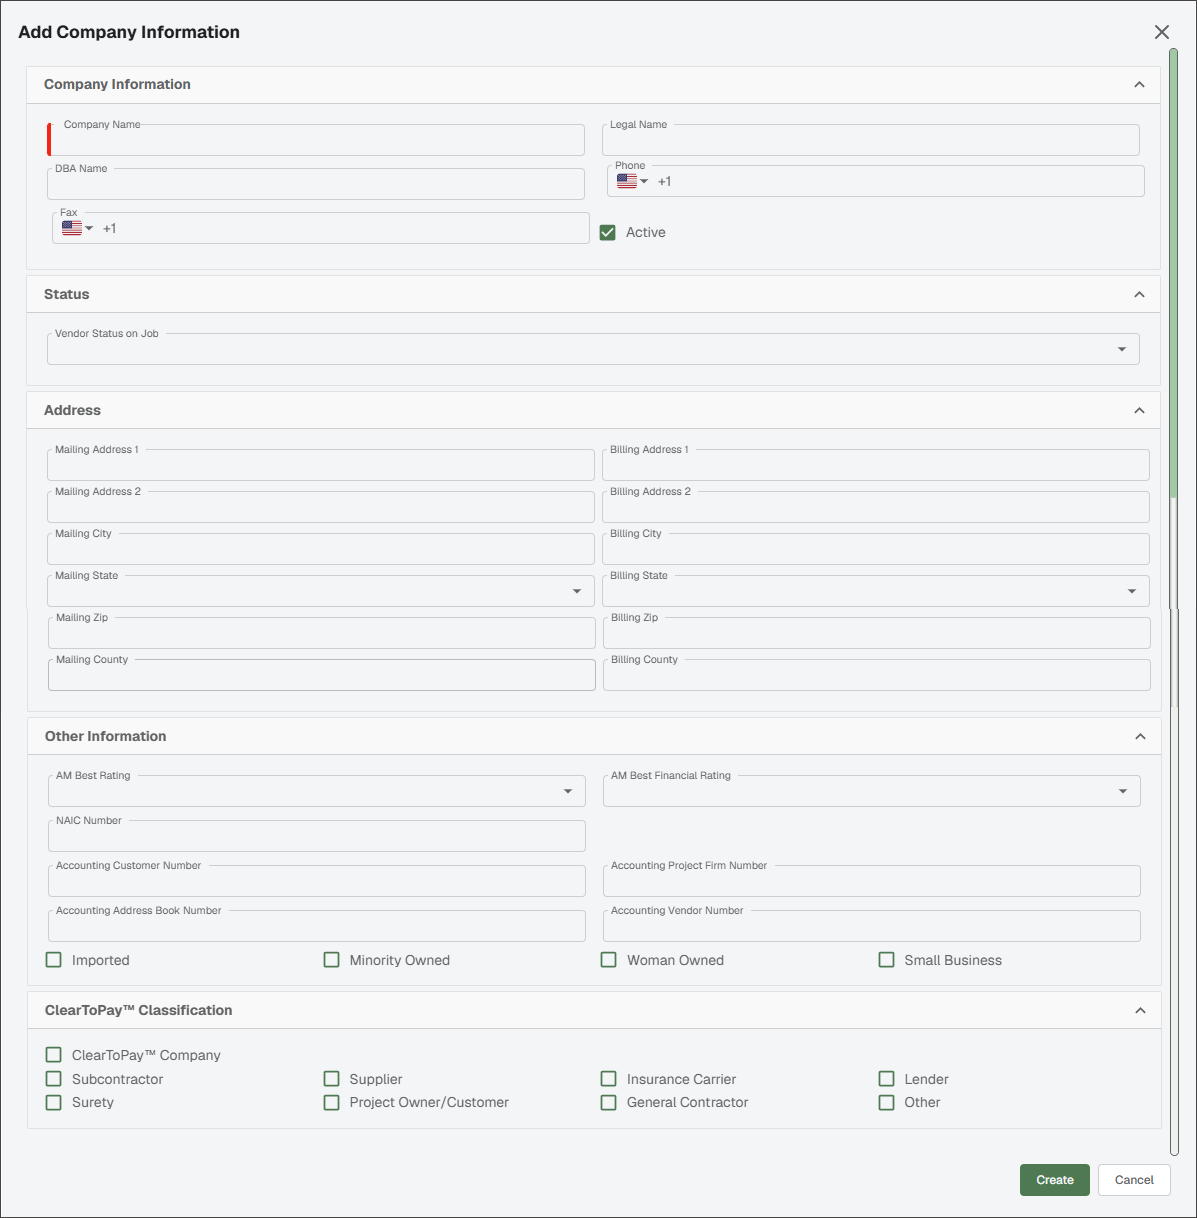
In the Company Information section:
Enter the vendor's name in the Company Name field. This is a required field.
Enter the vendor's legal and DBA names in the respective fields, if applicable.
Enter the numbers in the Company Phone and Company Fax fields.
Leave the Active check box selected to make this vendor active in ClearToPay. If this vendor should not be active, deselect the check box.
In the Status section, use the Vendor Status on Job dropdown to assign the vendor one of the following statuses:
Pending: Typically, when a vendor is imported or manually added to a job, its status is set to Pending while further information gathering and planning take place. Vendors in this status do not report or generate compliance issues, emails or warnings.
Active: This status is used for vendors assigned to in-progress jobs. Compliance tracking and automated emails are active.
Inactive: This status is used when a vendor is no longer required for a job. Vendors in this status do not report or generate compliance issues, emails or warnings.
In the Address section, enter the address information for the vendor company's location.
In the Other Information section, you can enter the insurance rater information, NAIC number, update the accounting numbers or select/deselect the business entity designators.
In the ClearToPay Classification section, select or for this vendor.
Note
Changes made in the ClearToPay Classification section impact how the company is identified in the ClearToPay module.
Select .
Navigate to the Job Dashboard and click , then do one of the following:
To import vendors to the job: Click as shown below:
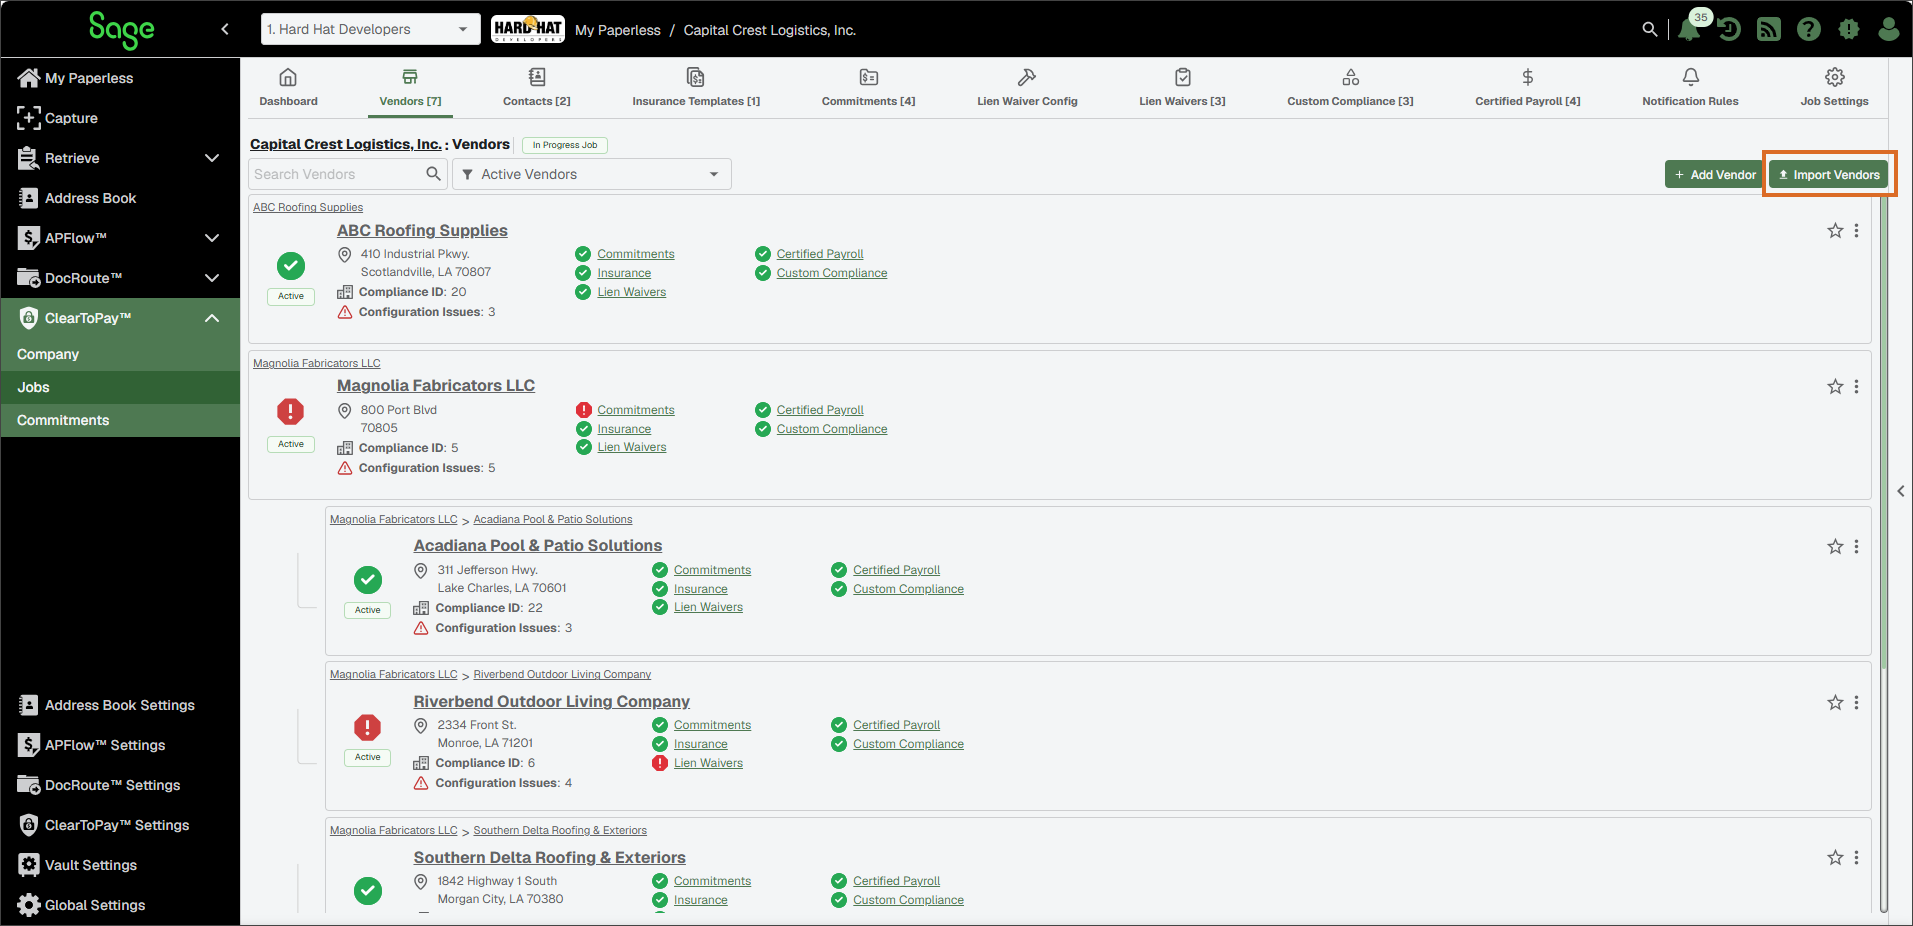
To import tier vendors beneath another vendor:
Navigate to that vendor's Tier page and and click as shown below:
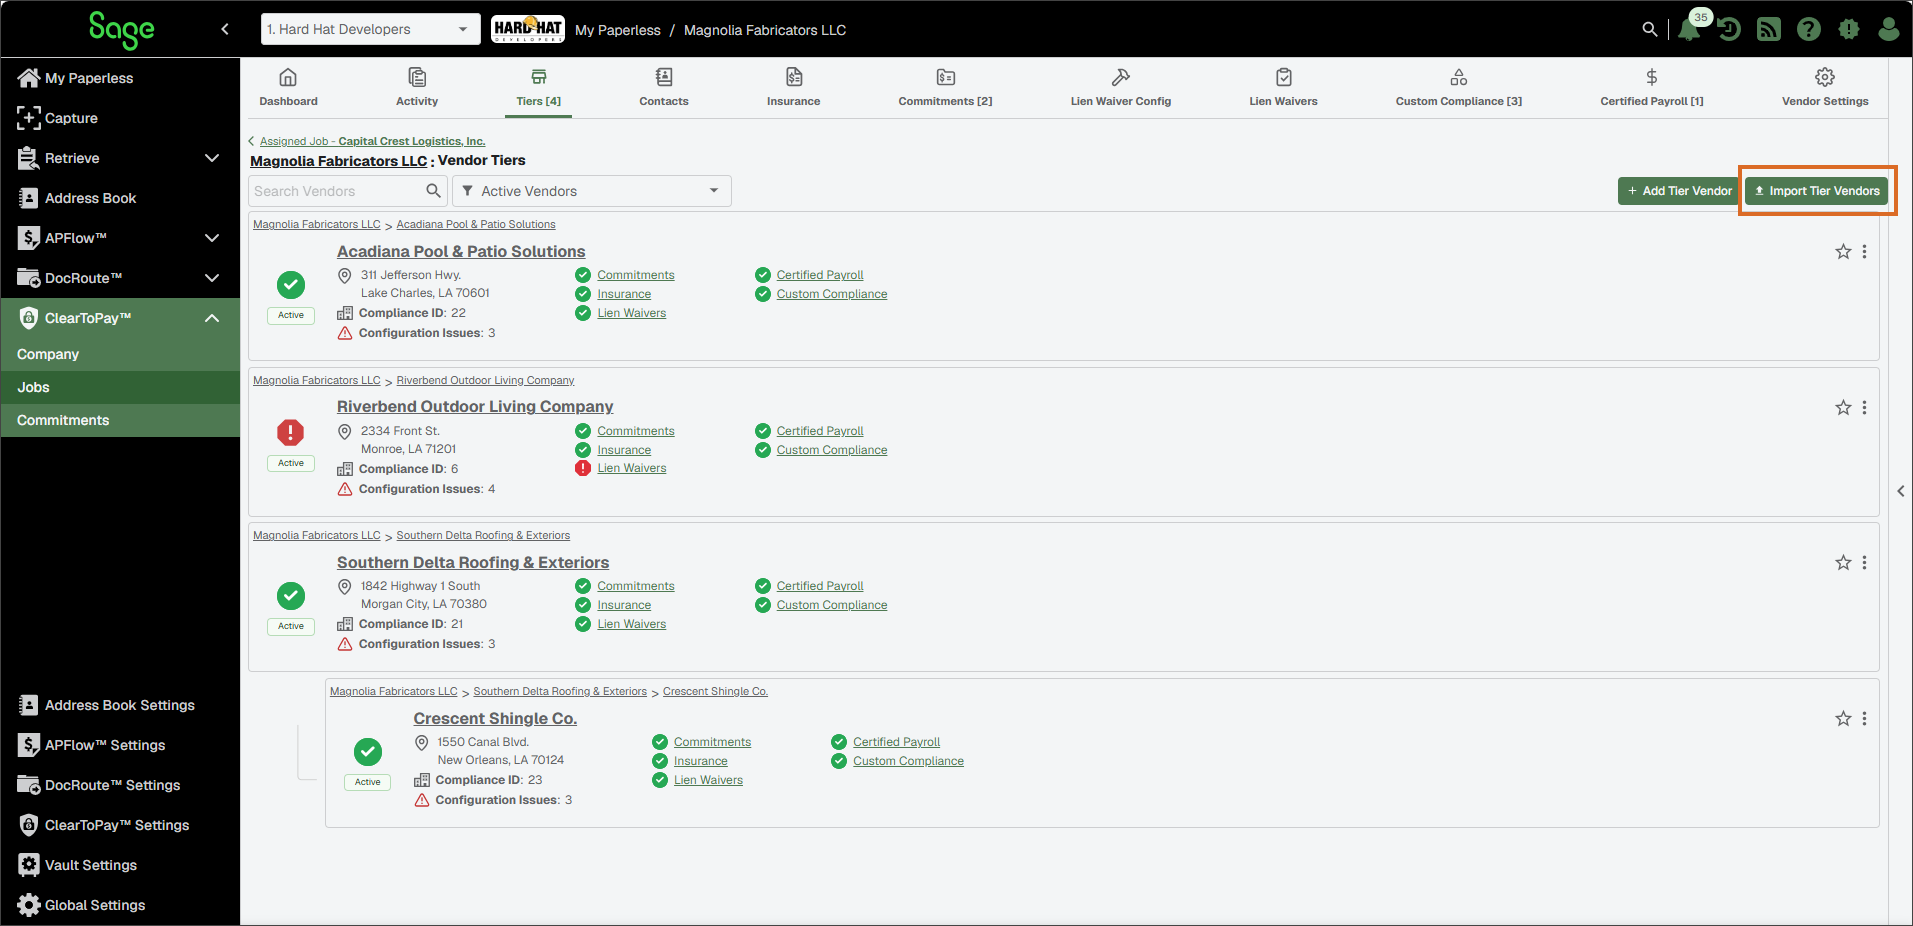
Navigate to the job's vendor list or vendor Tier page and click the vertical ellipsis
on the vendor you want to import tier vendors beneath. Then click as shown below: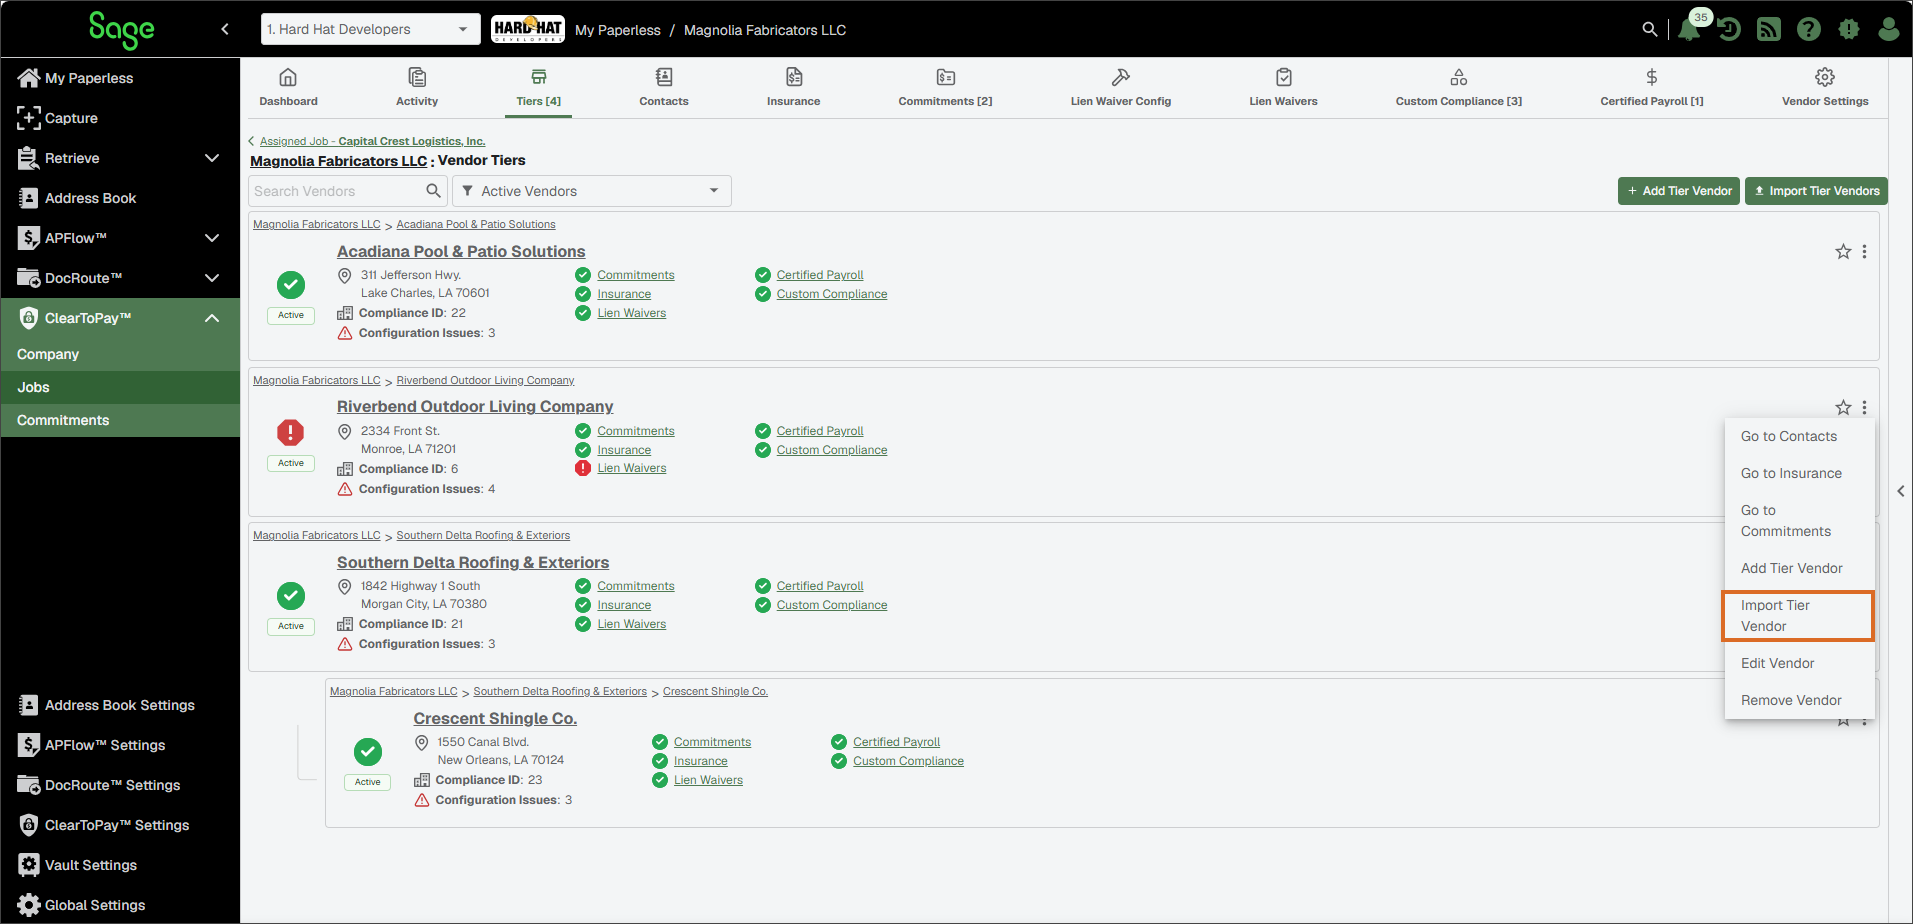
In the Import Vendors dialog, select the connection source from the dropdown:
Note
Bridge Connection is the default, but Address Book is an option if the vendor already exists within the company.
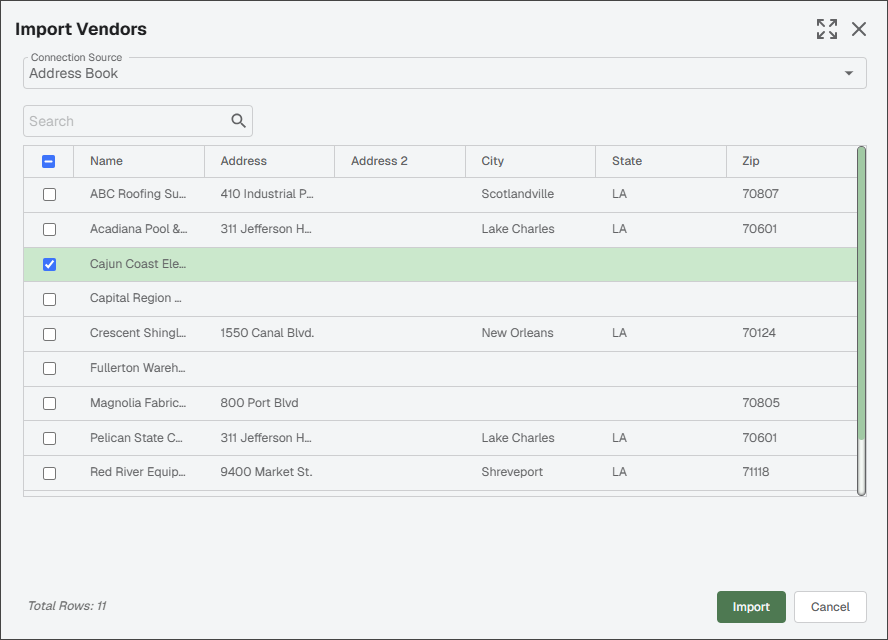
Select the vendors you want to import from the list.
Select .