Industry Standard File Import vs. Template-Based Import
Depending on the types of credit card statements that need to be imported, you may need to use and industry standard file or create an import template. Credit card import templates can be added, edited, copied or removed from multiple locations within Sage Paperless Construction.
From My Paperless, click APFlow™.
From the APFlow™ navigation bar dropdown, click Credit Card Importer.
The Credit Card Importer page similar to the following displays:
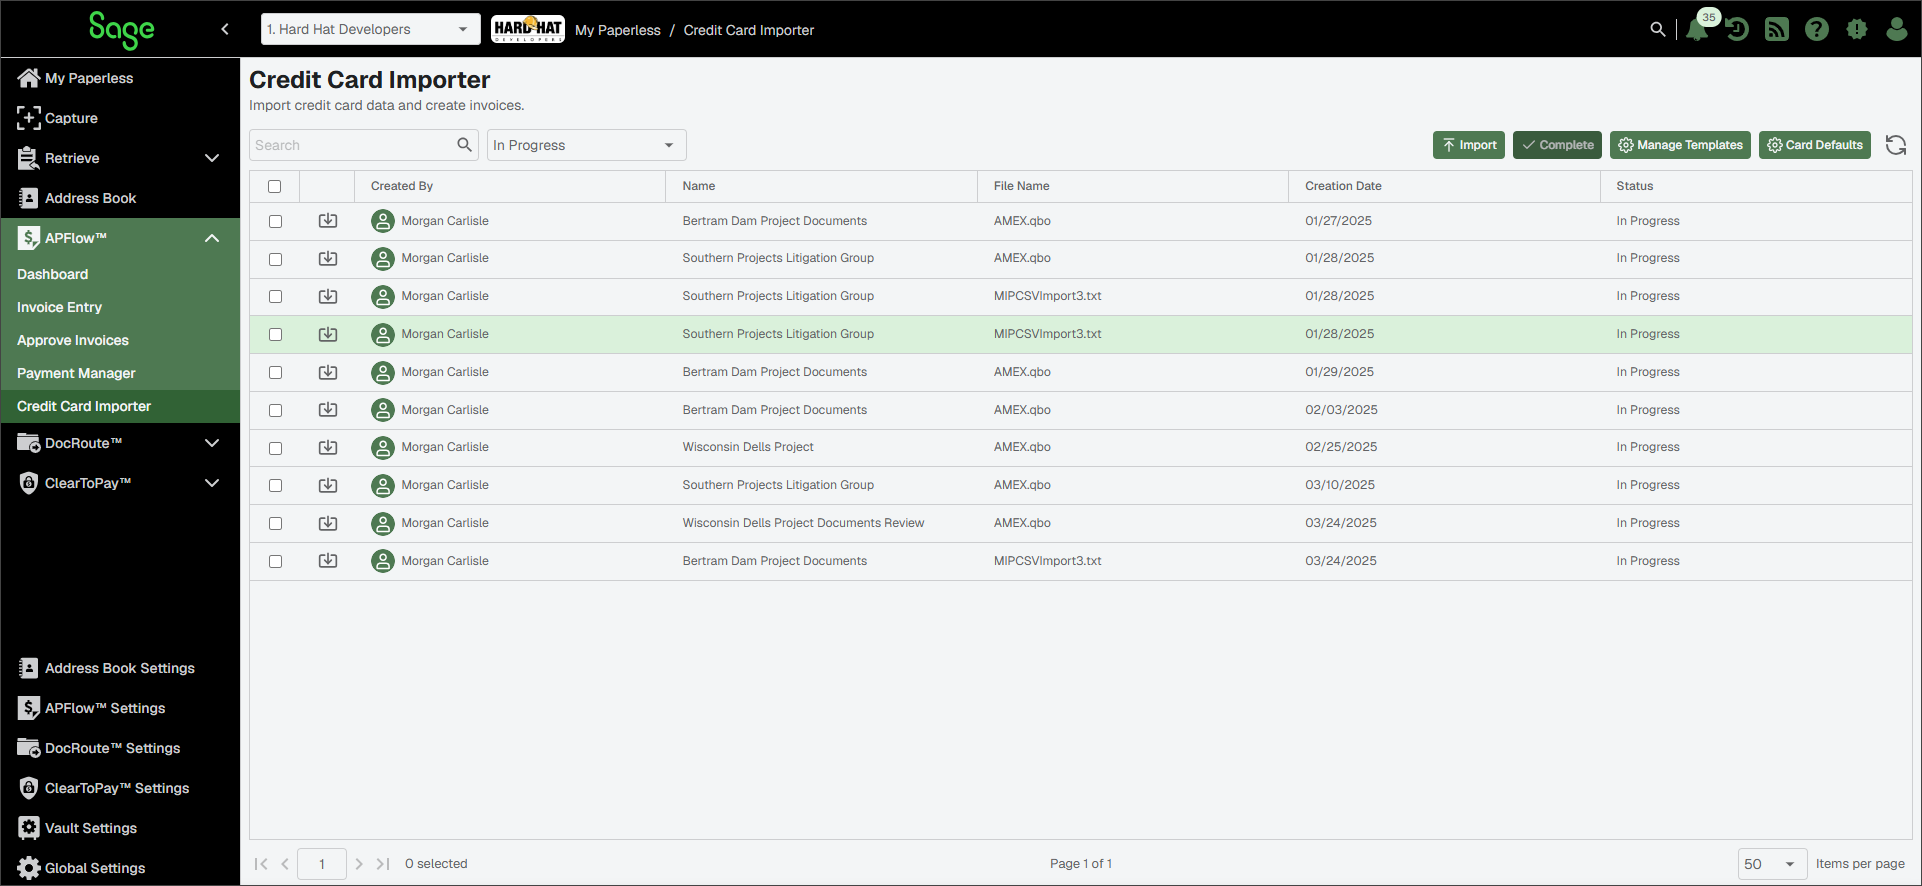
If the credit card statement uses Quicken (.qfx), Quickbooks (.qbo) or Microsoft Money (.ofx), see Industry-Standard File Import for more information. If the credit card statement does not use one of the three standard formats and a template must be created to import .txt or .csv files, see Template-Based Import for more information.
Important
The Credit column is used when debits and credits are not combined in the same column in the file. When this occurs, set the Transaction Amount to the debit column and Credit to the credit column.
Any field in the Invoice Entry line section may be mapped to a field in the template.
Complete the following steps to verify if you are using a standard file type. If you are, you can complete the process as shown in Create a New Import. If not, you can create a template to accommodate .txt or .csv files as described in Template-Based Import.
Download the credit card statement from the credit card provider.
Check the file extension.
Note
Most credit card companies offer the ability to download credit card statements into one of three standard download formats:
Quicken (.qfx)
Quickbooks (.qbo)
Quickbooks (.qbo)
On the Credit Card Importer main page, click .
The Manage Credit Card Templates dialog displays:
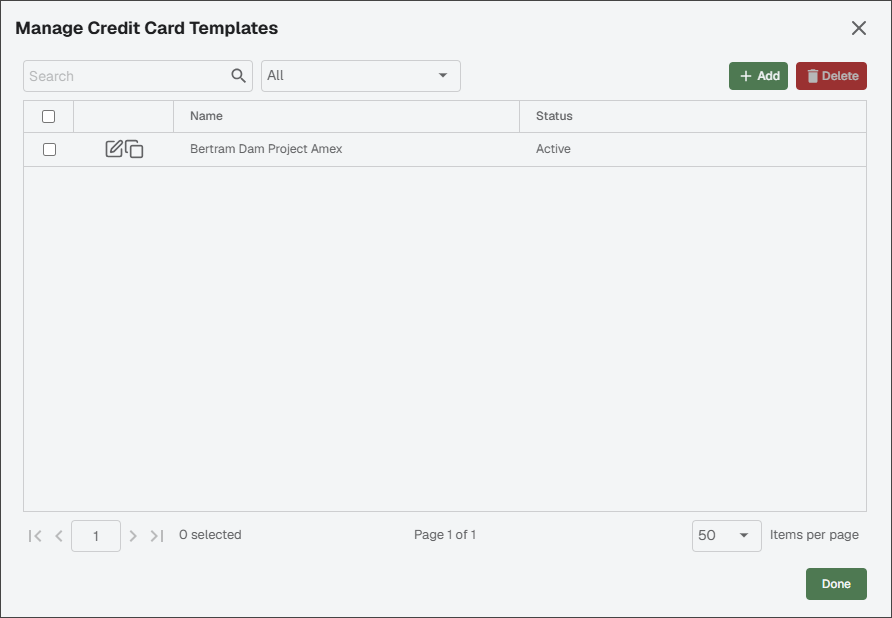
Click .
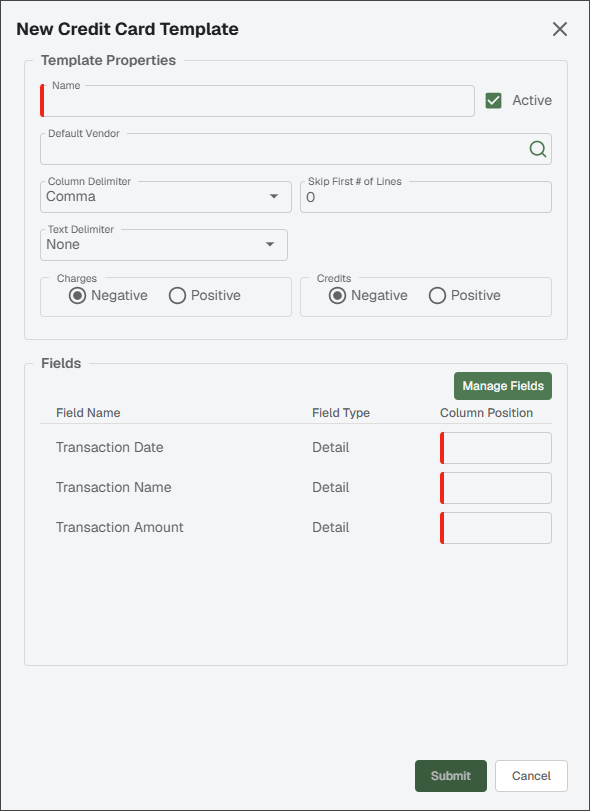
A New Credit Card Template dialog displays:
Important
You must populate all required fields before clicking .
In the Name field, enter an appropriate name for the template. This is a required field.
Note
The check box is selected by default. If this template should not be active, click the check box to remove the checkmark.
In the Default Vendor field, click the Lookup
 icon to locate the vendor.
The New Credit Card Import dialog redisplays.
The template name that displays in the Template Name field is system-generated and cannot be modified.
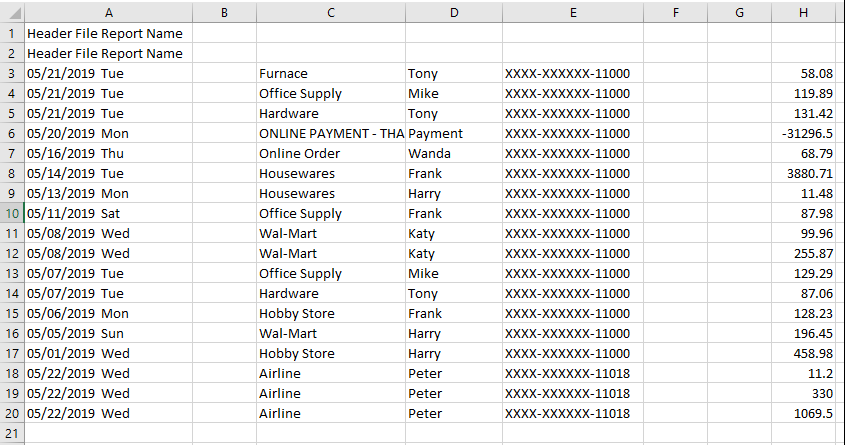
Open the credit card statement in Excel. Identify the column locations. Determine whether Charges and Credits are negative or positive. Look to see if header rows exist.
In this Excel sample, the header file occupies rows 1 and 2. The Transaction Date is column 1, the Vendor is column 3 and the Transaction Amount is column 8. Charges are positive and Credits are negative.
Open the credit card statement in Notepad to discover how the columns are separated and whether double quotes or single quotes are present.
The format may resemble the following:
Type,Trans Date,Post Date,Description,Amount,Category,Memo
Sale,08/03/2018,08/05/2018,ULTA #337,-51.14,,null
Sale,07/30/2018,07/31/2018,SHOE STATION #17,-115.48,,null
Sale,07/30/2018,07/31/2018,ACADEMY SPORTS #51,-81.42,,null
Payment,07/25/2018,07/25/2018,Payment Thank You-Mobile, "2,000.00",,null
Sale,07/21/2018,07/24/2018.WENDYS #1813,-18.22,,null
Note
In this Notepad sample, the columns are separated by commas and double quotes are used.
In the Column Delimiter dropdown, select from one of the following:
Tip
Using the Notepad sample, Comma is the correct choice for the Column Delimiter field.
Comma
Tab
Space
Pipe
In the Skip First # of Lines field, enter the number of header rows.
Tip
Using the Excel sample as a reference, 2 is the correct choice for the Skip First # of Lines field.
In the Text Delimiter field, use the dropdown to select one of the following:
Tip
Text delimiters are typically used when the column delimiter is part of the value—in the case of commas in a currency value for instance—which may not be used on every line.
Using the Notepad sample, Double Quote is the correct choice for the Text Delimiter field because there is an amount listed that includes a comma and is surrounded by double quotes: "2,000.00". If you selected instead, the 2,000.00 entry would "be read" by the system as 2.
None
Single Quote
Double Quote
In the Charges section, designate if the charges on the credit card statement are listed as Negative or Positive.
In the Excel sample, the charges display as positive numbers.
In the Credits section, designate if the credits on the credit card statement are listed as Negative or Positive.
In the Field Name / Column Position box(es), the following fields are required:
For example, using the Excel sample, the Date Posted column position is 1, the Amount column position is 8 and the Description column position is 3.
Transaction Date
Transaction Amount
Transaction Name
(Optional) Click to select other field names.
The following dialog displays:
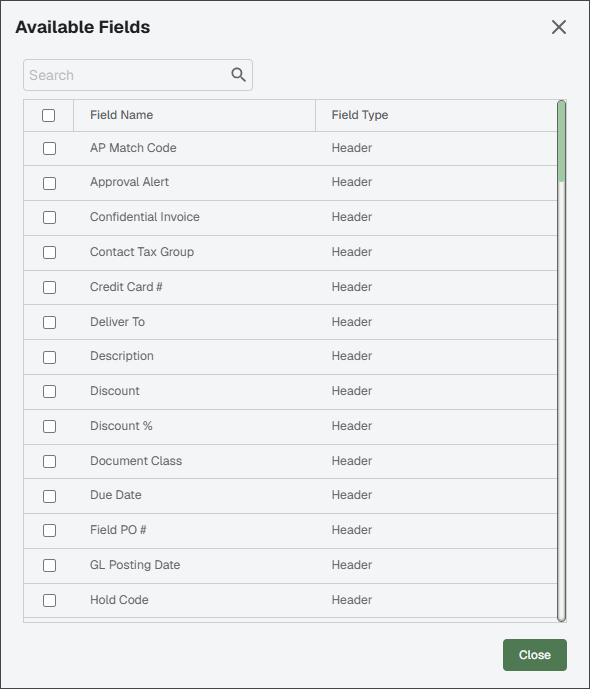
Click .
The credit card statement using the template displays. This is how to determine if the information added to the Template Properties area of the Add Credit Card Template page accurately reflects the associated credit card file.