Company Notification Rules
Important
You must be configured as with Compliance Manager or Auditor access permissions for the current vault to be able to view the Company pages within ClearToPay. Only a user with Compliance Manager permissions can edit this page.
Notification rules in ClearToPay™ are automated communication mechanisms designed to provide adequate warning and support prompt action regarding a vendor's compliance status. They ensure that both external vendors and internal project teams are kept informed of missing or expiring documentation.
When notification rules are configured at the company and job levels, the system sends automated email notifications to vendors when their compliance items—such as insurance certificates, contractor licenses, or certified payroll—are missing, expired, or approaching expiration. These rules can be configured to copy internal stakeholders, such as project managers or supervisors to keep them "in the loop" on issues. Additionally, every time an automated notification is sent, ClearToPay records it in Email History.
From My Paperless, click .
In the ClearToPay™ navigation bar, click .
Click .
A page similar to the following displays.
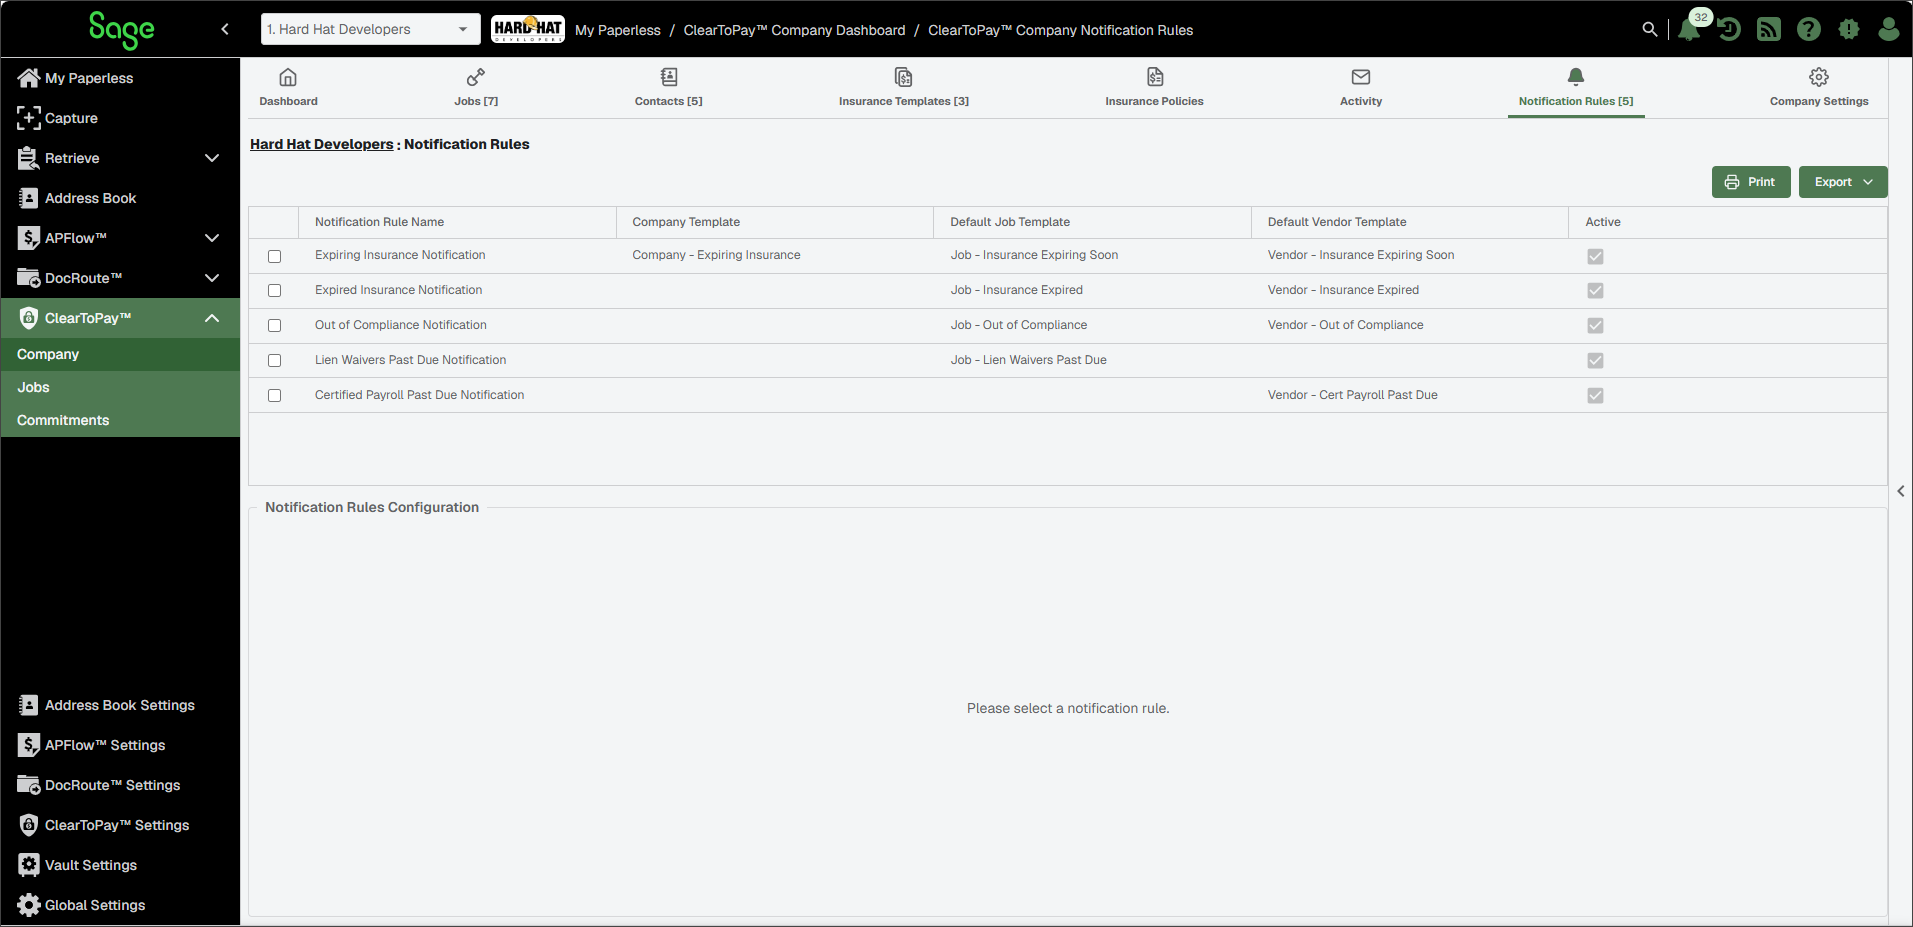
From the company Notification Rules page, you can perform the following tasks:

Click to print the Notifications Rules grid.

Click to export the grid information to Excel, CSV or PDF.
Click the check box for a specific notification rule to populate the Notification Rules Configuration section at the bottom of the page.
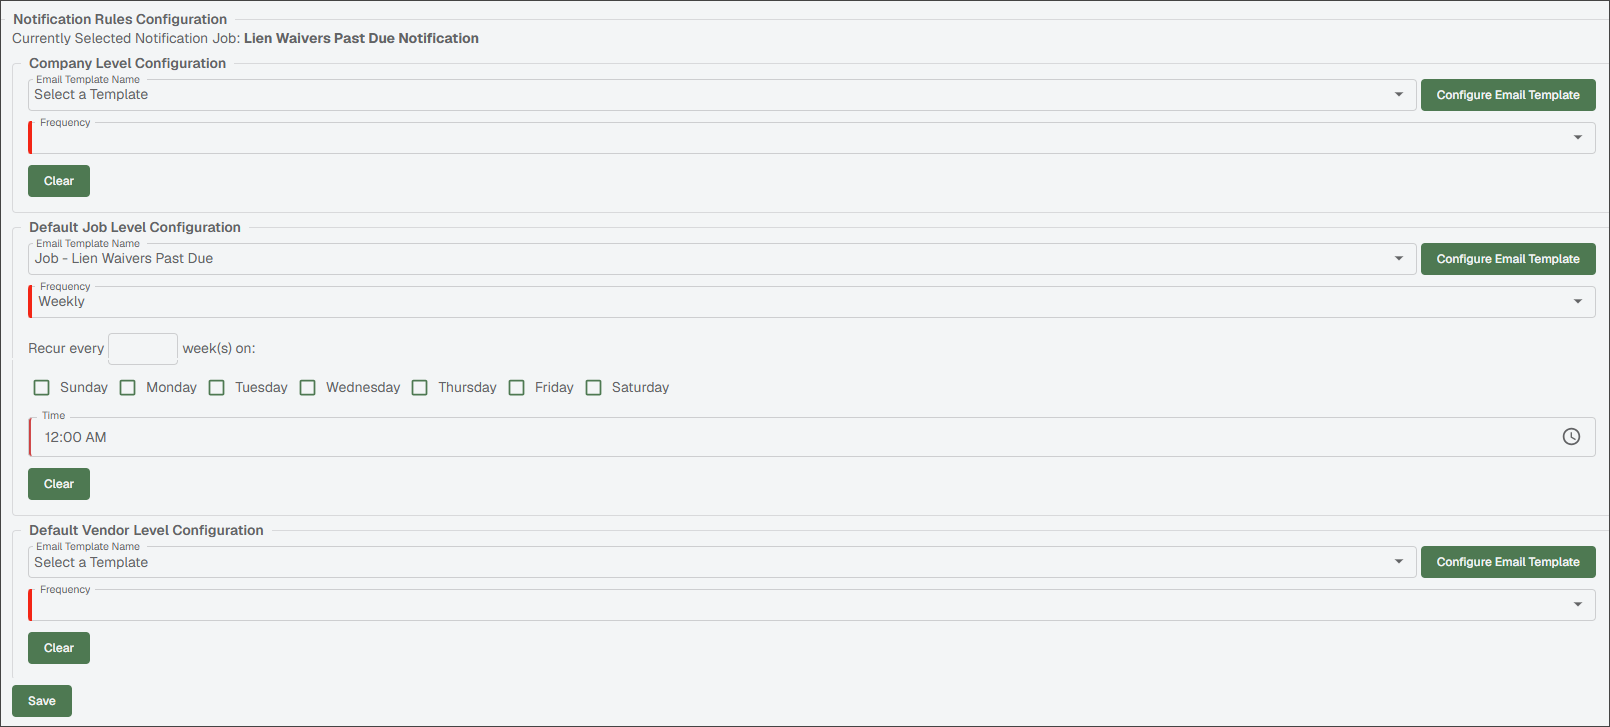
Company Level Configuration: Choose the appropriate template for your selected Notification Rule from the Email Template Name dropdown and the timing from the Frequency dropdown. Click the button if you need to make updates to the template.
Default Job Level Configuration: Choose the appropriate template for your selected Notification Rule from the Email Template Name dropdown and the timing from the Frequency dropdown. Click the button if you need to make updates to the template.
Default Vendor Level Configuration: Choose the appropriate template for your selected Notification Rule from the Email Template Name dropdown and the timing from the Frequency dropdown. Click the button if you need to make updates to the template.
Select the check box to make the notification rule available.
Click .
Repeat step 5, above, to configure additional notification rules.