Sage 100 Contractor Bridge Prerequisites
Before bridging Sage Paperless Construction to Sage 100 Contractor, the following accounts need to be configured with the proper permissions.
Account | Required? | Use |
|---|---|---|
Accounting System Service User Account in Sage 100 Contractor Database | Yes | You must have an administrator account configured to serve as a dedicated, non-person account to use to set up the bridge integration with Sage Paperless Construction. |
Windows Domain Service Account | Yes | You must have a username and password for a domain service account that is a local admin to the server where Sage 100 Contractor is installed. |
Important
You must be an administrator to complete the following procedure.
Complete the steps below:
Open and sign in to Sage 100 Contractor Database Administration.
In the left navigation bar, select .
From the Authentication dropdown, select .
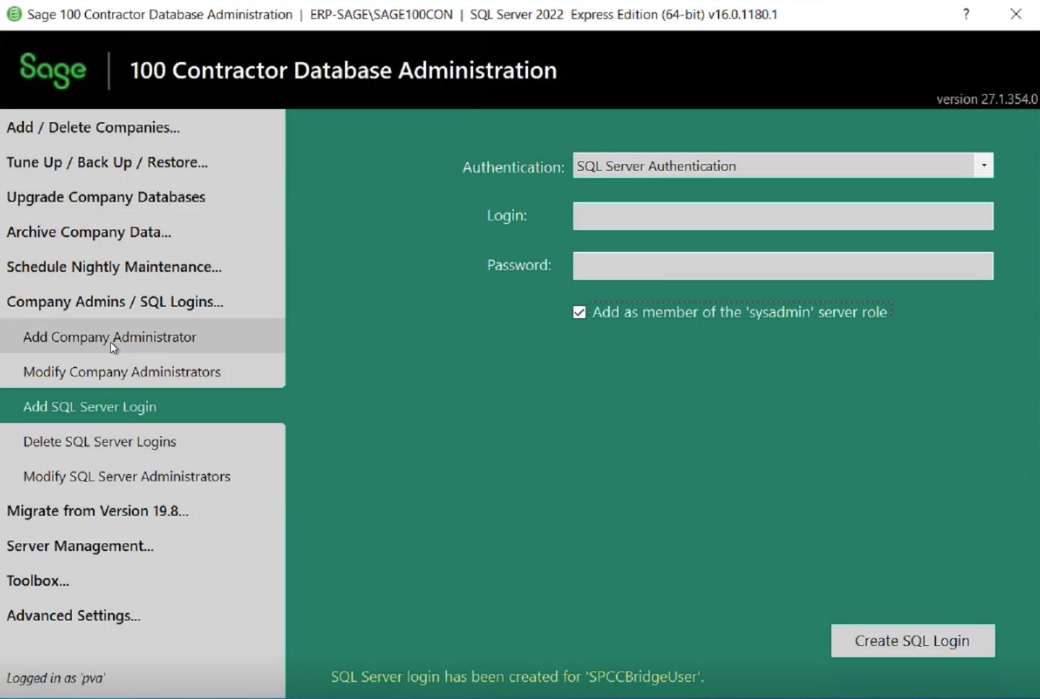
In the Login field, enter a name for your non-person account.
For example, "SPCCBridgeUser."
Note
It is recommended that you do not include the word "paperless" in the login name.
In the Password field, enter a password for this account.
Note
Passwords are not stored or retained by Sage or Sage Paperless Construction.
Select the check box.
Click .
In the left navigation bar, select .
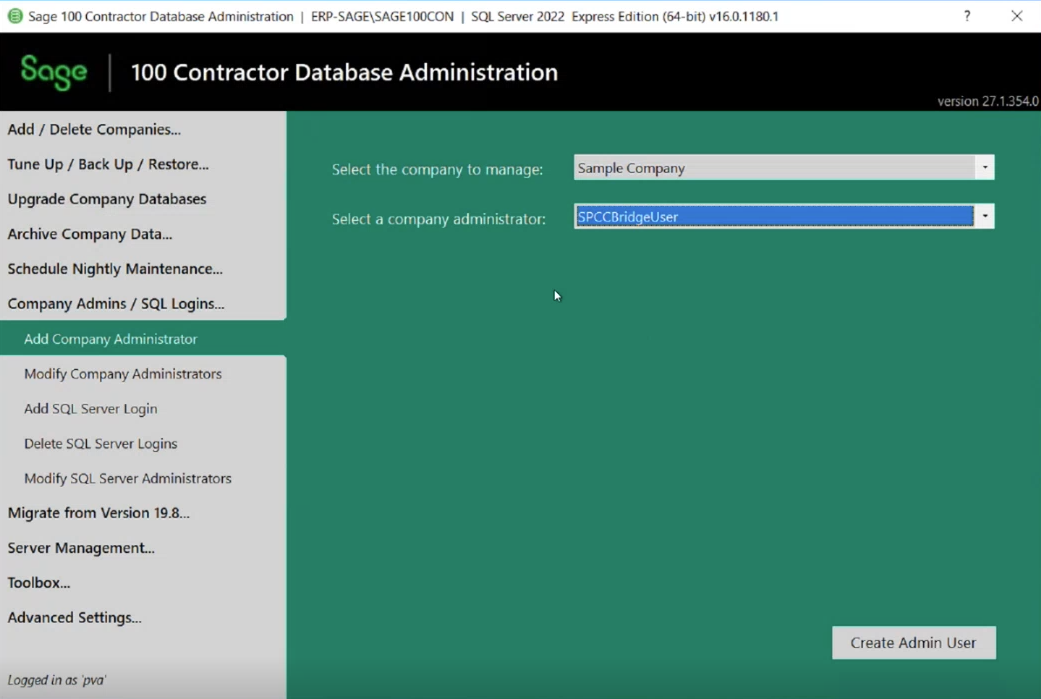
From the Select the company to manage dropdown, select the company you want to bridge to Sage Paperless Construction.
From the Select a company administrator dropdown, select the account you created in step 3, above.
Click .
(Optional) Repeat this process for each company you are bridging to Sage Paperless Construction.
Open and sign in to Sage 100 Contractor as an administrator.
In the Company List dialog, select the company you want to bridge and make sure the check box is selected.
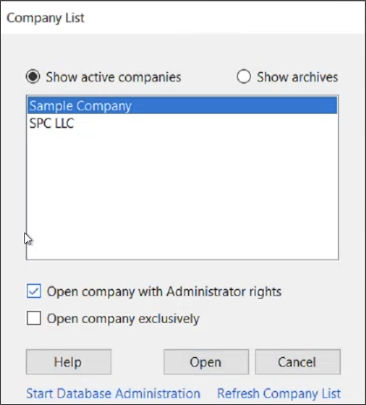
Click .
In the left navigation bar, select .
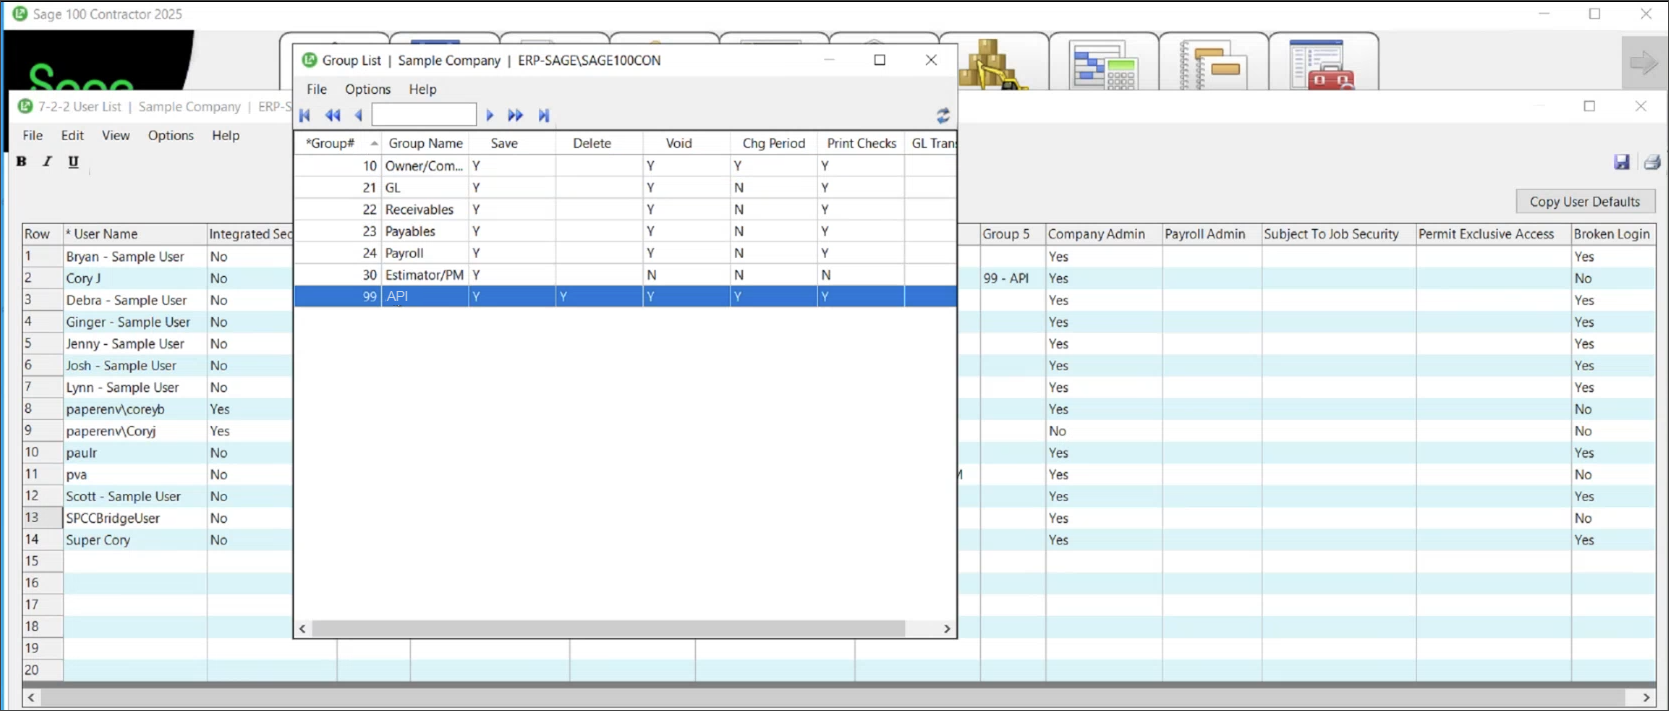
If there is not already an API group created, you must enter the values shown below:
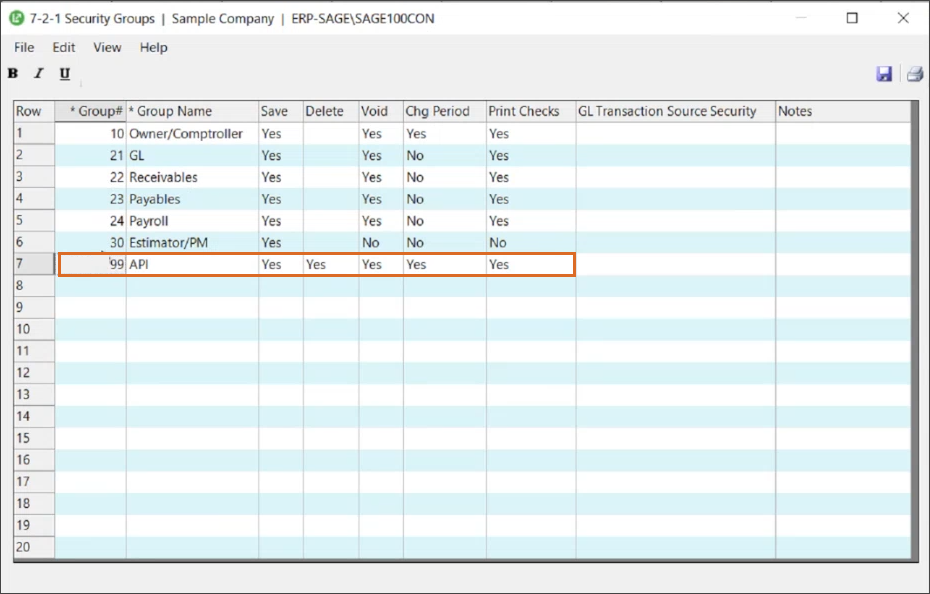
Group#: 99
Group Name: API
Save: Yes
Delete: Yes
Void: Yes
Chg Period: Yes
Print Checks: Yes
In the left navigation bar, select .
Locate your newly created user account in the list (example: SPCCBridgeUser) and click in the Group 1 column for that row to display a lookup option.
In the Group List dialog, highlight the group, then click Close
 .
.
Click .
(Optional) Repeat steps 6-13 for each company you are bridging to Sage Paperless Construction.
To install the Server Agent to your Sage 300 CRE or Sage 100 Contractor server, you must have a username and password for an account that meets the following requirements:
Is a domain service account (a standard domain user)
Is configured as a dedicated, non-person account (not tied to any employee)
Is a local admin to the server where Sage 300 CRE or Sage 100 Contractor is installed
Important
This account must have full access to the accounting system's data folders; however, it does not need to be a domain admin account.
Note
It is recommended that you use a naming convention like svc_paperless or spc_paperless to make it clear that this is a service account so it is not deleted by mistake.