Review Lien Waivers
Lien waiver documents are provided to you by the job's general contractor so you can sign and return them within the required timeframe.
If lien waiver tracking is enabled for a particular job, the Lien Waivers and Lien Waiver Details sections display on the portal's job details page.
From one of the portal's job or vendor pages, click .
 |
A page similar to the following displays:
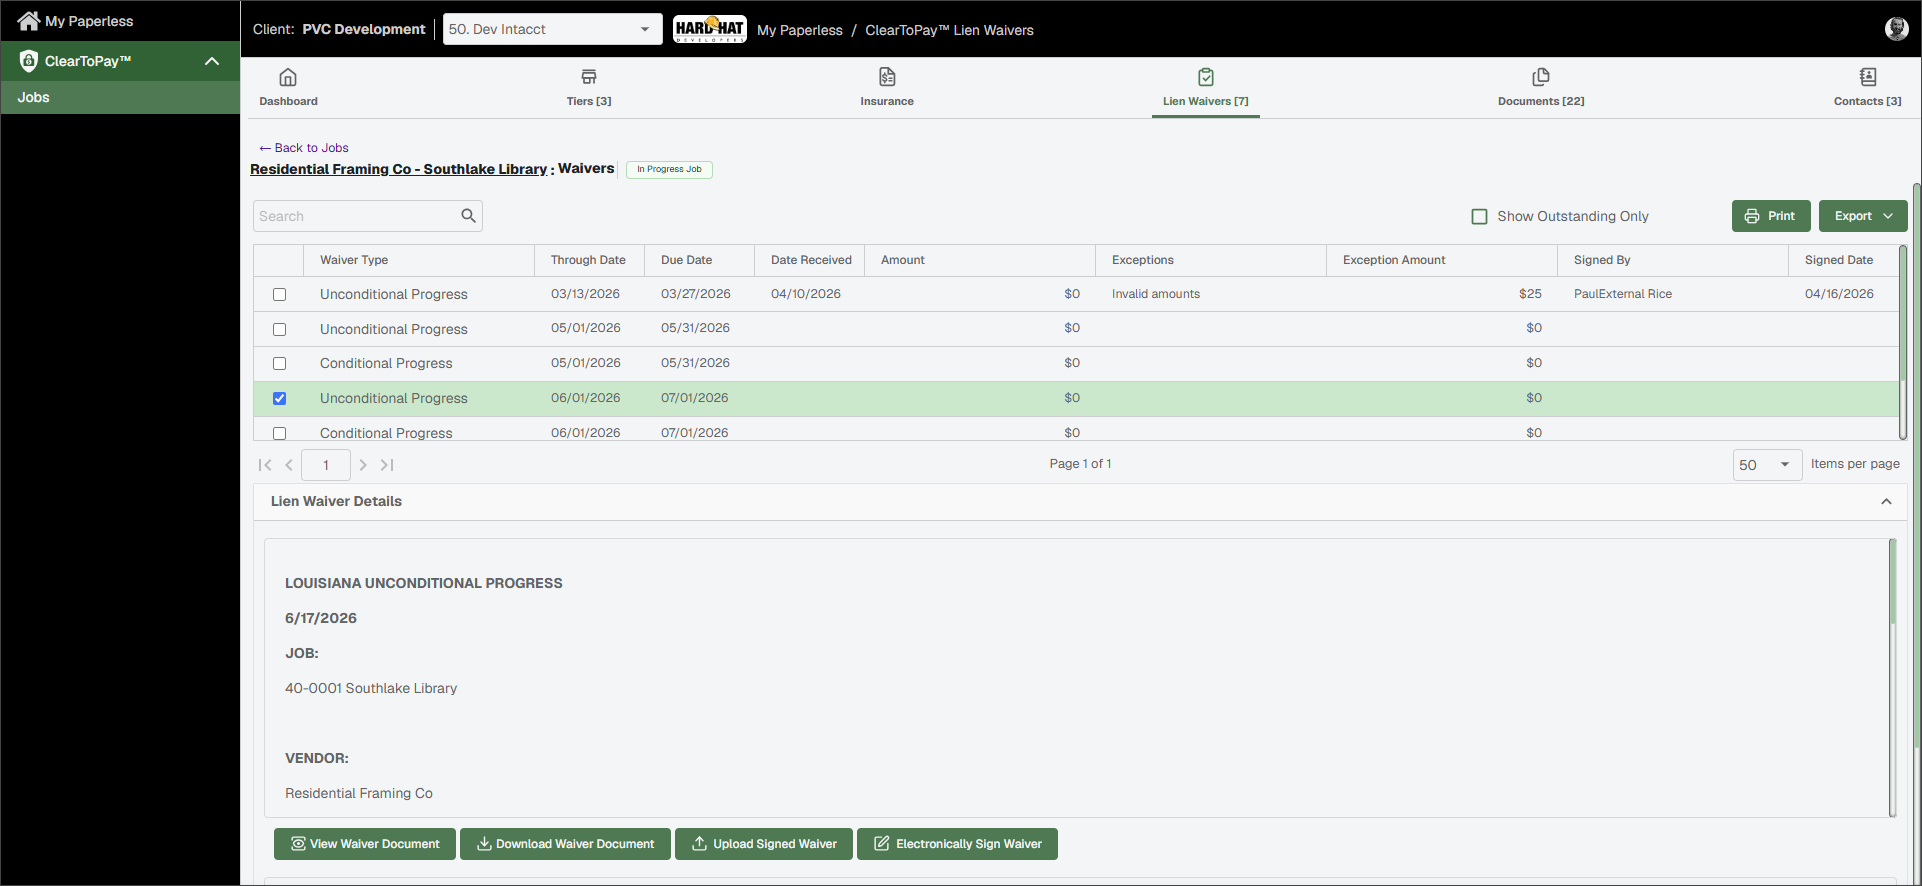
Use the Lien Waivers page to do the following:
 | Search for a waiver record by waiver type or amount. |
Show Only Outstanding | Select the check box to show only the lien waivers that have not yet been received by the general contractor. |
 | Click to print the Lien Waivers grid. |
 | Click to export the grid information to Excel, CSV or PDF. |
Waiver Record Details | When a waiver is selected from the list, the Lien Waiver Details section displays details for that waiver, including the ability to view, download, upload and electronically sign the document. See View Waiver Document, Download Waiver Document, Upload Signed Waiver or Electronically Sign Waiver for more information. You can also update the Amount and Exception Amount fields and save the information into the system for review. 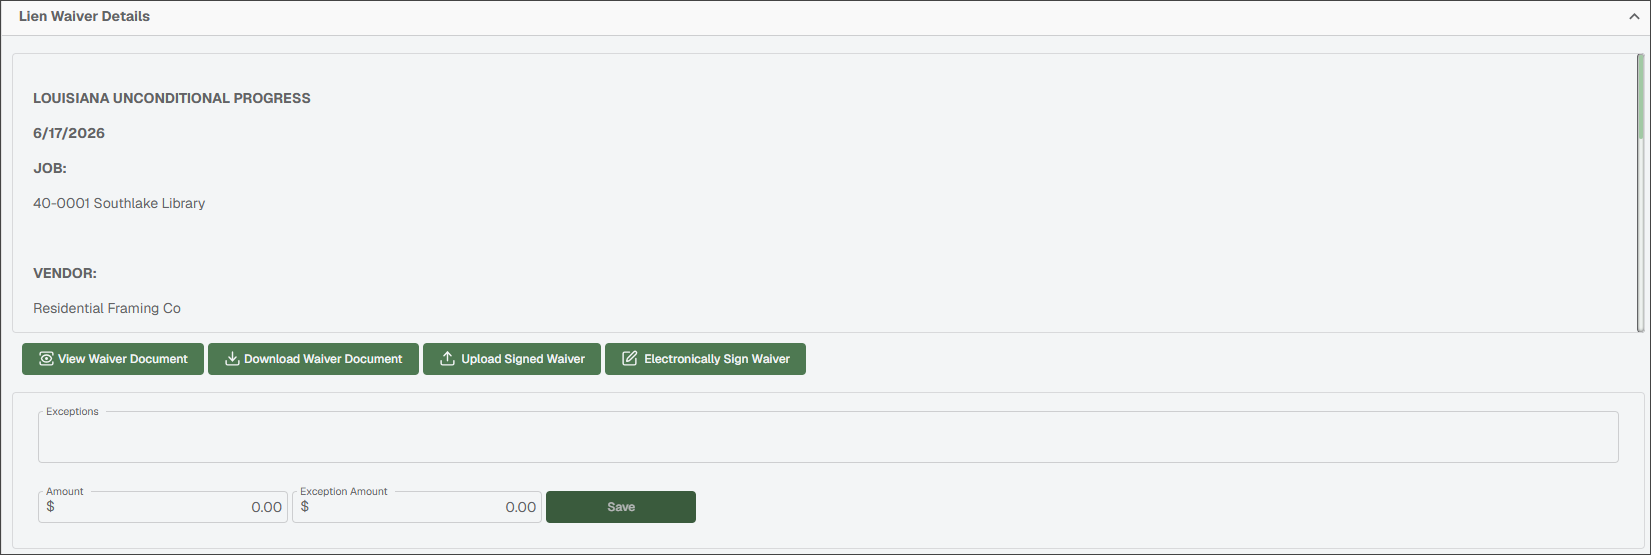 |
Via the portal, complete the following steps to view and download a copy of the lien release.
From the Lien Waivers page, select the waiver you want to view from the Lien Waivers grid.
Note
If you need to narrow down the list, you can select the Show Outstanding Only or use the Search bar to enter a keyword.
The Lien Waiver Details section displays the selected waiver.
Click .
The file opens in a viewer screen to make reading the document easier.
Note
If needed, you can Expand
 and Minimize
  the Lien Waiver Viewer dialog using the icon in the upper right.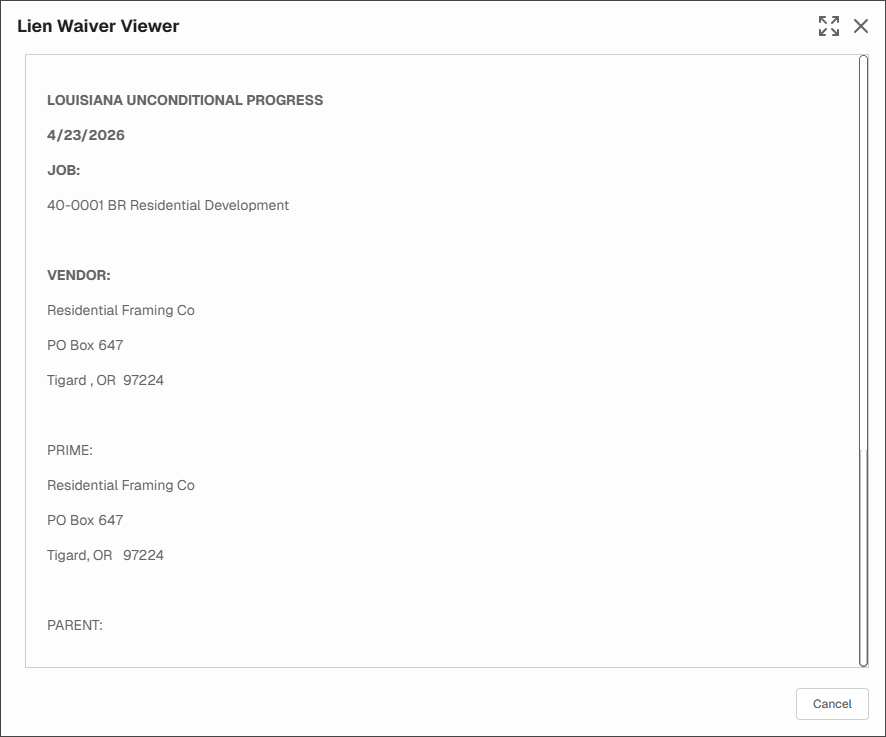
Click Close
 or to exit the viewer.
Via the portal, complete the following steps to view and download a copy of the lien release.
From the Lien Waivers page, select the waiver you want to download from the Lien Waivers grid.
Note
If you need to narrow down the list, you can select the Show Outstanding Only or use the Search bar to enter a keyword.
The Lien Waiver Details section displays the selected waiver:
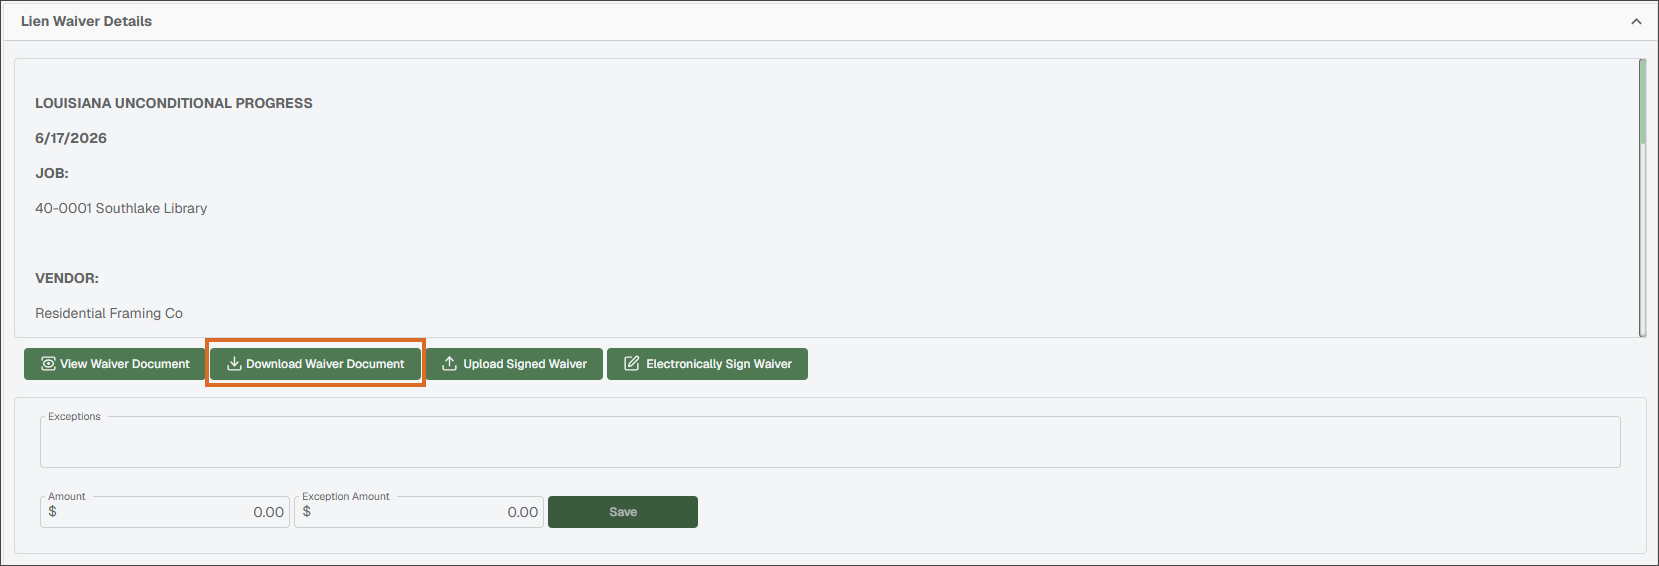
Click .
The file downloads to your computer or mobile device as a PDF.
Review, print and sign the lien release as appropriate.
Continue to Upload Signed Waiver.
Once you have downloaded, printed and signed a physical copy of your lien waiver document, complete the following steps to upload it back into the Sage Paperless Construction system:
Save or scan your signed document to a local drive.
From the Lien Waivers page, select the waiver you want to reupload from the Lien Waivers grid.
The Lien Waiver Details section displays the selected waiver:
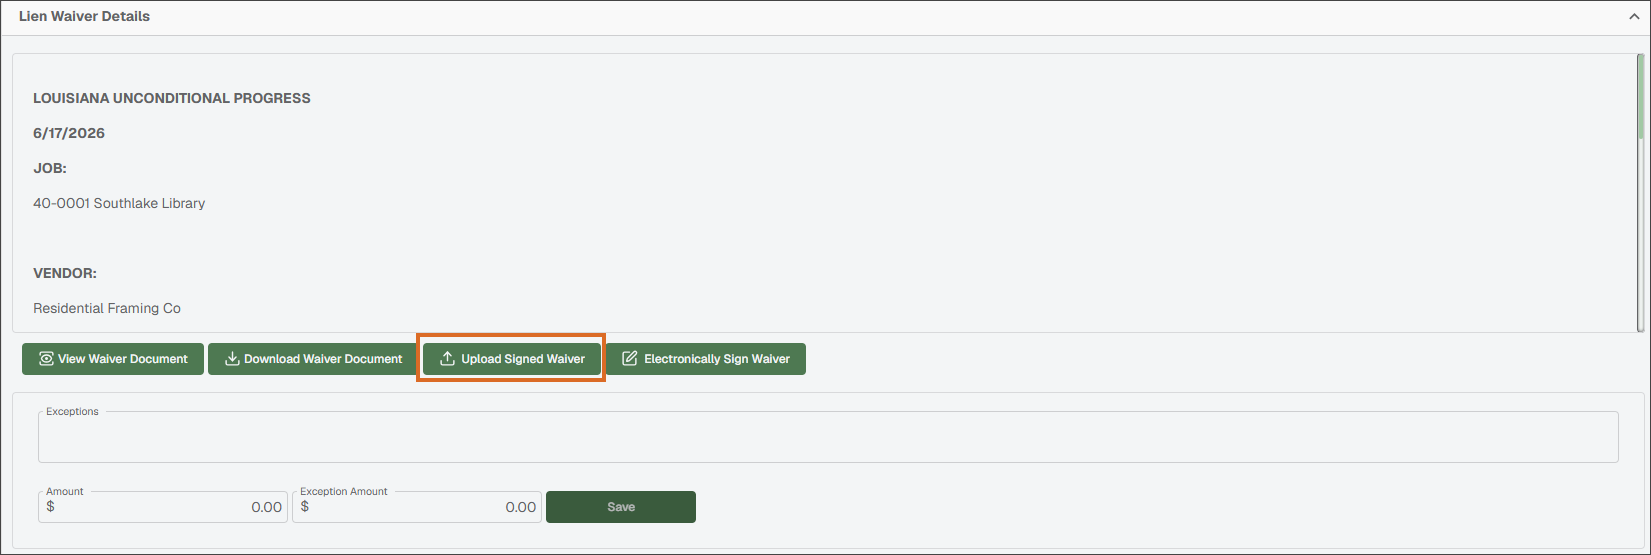
Click .
Drag and drop or click to locate the file on your computer or mobile device.
Click .
The signed document is uploaded into the system and routed to the correct individual for review and approval.
From the Lien Waivers page, select the waiver you want to sign from the Lien Waivers grid.
Note
If you need to narrow down the list, you can select the Show Outstanding Only or use the Search bar to enter a keyword.
The Lien Waiver Details section displays the selected waiver.
Click .
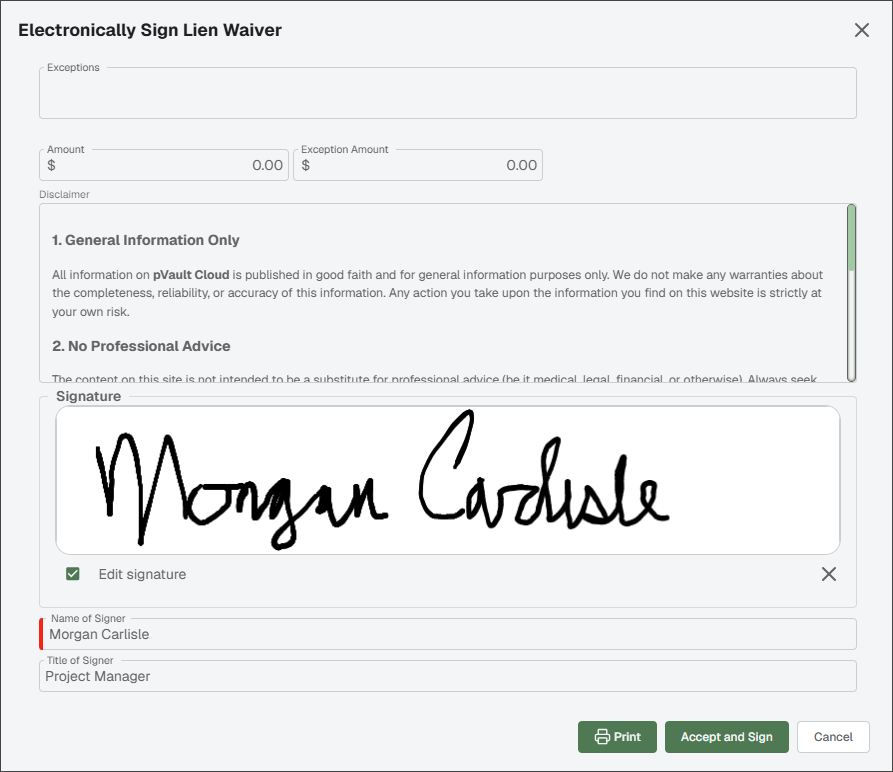
Enter any exceptions.
Review the disclaimer.
Make sure the Edit signature check box is selected, then sign your form in the Signature field.
Type your name and title in the Name of Signer and Title of Signer fields.
Click .
Note
The Signed Date value populates in the grid.