APFlow™ Routing Rules
You can create (and edit) the routing rules your invoice routing process should follow.
From the Routing Rules page, you can set up a list of predefined rules for auto assigning approvers to inputted invoices based on the coding of the invoice. You can define approvers based on job coding, invoice totals, etc.
For each rule, you can specify routing the invoice to one or more reviewers and include defining the routing sequence. You can define routing rule groups. (See APFlow™ Rule Groups for more information on rule groups.)
Note
Instead of assigning individual users to a rule, you can assign a role instead. Then for that role, you can assign one or more individuals. The benefit of this is that when a person changes roles, only the role needs to be updated rather than every routing rule to which that person was assigned as part of their previous role.
Routing rules work with custom Entry Fields in the same manner as other fields. For more information, see APFlow™ Entry Fields.
From My Paperless, click .
In the APFlow™ Settings navigation bar, click .
A page similar to the following displays:
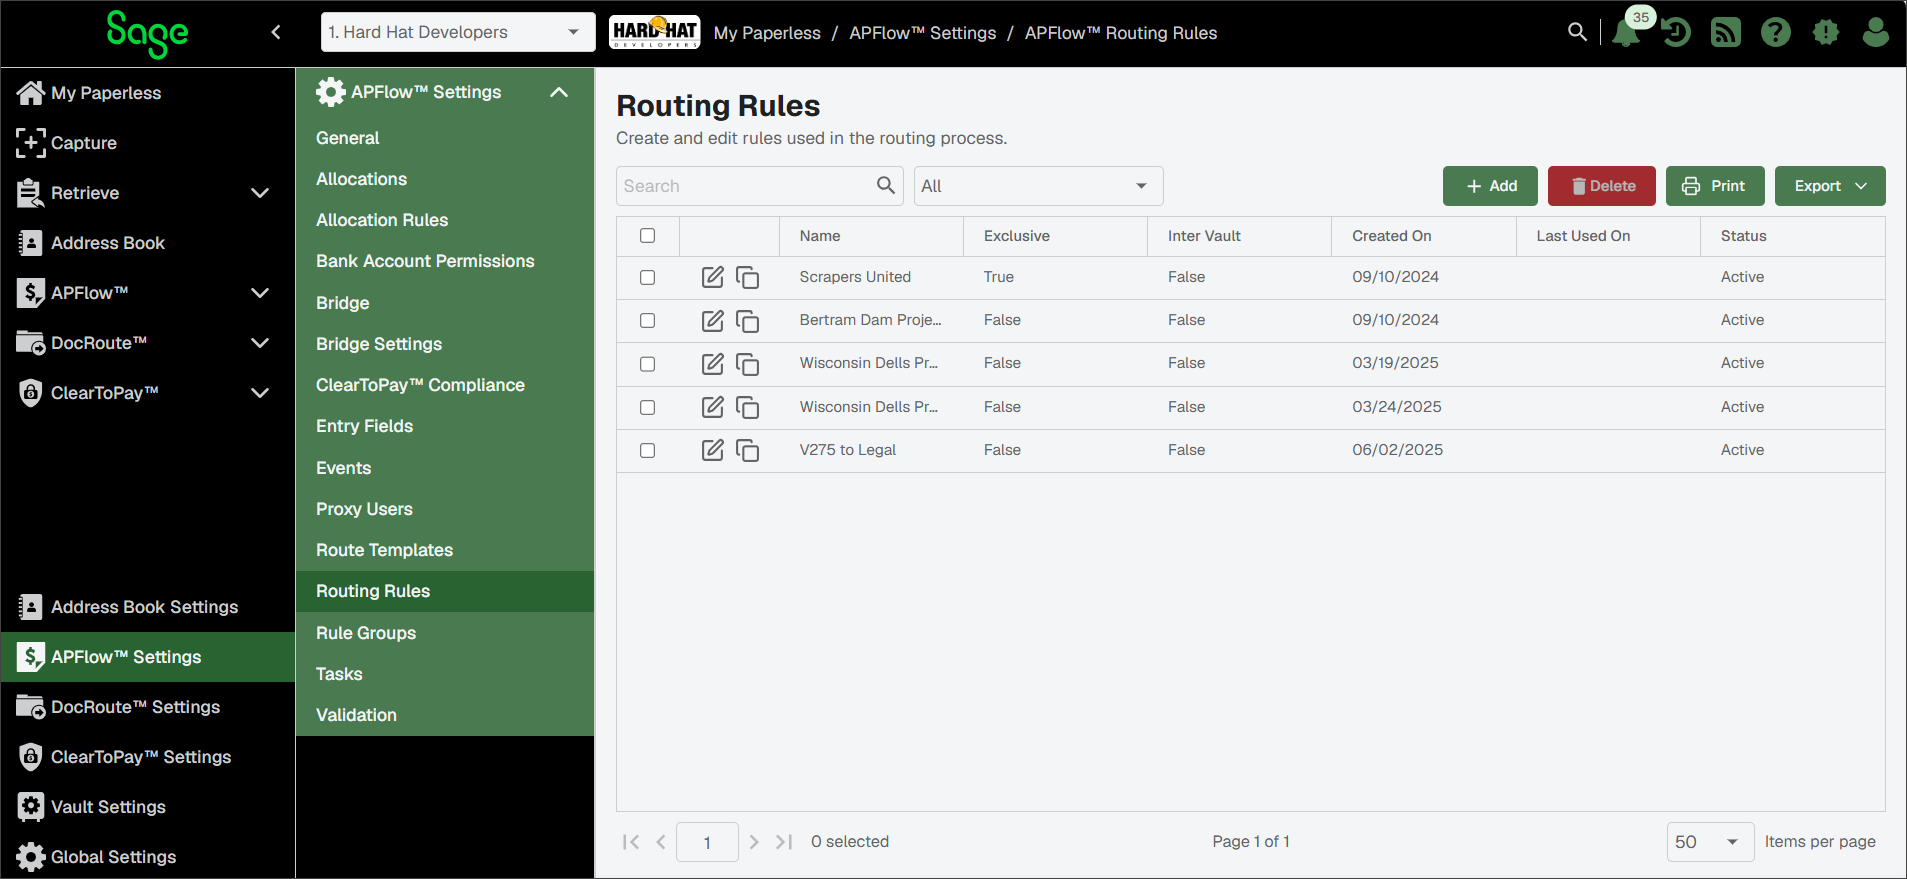
You can use the Routing Rules page to do the following:

To create routing rules, click . For more information, see Add APFlow™ Routing Rules.

To delete one or more routing rules from the list, select their check box and click .
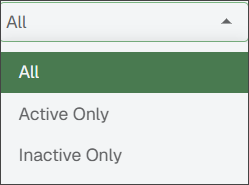
Use to narrow down the list of routing rules that display.

To search for a specific rule, enter a portion of its name. Then, press or click the Search
 icon.
icon.
Click Copy
to duplicate a routing rule.
Click Edit
to update a routing rule. See Edit APFlow™ Routing Rules for more information.Exclusive Column
If True displays in the Exclusive column for a routing rule, the Exclusive check box is was selected in the Routing Rule Properties dialog, indicating an exclusive rule exists. If False displays, an exclusive rule is not in place for that rule.
Exclusive rules can be used as exceptions to normal routing.
For example, if a company owner wants to see any invoices over a certain dollar amount first, an exclusive rule can be set up based on invoice total. If the invoice gets routed to the owner based on this rule, all nonexclusive rules and exclusive rules with a lower priority are skipped.
Inter Vault Column
If the Inter Vault column is checked for a specific routing rule, the Inter Vault check box is was selected in the Routing Rule Properties dialog, indicating that an invoice entered in one vault needs to be routed against rules configured in another vault.
Created On Column
The date in this column identifies when a routing rule was created. The date that displays in this column is system-generated and cannot be altered.
Last Used On Column
The date in this column identifies the last time a routing rule ran. Use the information in this column to identify routing rules that are not valid or no longer necessary. Then, click Edit
and deselect the Active check box.If no date or time displays, the associated routing rule has not run.
Status Column
If the Active check box is selected for a rule, Active displays in this column. If the check box is blank, Inactive displays.
Note
The Active check box is selected by default.
Note
Routing Rules work with custom Entry Fields in the same manner as other fields. See APFlow™ Entry Fields for more information.
Click .
The following Create Routing Rule - General Properties dialog displays:
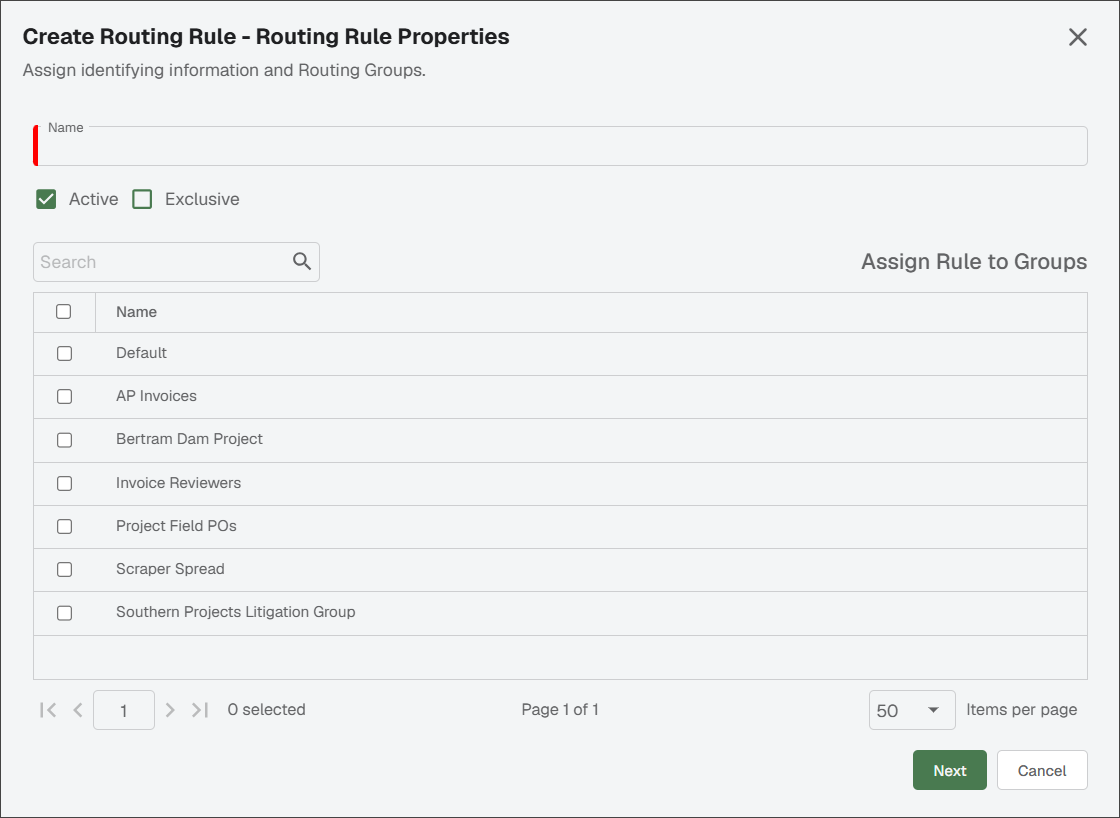
In the Name field, enter the name of the routing rule. This field is required.
Note
For example, "Bertram Dam", "Rock Trucks" or an Individual's name.
The Active check box is selected by default. If the route template should not be active, deselect the check box.
If this routing rule is considered an exception to normal routing, select the check box.
Note
Exclusive rules allow you to prioritize rules and be evaluated first, before other routes. You can have more than one exclusive rule.
Select the group(s) you want to assign the routing rule to in the Assign Rule to Groups section.
Click .
In the Creating Routing Rules - Rules dialog, click the Plus
 icon.
icon.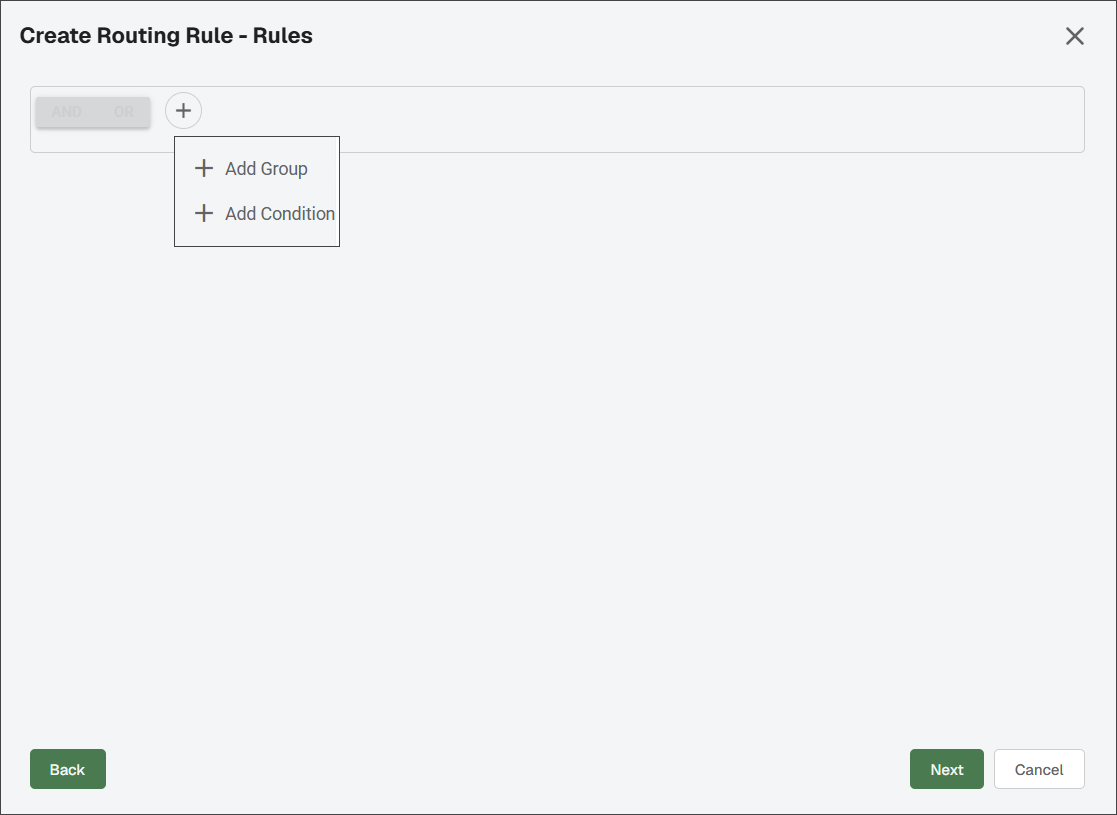
Click either or .
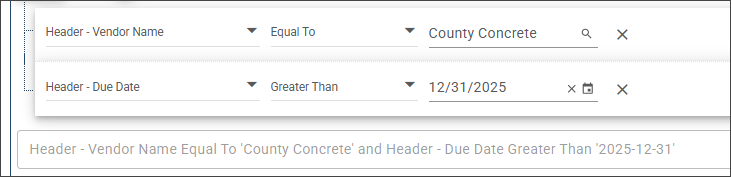
Build out your routing rule criteria using the dropdowns and fields available.
Note
For example, you could select AND to create a routing rule for all County Concrete vendor invoices received after 2025.
Click .
Click either or :
Important
You can select to use only a template, create a new sequence of recipients specific to this rule or combine the two. If you manually add the same reviewer with a different route sequence outside the route template to this route, that reviewer displays twice.
Select to create a new sequence of recipients unique to this routing rule:
The Add Recipients to Route dialog displays:
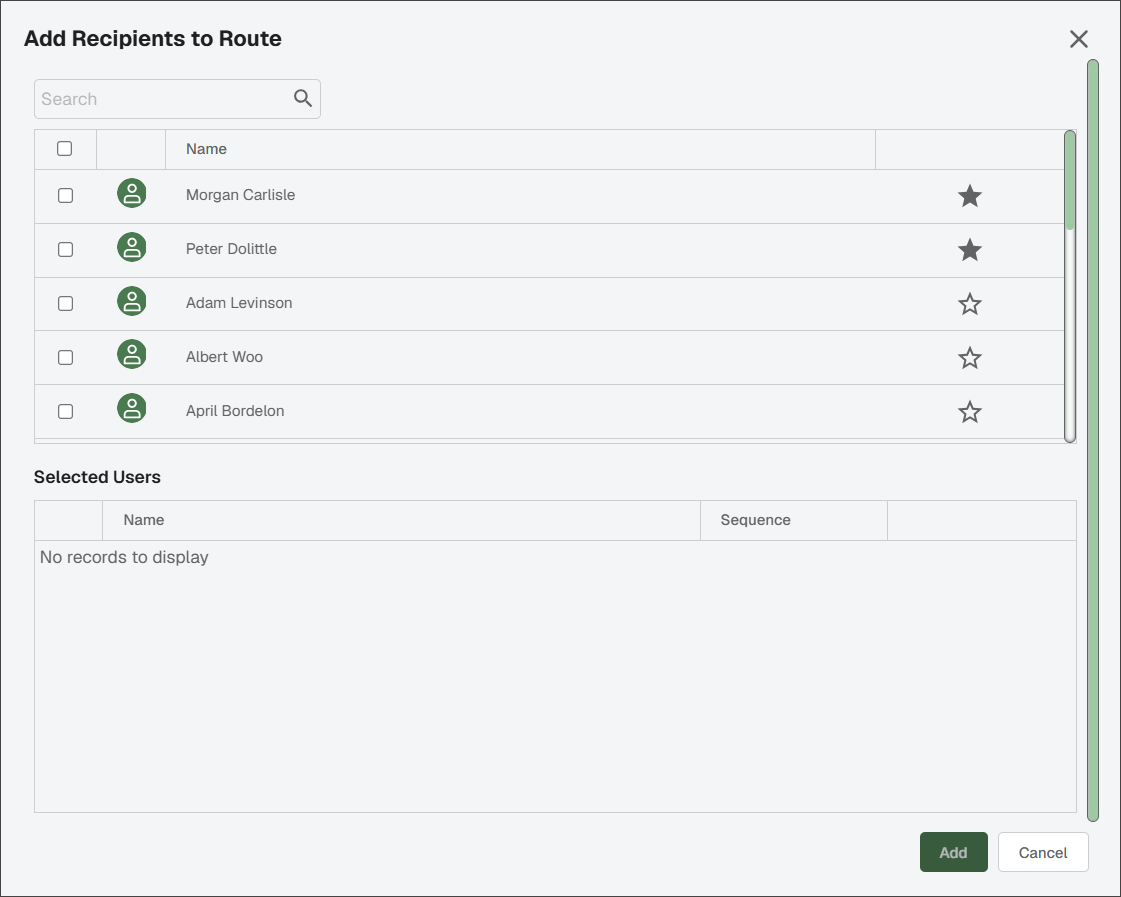
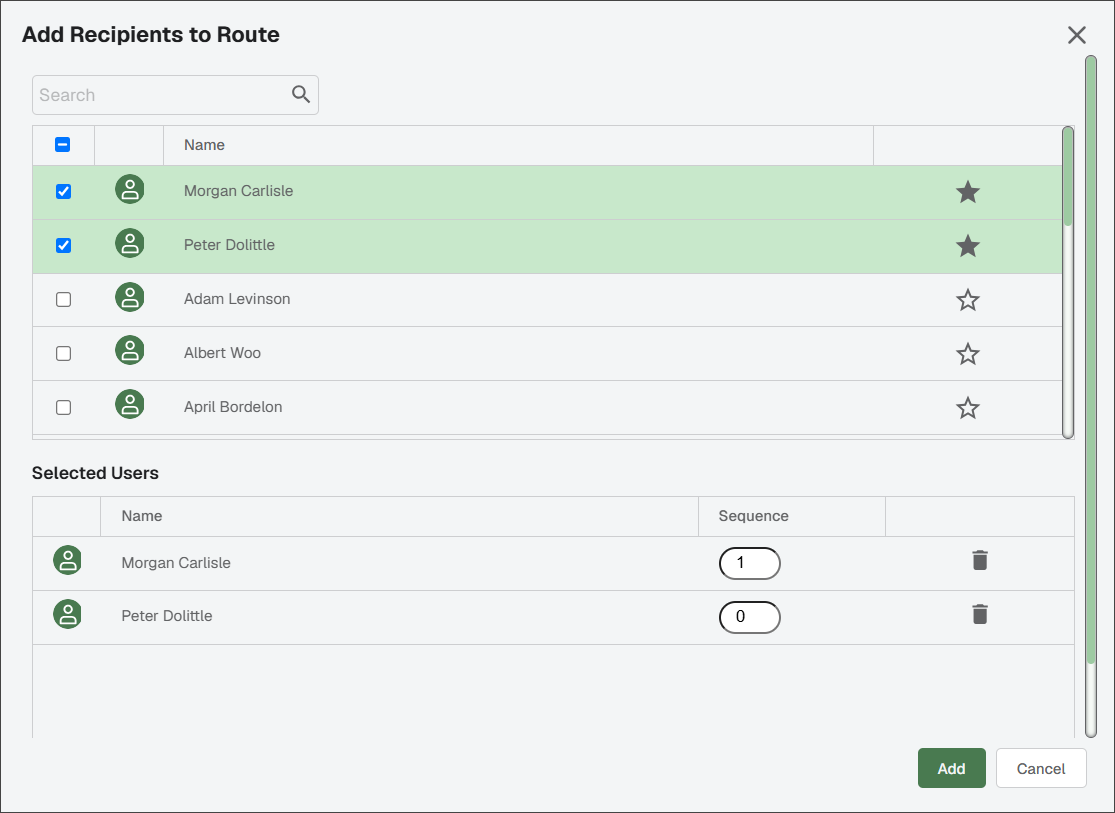
Select users to include in the route. As you do so, the Selected Users section populates:
Note
Adjust the sequence as needed to reflect the order in which they should receive the information.
Click .
Note
The recipients display in a card view or a grid format. Use the
 or
or  icon in the upper right to switch between views.
Select to reuse an established sequence of recipients already created. See APFlow™ Route Templates for more information.
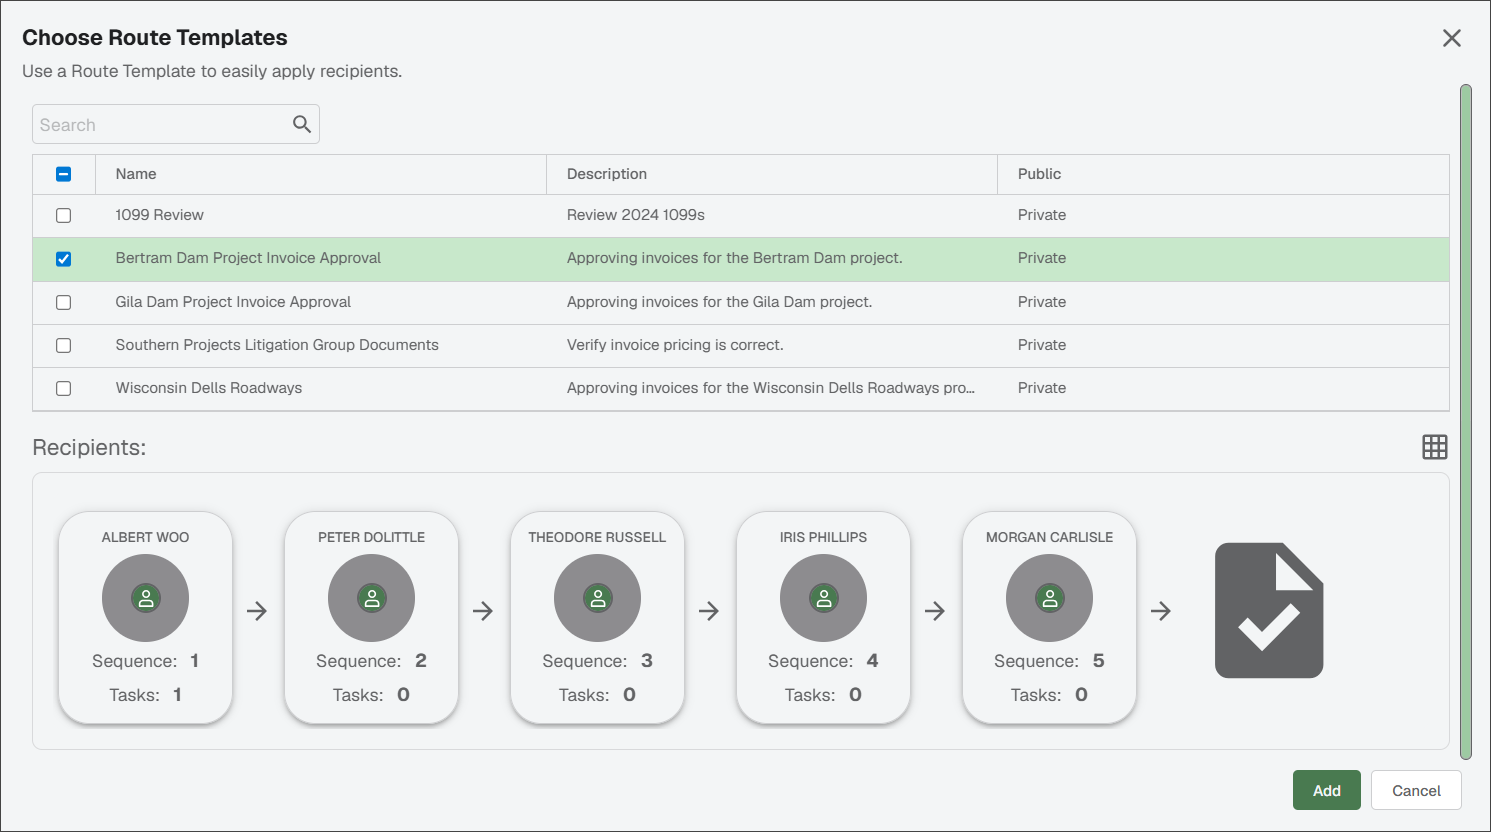
The Choose Route Templates dialog displays:
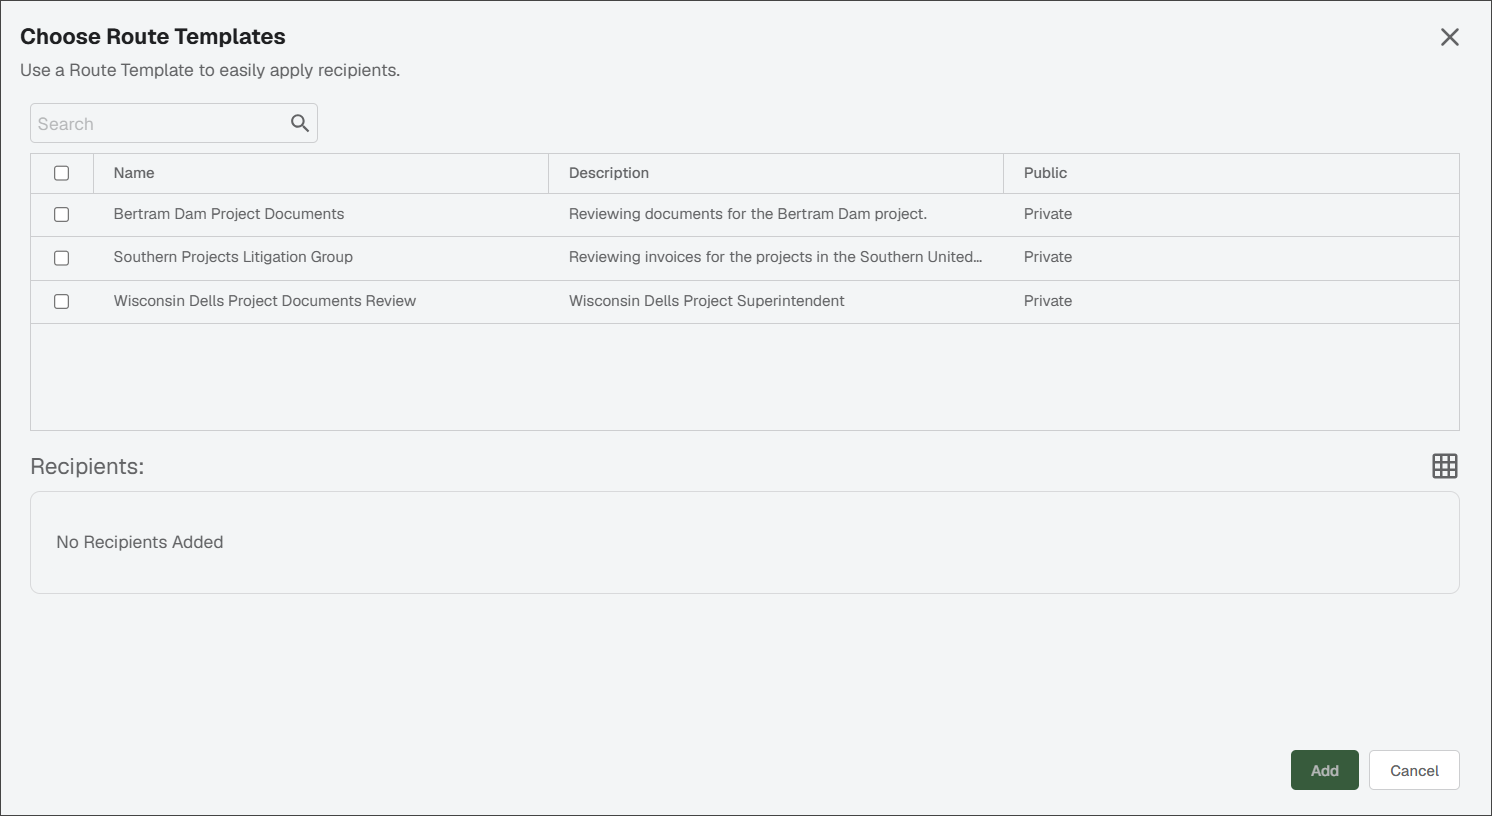
Select the route template you want to use. The recipients associated with the route template populate in the Recipients section:
Click .
Note
The recipients display in a card view or a grid format. Use the
or icon in the upper right to switch between views.
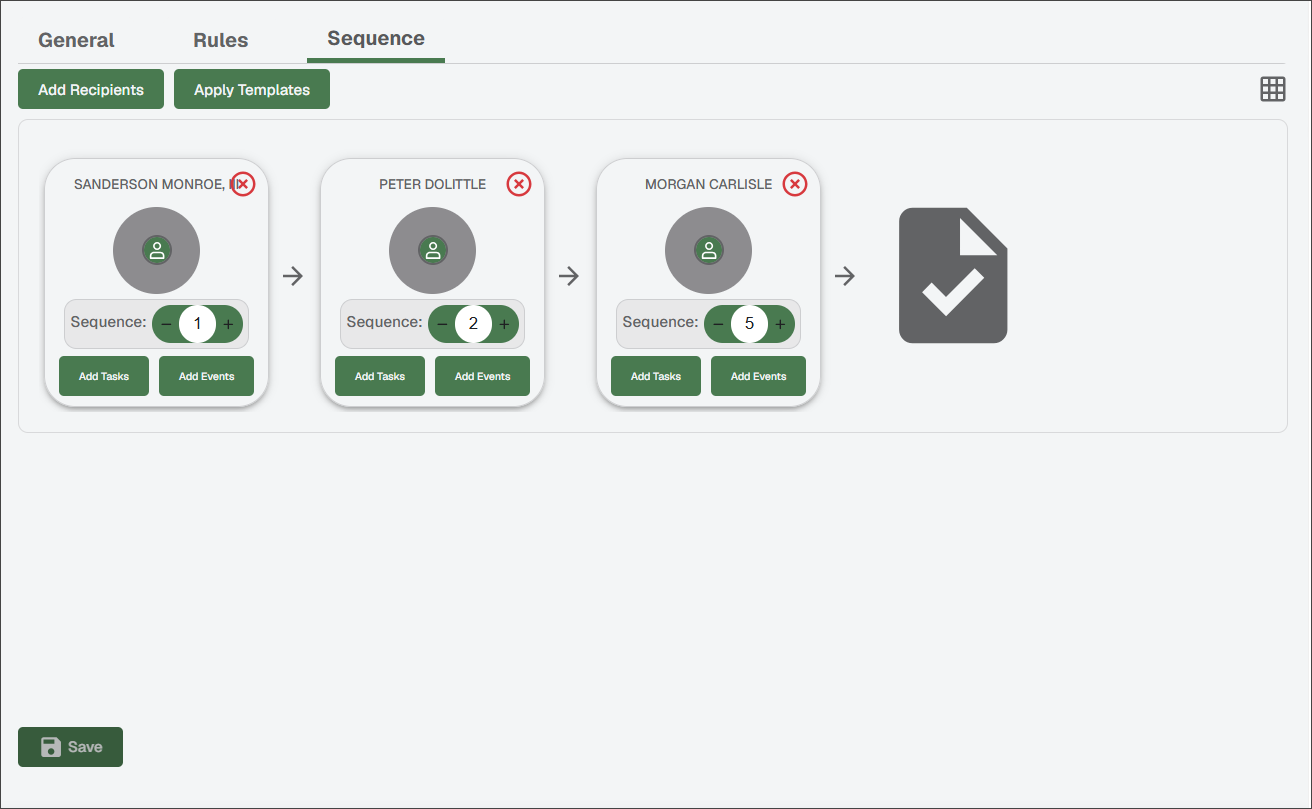
Review the route recipients and their sequence, especially if you combined a route template with additional recipients.
Important
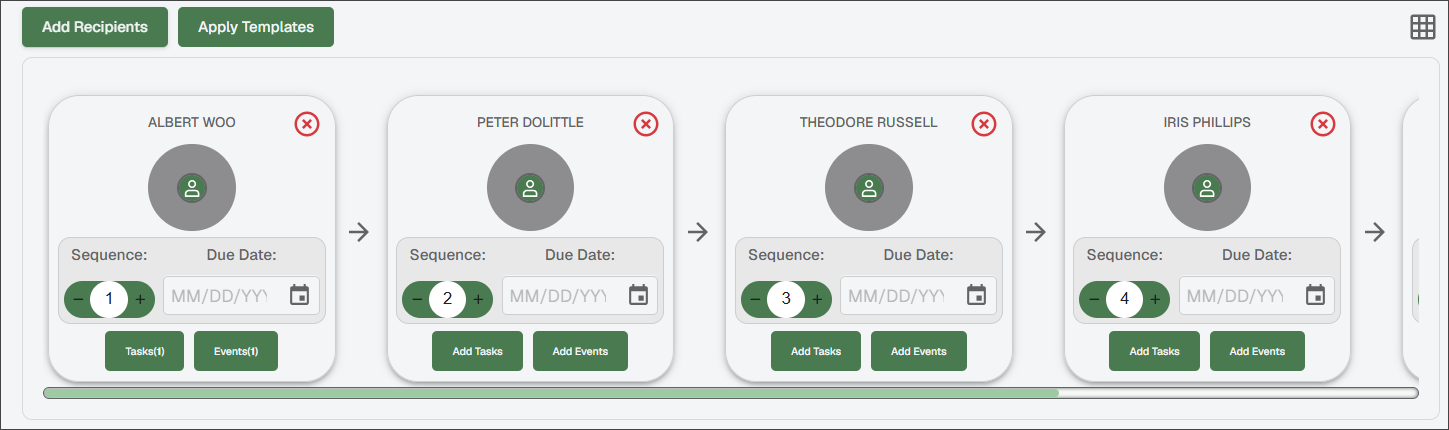
The same reviewer can display more than once in your route. When the route template was created, specific reviewers were identified and route sequences assigned. Those reviewers with their route sequences systematically display. If you manually add the same reviewer with a different route sequence outside the route template, that reviewer displays twice based on the order of their route sequences. Your sequence could resemble the following:
Click .
From the Routing Rules page, find the rule you want to edit.
Click the Edit
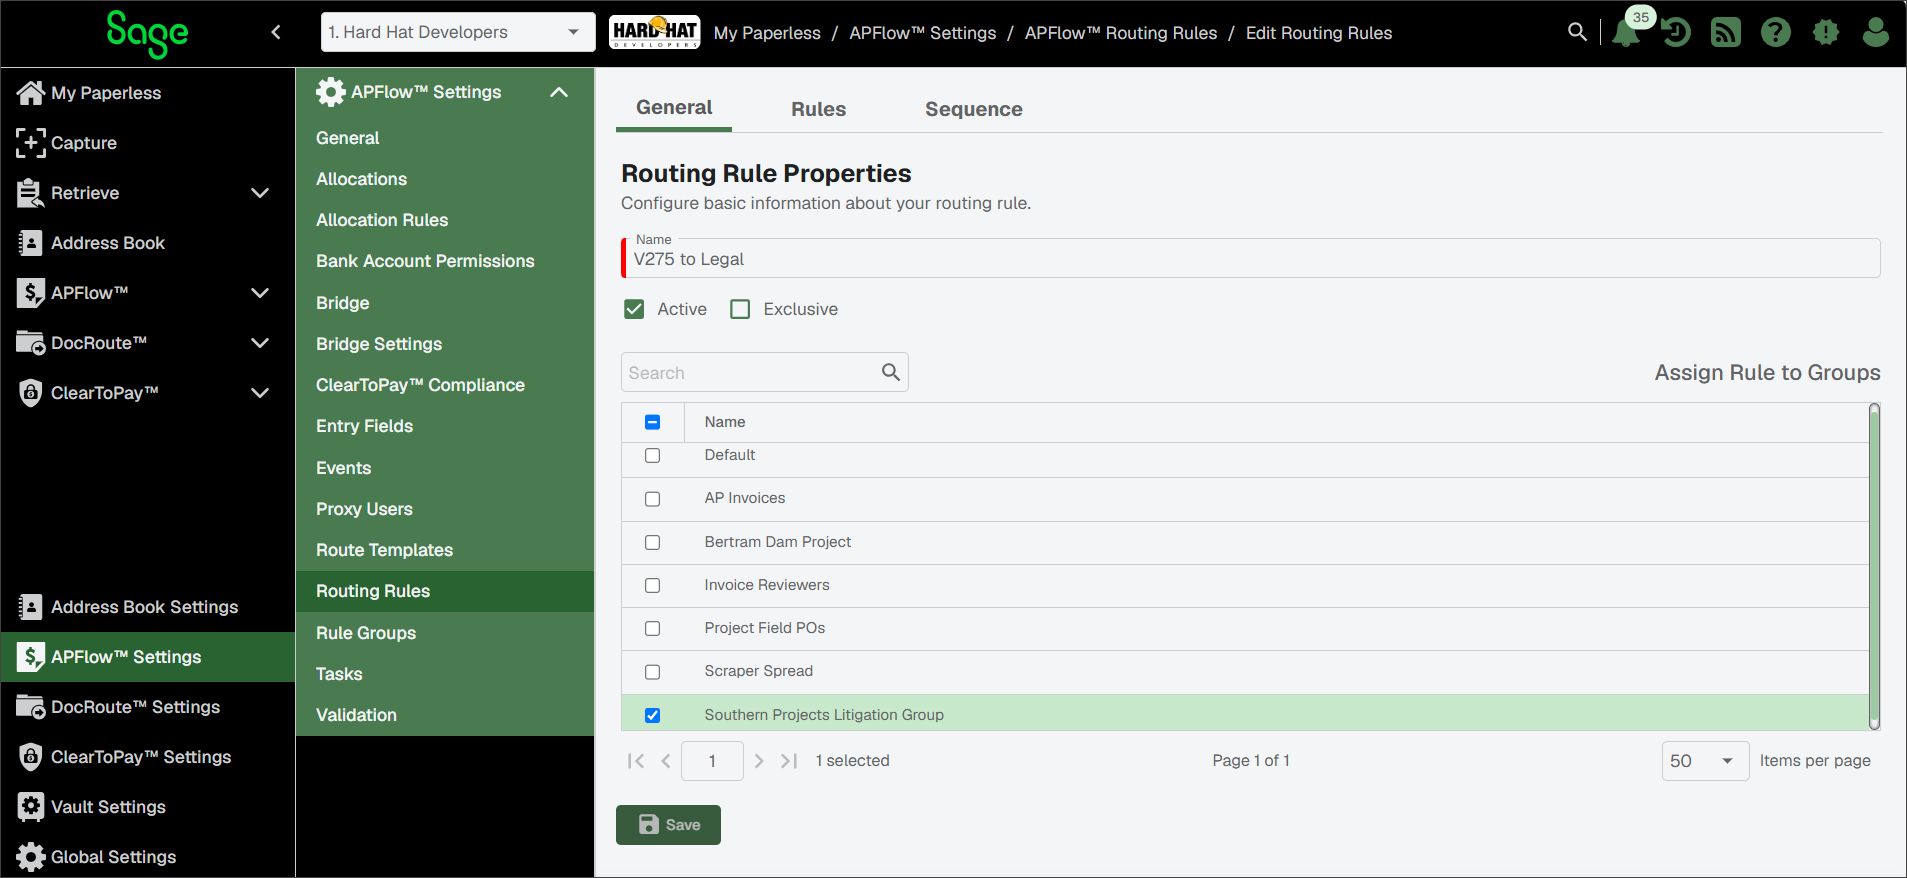
icon.Make necessary updates routing rule status, exclusivity status and groups.
Click .
Click the tab:
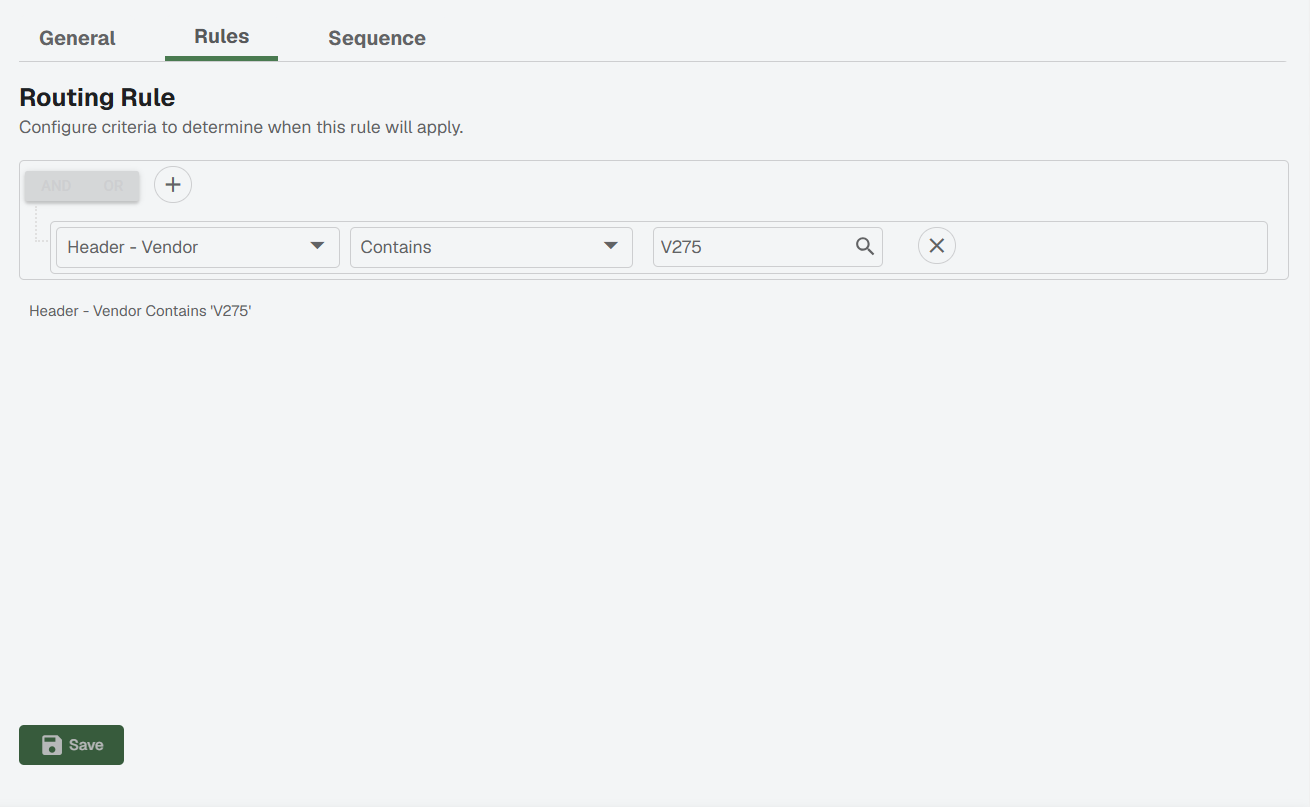
Make necessary updates to the routing rule criteria.
Click .
Click the tab.
Make necessary updates to the routing rule recipients or their sequence.
Note
If appropriate, apply or remove route templates. The same reviewer can display more than once in your route.
Click .