DocRoute™ Route Templates
If you repeatedly route similar documents to the same individuals, creating and using route templates can help get those documents out for review and approval more quickly.
Complete the following steps to create route templates:
From My Paperless, click .
In the DocRoute™ Settings navigation bar, click .
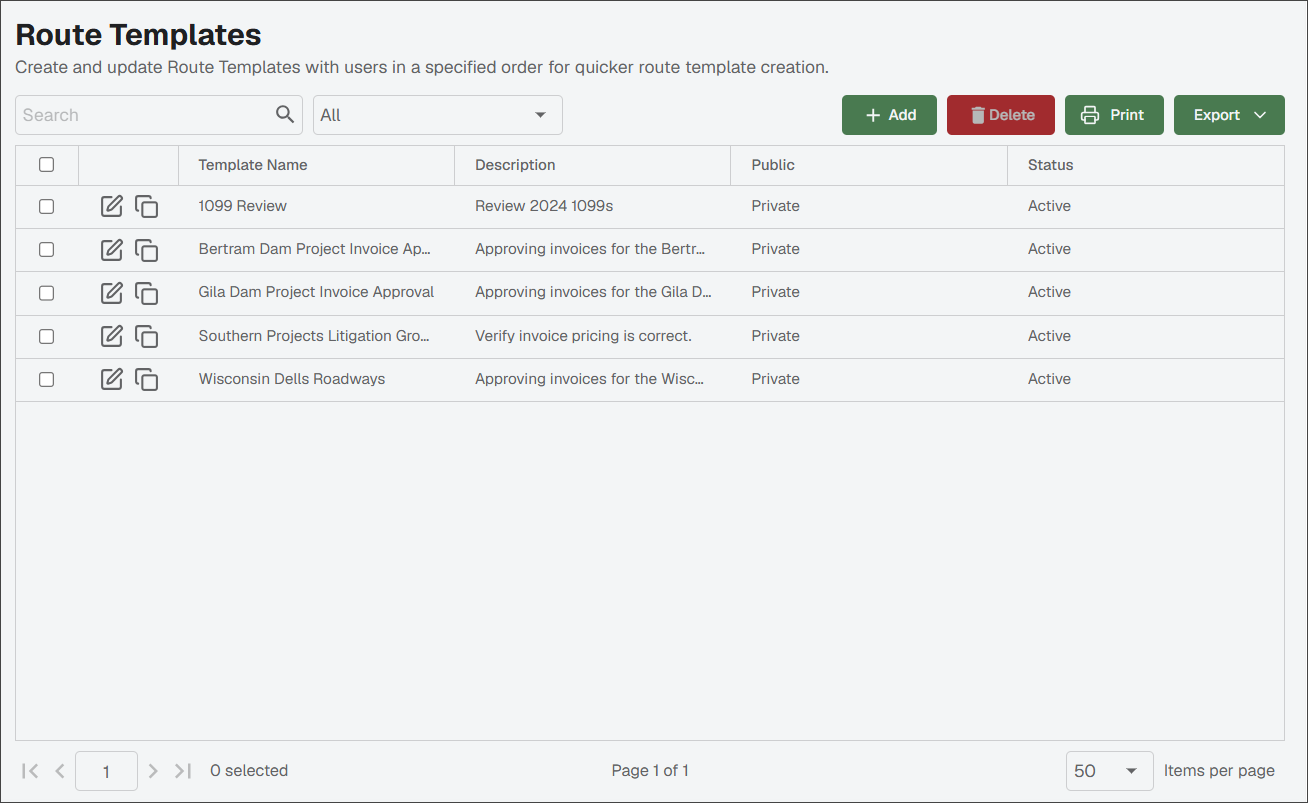
A page similar to the following displays. From this page, you can view, edit, copy, delete and export a list of all existing route templates.
Click .
The Create A New Template page displays:
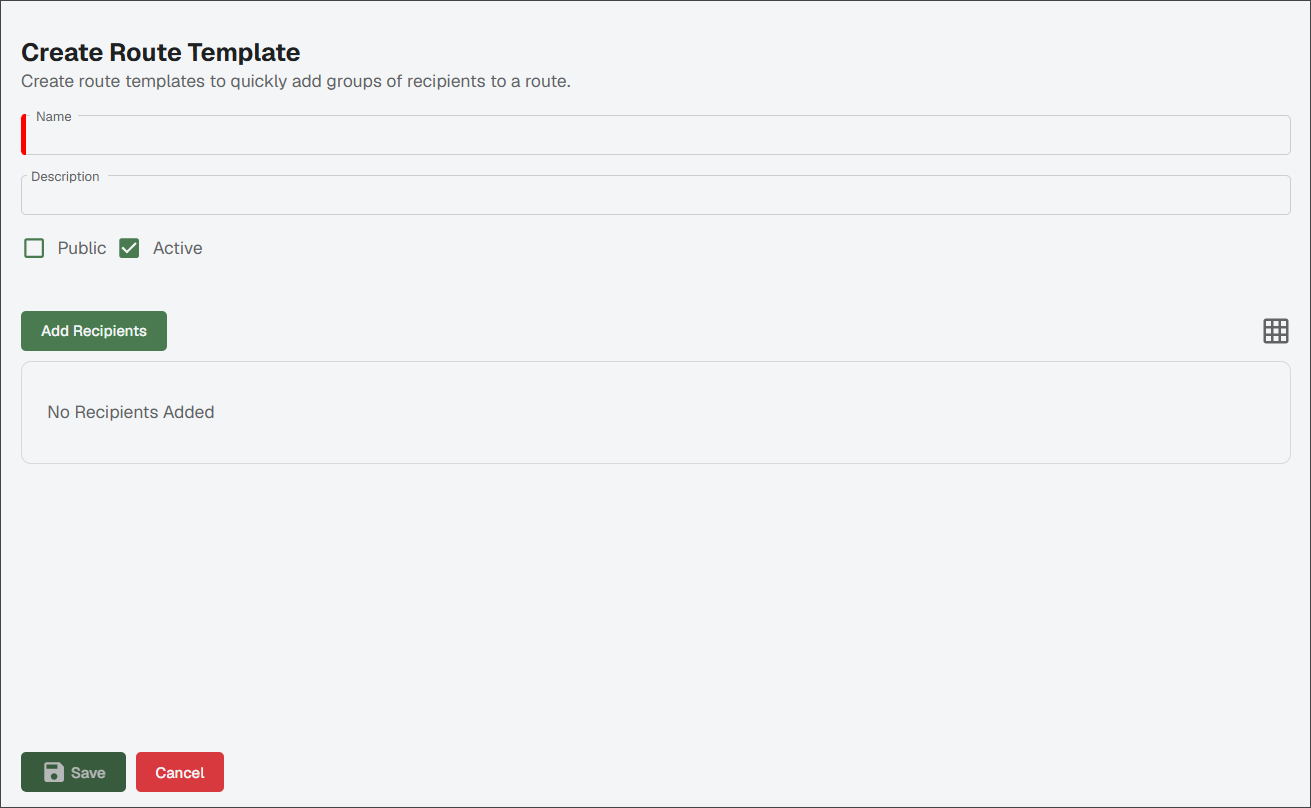
In the Name field, enter a name for the route template.
Note
For example, "Bertram Dam Project Invoice Approval."
In the Description field, enter a description of the template.
Note
For example, "Approving invoices for the Bertram Dam project."
Select the check box if this newly created template should be available for all users in the current vault. If it should only be available to you, leave the check box blank.
The Active check box is selected by default. If the route template is not active for whatever reason, deselect the Active check box.
Click .
In the Add Recipients to Route dialog, select one or more users who should function as reviewers/approvers for the document(s) you are routing with this template.
Note
You can click the Favorites
 icon to identify those individuals to whom you frequently route documents for review.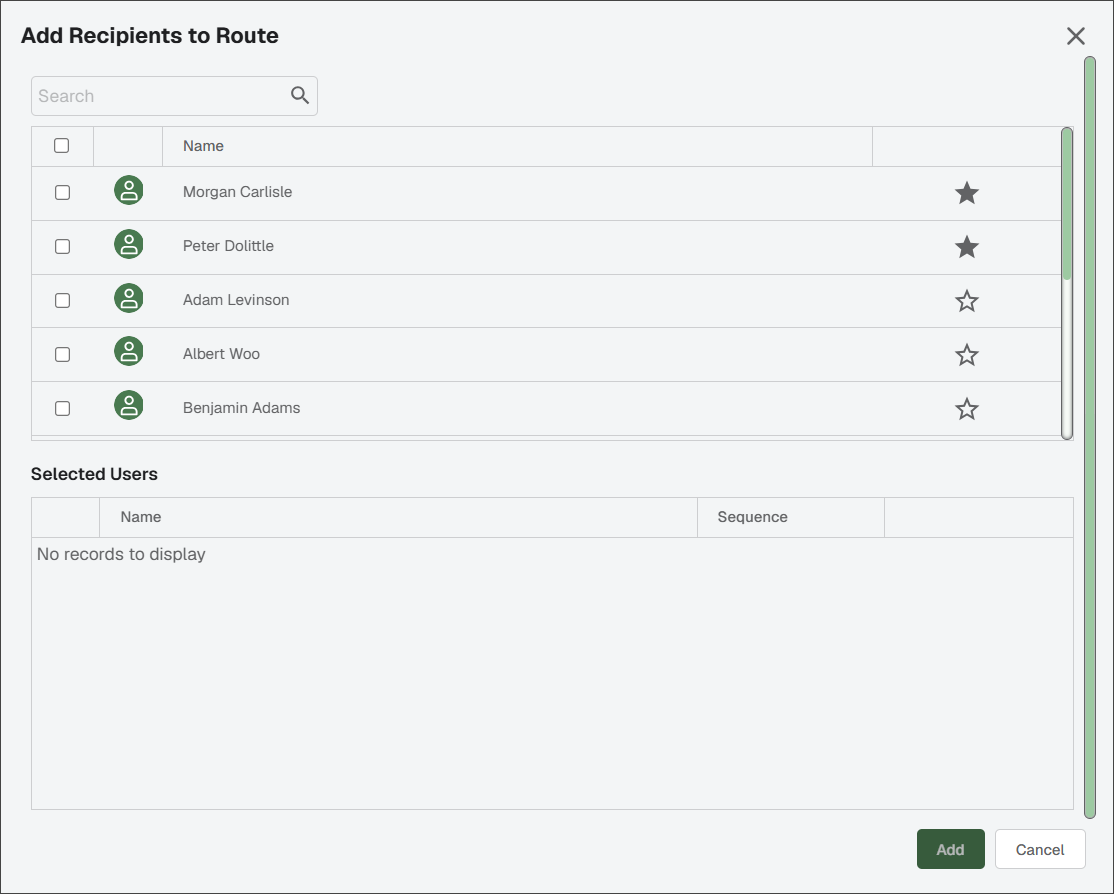
Click .
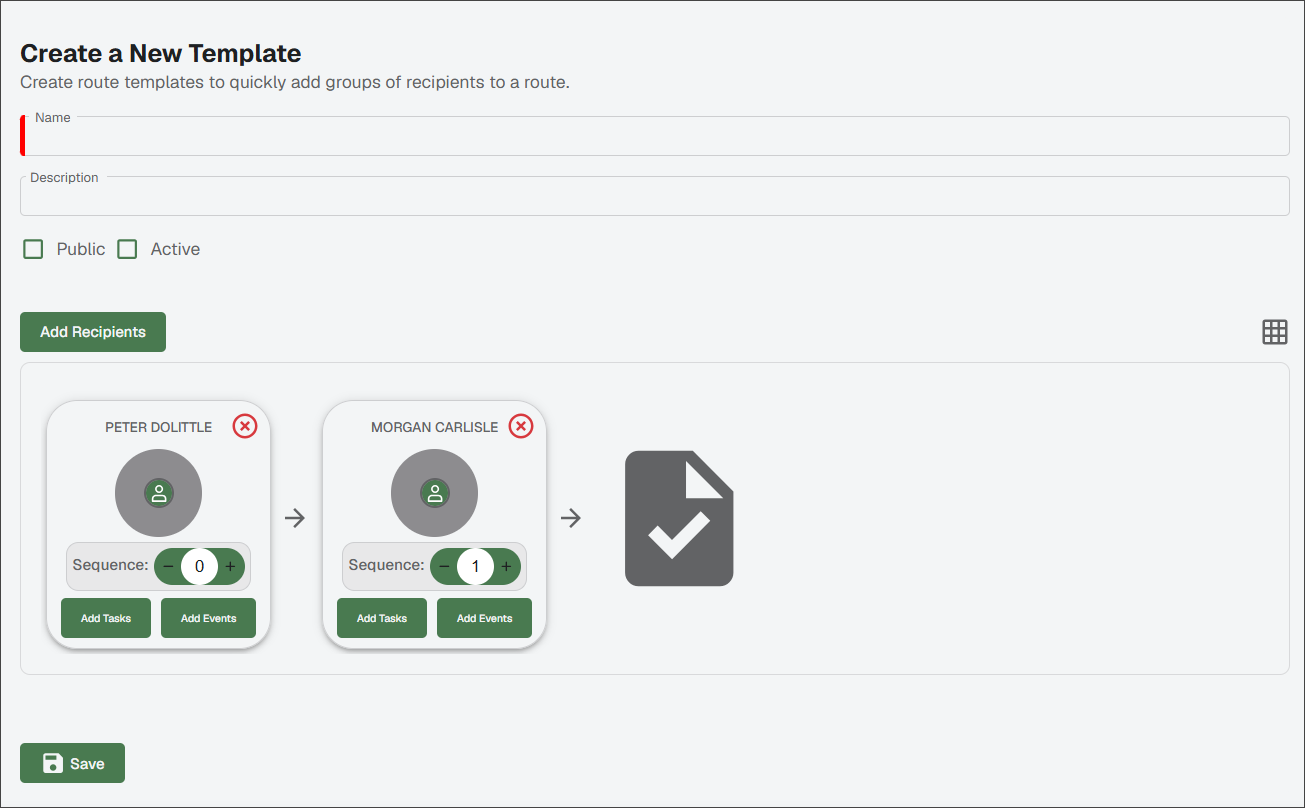
The completed route template displays:
Click .
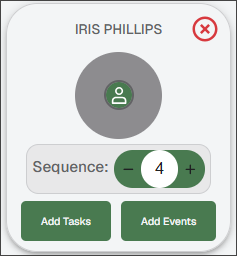
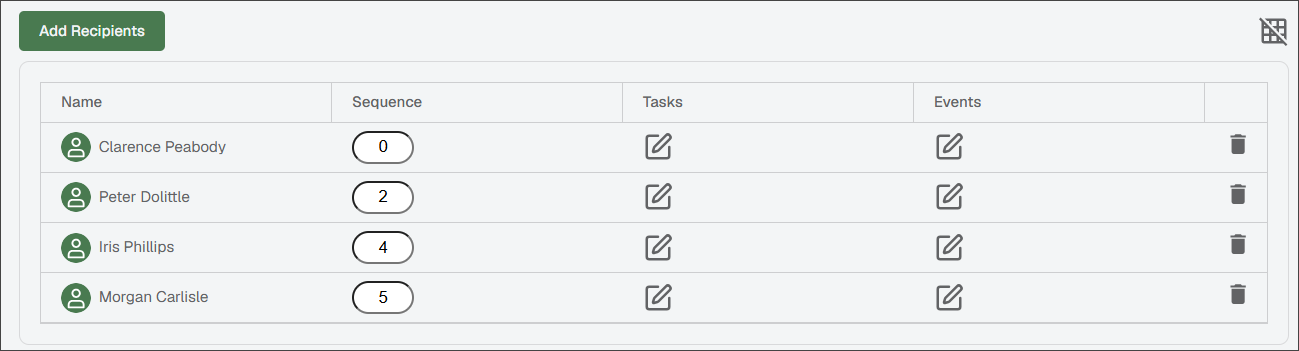
You can set recipients to display in a card view or a grid format. If the recipients have their profile picture set in My Profile, that image displays here as well.
Note
The card format is the default. Each card includes the following information:
 |
To switch between card and grid views, click the Non-Grid  icon to show the card view or click the Grid
  icon to show the recipients in a table format.
 |
To delete an individual from the route template, click the Delete  icon if displaying in the card format. Click the Delete
  icon if displaying in the grid format.
If you have already assigned a sequence number to an individual, that number displays in the Sequence pane. That is the default sequence number. You can manually change the sequence number here. When you do, the recipient systematically moves to its new position in the sequence.
For information on creating a default sequence, see User Roles.
DocRoute routing tasks are created and managed in DocRoute™ Settings > Tasks. Once a task is created, you can add it to a specified recipient's step in the routing flow.
To assign a task to an individual included in a route template, click .
The Add Tasks dialog displays with the user's name:
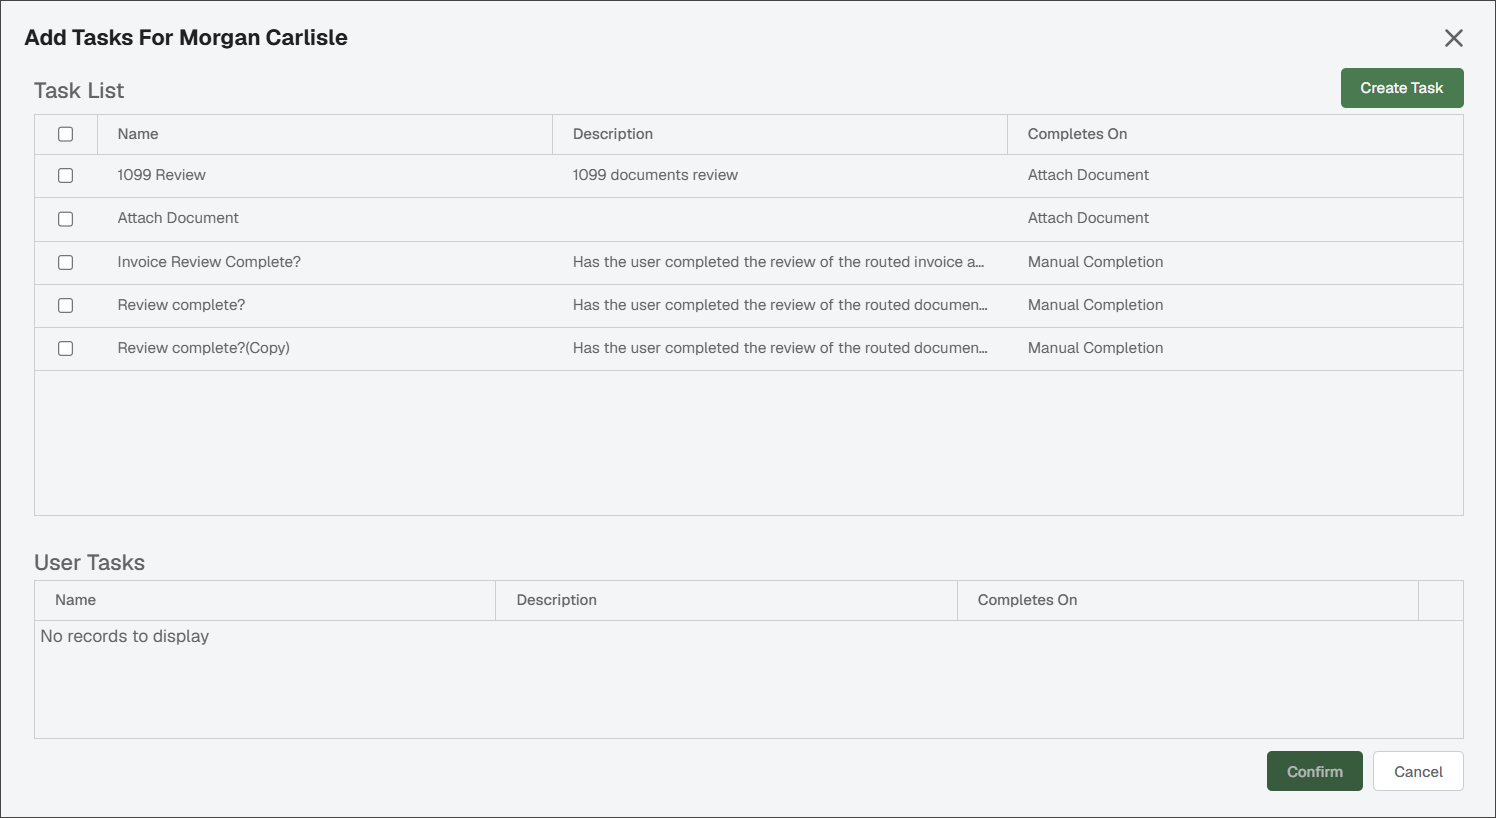
Select the check box for the task you want to assign to the recipient at that point in the route sequence.
Note
You can click in the upper right to add a new task on the fly. The task is added to the routing flow as well as to the main Task page.
Click .
DocRoute routing events are created and managed in DocRoute™ Settings > Events. Once an event is created, you can add it to a specified recipient's step in the routing flow.
To assign an event to an individual included in a route template, click .
The Add Events dialog displays:
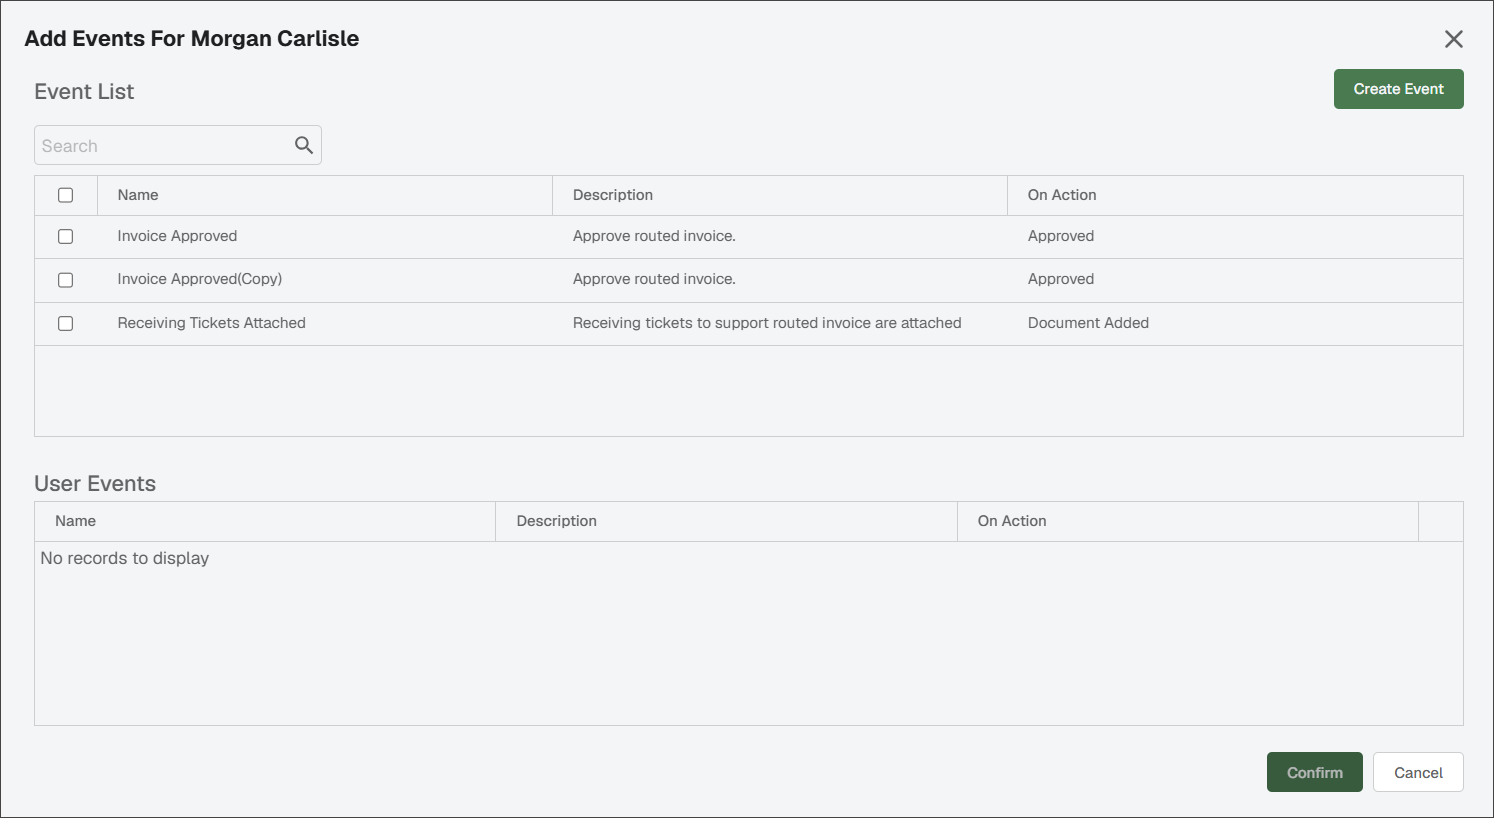
Select the check box for the event you want to assign to the recipient at that point in the route sequence.
Note
You can click in the upper right to add a new event on the fly. The event is added to the routing flow as well as to the main Event page.
Click .