Vendor Insurance
You can use the Insurance page to manage insurance requirements for this vendor. You can also review and update the current list of assigned insurance templates from this page. The available list of templates is set at the company level.
Note
Track Insurance must be enabled at the company and job levels for it to be configurable at the vendor level. Tracking for insurance types is enabled in Vendor Settings.
Complete the following steps:
From My Paperless, click .
In the ClearToPay™ navigation bar, click .
From the Jobs page, do one of the following:
Select a job from the list to access its vendors.
Click on (if enabled) to access those vendors.
Click .
Select the vendor whose insurance policies you want to see.
From the vendor's dashboard, click .

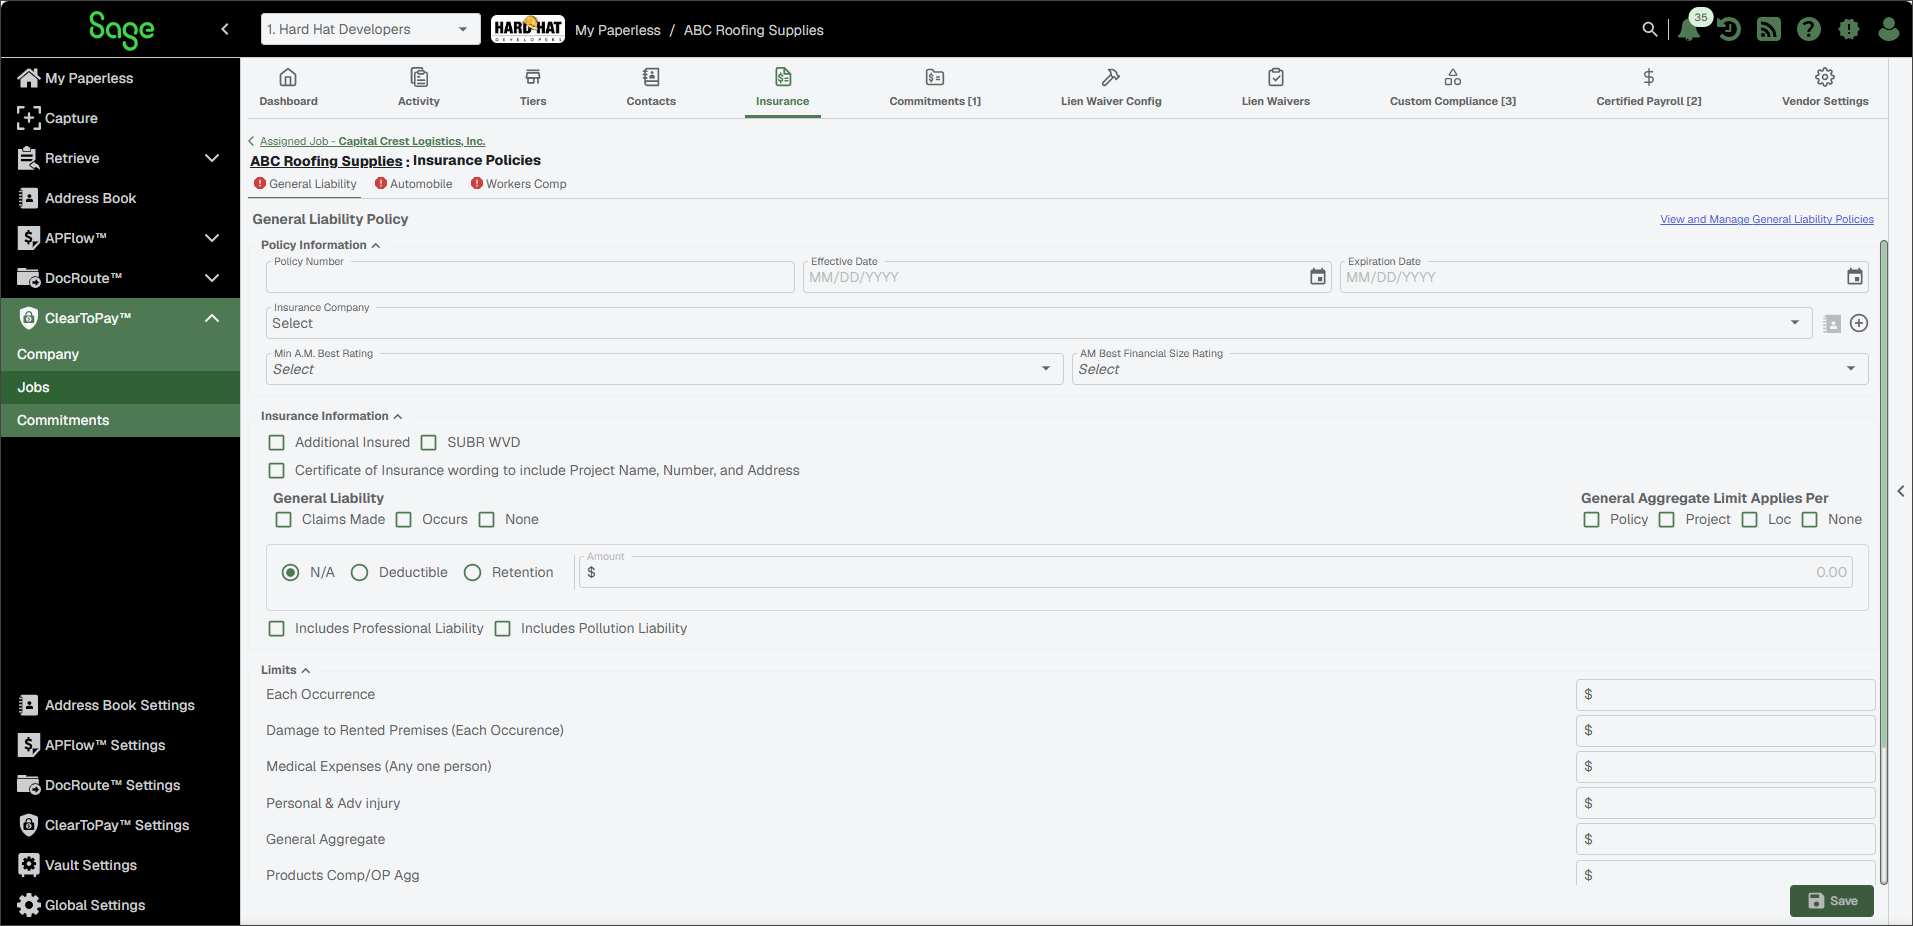
The Insurance Policies page opens and displays a series of tabs for each of the vendor's insurance policies. Red or green icons indicate whether or not each policy is in compliance.
Note
The tabs that display on the Insurance Policies page as well as the insurance template selected for this vendor are determined on the Vendor Settings page. The insurance template applied to the vendor from the job level impacts certain coverage levels and fields, including whether or not the template should be used for all operations jobs, allows overrides or is the default template for a job. See Job Insurance Templates for more information.
Complete the policy entry or updates for the following policies, as necessary. See Standard Policy Entry for more information.
Note
For the current insurance policy, the expiration date displays in the header. Otherwise, it may display Incomplete Policy, Expired Policy or Future Policy.
General Liability
Automobile
Umbrella
Workers Comp
Professional Liability
Pollution Liability
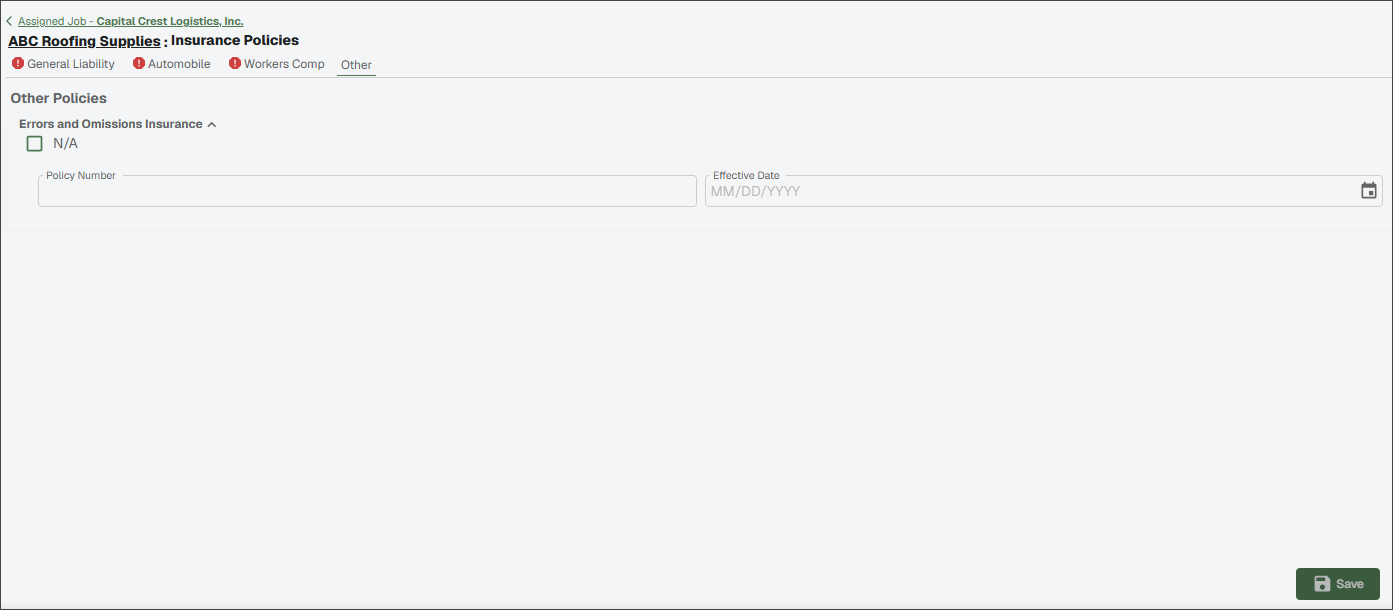
Other
(If applicable) Complete policy entry or updates for the policy types not listed above on the Other tab. See Other Policy Entry for more information.
Out of the box, ClearToPay™ provides tracking for General Liability, Automobile, Umbrella, Workers Comp, Professional Liability and Pollution Control insurance types. While some of the information on each of these tabs is populated from the selected insurance template at the job level, some of the insurance data must be entered manually.
ClearToPay is then able to track the vendor's actual policy values against the template's requirements to determine if the vendor is in compliance.
Policy Information
Enter policy information (such as the policy number, effective date and expiration date) from the provided documentation. You can choose one of the companies from the Insurance Company dropdown, or click:
Address Book
 to populate options from the address book.
Add Insurance Company
 to manually enter insurance company information.
Use the insurance rating fields to track a vendor's insurance ratings to make sure they are insured by a reputable company. The system allows you to define which rating service your company uses in (e.g., A.M. Best, Moody's, etc.) and reflects that choice on the labels.
Insurance Information
Select the applicable check boxes and enter the policy's coverage details into the Insurance Information section based on the provided documentation. This information can include, but is not limited to:
Additional insured
SUB WVD
Coverage selections regarding claims and deductibles
Aggregate values and limits
Limits
Enter the limit values (by cost) for each of the options based on the provided documentation.
Endorsements
Use the Endorsements section to track legally binding changes to a policy. A master list is defined at the company level, and specific requirements are set within job insurance templates. Verify the wording of endorsement clauses and note that they have been read and verified in ClearToPay. If applicable, select the following check boxes:
Included: Indicates that the specific endorsement clause has been located/verified within the vendor's provided insurance documentation.
COI Desc: Confirms that the Certificate of Insurance (COI) description for the endorsement has been read and verified in the system.
Approved: Indicates that the policy changes or specific endorsement details for the vendor have been reviewed and approved.
Waivers
If the insurance template applied to the vendor at the job level allows overrides, users with Compliance Manager permissions have the ability to waive specific requirements. See Waive Vendor Insurance for more information. If overrides are not allowed, this option does not display on the Insurance Policies page.
View and Manage Insurance Policies
ClearToPay provides the ability to enter new insurance information before the current insurance policy expires, preventing lapses in coverage that result in non-compliance. For more information, see Manage Vendor Insurance Policies.
If your company tracks supplemental insurance types beyond the standard, they display for data entry on the Other tab.
Note
They must be enabled in vendor settings and included in the vendor's assigned template.
The list of available options for Other insurance and their tracked options are configured in . Enter the information needed and click . This varies from company to company.
If the insurance template applied to the vendor allows overrides (enabled at the company level), users with compliance manager permissions have the ability to waive specific requirements and a Waive button displays within the Waivers section at the bottom of the insurance policy tab.
Note
Insurance information must be entered and the policy saved for the Waivers section to display.
Users may want to waive insurance requirements if the vendor's coverage is considered "close enough" or if specific coverage requirements included in the template are not relevant for the type of work the vendor is performing. Waiving requirements prevents the subcontractor from being marked non-compliant because of the accepted exception.
From the vendor Insurance Policies page, scroll to the Waivers section.
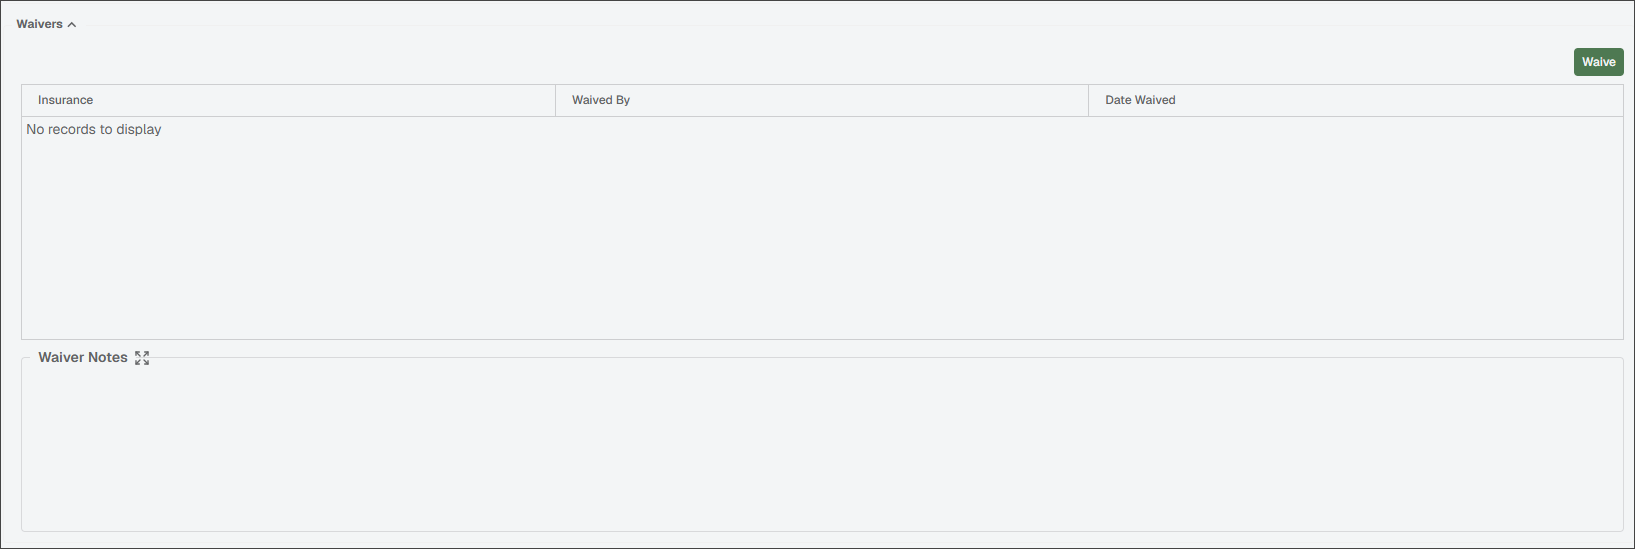
Click .
Either select individual check boxes for specific insurance policy requirements, or select the highlighted box to select all check boxes and waive all coverage requirements.
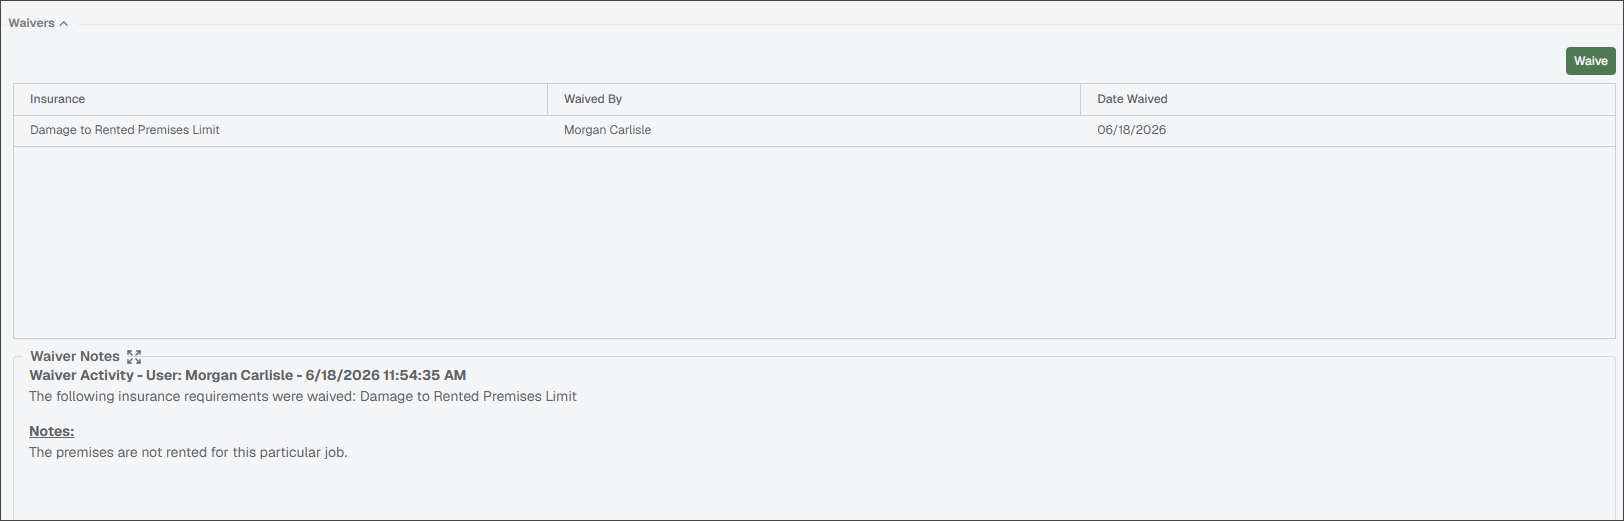
In the Notes field, enter a description that includes the reasoning behind the waiver.
Click .
Note
The waiver(s) display along with the notes, and the system logs the user who waived the policy requirement along with the time stamp and date.
ClearToPay™ provides the ability to enter new insurance information before the current insurance policy expires, preventing lapses in coverage that result in non-compliance. When no longer current, old policies remain in the list for historical purposes
From the Insurance Policies page, click the link.
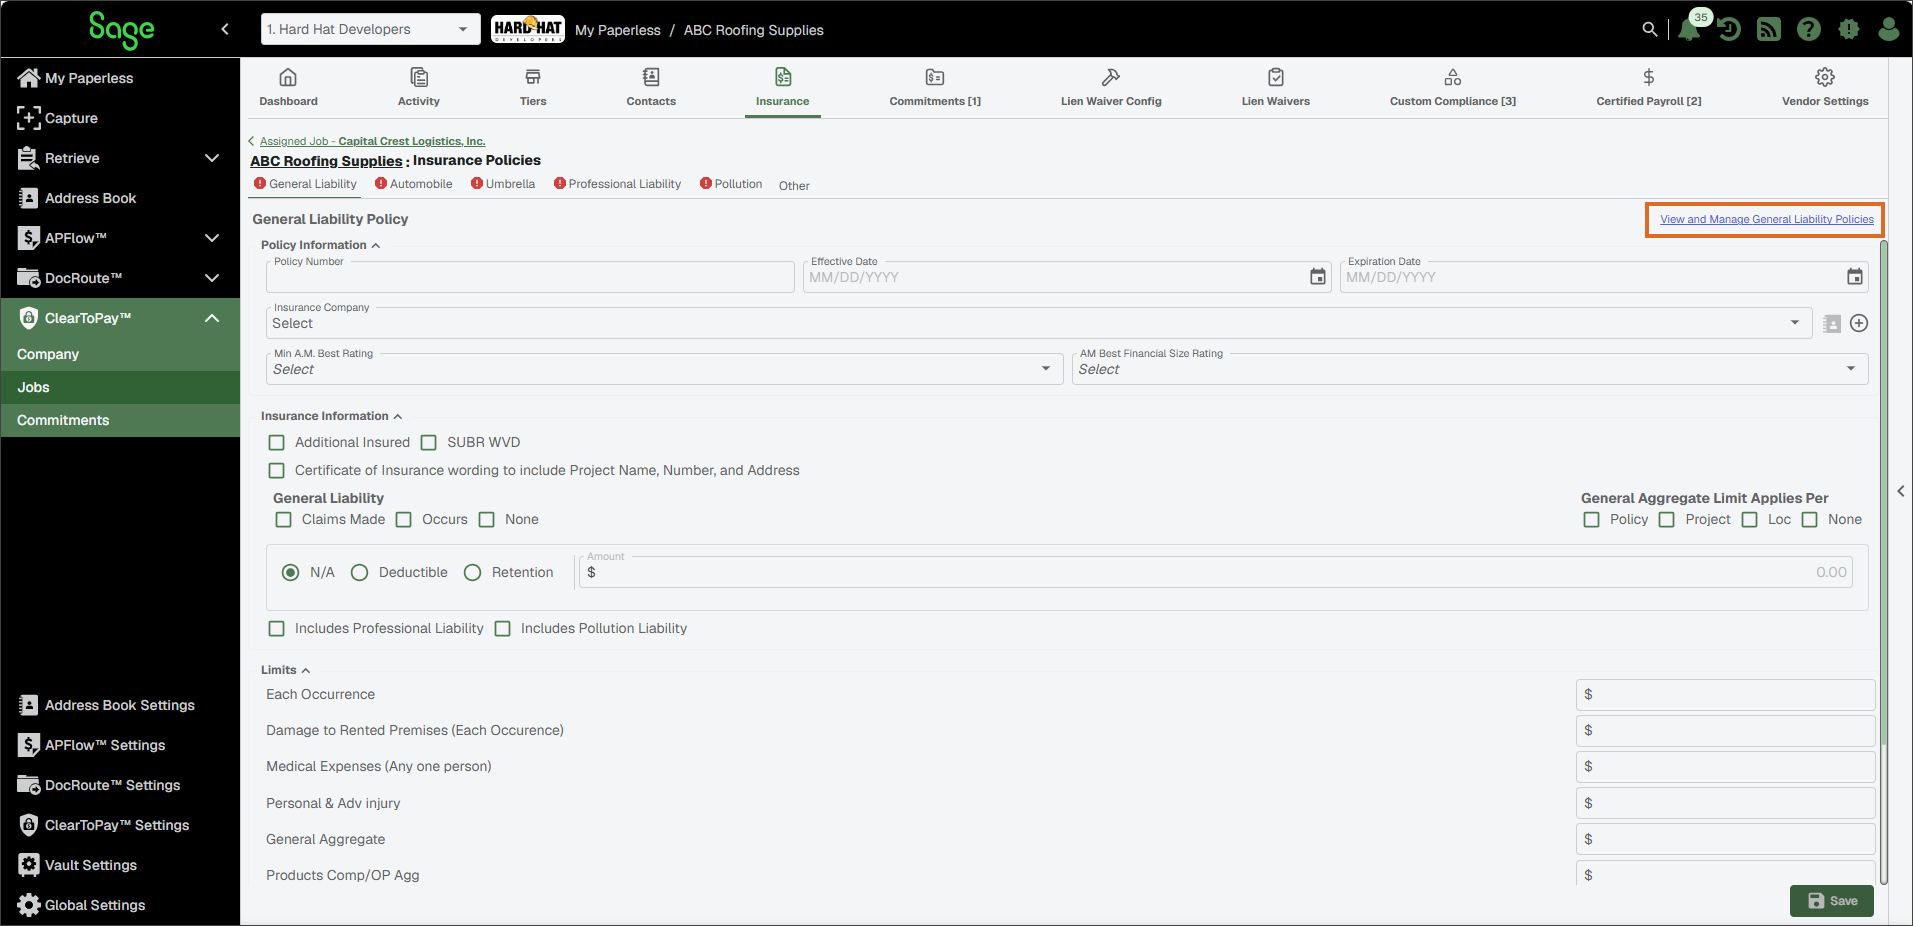
In the Change Selected Insurance Policy dialog, you can review current, future and past policies (if they exist in the system). To view policy details, select the check box for that policy and click .
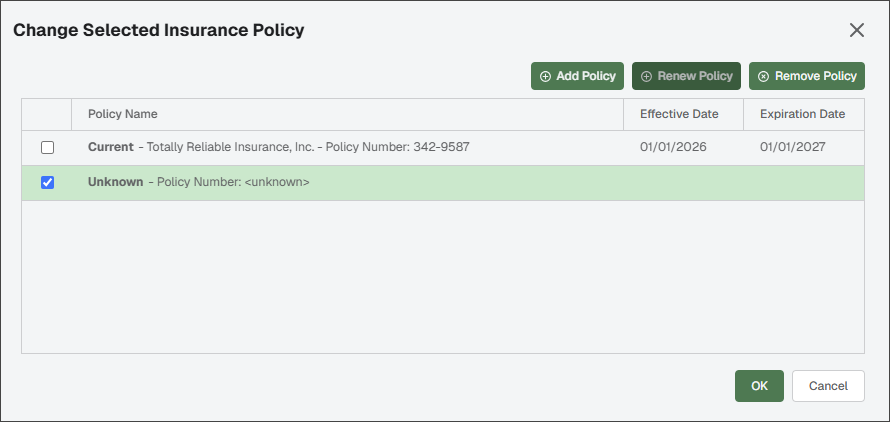
The policy's information is loaded into the Insurance Policies page.
From the Change Selected Insurance Policy dialog, you can also do one or more of the following:

Click to add a completely new policy (in the event that the vendor changed insurance providers or deleted all insurance policies) and the form on the Insurance Policies page must be completed in its entirety.

Click to enter the effective and expiration dates for an upcoming insurance policy. Select this option if you are not changing insurance providers or, if you are changing providers, all insurance and coverage levels are the same as your previous policy. All waivers are cleared and only the top section of the form on the Insurance Policies page needs to be completed in this case.

Click to remove a policy from the list.
Important
It is possible to delete the current insurance policy which can result in non-compliance.