Sage Paperless Construction Help

Page Layout

Note

If no invoices for the Reviewer exist for a particular status, the entire Approve Invoices page is blank. The Status field that typically displays does not display.
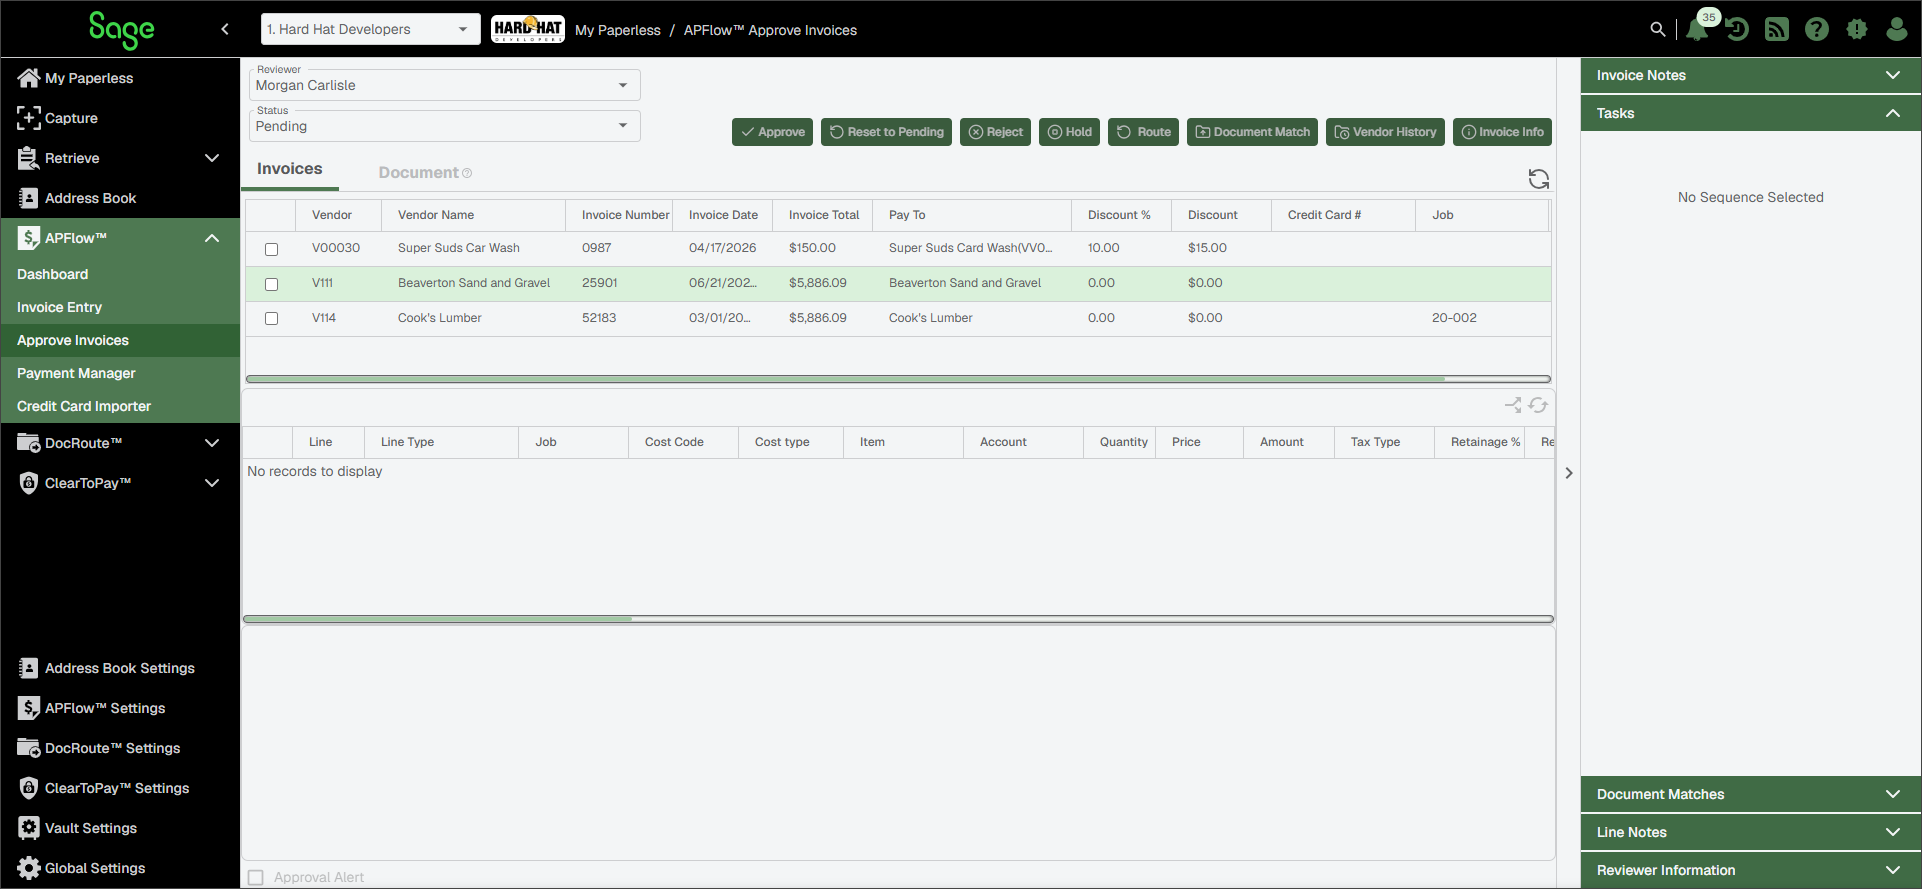
SageAPFlowApproveInvoicesmainpageblank-mh.PNG
ApproveInvoicesReviewerfield-mh.PNG

This field identifies the reviewer of the active invoice.

Note

This list includes all proxy users. See Add Proxy Users for APFlow™ for more information.

ApproveInvoicesStatusfield-mh.PNG

This field identifies the status of the active invoice. Pending is the default.

  • All Non-Exported: Displays invoices in all statuses that are still in the routing system, and not yet exported to the accounting system. These are invoices that are assigned directly or by proxy to this Reviewer.

  • Approved: Displays all invoices approved by this Reviewer. This includes those invoices approved on behalf of others through proxy.

  • Approval Alert: Displays all invoices requiring special attention. These are invoices that are assigned directly or by proxy to this Reviewer.

  • Non-Exported - Hold: Displays all invoices placed on hold that are still in the routing system and not yet exported to the accounting system. These are invoices that are assigned directly or by proxy to this Reviewer.

  • Pending: Displays all invoices in a Pending status. These are invoices that are assigned directly or by proxy to this Reviewer.

  • Rejected: Displays all rejected invoices that are assigned directly or by proxy to this Reviewer.

  • Reapprove: Displays all invoices with a coding change after this Reviewer approved this invoice. Occurs when a second Reviewer makes a coding change, requiring this Reviewer to re-review and reapprove the invoice.

  • (Bridge Setting): For some accounting systems, there are bridge settings that allow invoices to be grouped together by the following:

    • Job (Enable Approve Invoices Job Filters)

    • Work Order (Enable Approve Invoices Work Order Filters)

    • Property (Enable Approve Invoices Property Code Filters)

ApproveAPFlowButton.png
  1. Click Approve to approve the current invoice.

    Note

    When you do so, validation rules run against the current invoice to ensure that all required coding is filled in and valid. If there is missing or incorrect coding, a Validation Info dialog displays identifying the error.

  2. If you encounter validation errors, update the invoice coding as needed.

  3. Click Approve again.

    An invoice note is systematically created with the time stamp and invoice lines approved by the Reviewer.

    The invoice then moves to the Reviewer's Approved folder and remains there until it is exported by a Processor.

ResetToPending_icon.png

By clicking Reset to Pending, a Reviewer can cancel the "approval" of an invoice currently in the Approved folder and move it back to the Pending folder.

  1. In the Approved list, click to highlight an invoice that needs to be moved back to a Pending status.

    A Reset to Pending Reason note text box may display, prompting you to add an explanation for returning the invoice to Pending. If this dialog does not display, it may be because a bridge setting, Require Invoice Reset to Pending Notes, is not selected in Universal Bridge Settings.

  2. Type a reason for resetting the approved invoice back to a Pending status.

  3. Click Save.

    The invoice moves out of the Approved folder and redisplays in the Pending folder.

Reject_icon.png
  1. Click Reject to return the invoice back to the Processor assigned to the invoice.

  2. In the Pending list, click to highlight an invoice that needs to be rejected and returned to the Processor.

    A Reject Note note text box may display, prompting you to add an explanation for returning the invoice to the Processor. If this dialog does not display, it may be because a bridge setting, Require Invoice Reject Notes, is not selected in Universal Bridge Settings.

  3. Provide information to help the Processor take the appropriate action with the invoice.

Hold_icon.png
  1. Click Hold to retain the invoice in the Pending folder, but with a Hold status.

  2. In the Pending list, click to highlight an invoice that should be placed on hold.

    A Hold Note text box may display, prompting you to add an explanation for placing the invoice on Hold. If this dialog does not display, it may be because a bridge setting, Require Invoice On Hold Notes, is not selected in Universal Bridge Settings.

  3. Provide information to help the Processor take the appropriate action with the invoice.

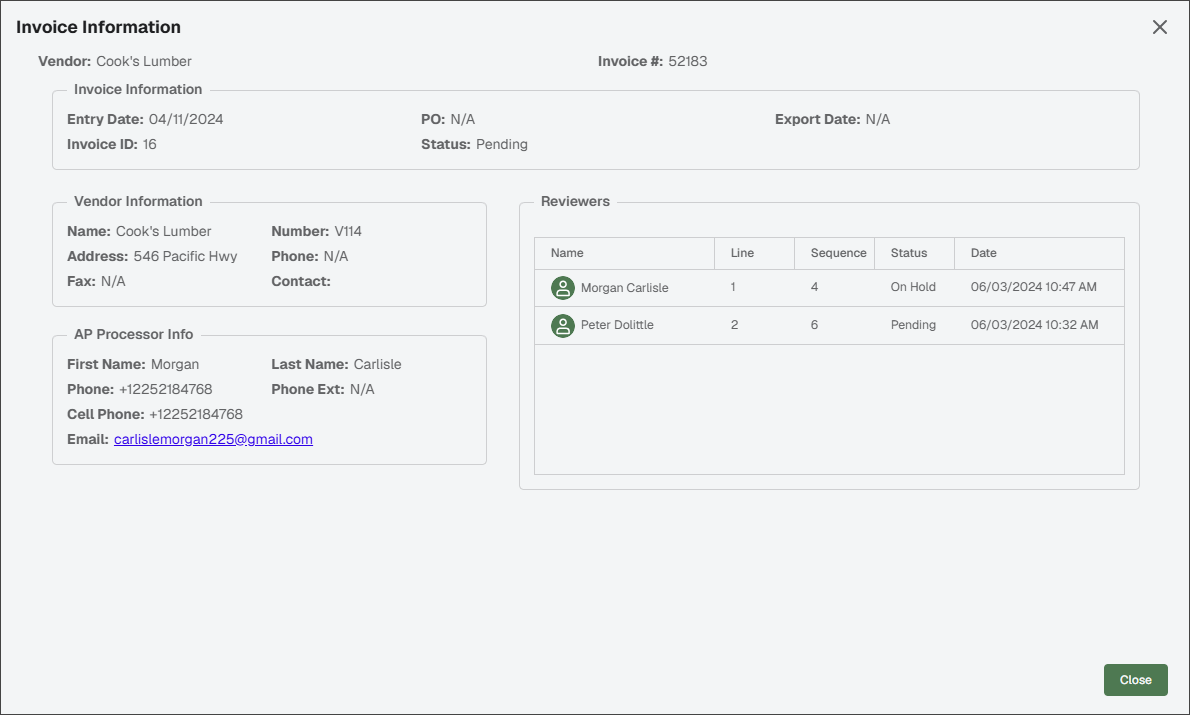
    Once you click Hold, the line number and associated reviewer in the Invoice Information dialog displays as On Hold in the Status column.

    The Reviewer Hold column in the top grid systematically updates and displays Yes or No, based on the hold status of the invoices.

    Important

    If you have placed an invoice on hold, the button label now reads: Remove Hold

RouteAPFlowButton.png

You can only route to a single person from the Approve Invoices page.

If you are a route recipient who determines a different individual should review what was sent to you, complete the following steps:

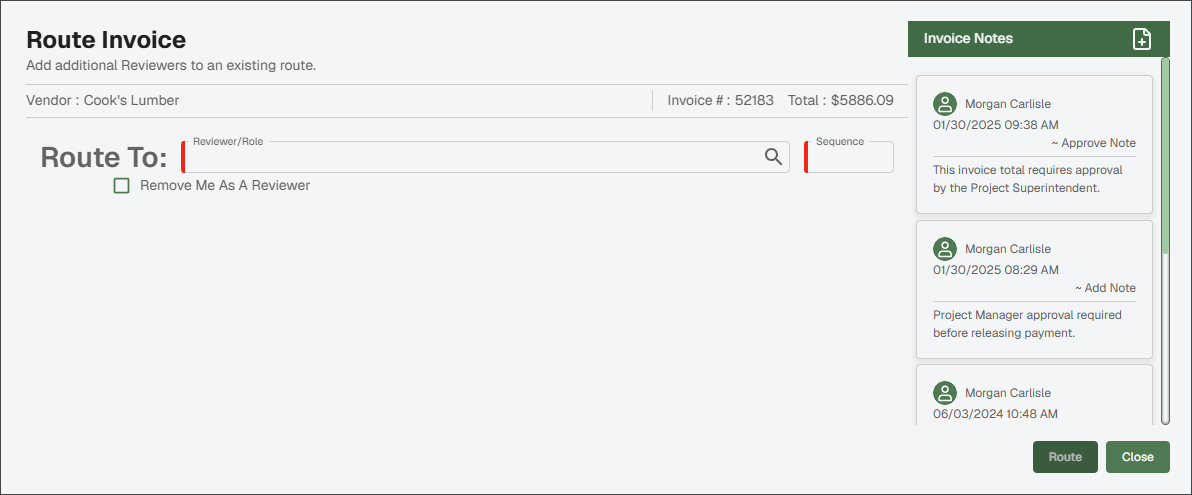
  1. Click Route to access a Route Invoice dialog:

    RouteInvoicedialog-mh.png

    The Vendor, Invoice # and Total fields are systematically populated.

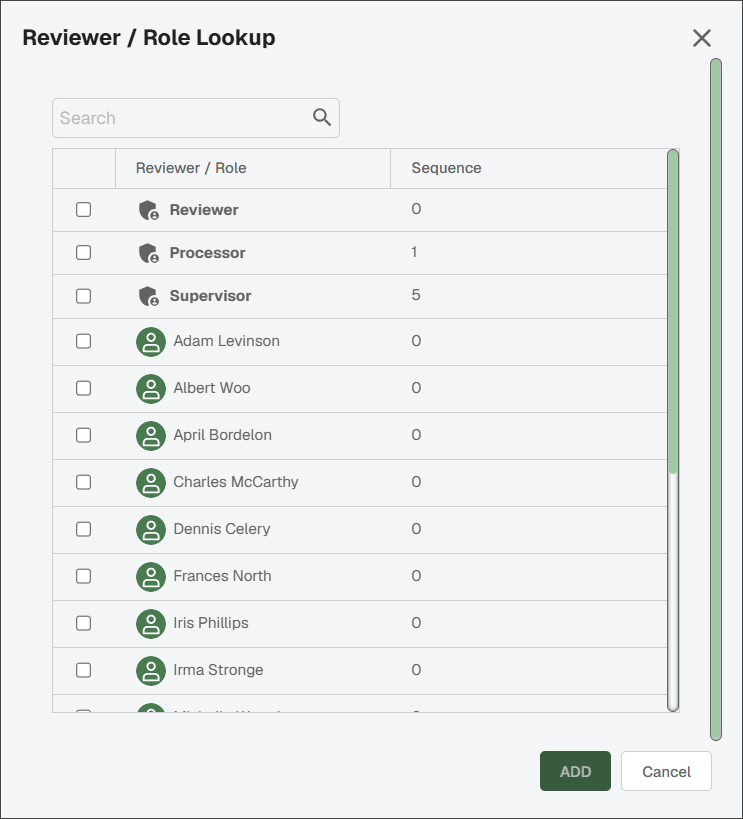
  2. Click the Route To field lookup search_icon.png icon to access the Reviewer / Role Lookup dialog similar to the following:

    SageReviewerRoleLookupdialog-mh.PNG
  3. Select the Reviewer. Click the check box adjacent to the name of the individual to whom the route should go.

  4. Click Add.

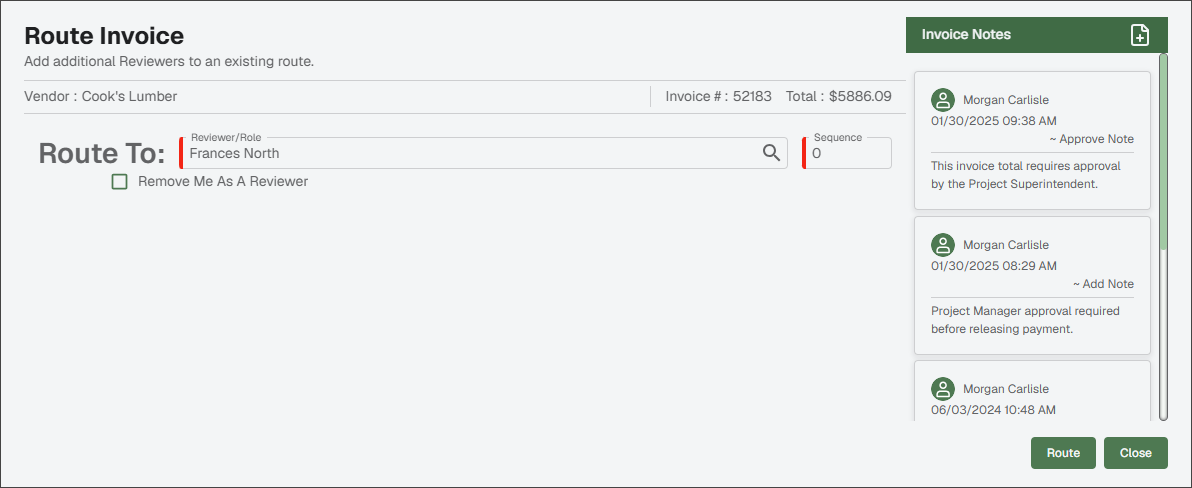
    The populated Route Invoice dialog displays:

    RouteInvoicedialogpopulated-mh.png
  5. Update the Sequence field number, if appropriate.

  6. If you click the Remove Me as A Reviewer check box, you are not only transferring your Reviewer responsibilities for the document(s) to be reviewed but also any associated Tasks and Events.

    If you leave the Remove Me as A Reviewer check box blank, you retain the responsibility to review the document(s) as well as to complete any associated Tasks and Events. The Reviewer to whom you route the document is only responsible for reviewing it—not for your associated Tasks and Events.

  7. In the Invoice Notes pane, click the Add Note note_add_filled_icon.png icon to add an invoice note in the dialog.

  8. Click Route.

DocumentMatchAPFlowButton.png
  1. Click this button to open the Match Documents page.

  2. View the invoice and any supporting documentation that the Processor attached to the invoice.

    Note

    For more information about Document Matching, see Match Documents in APFlow™.

VendorHistoryAPFlowButton.png

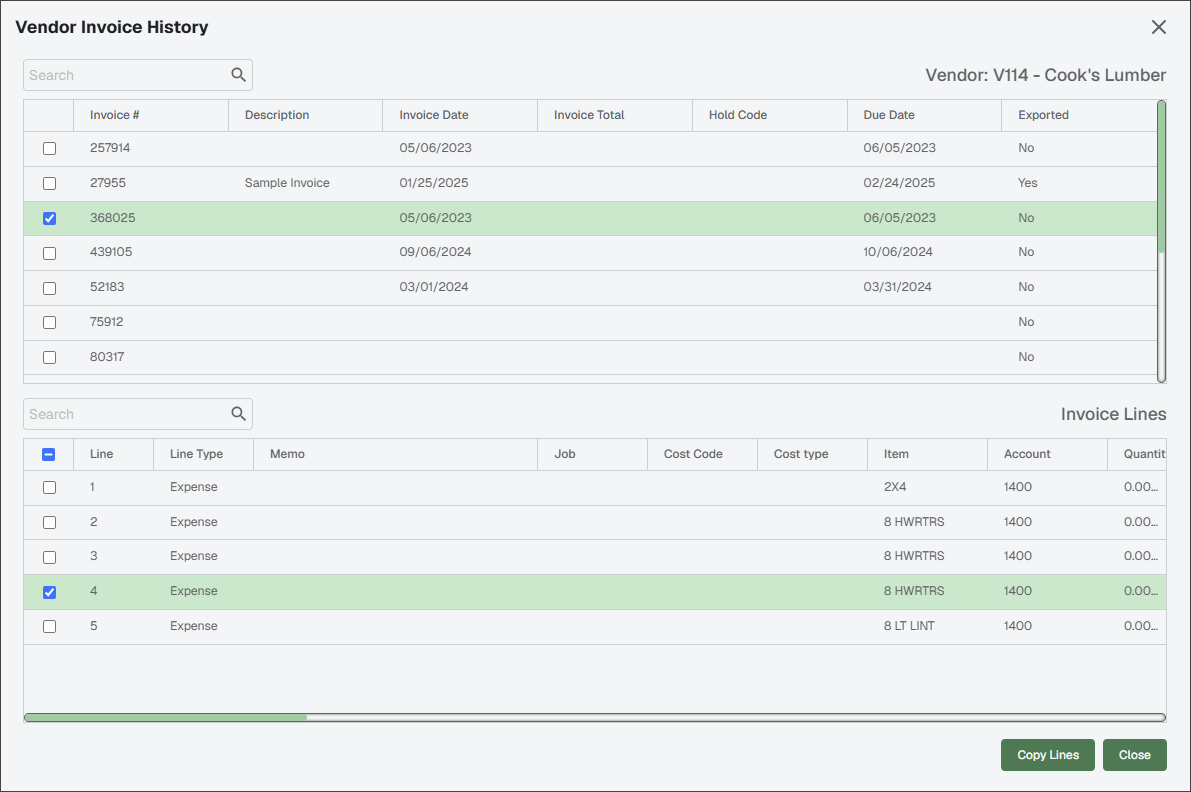
Click this button to open the Vendor Invoice History dialog. Past invoices for the vendor display.

SageInvoiceEntryVendorHistorydialog-mh.PNG

There is a Search field where you can start to enter an invoice number to narrow the list.

Not only can you filter on the Invoice # column entries, but you can also filter on the Description column entries.

InvoiceInfoAPFlowButton.png

Click this button to display additional information about the invoice and the vendor.

An Invoice Information dialog similar to the following displays:

SageInvoiceInformationLocatingInvoiceID-mh.PNG

Note

If, while in Approve Invoices, you click Hold for a specific line, the Status column identifies the associated reviewer and reflect that the line is On Hold.

Invoices tab

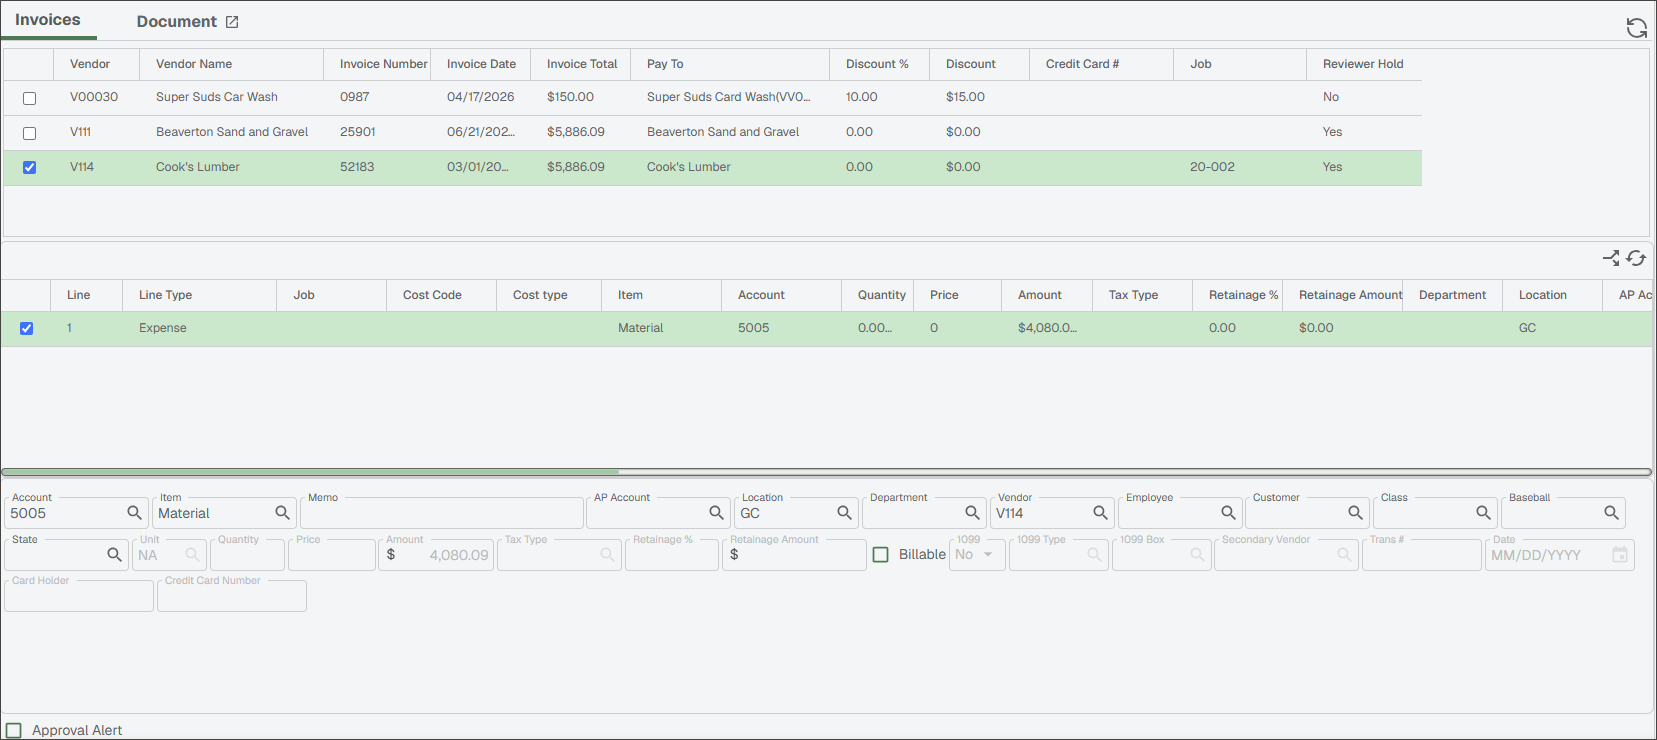
In this view, the approved invoice displays with the line detail visible.

SageApproveInvoicesInvoicetabdisplay-mh.PNG

Document tab

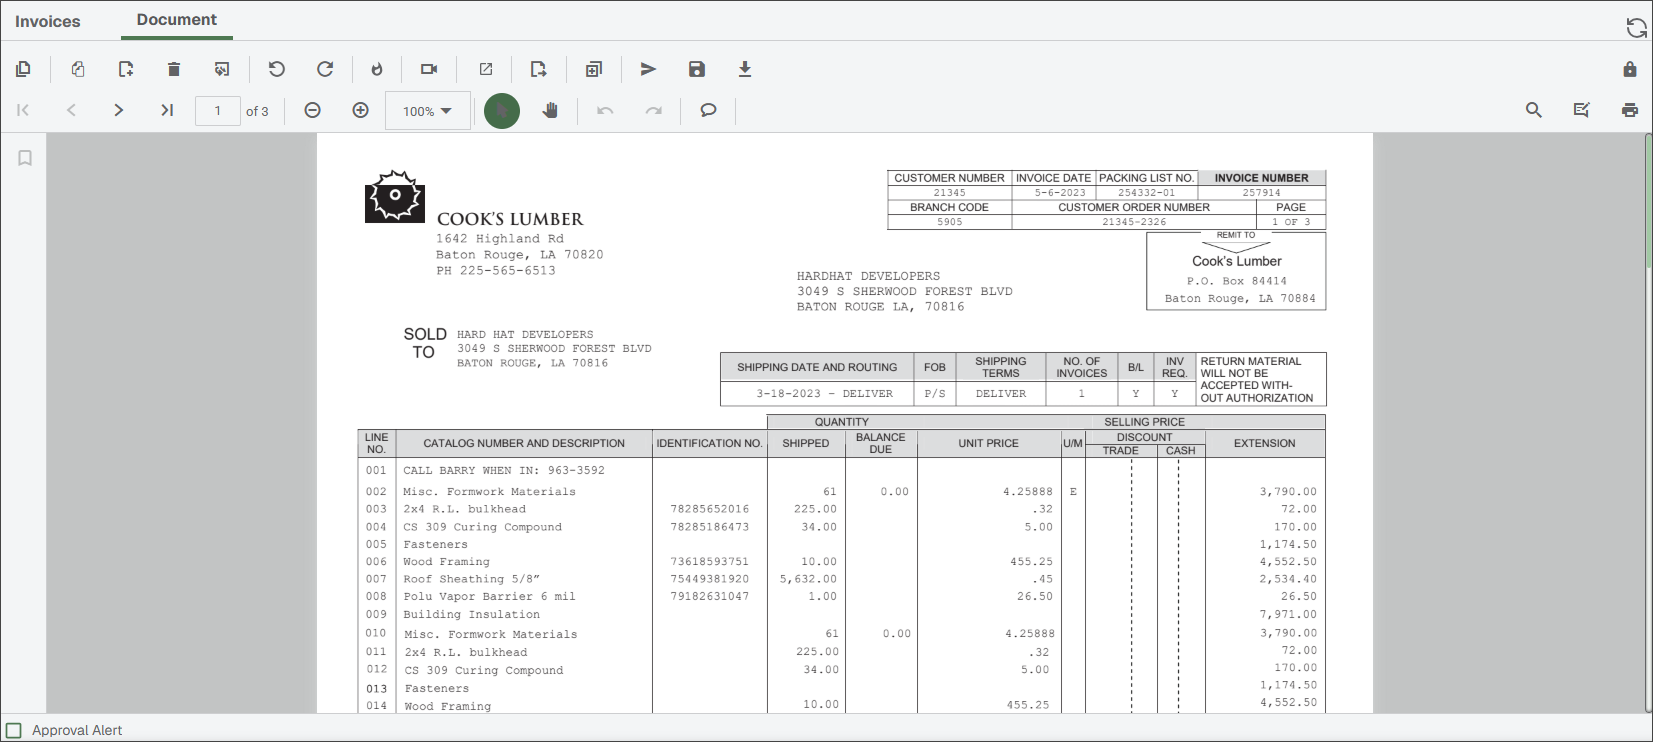
Click this tab to open an image of the invoice document.

On the Document tab, click the open_in_new_icon.svg to open a new Viewer window displaying an image associated with the active invoice. You can then manually move that Viewer window to a different monitor. This way you can view the invoice and the associated document simultaneously. With the Viewer window active, as you move from invoice to invoice, the image in the Viewer window automatically refreshes to display the associated image.

SageAPFlowApproveInvoicesPopOutDocumentViewerwindow-mh.PNG

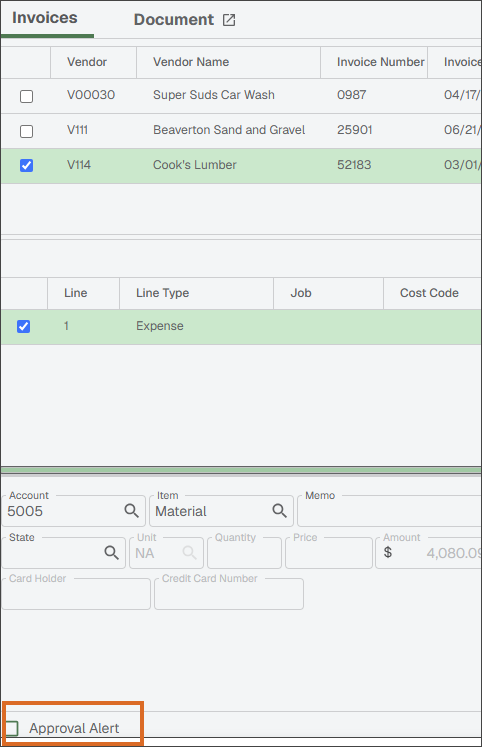
Approval Alert check box

Invoices marked with this flag displays differently in Approve Invoices and the APFlow™ sidebar.

APFlowApproveInvoicesApprovalAlertCheckBoxSage.png

Note

An Approval Alert Note dialog may display, where you can enter an explanation for the approval alert in the text box. If this dialog does not display, it may be because a bridge setting Require Invoice Approval Alert Notes is not selected. For more information, see Universal Bridge Settings.

Approve Invoices Middle Grid (Invoice Coding)

The invoice lines that display in this middle pane are based on the GL codes or job codes that the Processor entered for the highlighted invoice.

An invoice must have at least one coding line. As a coding line is highlighted, the coding fields display in the bottom invoice line coding pane.

Note

Invoice lines displaying in the middle pane are read-only.

Approve Invoices Bottom Grid (Invoice Line Coding)

The information that displays in the bottom pane is based on the highlighted invoice in the top pane and the invoice coding line highlighted in the middle pane.

This is where the details of each line display and where the coding is checked.

For fields with lookup search_icon.png icons that are not read-only, you can click on the icon to access the associated lookup list to either modify the field or populate it.

The fields that display depend on the line type entered by the Processor.

Note

Every accounting system has some fields unique to their system.

Some fields displaying in the bottom pane are editable.

Change Line Type

If you have a line type that needs to be changed, you can change any existing line type in the middle (line) pane as long as your accounting system supports that line type.

  1. Click to select the check box at the beginning of the line type you want to change.

  2. Click the Change line Type sync_icon.svg icon to bring up the available line types.

    A dropdown with the available line types displays
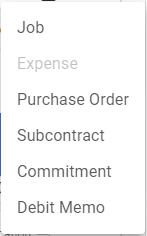
    SageNewlineChangelinetypedropdown-mh.PNG

    Note

    The dropdown identifies the current line type for the existing line by displaying it as inactive.

    In this example, Expense is the current line type.

  3. Pick from the dropdown.

    The bottom (details) pane fields update to support the new line type.