Drag and Drop Electronic Files
You can drag and drop electronic files (i.e. Tiff images, Excel spreadsheets, Word documents and PDFs) into Sage Paperless Construction. This includes the ability to "drag and drop" URLs.
When dragging a file into Sage Paperless Construction, the following Capture Documents page displays:
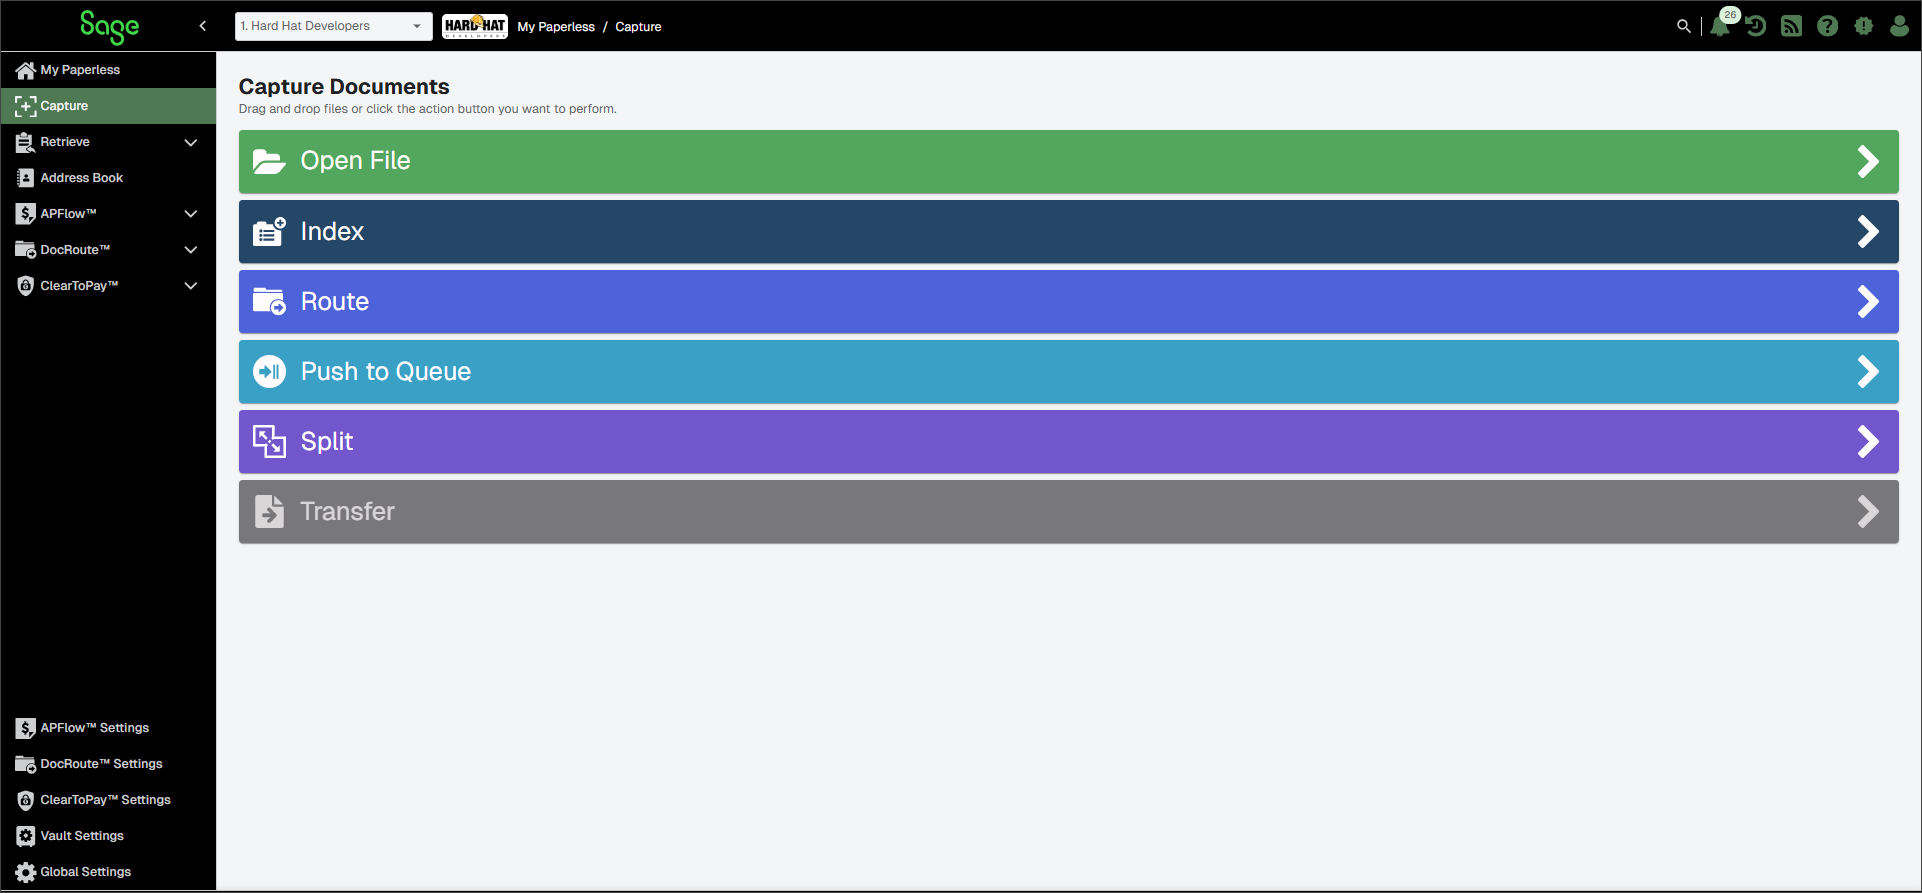
To choose an option, use your mouse to move "drag" the file or URL in to one of the areas defined below and release the mouse button to "drop" the file.
Note
If the document image being dragged and dropped into Sage Paperless Construction is not supported by the viewer, a Document type is not Supported message displays. This message indicates that the selected file cannot be viewed through the Sage Paperless Construction application. The file can be viewed through its normal viewing application by double clicking the hyperlink and viewing the file in its native program. The file can still be indexed in Sage Paperless Construction by selecting . Later, when searching for this document, it displays as a hyperlink that can be opened in its native program.
Open File | Open the file in the main viewer. | |
Index | When you move a document to the Index bar, a page similar to the following displays: NoteFor a URL, an Open in Default Browser message displays. Click to open. The website also displays in the main pane. 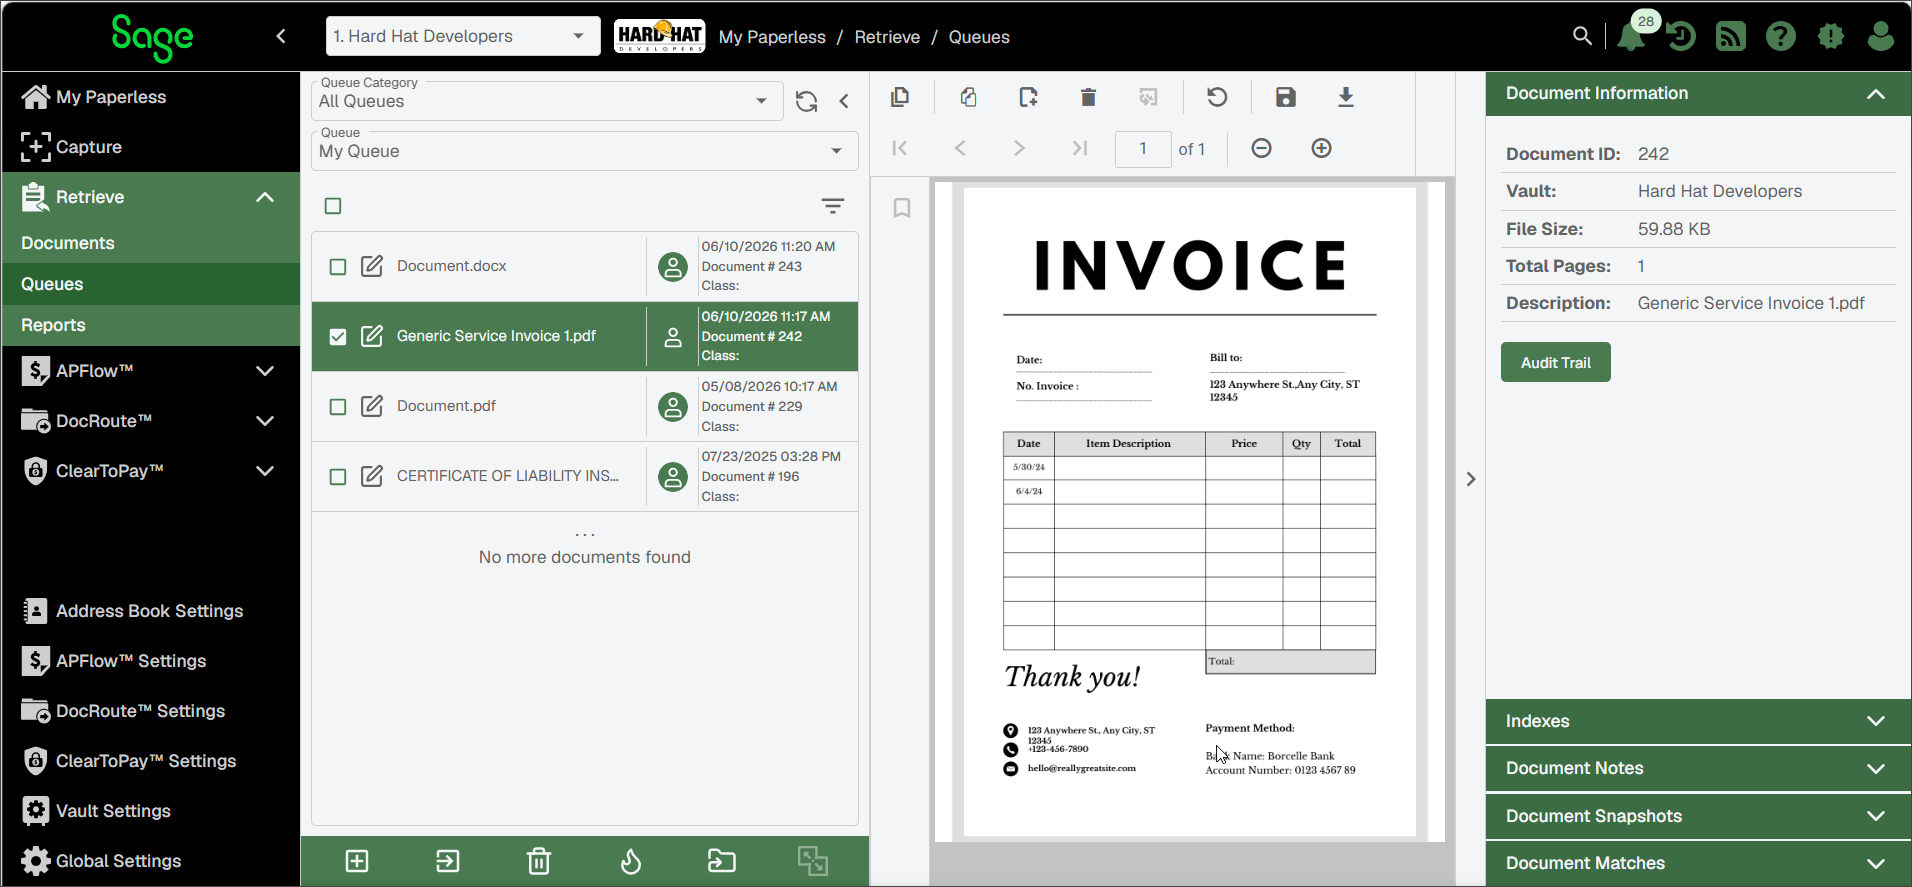 Complete the steps in Index Documents in Sage Paperless Construction do index your document(s). If you are capturing a series of documents with the same information, you can select the check boxes adjacent to Index Value fields. Select any check box(es) adjacent to fields where the information remains the same from document to document. For example, if all the documents have the same AP Vendor, populate the AP Vendor field and select the adjacent check mark. During this data entry session, every document entered automatically has the AP Vendor field populated with the same information. NoteA session is considered the time period between logging in to the Sage Paperless Construction at the beginning of your work day until you log off at the end of your work day. | |
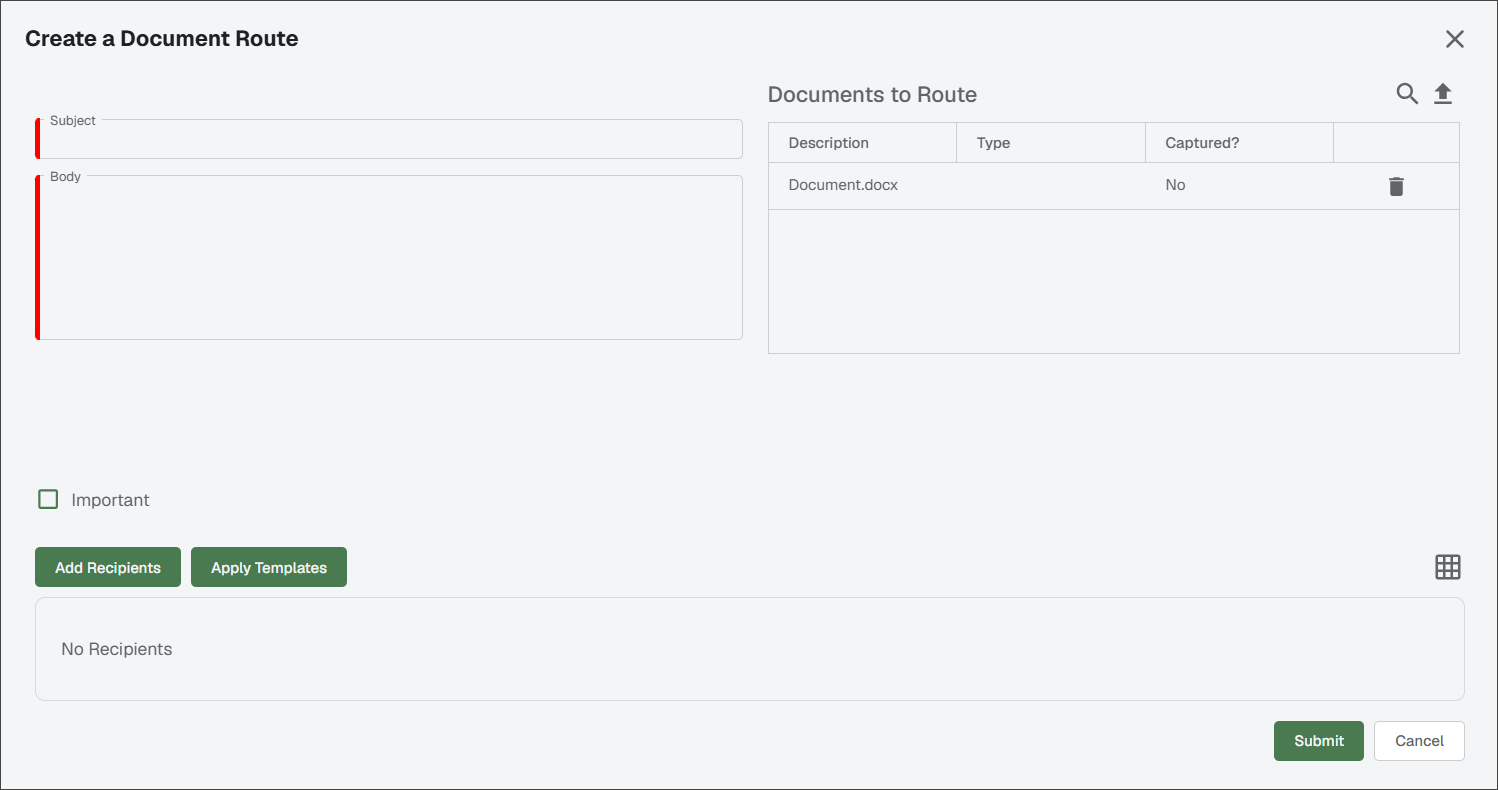
Route | Route the file. ImportantIf you do not have DocRoute™ permissions, this section is not visible. When you move a document to the Route bar, the following Create a Document Route dialog displays:
From here you can enter pertinent information, including recipients, before routing the document for review or approval. | |
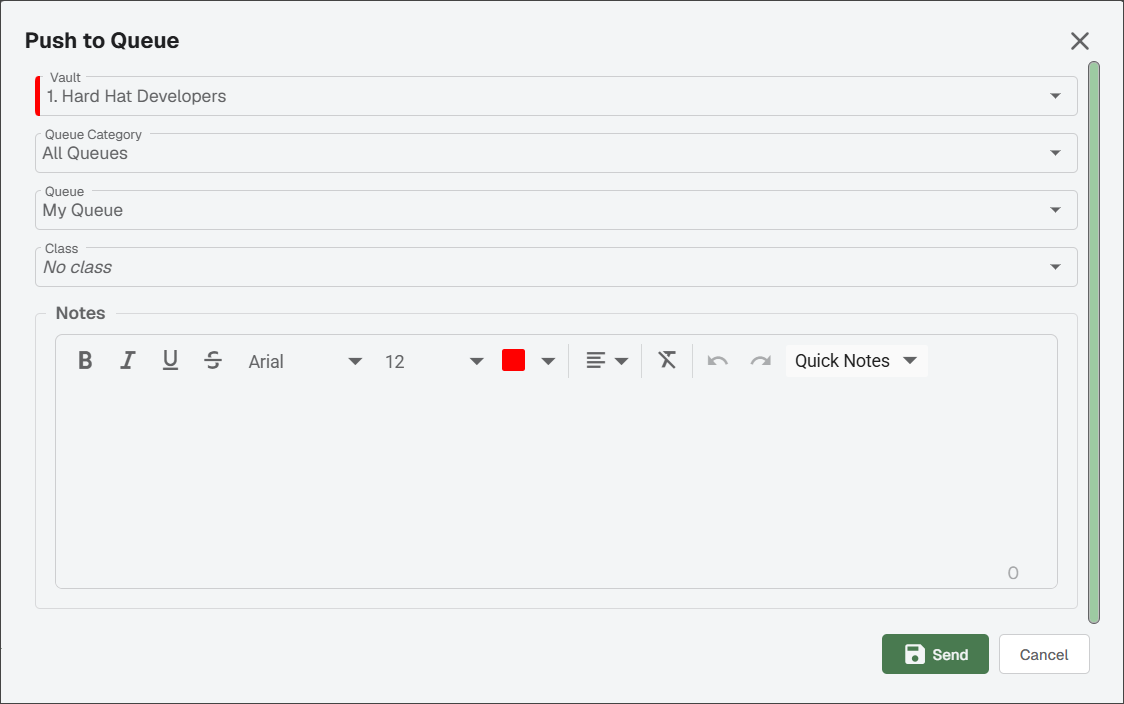
Push To Queue | Push the file to a user's queue. When you move a document to the Push To Queue bar, the following Push To Queue dialog displays:
| |
Split | When you move a document to the Split bar, a page similar to the following displays: 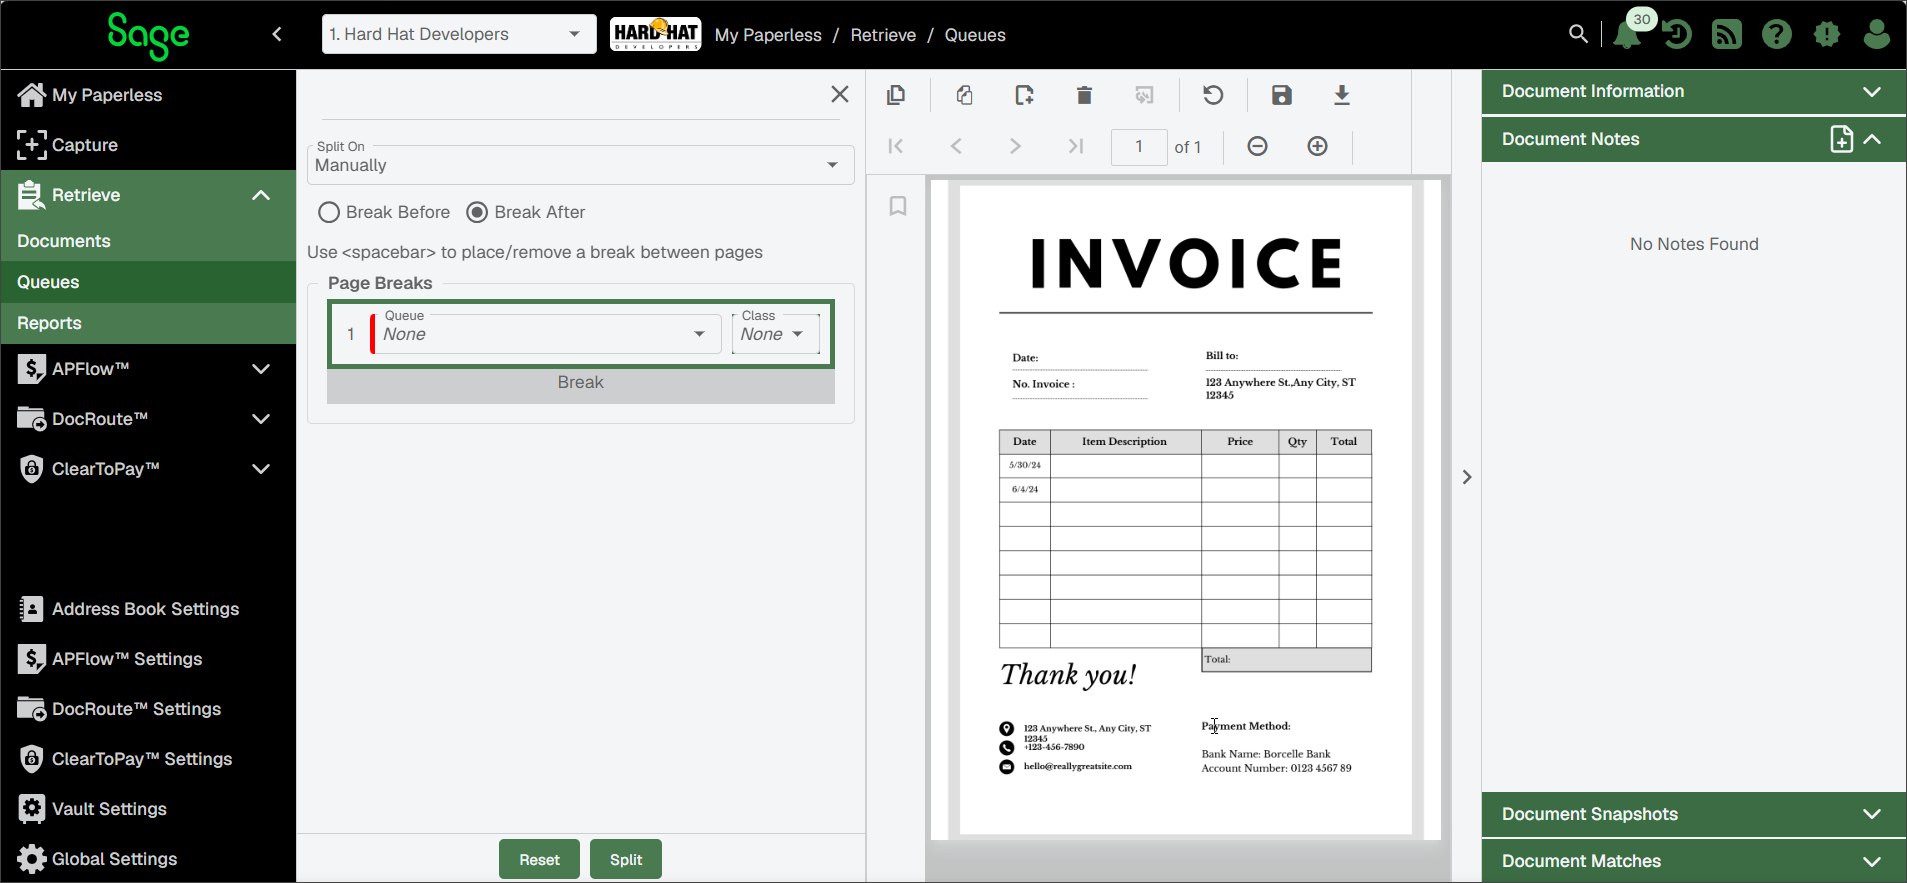 From here, you can manually split the file and assign it to multiple user queues. For more information, see Split Document Pages. You can also assign a document class value when you split a document to a queue. Use the Class dropdown to select a document class. NoteThe Document Class field is pre-populated when creating the invoice in Invoice Entry. | |
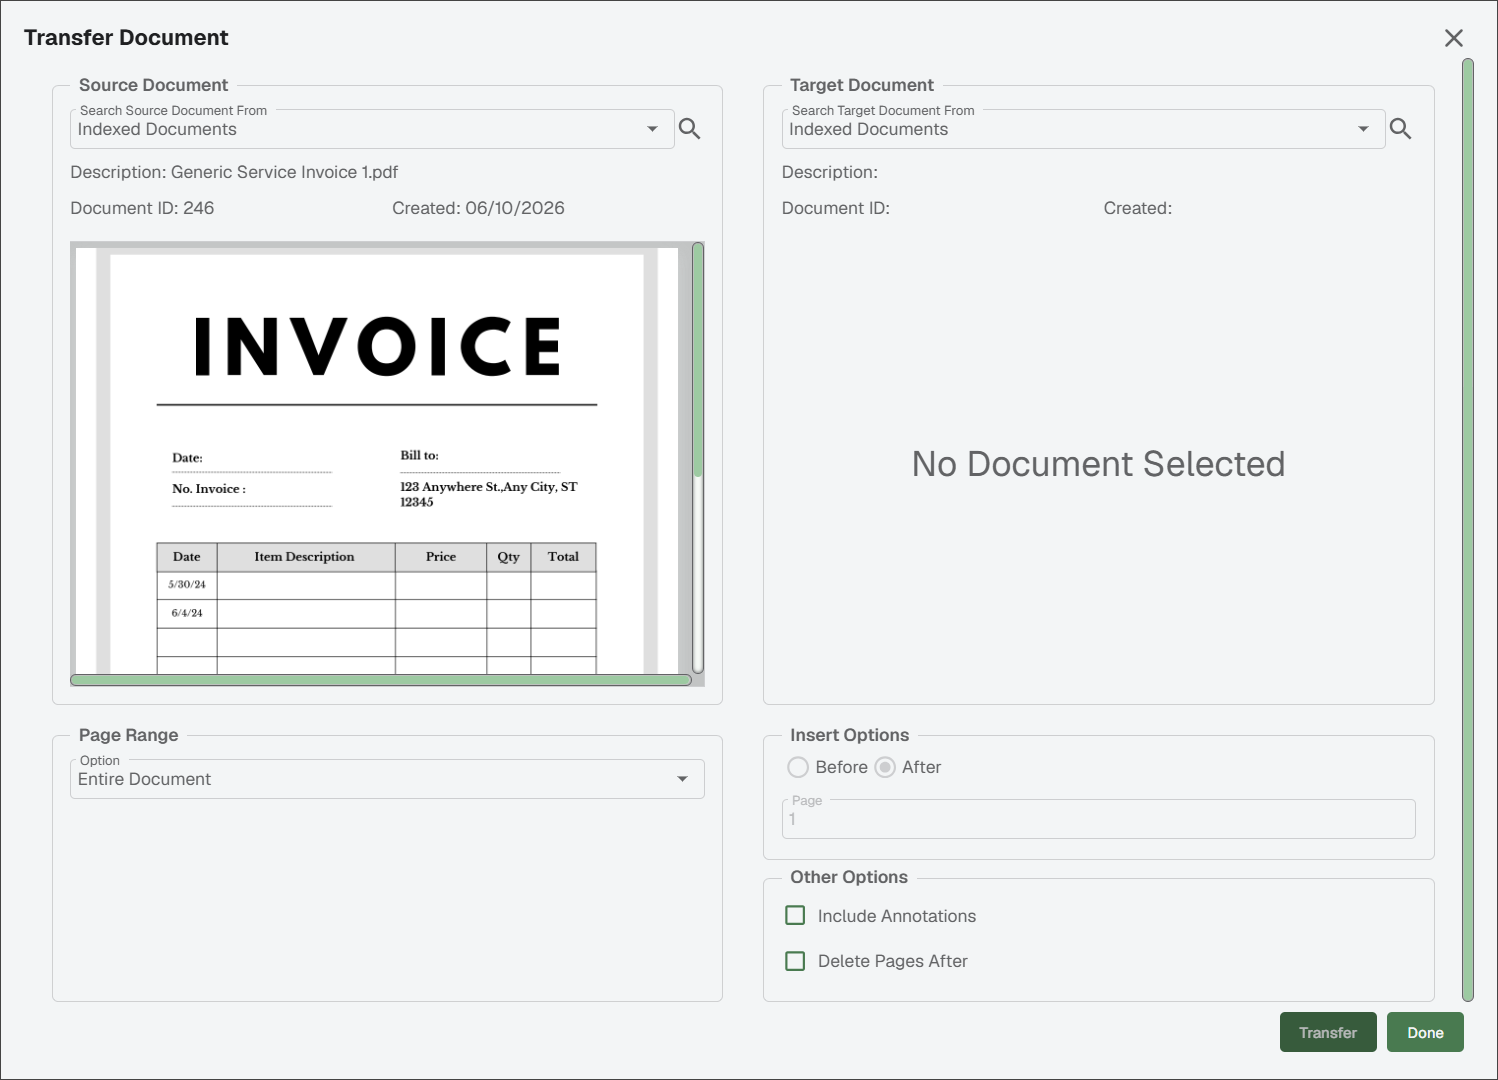
Transfer | When you move a document to the Transfer bar, a page similar to the following displays:
From here you can transfer page(s) from the source document into another document. For more information, see Transferring Document Pages. |