Working with Documents
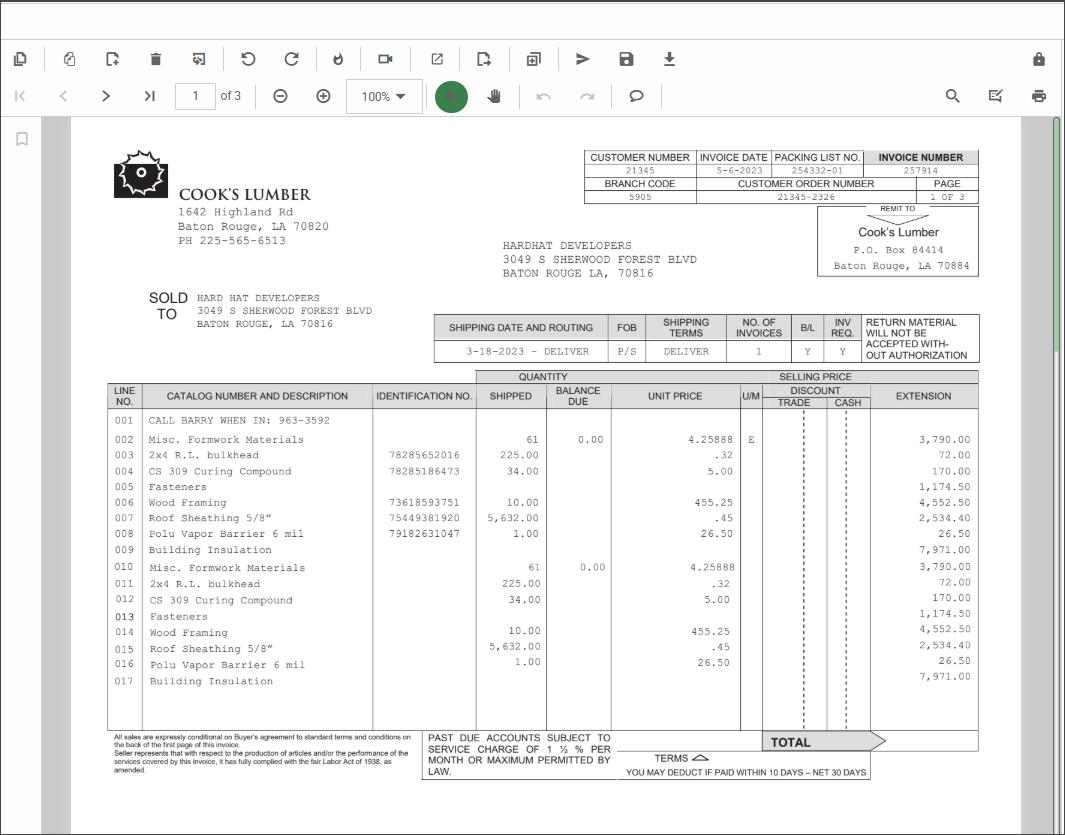
Documents can be manipulated in many ways within the Sage Paperless Construction viewer.
 |
For instructions on searching for indexed documents and opening them in the viewer, see Locate Indexed Documents.
You can mark documents used on a consistent basis as Hot Documents. When you identify a document as a Hot Document, a shortcut link is added to the My Paperless dashboard. You can click this link to open the document instead of having to conduct searches.
To mark a document as a hot document, click the Hot Document
 icon while the document displays in the viewer.
The following Add Hot Document dialog displays:
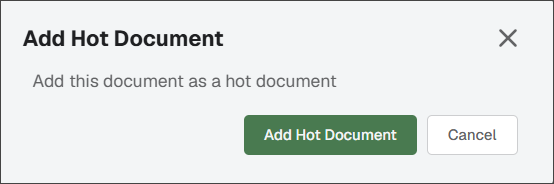
Click .
The document displays in the Hot Documents widget on your My Paperless dashboard.
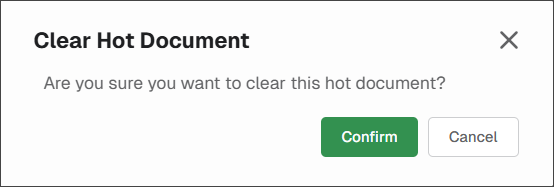
(Optional) To remove a hot document from the list, select the check boxes for one or more hot documents from the list in the Hot Documents widget.
Click the button in the widget.
In the Clear Hot Documents dialog, click .
Click the Add Comment
 icon, then place your cursor on the location within the document where you want to leave your comment.
This icon displays on the document:

Double click the yellow Comment icon to open a Comments grid. This is where you can add a comment or note that displays on the face of the document.
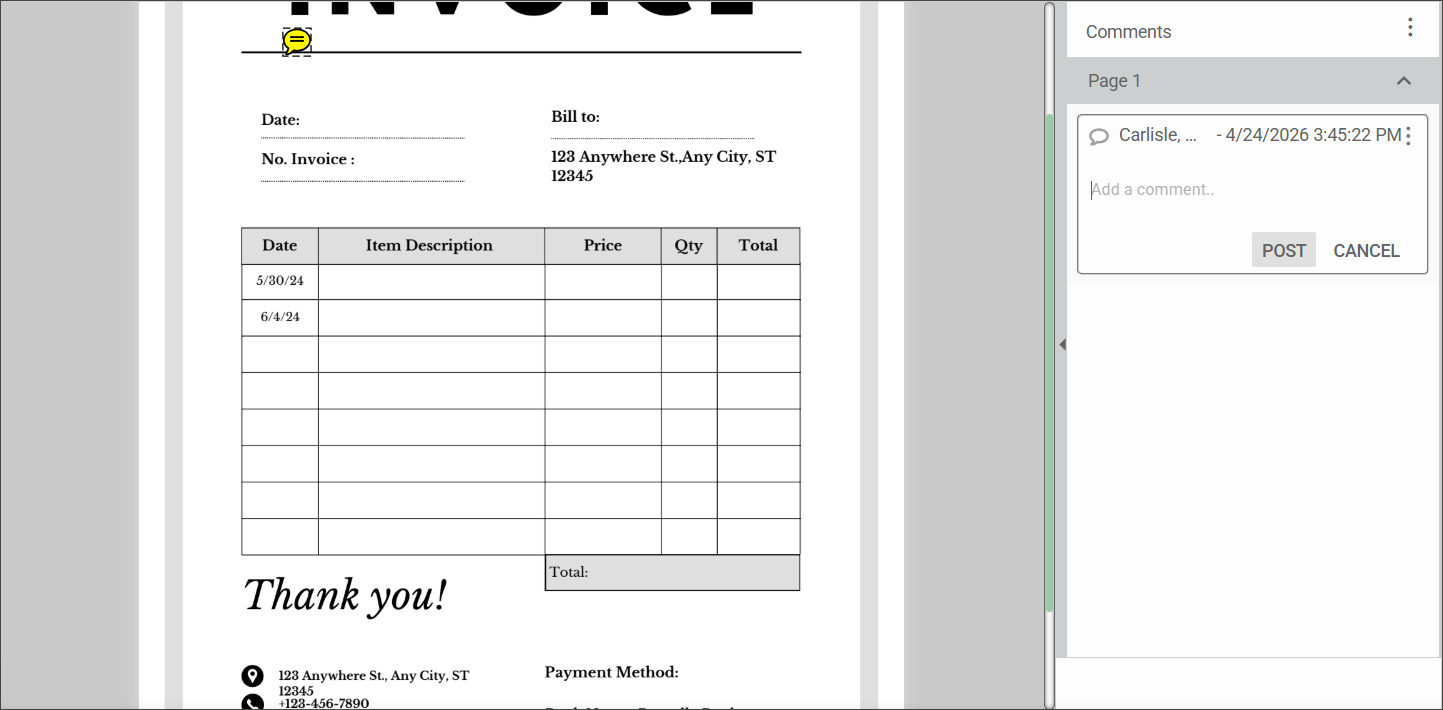
Enter your comment in the text box, then click .
(Optional) If you are viewing someone else's comment on a document, click on the yellow Comment icon to display the Comments grid and enter a response in the Add a reply field.
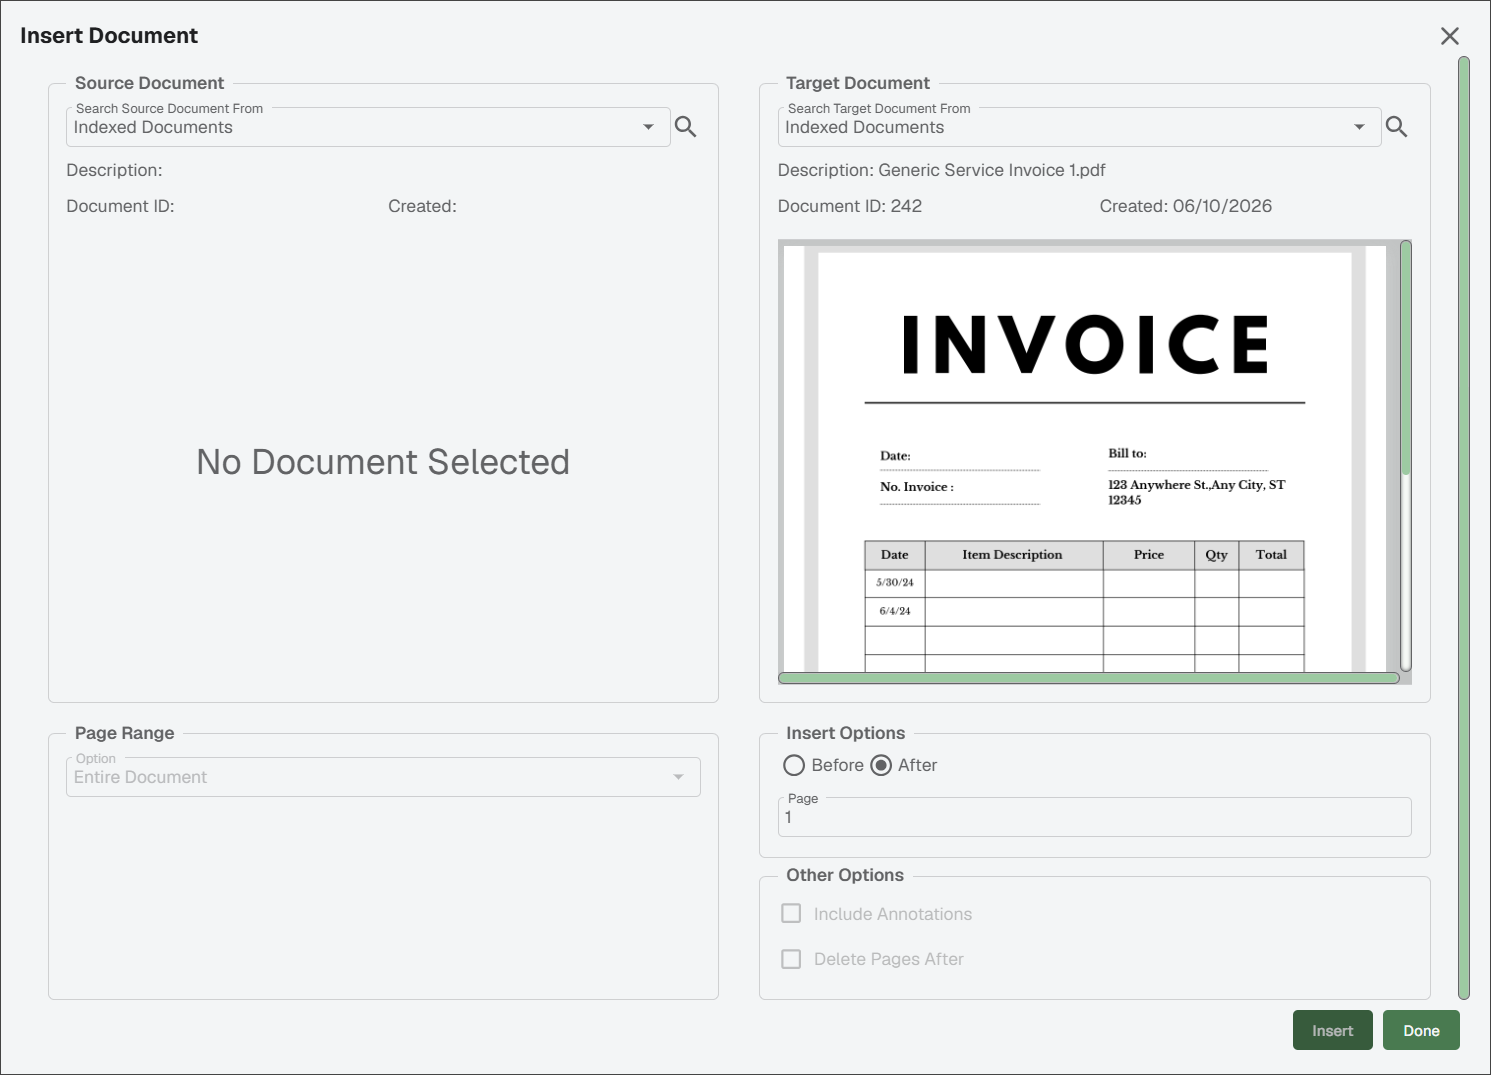
Click the Add Pages  icon to open the Insert Pages dialog, where you can insert pages from a different document in Sage Paperless Construction into your currently selected target document.
 |
Note
Permission to perform this function is assigned in . See Document Types Tab for more information.
Some documents may require additional information before storing them or routing them to other people. You can use the annotations feature to mark up and update documents.
If you want to make the annotations permanent, click the Burn in Annotations  icon.
icon.
Important
To access the Annotations toolbar, click the  icon so it displays beneath the document's other toolbars.
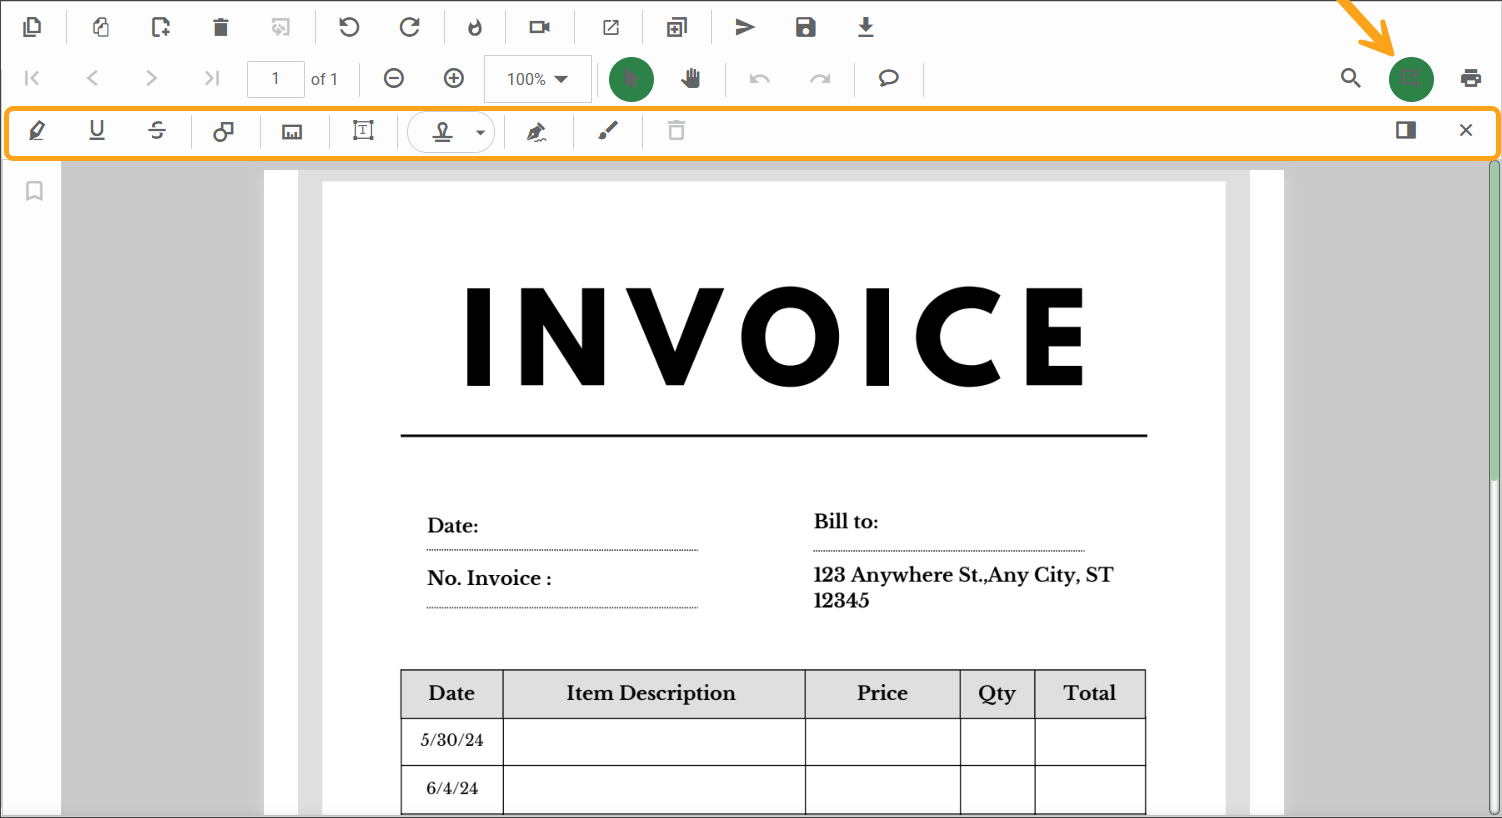 |
The Annotations toolbar allows explanatory notes to be added quickly, and highlight important areas of an image with tools that include emphasis pointers and a variety of stamps.
Icon | Name | Description | |||
|---|---|---|---|---|---|
| Highlight Text | Click the icon and highlight the text you want to call attention to. (Optional) Use the Paint Bucket | |||
| Underline Text | Select and underline text. | |||
| Strikethrough Text | Select and strikethrough text. | |||
| Add Shapes | Click the Add Shapes icon and select the shape (line, arrow, rectangle, circle or polygon) you want to add to your document. Once you have added the shape, look for the "handles" on the shape and use these handles to change the shape or move it. 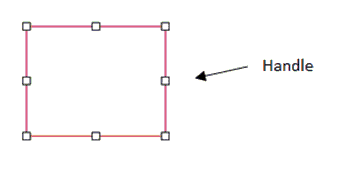 NoteBorder color, background color, line thickness and transparency can all be customized. | |||
| Calibrate | Use the calibrate feature to calibrate distance perimeter, area, radius or volume. | |||
| Free Text | Click the Free Text icon to add a text box and type information onto your document. NoteFont color, font style, border and background colors, line thickness and transparency can all be customized. | |||
| Add Stamp | Click the Add Stamp icon to add either a system generated or custom stamp to your document. System-generated stamps include "witness," "approved" and "information only." Custom stamps are the stamps created by you or someone else in your company. See Configure Custom Stamps for more information. | |||
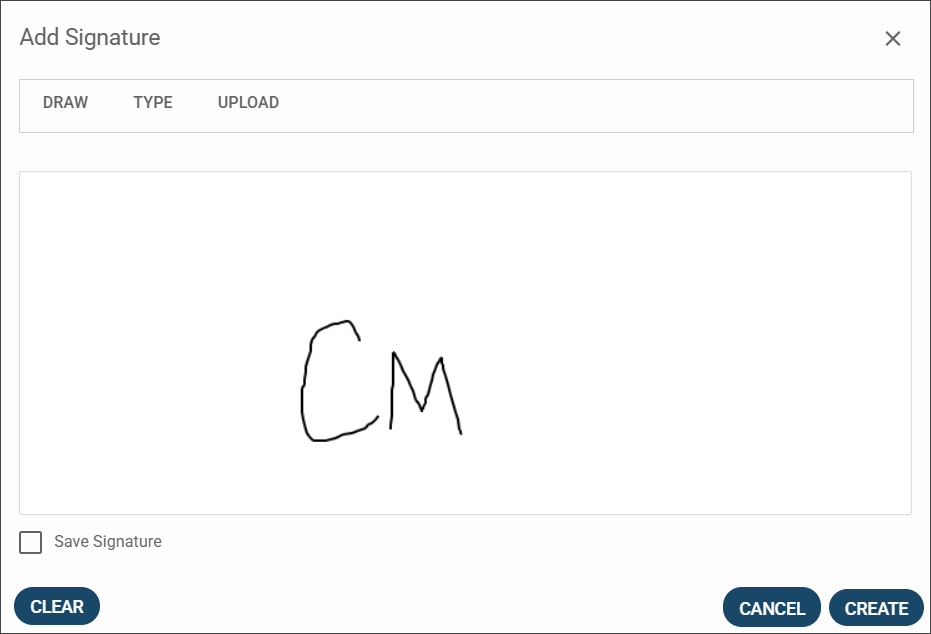
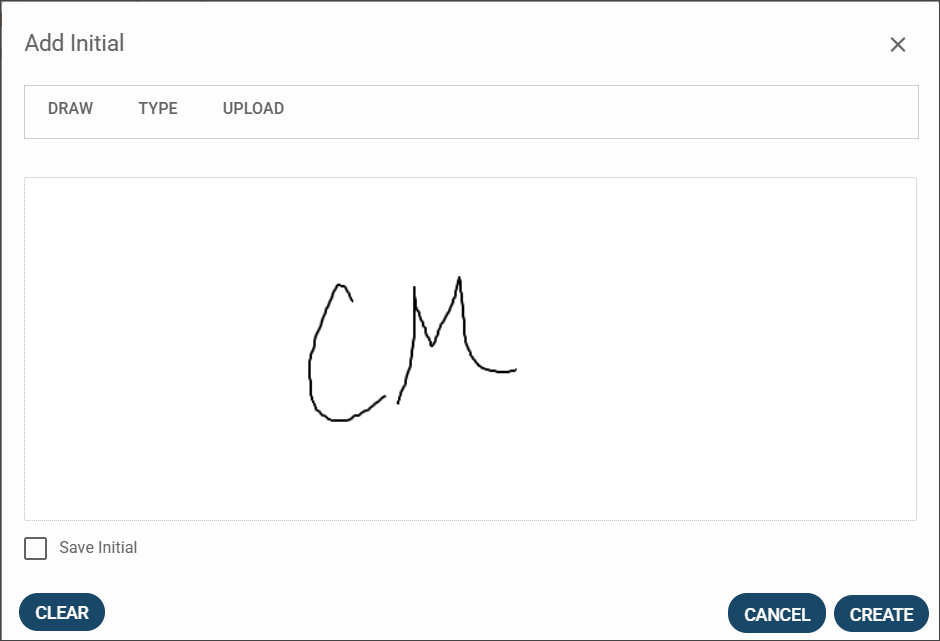
| Add Signature | Click the Add Signature icon and select either or . Both options open a dialog where you can choose to draw, type or upload your signature or initials. Use the Save check box to save the option in Sage Paperless Construction and click to place the signature or initial within the document:
| |||
| Draw | Click the Draw icon to mark up your document by drawing directly on the image. NoteInk color, line thickness and transparency can all be customized. | |||
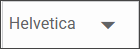
| Font Family | Use to select the font family when using the Free Text option to add a text box. | |||
| Font Size | Use to select the font size when using the Free Text option to add a text box. | |||
| Font Color | Use to select the font color when using the Free Text option to add a text box. | |||
| Align | Use to left align, center, right align or justify the text when using the Free Text option to add a text box. | |||
| Style Font | Use to bold, italicize, strikethrough or underline text when using the Free Text option to add a text box. | |||
| Paint Bucket | Use to access the color picker for background color for highlighting, shapes and text boxes. | |||
| Border Color | Use to access the color picker for border color around shapes and text boxes. You may need to increase the line thickness to make the border visible. | |||
| Annotation Properties | Click the Annotations Properties dropdown to access Line Thickness | |||
| Delete Annotation | Use to delete the selected annotation. | |||
| Comment Panel | Click the Comment Panel icon to open and close the comment panel, which shows the comments added to the document by you and others. | |||
| Discard Changes | Click to remove all changes and annotations added to the document. | |||
| Close Annotation Toolbar | Click the Close icon to close out of the annotation toolbar. |
















Important
For the Bookmark  icon to be active, a document image must be present in the Sage Paperless Construction viewer.
Sage Paperless Construction retains any bookmarks existing within PDF files when they are indexed into the system. Click the Bookmark icon to add a new bookmark. You can edit the bookmark or you can remove it.
A bookmark links to paragraphs or pages within a document. Use bookmarks to mark a place in the document or to jump to a specific destination in the document. For example, a common use for bookmarks is in a table of contents. Simply click on a bookmark in the list and you are taken to that page or location within the document.
Any document saved in, or emailed from, Sage Paperless Construction in PDF format automatically has associated bookmarks saved with it. This means all bookmarks are visible by external users viewing the document with an external PDF viewer.
Important
A document can only be checked out if it has been indexed. You are not able to check out a document that displays in your My Queue.
Note
If you are trying to access a document that someone else has checked out, red text identifying the individual who checked out the document shows in the viewer. That individual must check the document back in before you can access it.
When you check out a document, you are able to prevent other users from working on the same file. A document can be checked in by a system administrator if needed. See Locked Documents for more information.
Complete the following steps to check out a document:
From the document viewer, click the Check Out
 icon.
icon.A confirmation dialog is displayed. The options vary depending if the document is a PDF file or other type of file.
Click to complete the check out process and close the dialog.
While the document is checked out, a shortcut link displays on your My Paperless page in the Checked Out Files widget. You can click the link to access the checked out document.
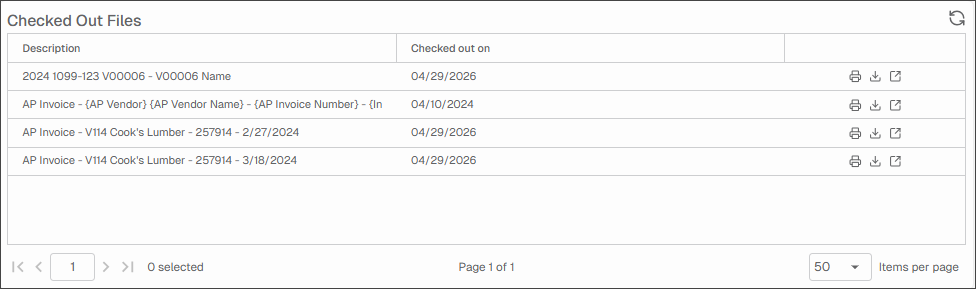
(Optional) When you are ready to check the document back in, click the View
 icon in the widget to open the document in a new window.
Then, click the Check In
 icon.
icon.A confirmation dialog is displayed. The options vary depending if the document is a PDF file or other type of file.
Click to complete the check in process and close the dialog.
Snapshots are copies of indexed documents made before and/or after new changes are saved. Snapshots are used to maintain a history of revisions.
Document types can be configured by administrators so that snapshots are take manually, automatically or when prompted.
Note
You only get prompted to take a snapshot, or have a pre-configured automatic snapshot taken, if the document is already indexed.
Configure Document Snapshots
From My Paperless, click .
In the Global Settings navigation bar, select .
The Document Types page displays:
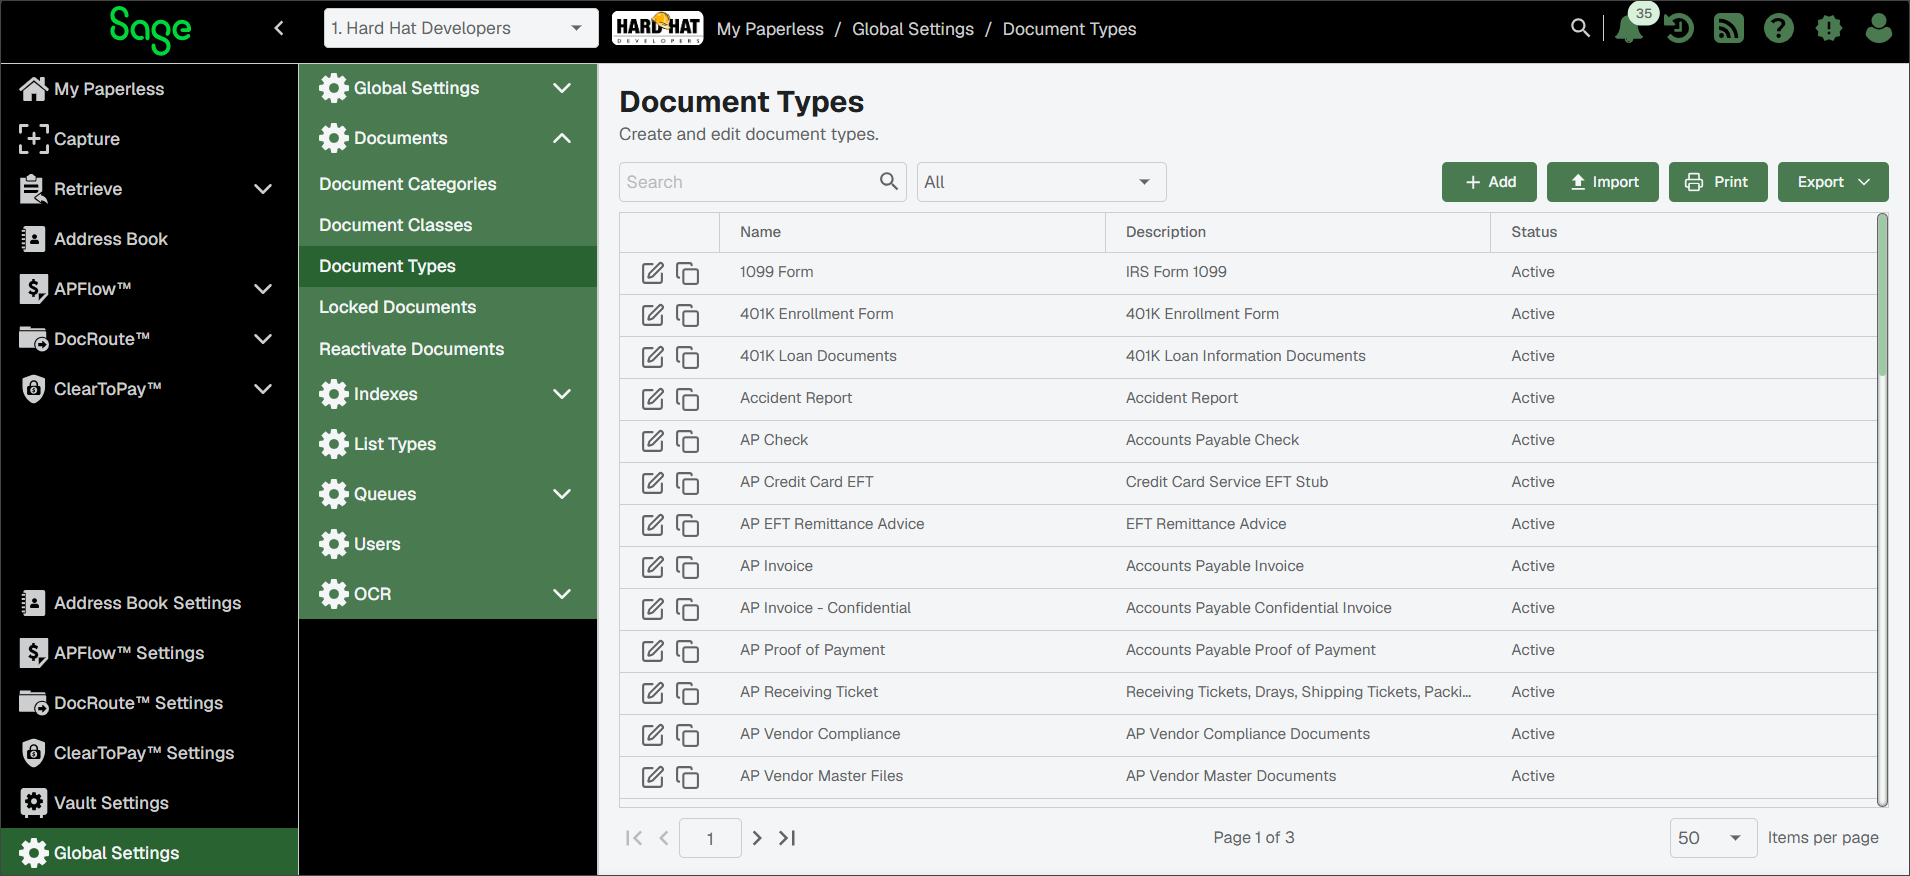
Scroll through the list and click the Edit
 icon to select the document type.
The Document Type General Properties page specific to the selected document type displays on the General tab:
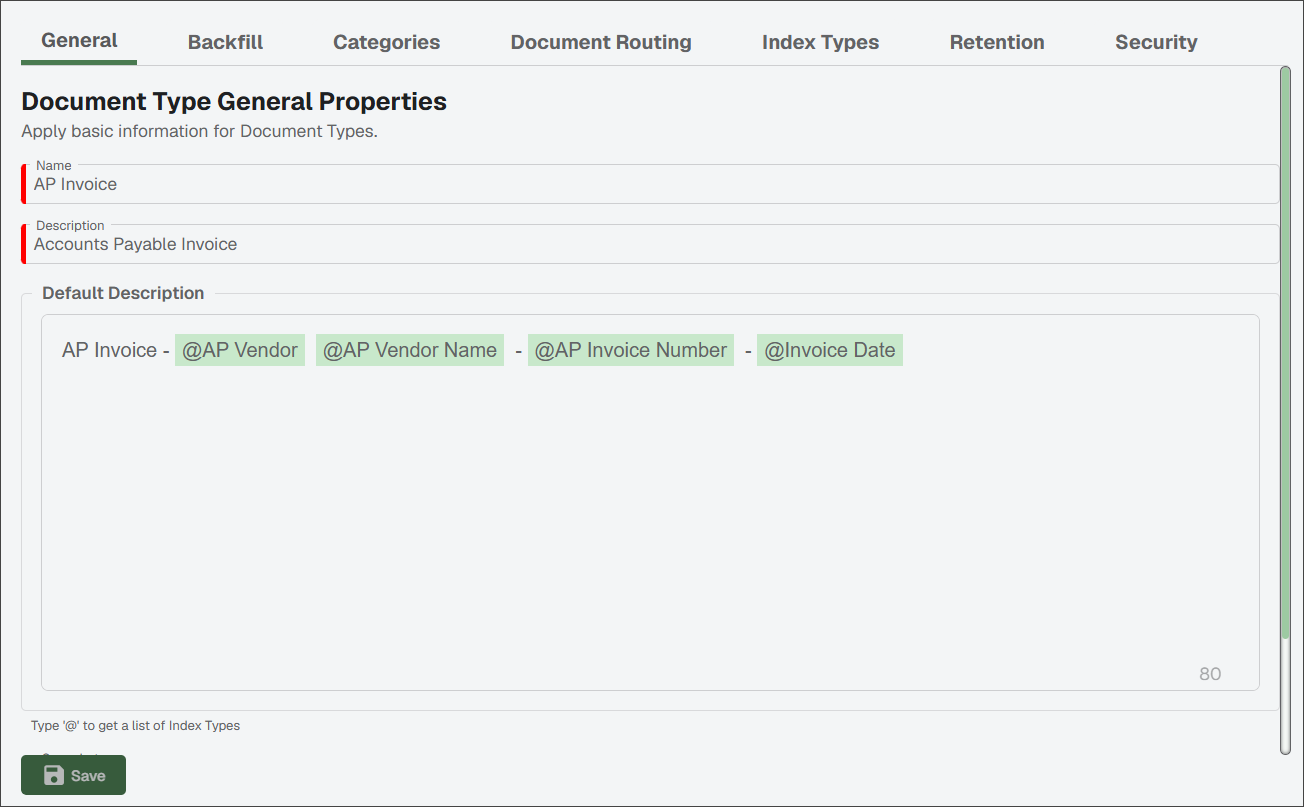
To configure the snapshot, select the appropriate radio button. Manual is the default.
Note
If the administrator determines that snapshots should be taking automatically or if the processor should be prompted to take snapshots, these changes are made here.
Click .
Take Manual Document Snapshots
When the Document Type snapshot option is set to Manual, the processor determines when to take the snapshot. Complete the following steps to take a snapshot:
From My Paperless, click .
From the Retrieve navigation bar, click .
Select the document so it is visible in the viewer, the click the Snapshots
 icon.
icon.The Take Snapshot? dialog displays.
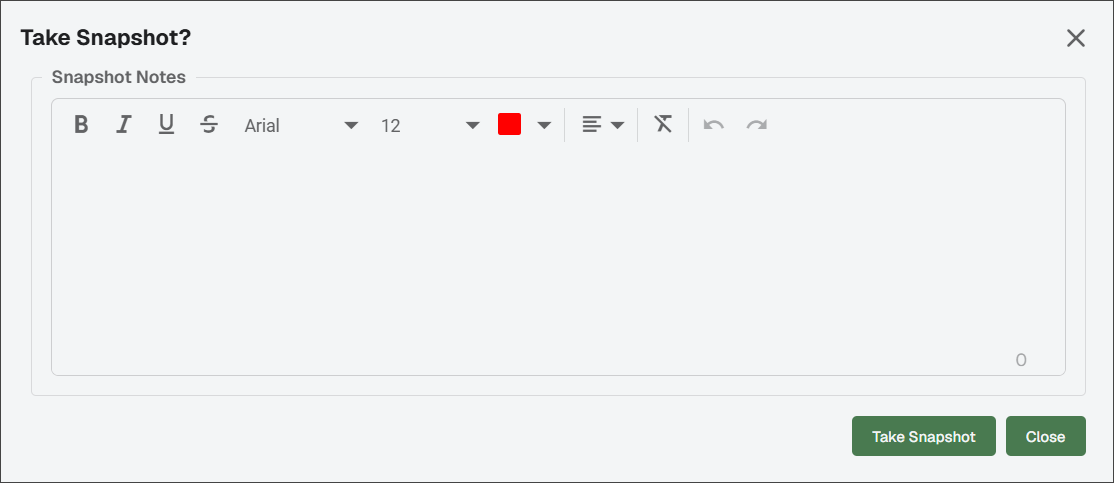
(Optional) Enter a note about the snapshot and reason for taking it.
Click .
You can view the snapshot in the Document Snapshots section of the sidebar.
Take Prompted Document Snapshots
If the Document Type snapshot option is set to Prompt, you are prompted to take a snapshot every time the document is saved.
Click either (to take the snapshot) or (to not take the snapshot).
Take Automatic Document Snapshots
If the document types are set up with the snapshot option set to Automatic, a snapshot of the file is taken before every change is saved. You are not prompted to take the snapshot.
Paperless Optical Character Recognition (OCR) offers a way to systematically scan your documents, extract data from the document images and input index values. Drag and drop your documents into Sage Paperless Construction, and OCR automatically extracts key information from the document, eliminating manual entry of those values.
Important
Prior to accessing and using OCR, it must be licensed and configured by an administrator.
For OCR license information, see License Information.
For information on setting up OCR, see Configure OCR Settings.
OCR Icons and Validation
As invoices enter the queue (and display in the Document Queue) they are automatically processed by Paperless OCR. Documents still being processed by Paperless OCR open as read-only until processing is complete.
Blank OCR Entry | No icon means that the document was not picked by the Paperless OCR system for processing. | |
| This is the unprocessed OCR icon. | |
| A yellow icon indicates that the document is actively being processed by the OCR system. | |
| Click the question mark icon for more information about the status of the associated document. When you click the icon, a dialog displays describing the error:
| |
| A red icon indicates that the OCR system failed to capture all required fields. | |
| A red circle with an exclamation point indicates that a system error occurred during processing. | |
| Click this icon to access the OCR Learn page. See Train OCR for more information. | |
| A green icon indicates the Paperless OCR system successfully extracted all fields. For non-invoice document types that still remain in the queue as green, it is because not all fields required before saving were populated by a combination of OCR and backfilling. Non-invoice documents that processed successfully are saved and leave the queue. |





Train OCR
Use the OCR Learn page to "train" the Paperless OCR system to correctly read your documents.
Note
For a particular vendor's invoices, you may need to "train" the system seven to ten times to make sure OCR is pulling the correct data from the invoice fields.
From an OCR queue, click the Learn
 icon next to an unprocessed or incorrectly processed document in the queue.
Note
Immediately above the icons located at the bottom of the OCR Queue is a number and a percentage. The number reflects the number of documents that your company has run through OCR. The percentage reflects the usage percentage according to your company's plan, so you know when you are about to reach, or have exceeded, your company's OCR plan limits.
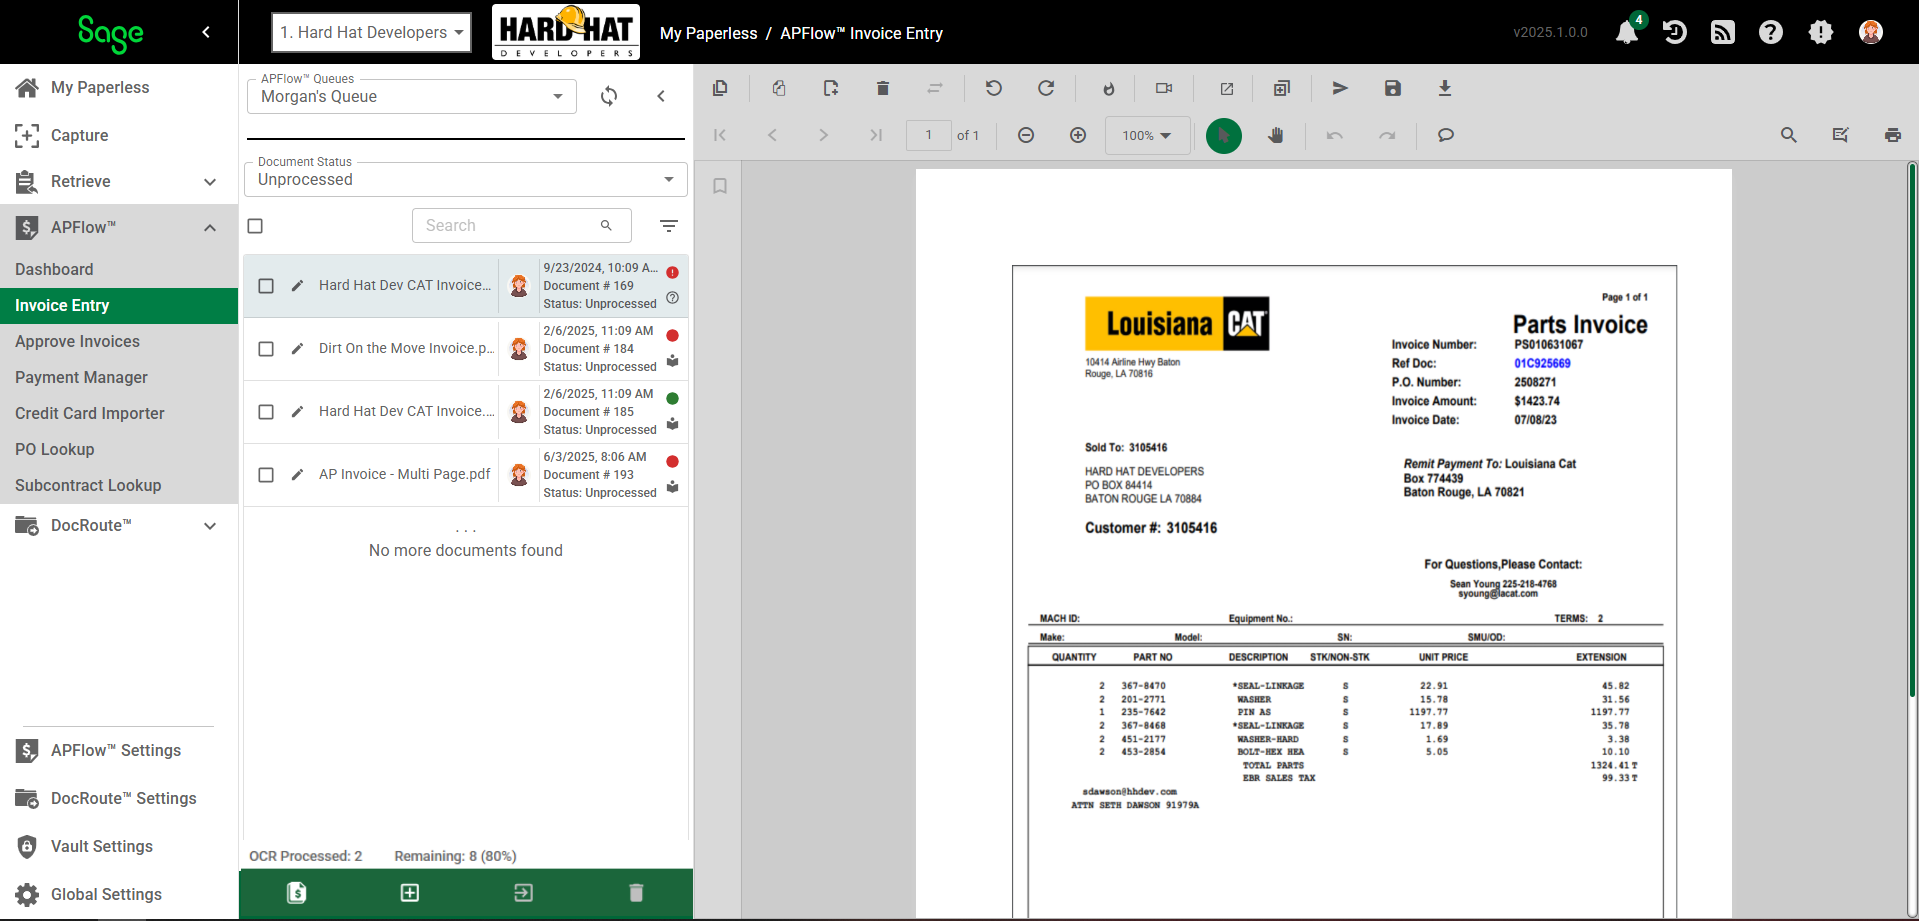
A Learn page similar to the following displays:
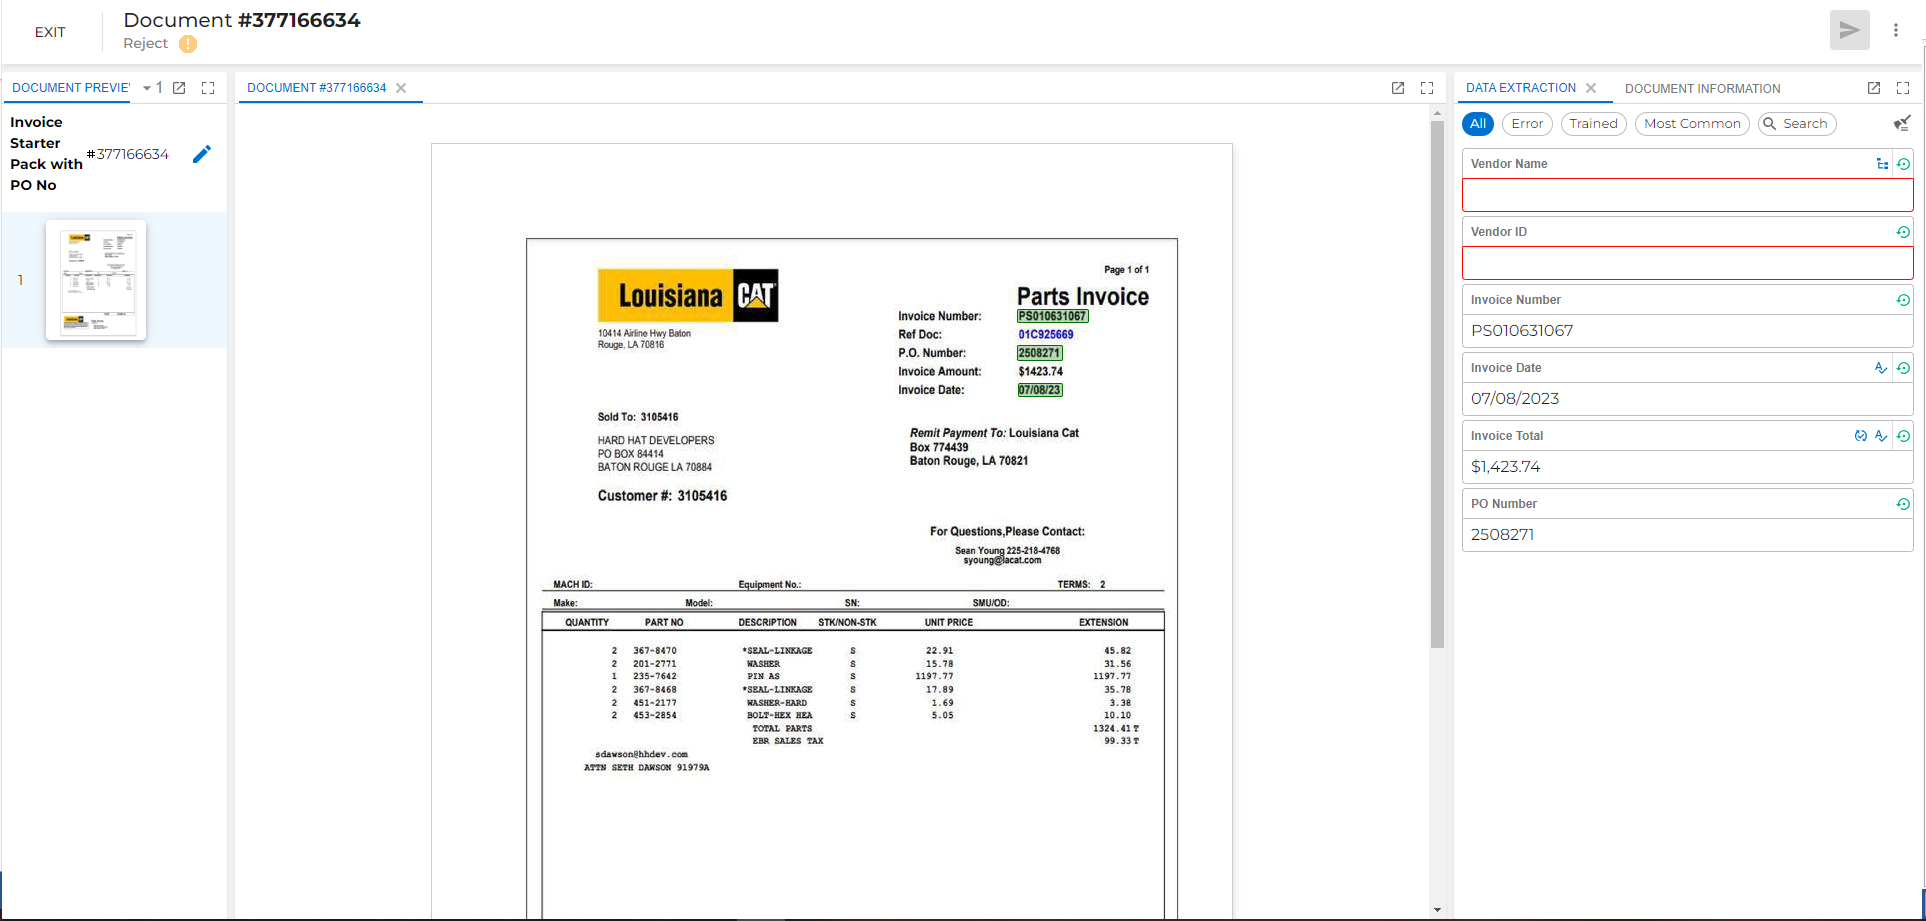
In the sidebar, click in a required blank field.
Important
Do not train the system to capture the Vendor Name or Vendor ID fields directly from the invoice. To properly train the system on the vendor's name and ID, it is recommended that you do so using vendor variant lists. See Create a Vendor Variant List for OCR for more information.
Alternatively, you can update the vendor's information in the bridged accounting system to match their invoices exactly.
Then, highlight the area of the invoice where that information displays.
Scroll over the area. You should see a highlighted area similar to the following:
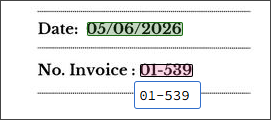
Release your left mouse button.
The information populates in the sidebar.
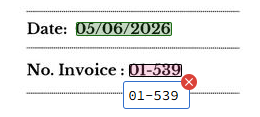
(Optional) If you need to clear the information, either delete it from the sidebar or click the red
 .
.
Review the information that was populated in the sidebar to make sure it is correct.
Continue identifying each location, essentially "learning" the locations of pertinent invoice information, of each required blank field.
When all required fields in the sidebar are populated, the Output Arrow
 turns blue.
(Optional) If you have the Line-Level OCR license, you can train the system to code in data at the line level. The Line-Level processor should display at the bottom of the screen.
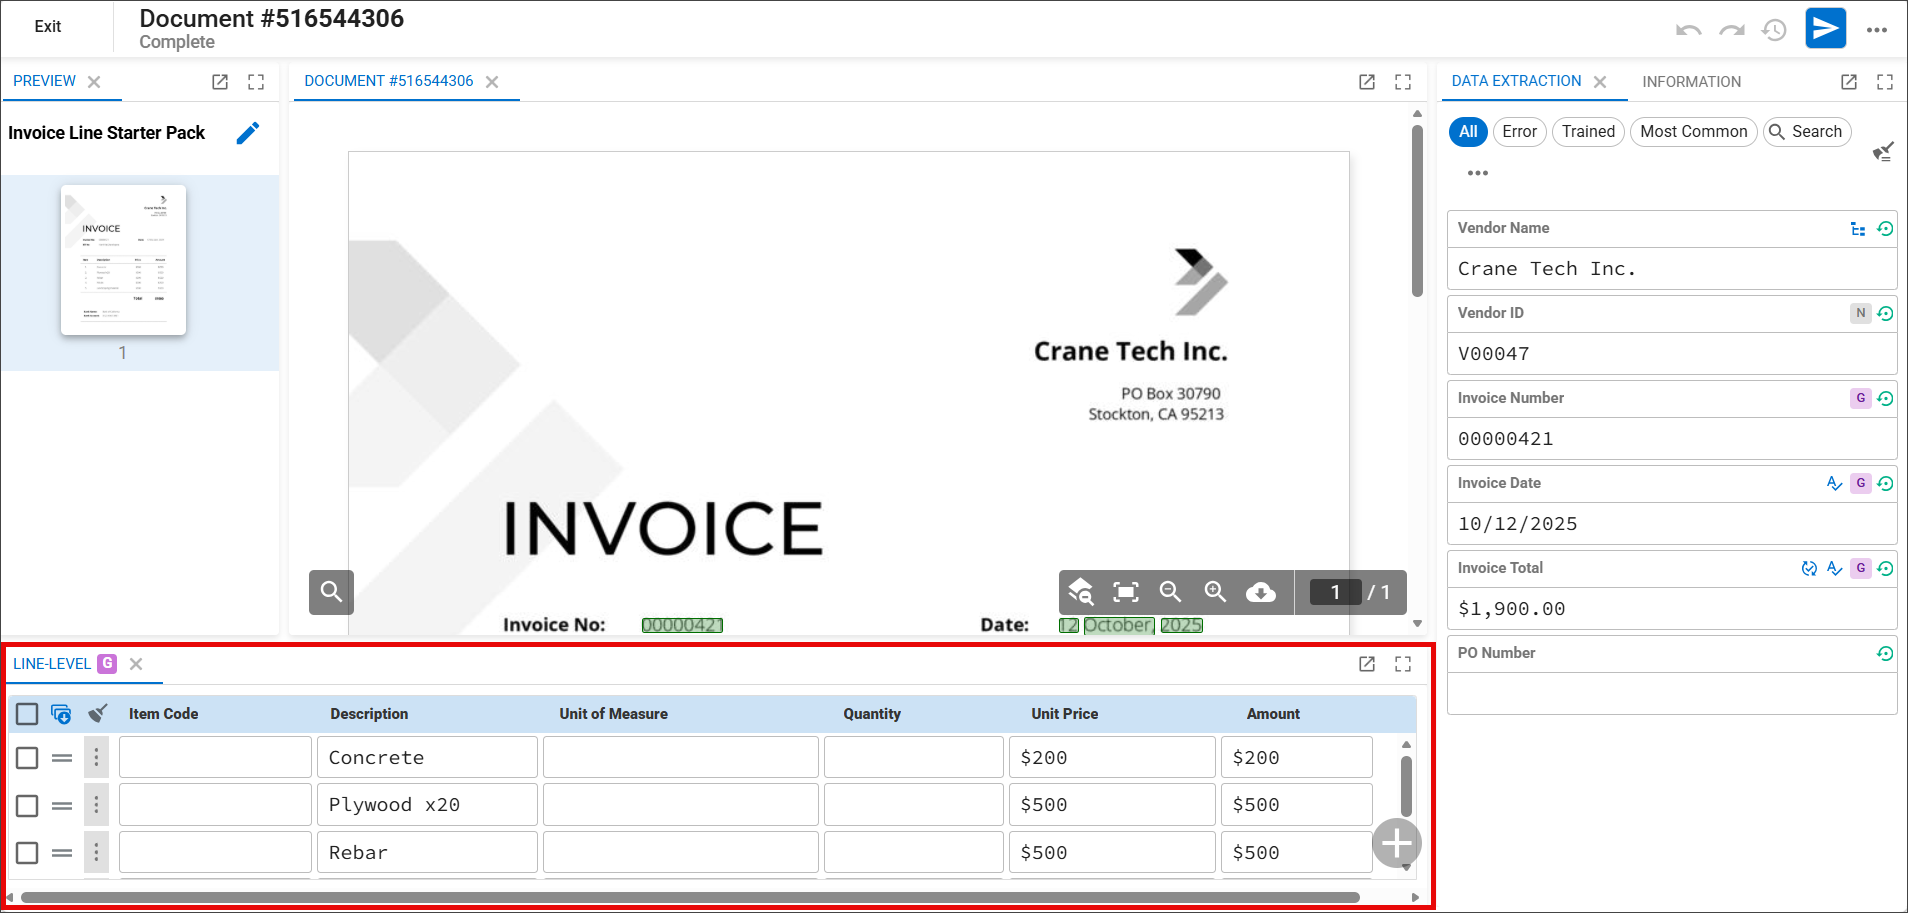
Point the cursor at the field in the line-level section and highlight the exact field in the invoice. It populates the values in the line-level section.
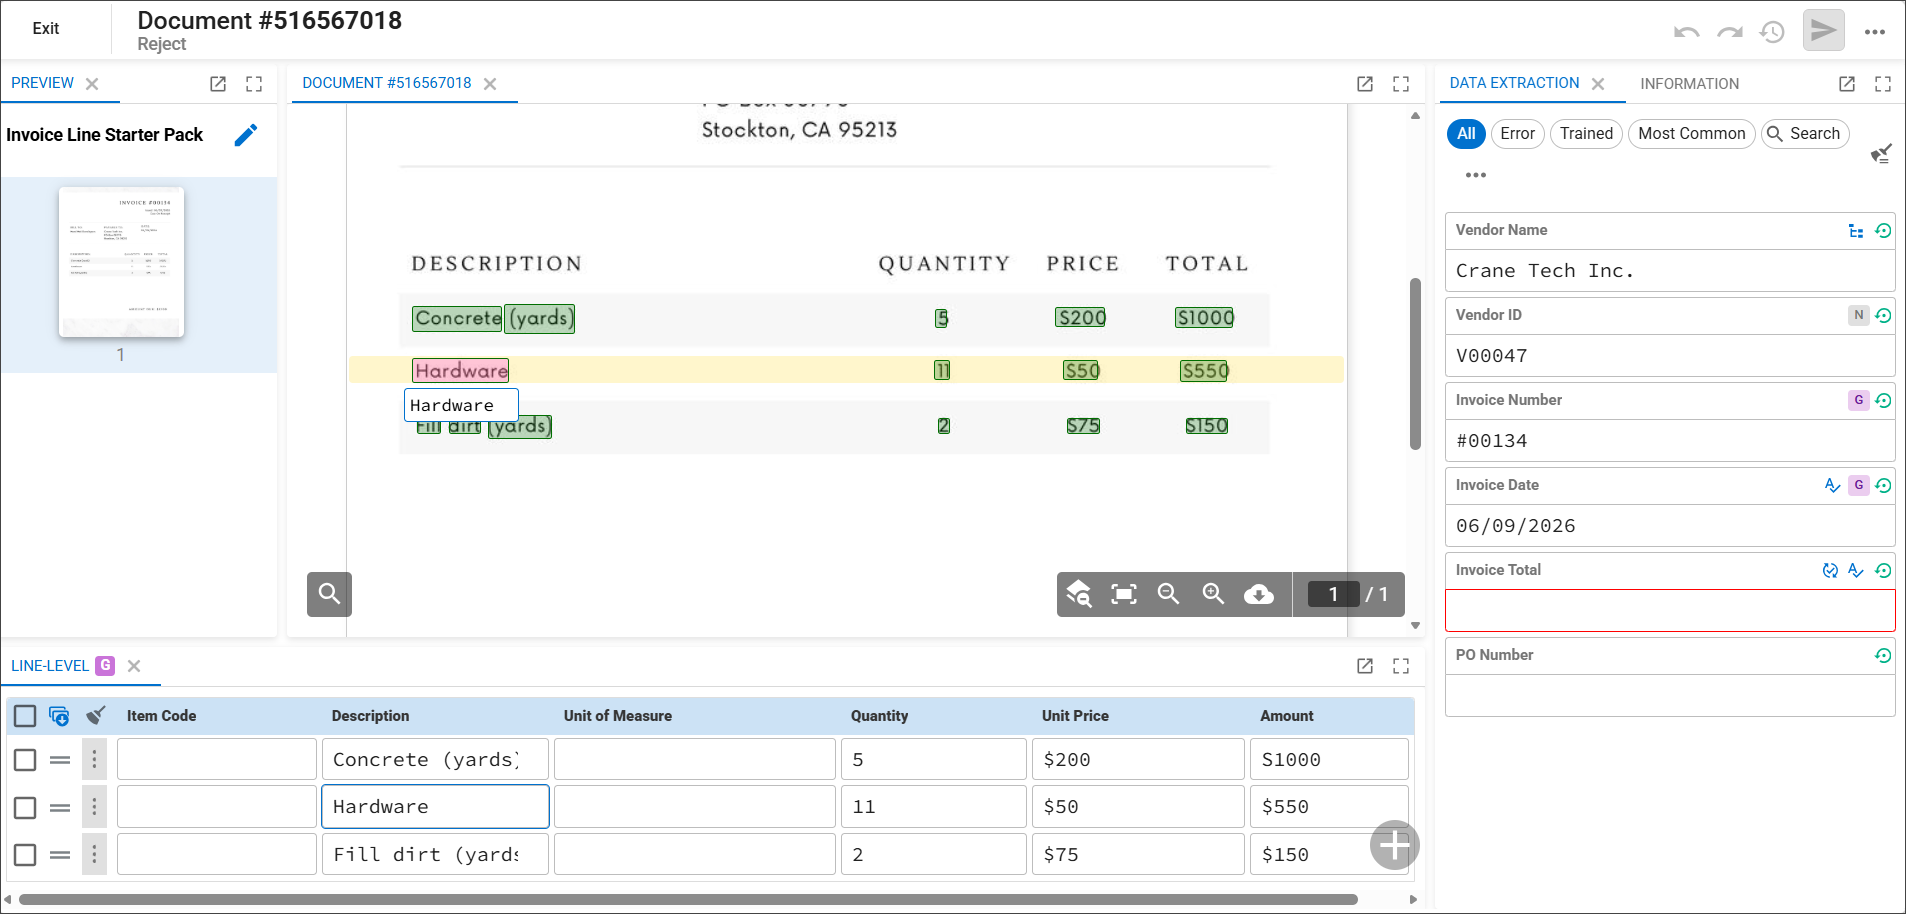
If you don't want to fill out each line manually, click the
 button. It uses changes you have just completed to fill in the rest of the lines.
The Generally Trained
 icon displays next to the Line-Level header.
If you need to clear information entered by mistake, select the line and click the
 button to remove any errors.
Note
By clicking the button, you are clearing all line-level data.
Click the Output Arrow
icon.The Learn page closes and the APFlow™ page redisplays and the OCR status indicator changes from red to green.
Index with OCR
When configured to do so, OCR can systematically index documents. OCR workflow mappings must be configured as for a selected document type to index them into the system instead of moving them through Invoice Entry. See Configure OCR Workflows for more information.
Once configured, the process works as shown below:
Capture: Documents are brought into the system (e.g., via drag-and-drop or email import jobs) and delivered to a designated OCR queue.
Extraction: The OCR engine "reads" the document and identifies the mapped fields defined in your OCR Workflow.
Population: The extracted text is systematically input into the corresponding document indexes.
Validation: If all required fields are successfully extracted, the document receives a green status indicator. If any required fields are missing, the document remains in the queue for manual review and processing.
Warning
Once a document is deleted and the settings are saved, the document cannot be restored.
From My Paperless, click .
From the Retrieve navigation bar, click .
From the document viewer, click the Delete Pages
 icon.
icon.The following Delete Pages dialog displays:
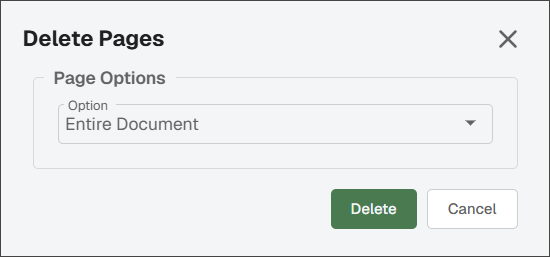
Select one of the following options in the Page Options dropdown:
Note
The default is Entire Document.
Current Page Only: Deletes the current page in the viewer.
Entire Document: Deletes the whole file.
Pages From/To: An additional field displays where you can enter the range of pages to delete.
Next # of Pages: An additional field displays where you can enter the number of pages beyond the current page to delete.
Select Pages: An additional field displays where you can enter a list of pages to delete.
Click to remove the identified page(s) from the document.
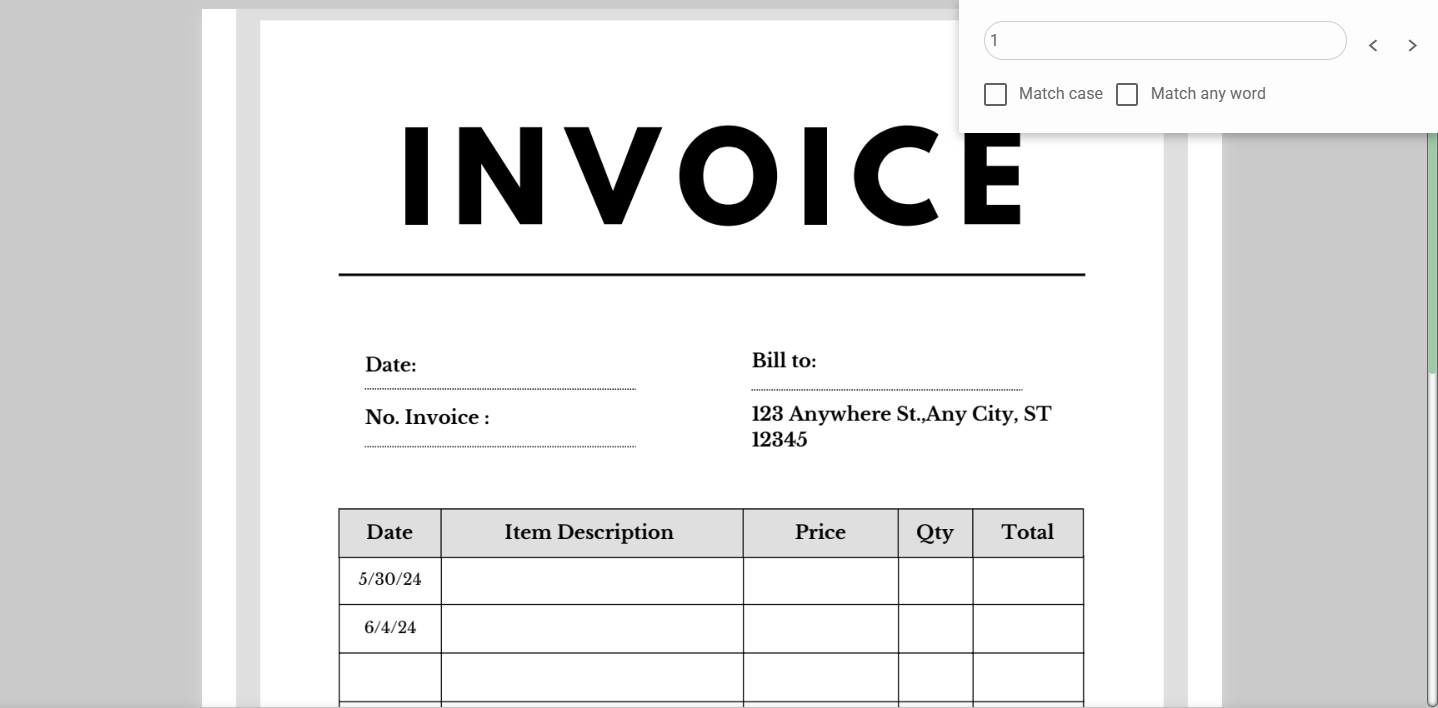
Click the Search  icon to display the Find in document field.
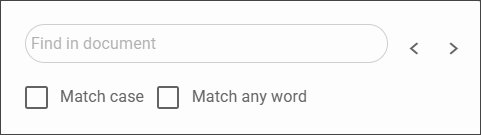
Enter the text you are looking for and press . You can also narrow results by selecting Match case or Match any word. Sage Paperless Construction locates the text entered and identifies it in the document by highlighting it.
 |
Documents stored in Sage Paperless Construction can easily be emailed to recipients within your company as well as externally.
Complete the following steps to email a document:
Click the Email
 icon while the document displays in the viewer.
The following Email Image dialog displays:
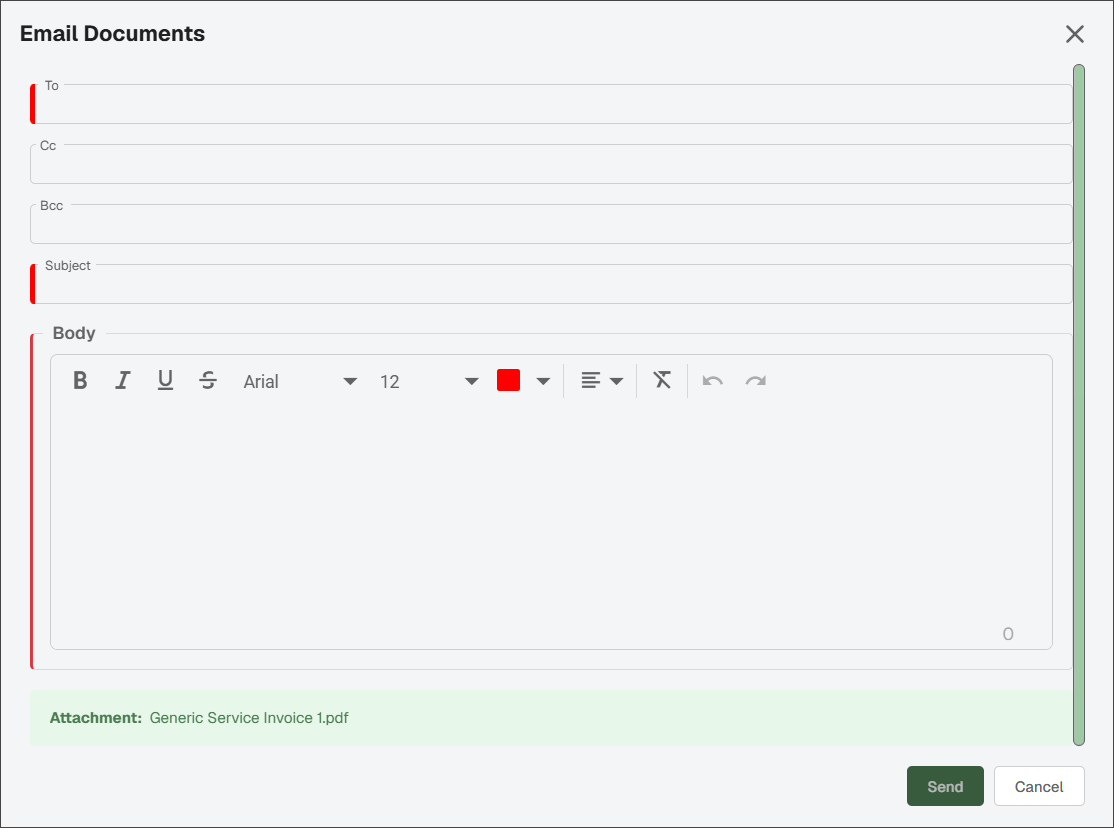
In the To field, enter the email address of the recipient(s).
If there are any recipients that should be copied on the email, enter those email addresses in the Cc or Bcc fields.
Enter the email subject in the Subject field.
Enter the email text in the Body field.
Click .
Sage Paperless Construction sends the email to the recipients, along with the document(s) which are attached.
The Insert Document tool is used to locate a document and insert it into a target document.
From My Paperless, click .
From the Retrieve navigation bar, click .
From the document viewer, click the Add Pages
icon.The following Insert Document dialog displays:
Review the two areas in the dialog where documents can display:
Source Document: Where the pages are coming from displays in the left pane.
Target Document: Where the pages are going to displays in the right pane.
Click the Search Source Document From dropdown to select the source document type. Then choose from the following options:
Indexed Document: An existing indexed document stored in Sage Paperless Construction.
Queue Documents: An existing document currently in my queue, stored in Sage Paperless Construction.
File: Any file that can be located on the local computer or network.
Recent History: From a file listed in the recent history listing.
Click the Search
icon to locate and select the document.Select the Page Range you want to insert into the target document.
In the Insert Options section, select either the or radio button and enter the page number.
In the Other Options section:
Include Annotations: Click to include existing annotations on the source document when the document is inserted.
Delete Pages After Insert: Click to delete the source document page(s) after the successful insertion into the target document is complete.
Click to complete the insert process.
Use the read-only toggle to lock or unlock the document that you see in the document viewer.
From the document viewer, click the Set Read Only
 icon.
icon.The document re-displays with Set Read Only icon replaced with the Remove Read Only icon. A Read Only indicator displays in the header.
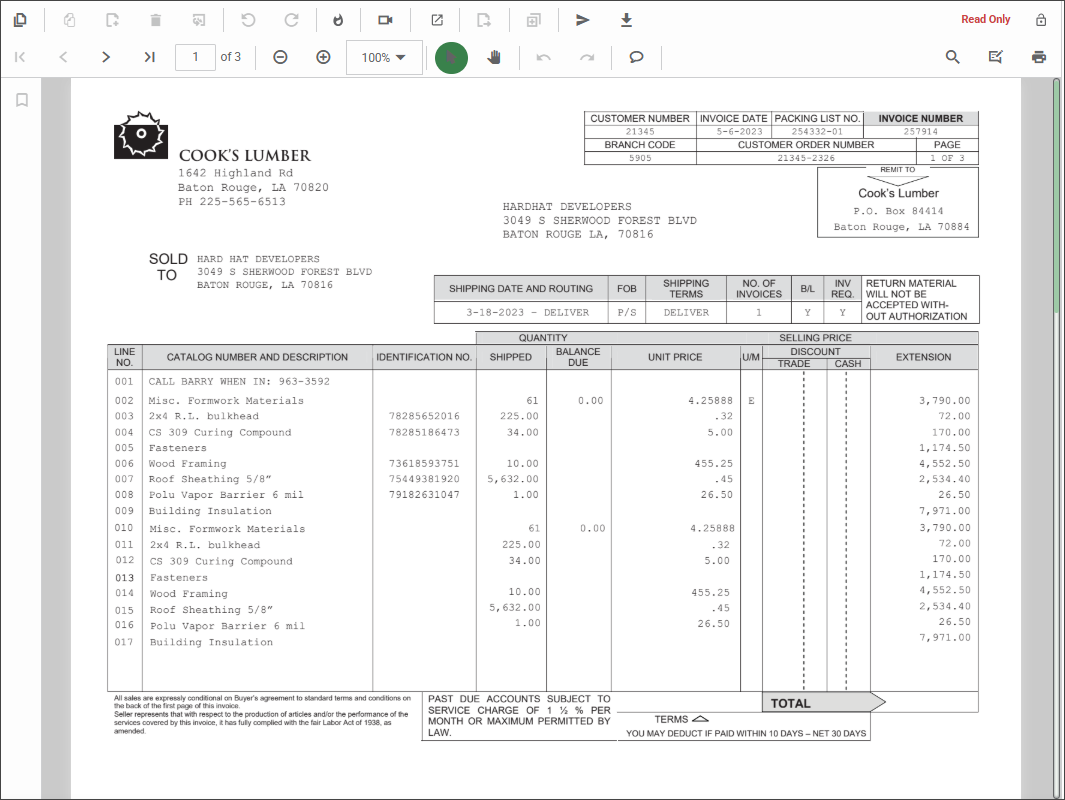
To make the document available for editing again, click the Remove Read Only
 icon.
icon.
When you expand the Document Match sidebar dropdown, documents that have already been matched to the active document, page or other type of artifact display.
Complete the following steps to add a new matched document:
Click the
 icon in the Document Match sidebar to open the matched document viewer.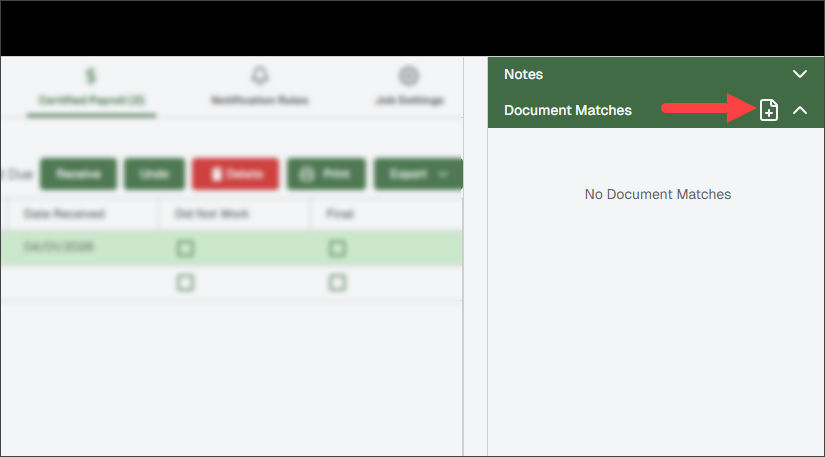
A page similar to the following displays:
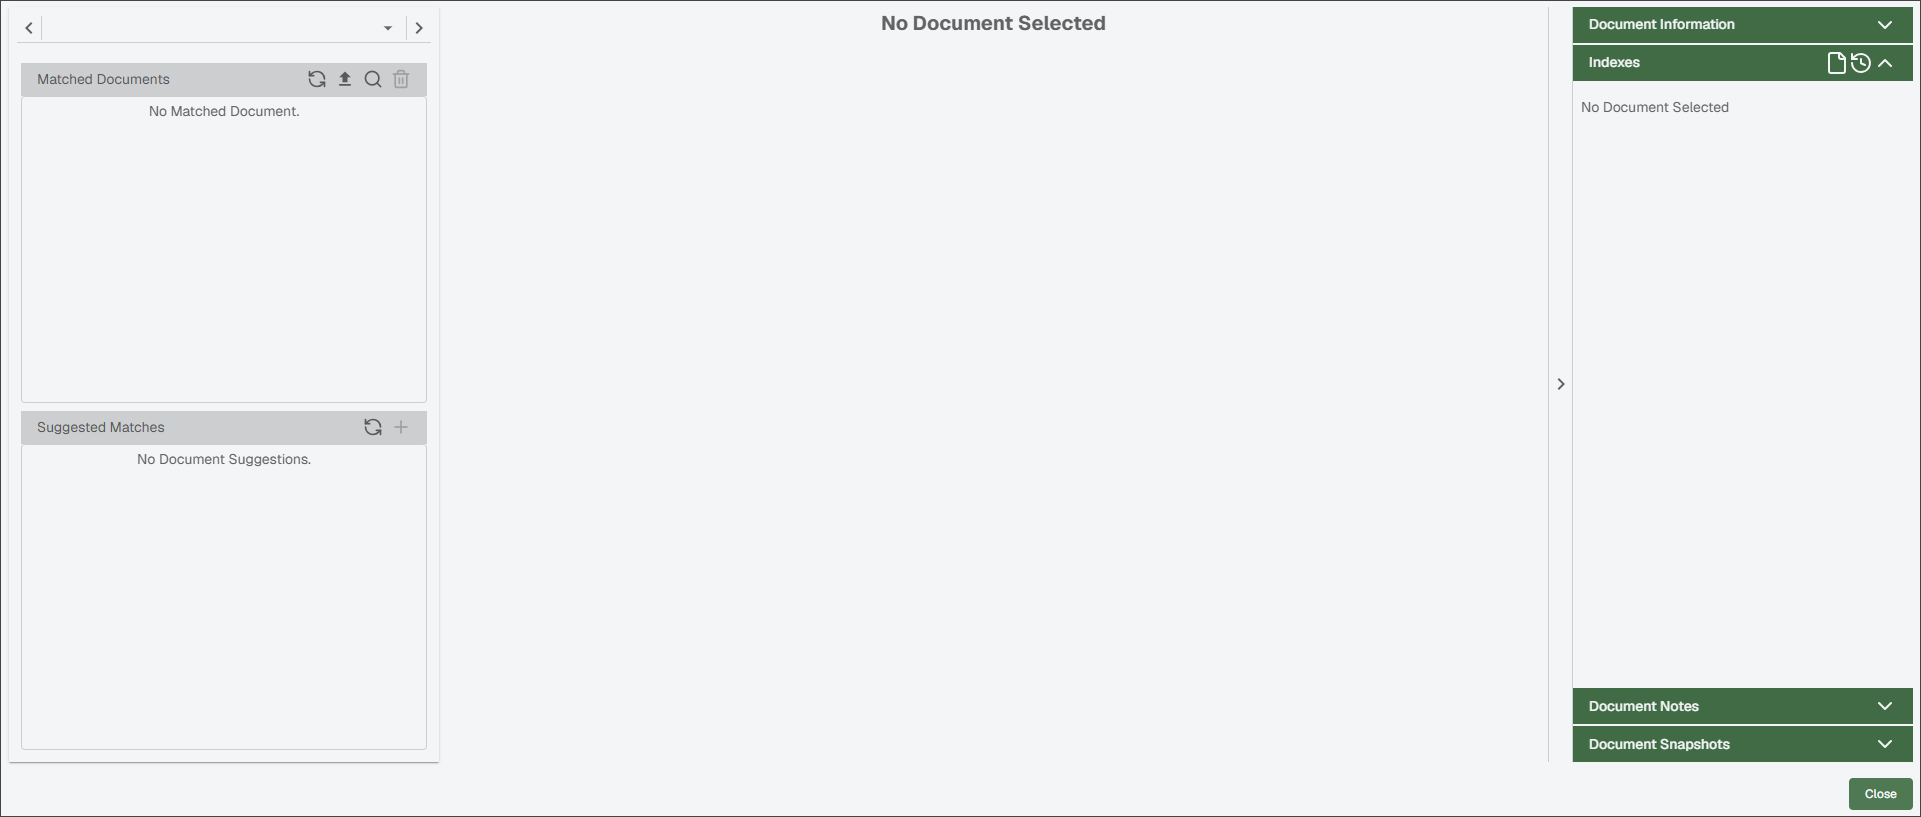
Do one or more of the following:
Click the Refresh
 icon in the Matched Documents pane.
The list refreshes to display any new matched documents.
Click the Search
icon in the Matched Documents pane to launch the Add Matched Document dialog.Enter document search criteria on the Criteria tab, then review document information and indexes on the Results tab.
Note
Prior to matching the document, you can review its Document Preview in the sidebar.
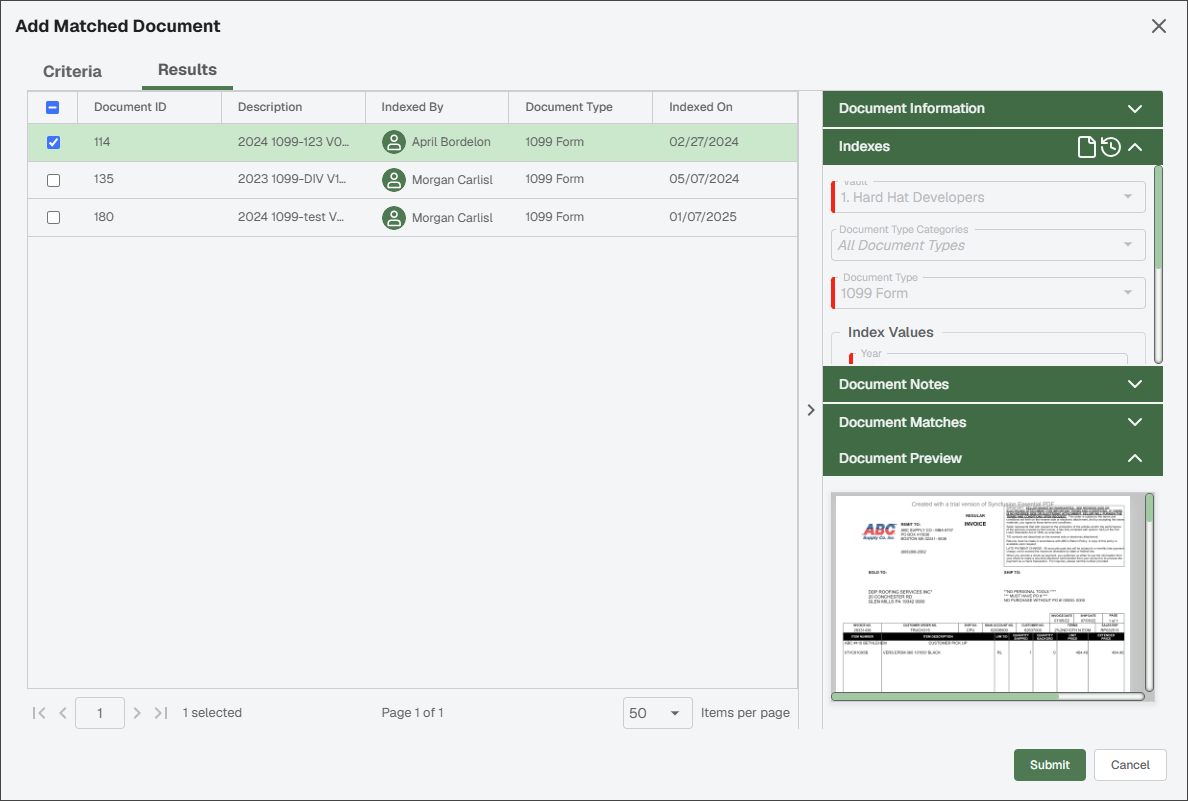
Select the document(s) to match and click .
Click the Upload
 icon in the Matched Documents pane to launch the Document Picker dialog .
Note
This functionality is only available when matching documents within the ClearToPay™ module.
Select a from the dropdown, then click to upload a local file into the system.
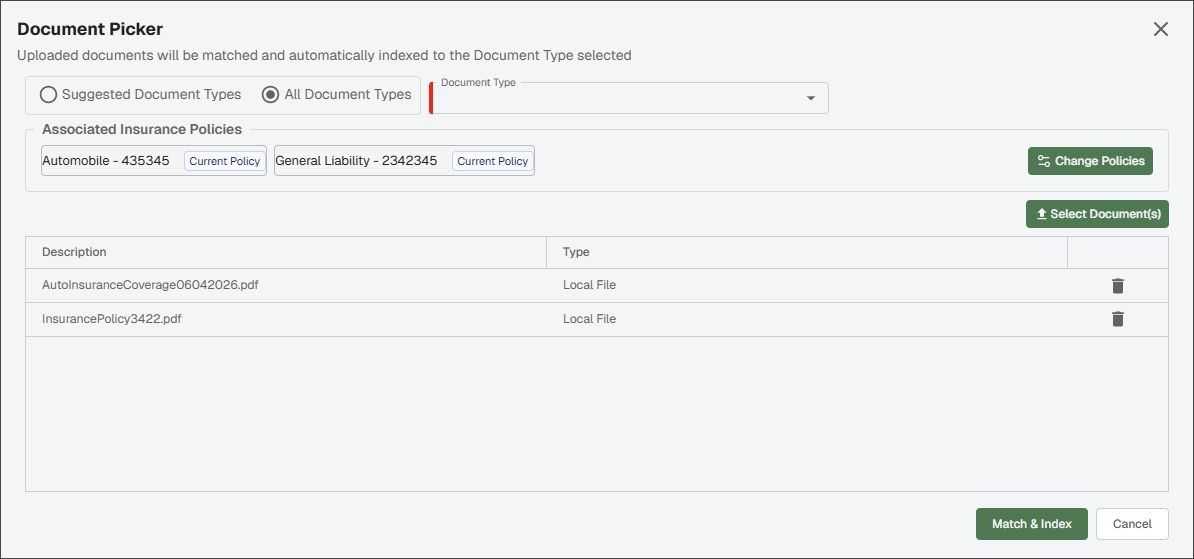
Click match and automatically index the uploaded file using your selected document type.
Tip
If you are matching documents from a vendor insurance page, an Associated Insurance Policies section displays. Click if needed to select the policy types associated with the insurance documentation you are uploading and matching.
Tip
If you need to upload a document and the appropriate Document Type/indexes are not available, you can still match the uploaded file without indexing it by clicking . A Matched Document has not been Indexed
 indicator displays. The document can be indexed at a later time.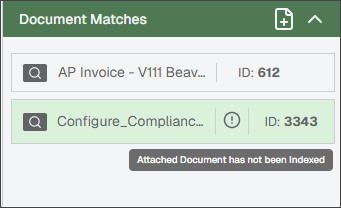
Click the Refresh
icon in the Suggested Matches pane.Review documents suggested as possible matches by the system.
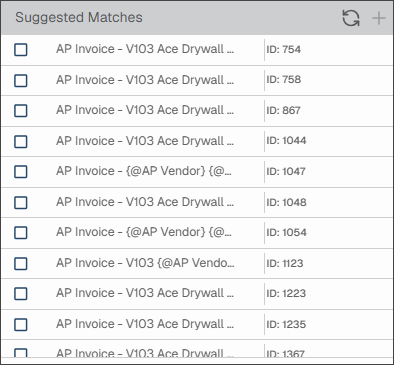
With the document's check box selected, click the
 icon to match the document.
Repeat the steps above for any additional documents that should be matched. You can also select multiple documents and match them at the same time.
Click when finished.
Click the Move Current Page  icon to open a Move Page dialog. From here you can move the current page to another position in the multi-page document.
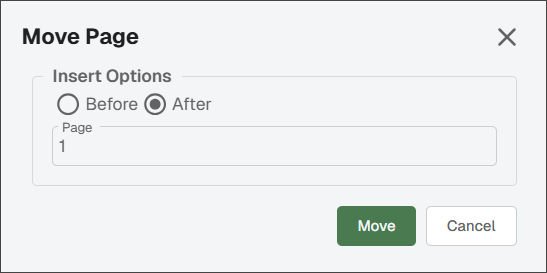 |
Manipulate the Insert Options section to change the order of the pages in the document.
Note
Permission to perform this function is assigned in . See Document Types Tab for more information.
Click the Pop Out Document icon to open the document in a new viewer window. This way you have the current document available to compare after accessing a different document in the Viewer.
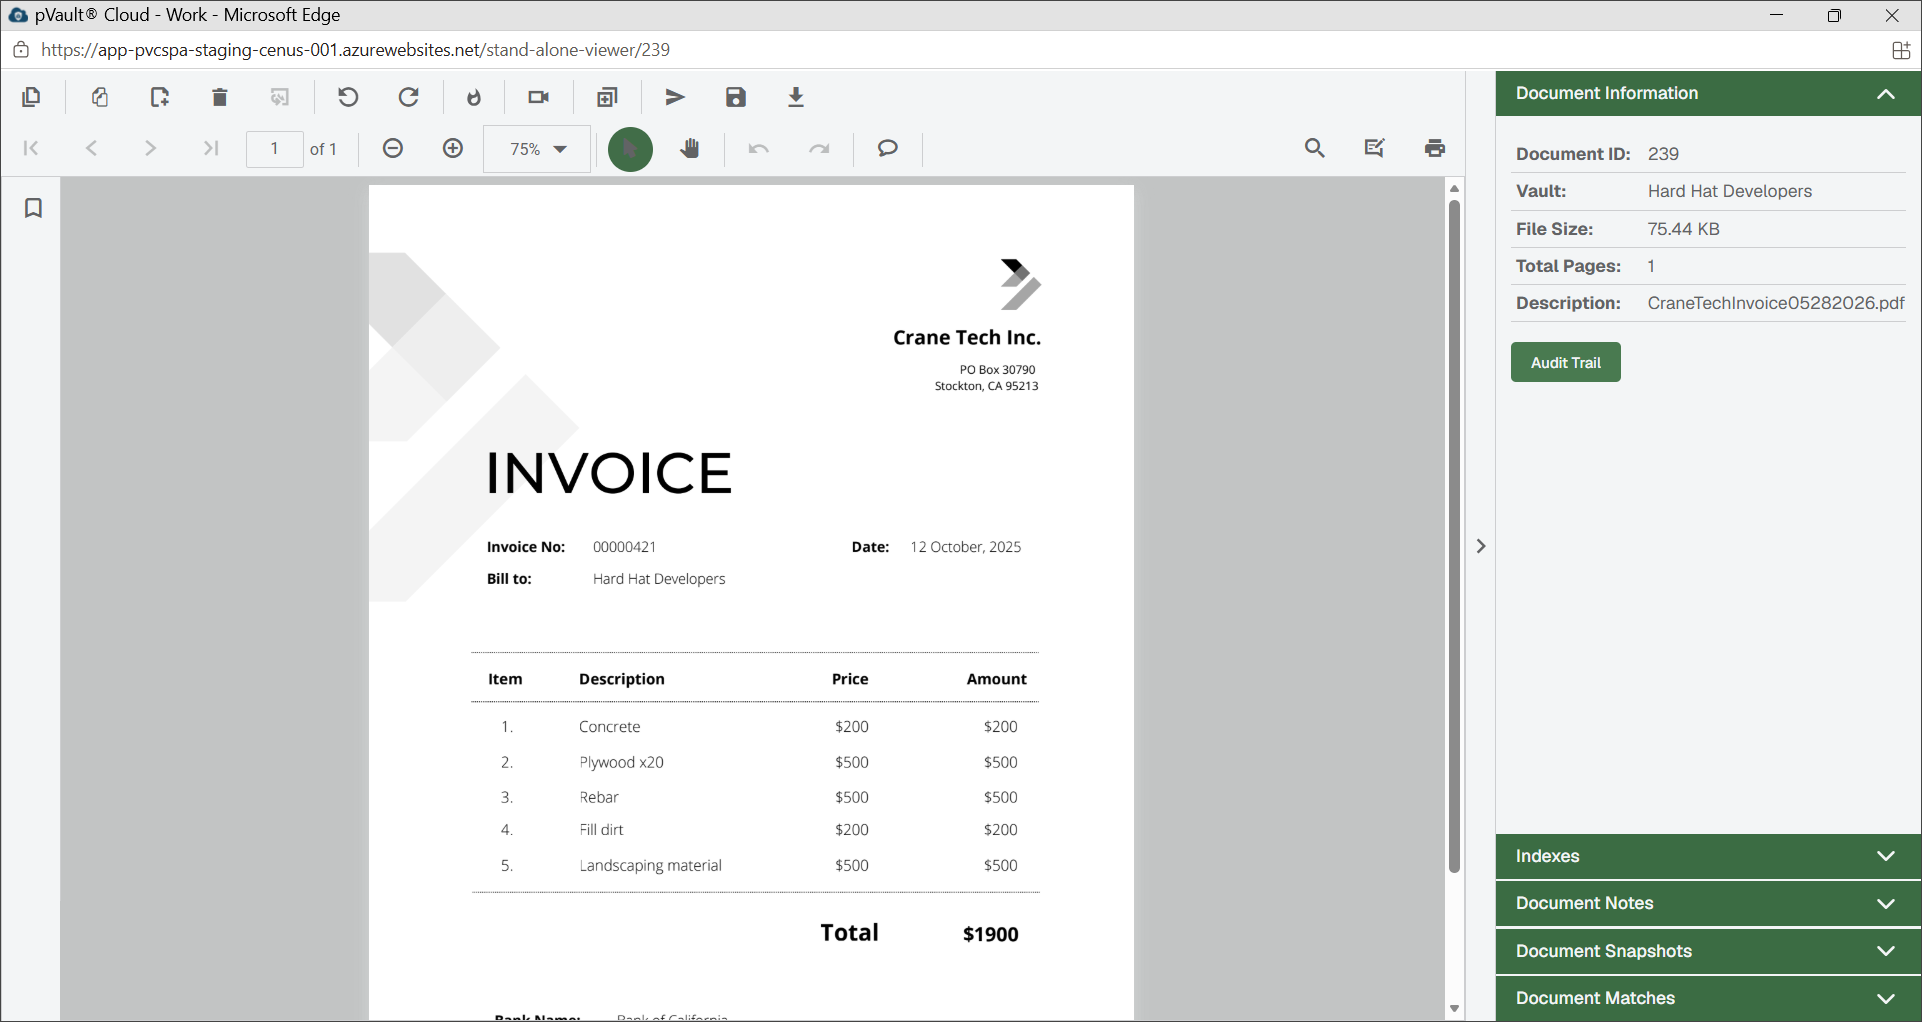
In Sage Paperless Construction, there are many pages that provide the option to print a document. Certain pages provide a Print or Print Document button. The document viewer has a Print  icon.
icon.
Click .
Note
Your print options vary based on your computer and all settings are saved on a document-by-document basis.
Important
If accessing the Print icon through the search utility, the Image List allows more than one document to be printed at a time. If accessing the Print icon from elsewhere, a single document should display in the Image List.
A Print Preview page similar to the following displays:
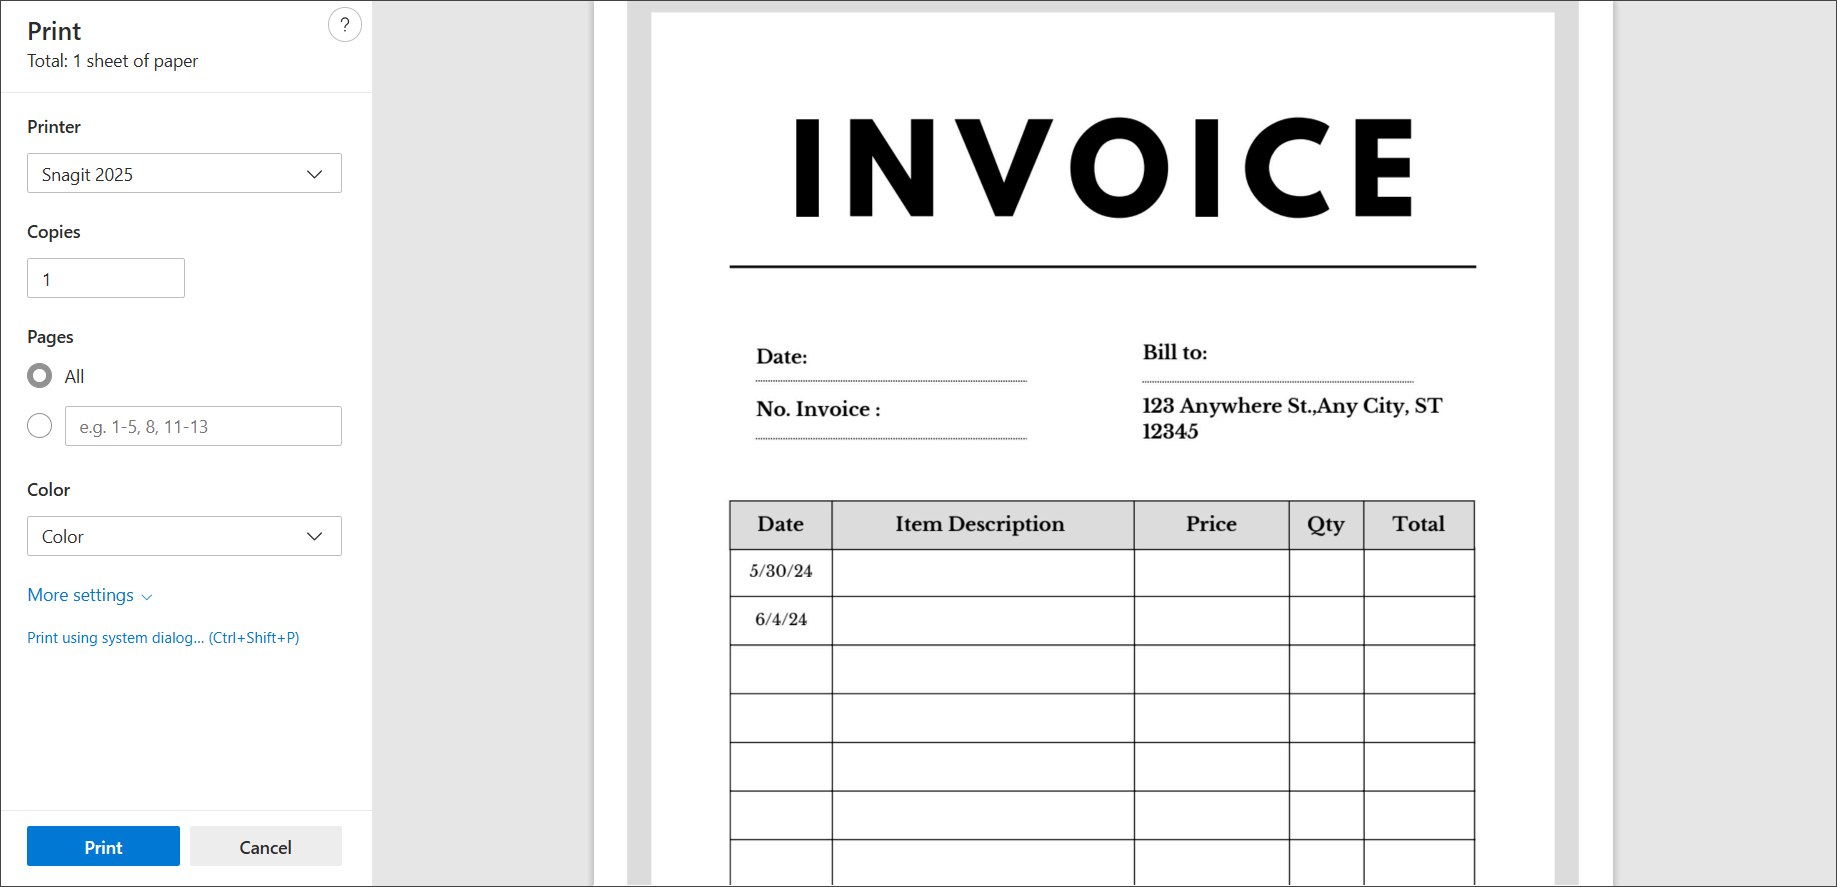
Select your print options, including the destination printer, which pages to print, layout, etc.
Click .
Any non-indexed document can be "pushed" to a user queue for further processing.
Do one of the following to push a document to a queue:
From My Paperless, click . Then click and select the file.
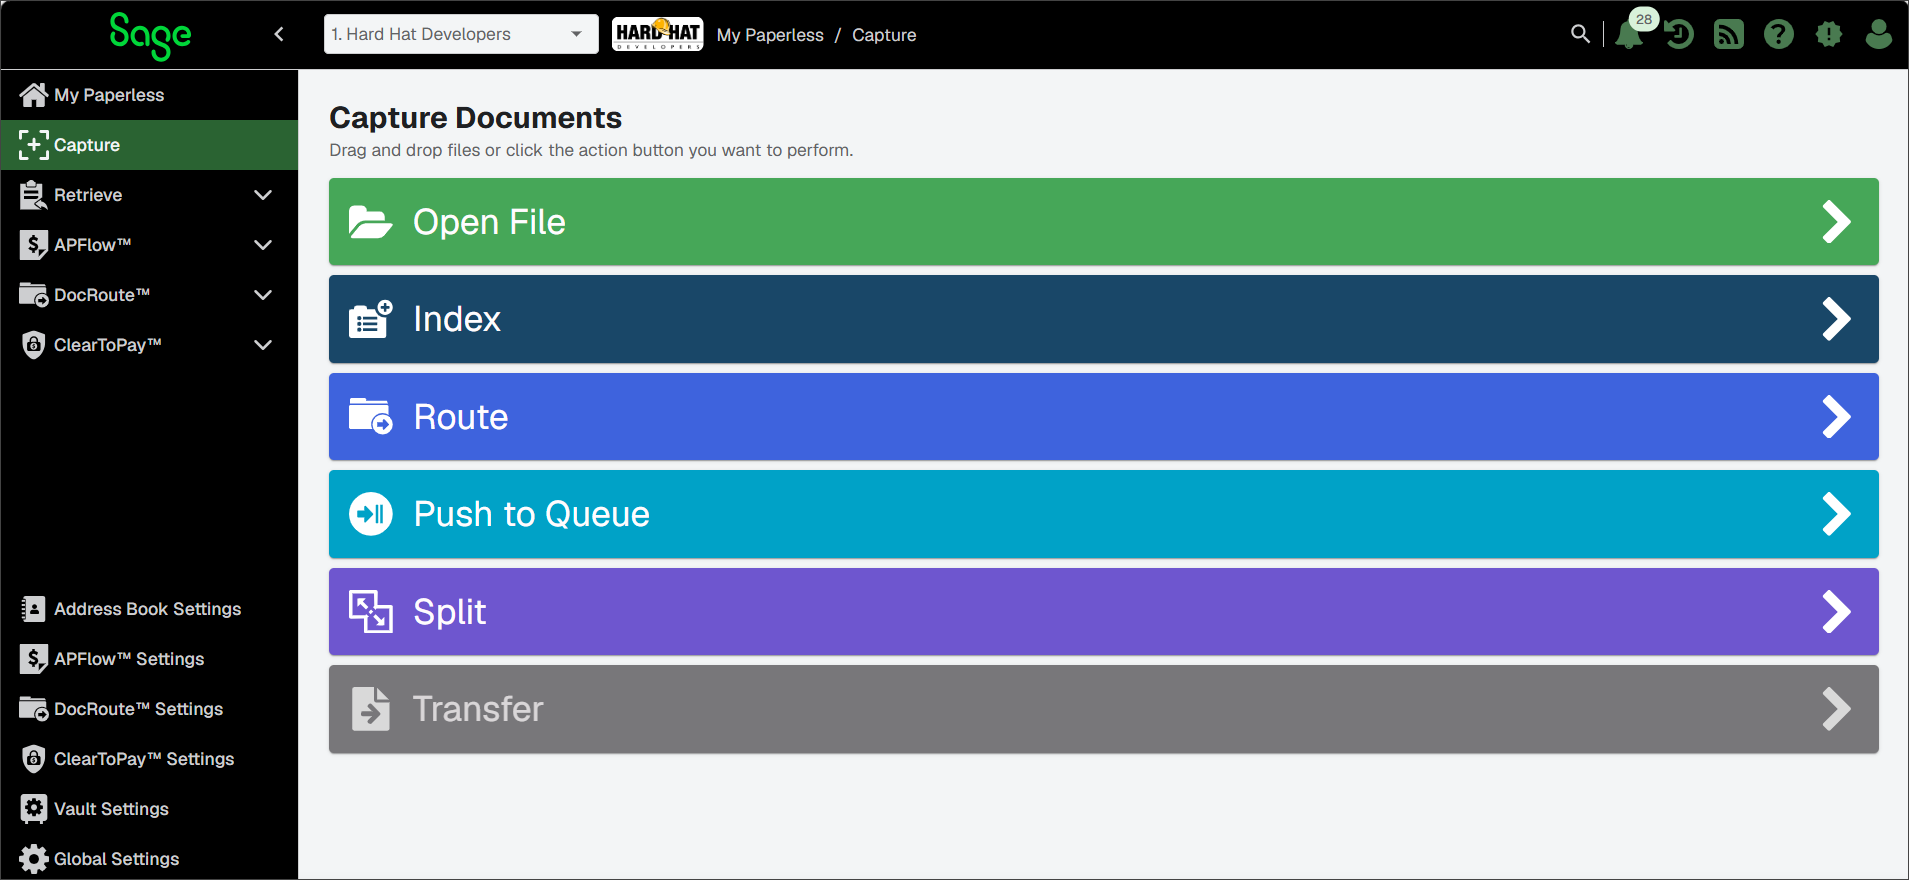
If a document is already in the system in one queue and you need to move it to another queue, click the Push to Queue
 icon located at the bottom of the page.
In the Push to Queue dialog, do the following:
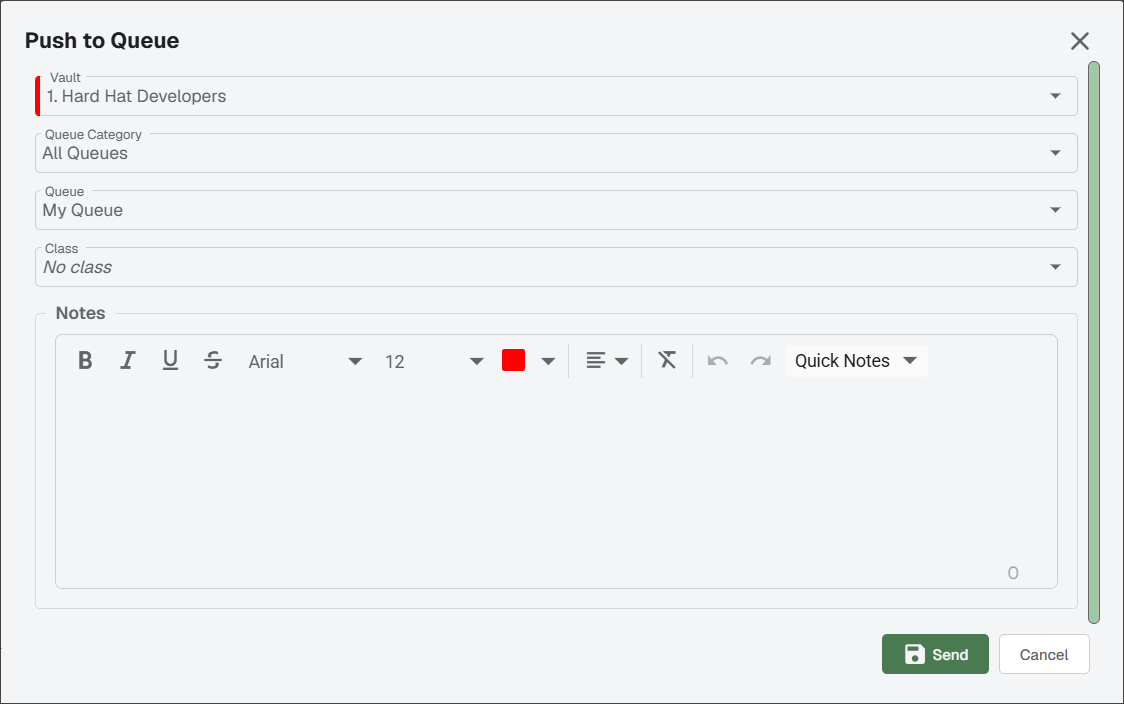
In the Vault field, use the dropdown list to select the vault where the document is to reside.
Note
The current vault is the default.
In the Queue Category field, use the dropdown list to select the queue category.
Note
Selecting this category limits the number of available queues.
In the Class field, use the dropdown to select the class to which the document should be designated.
Note
The class designation may be used for a specific business purpose. In Sage Paperless Construction, a class designation could be used with a routing rule or a report.
(Optional) In the Notes field, enter any appropriate notes.
Click to send the document to the selected user's queue.
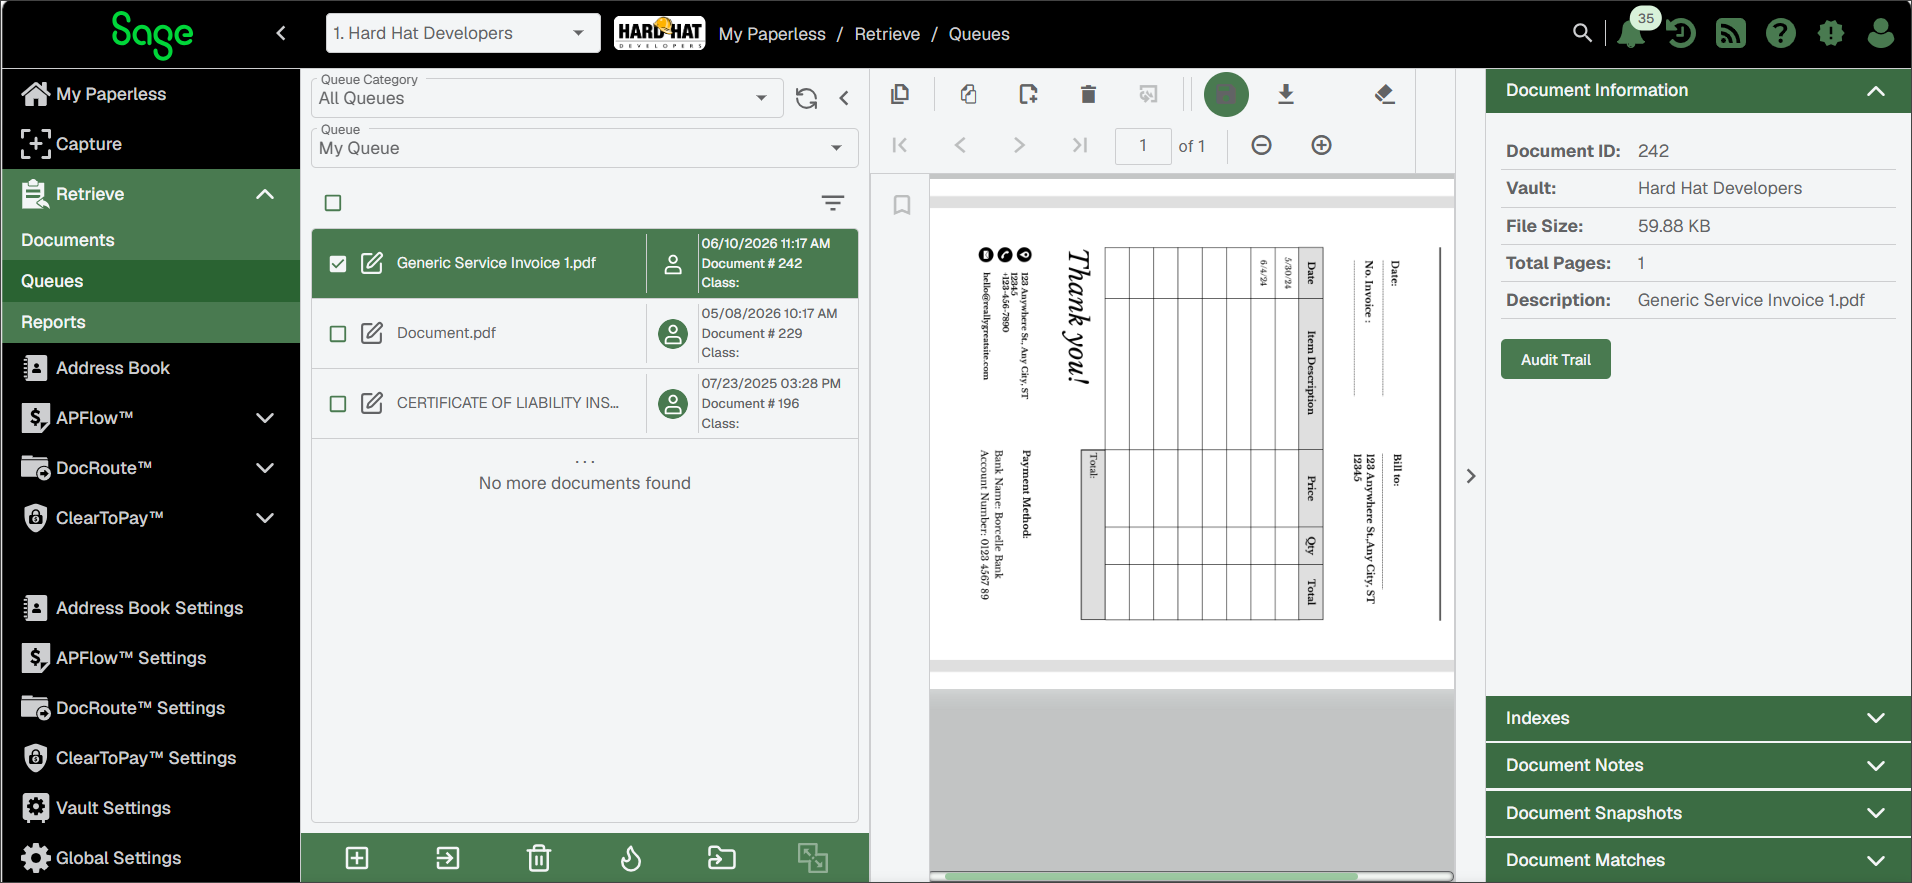
To rotate the image currently being viewed, click the Rotate Left  icon to rotate the image counterclockwise 90° or click the Rotate Right
  icon to rotate the image clockwise 90°
For example, the image below has been rotated to the counterclockwise.
You can use the pop out option to open and work on a document in a new browser window.
Note
Users can open as many additional windows to view documents as they choose. The only limitation is the user's workstation resources.
From My Paperless, click .
From the Retrieve navigation bar, click .
In the document viewer, click the Pop Out Document
icon.The document opens in a new browser window. When you finished working with the document, save any changes and close the window to be returned to the main document viewer.
You can set up document alerts for certain triggers in Sage Paperless Construction, including an alert for when a document is deleted, a note is added or a document is saved. These alerts could be for all documents or limited to a specific document ID.
For more information, see Set Up Document or Invoice Alerts.
The Transfer Document tool is used to copy source documents into a new or existing document or to a file on the hard drive.
Important
To access the Transfer Document dialog, the document must be open in Sage Paperless Construction.
From the document viewer, click the Transfer Pages
 icon.
icon.The following Transfer Document dialog displays:
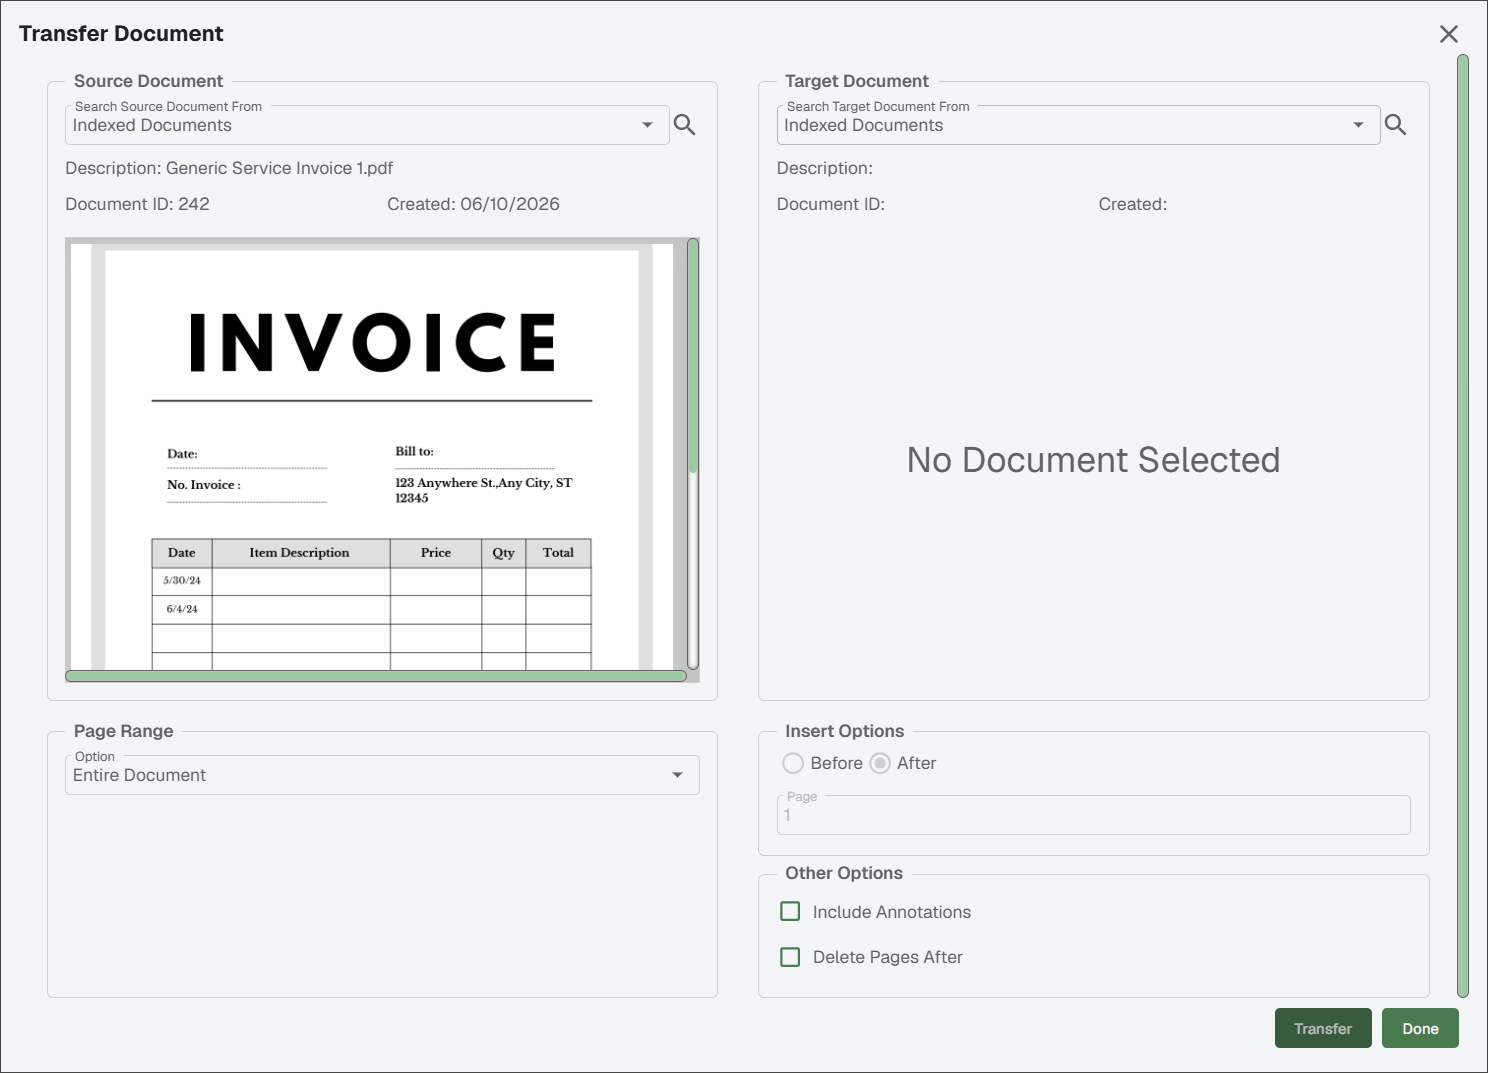
Review the two areas in the dialog where documents can display:
Note
You can click to move the identified Target Document to the Source Document.
Source Document: Where the pages are coming from displays in the left pane.
Target Document: Where the pages are going to displays in the right pane.
Select the Page Range you want to insert into the target document.
Click the Search Source Document From dropdown to select the source document type. Then choose from the following options:
Indexed Document: An existing indexed document stored in Sage Paperless Construction.
Queue Documents: An existing document currently in my queue, stored in Sage Paperless Construction.
Recent History: From a file listed in the recent history listing.
Click the Search
icon to locate and select the document.In the Insert Options section, select either the or radio button and enter the page number.
In the Other Options section:
Include Annotations: Click to include existing annotations on the source document when the document is inserted.
Delete Pages After: Click to delete the source document page(s) after the successful insertion into the target document is complete.
Click to complete the transfer process.
Click the Thumbnail  icon to open a thumbnail section immediately to the left of the Viewer.
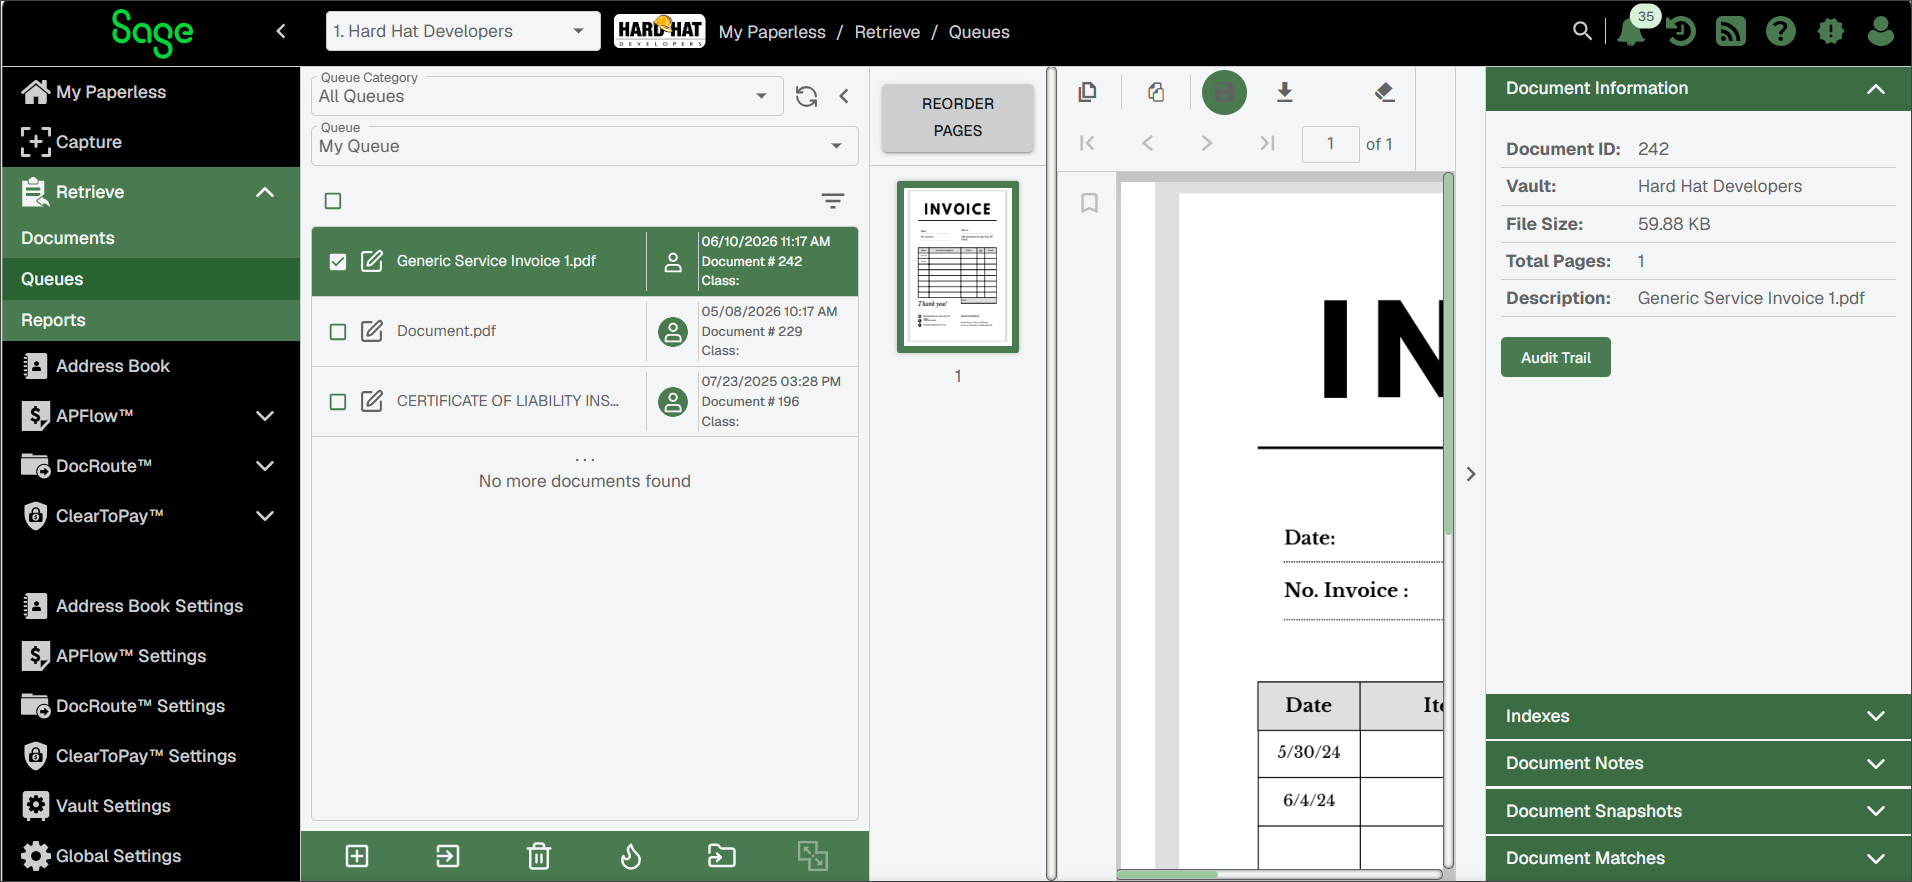
From there, you can click the button to drag and drop the page thumbnail images to update the page order. Click when you finish.
While viewing a document in the Sage Paperless Construction viewer, you can use the Zoom In  and Zoom Out
  icons to change the image size:
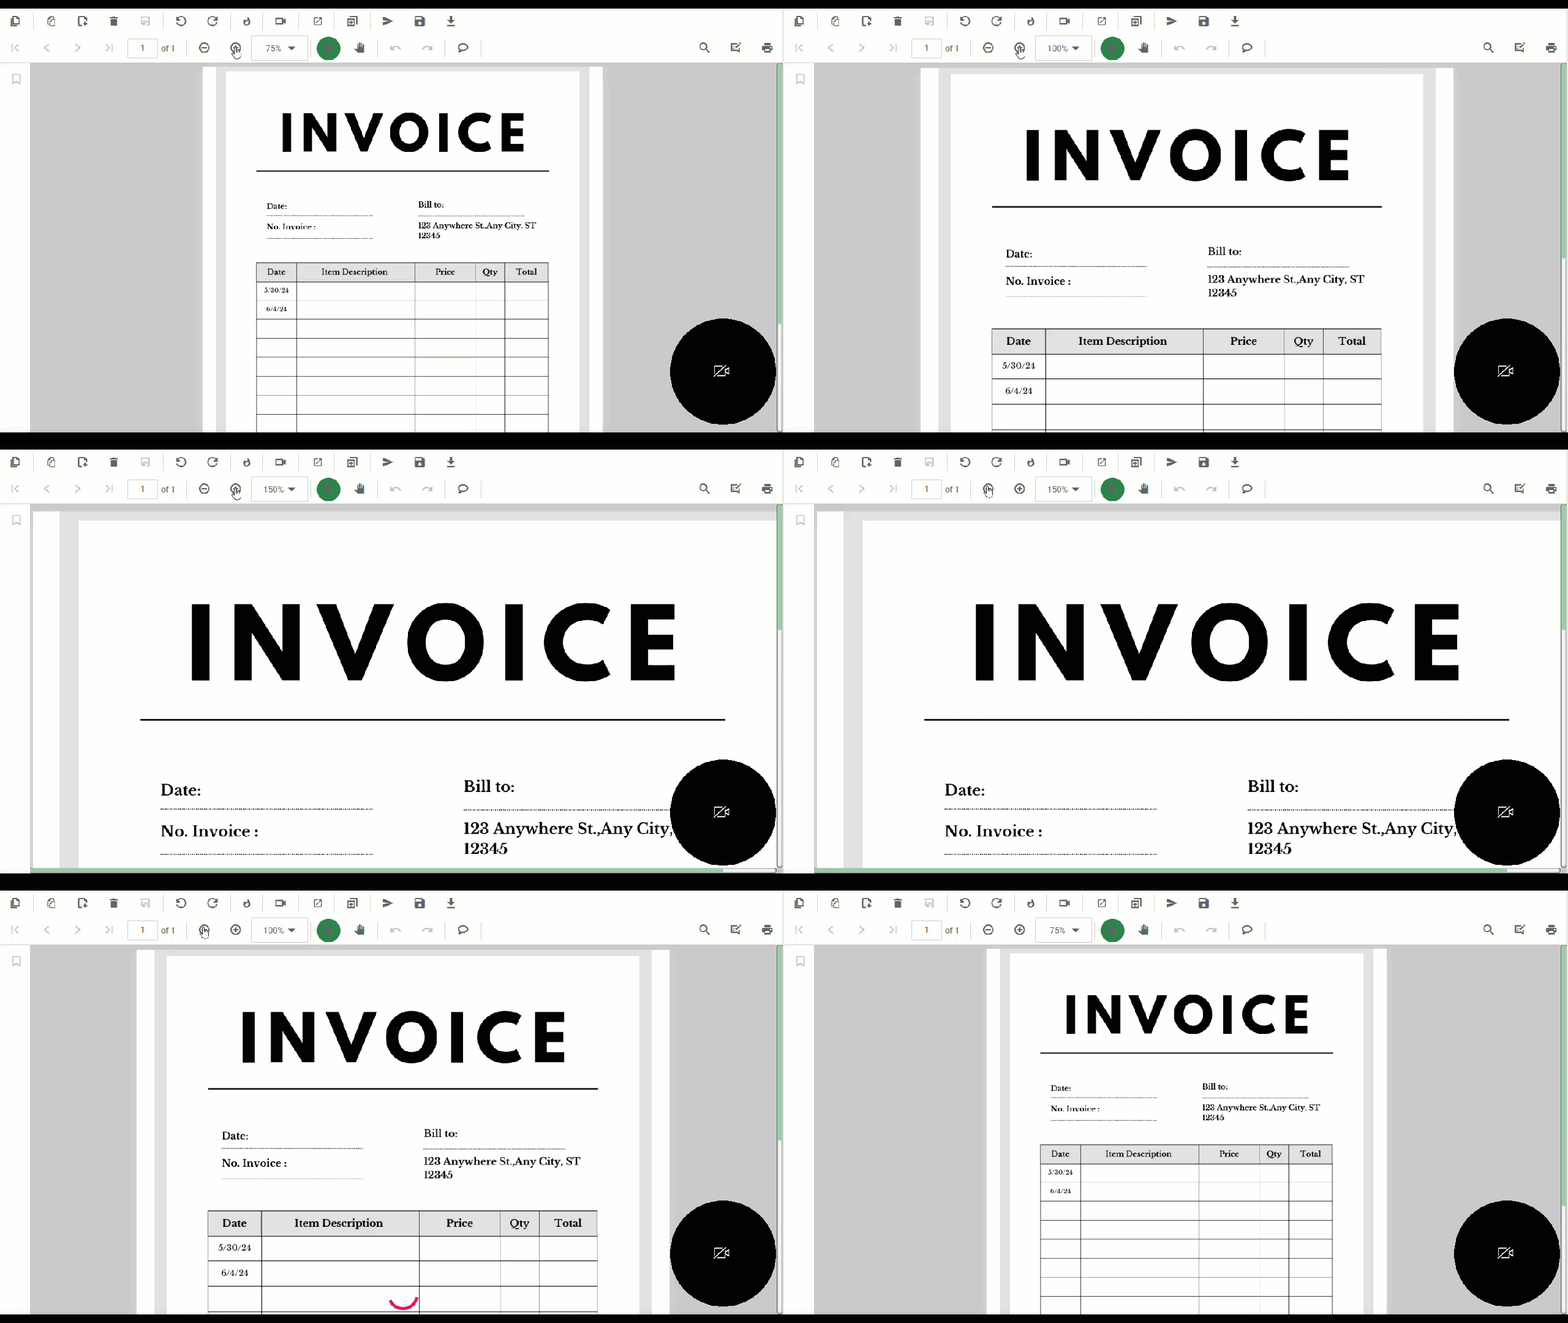 |
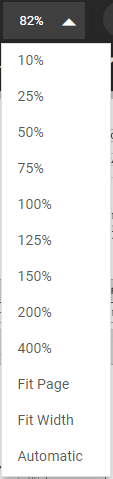
You can also use the dropdown to adjust the document image to a specific size.
 |