Job Contacts
Many contacts are shared between the company and various jobs, and can be accessed from the company Contacts or job Contacts pages. To view, add or edit contacts for a particular job, you must do so from that job's Contacts page.
Complete the following steps to access your job's contacts:
From My Paperless, click .
In the ClearToPay™ left navigation, click .
Choose the job from the list.
Click .

The Contacts page opens and displays a list of existing contacts for this job, including their names, the email groups to which they belong and contact information:
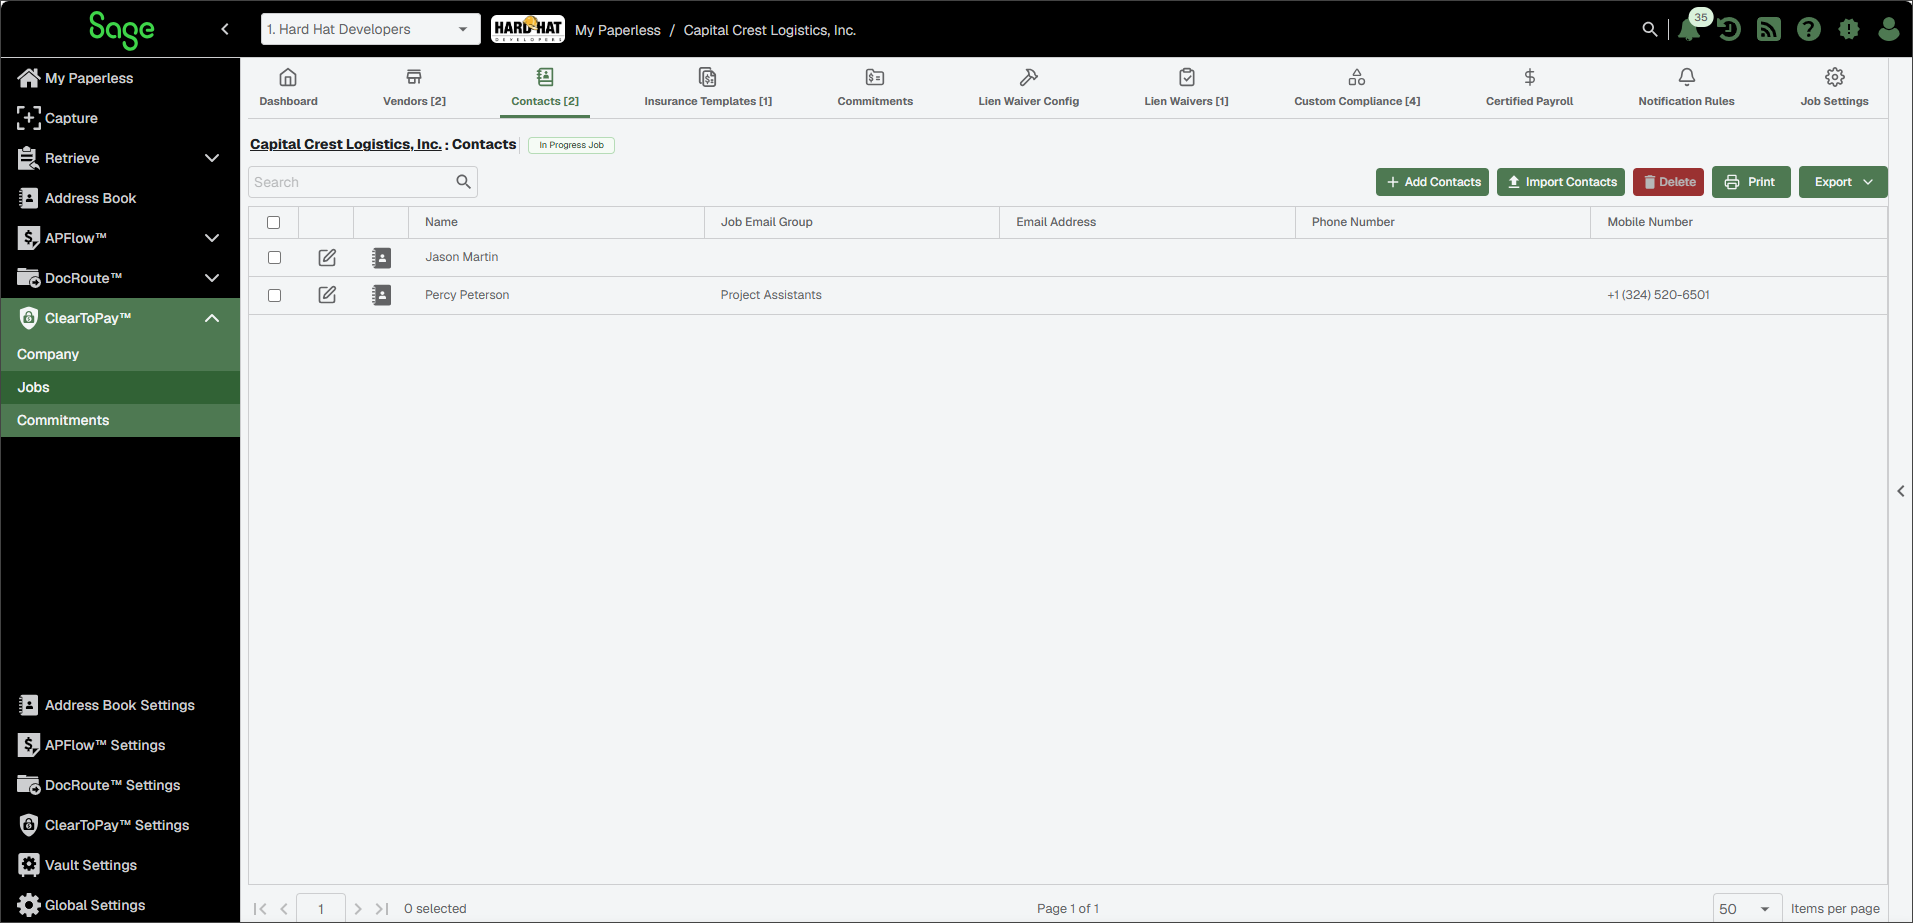
From the Contacts page, you can perform the following tasks:

To add a new contact to your job, click . For more information, see Create Job Contacts.

To import contacts from a bridged accounting system or the Address Book, click . For more information, see Import Job Contacts.

To delete one or more contacts from the list, select their check box and click .
Deleting a contact from the job contact list does not remove them from the company job list (if they are associated with one) or the Address Book.

Click to print the Contacts grid.

Click to export the grid information to Excel, CSV or PDF.

Click the Edit icon for a particular contact to edit their name, job email group, email address or phone numbers. Once the updates are complete, click .

Click the Address Book icon to view the contact and their associated jobs in the Address Book.
From the job's Contacts page, click .
In the Add Contact Information dialog, review the sections below:
Note
Depending on the company and whether or not it was imported into ClearToPay™ from the bridged accounting system, some of the contact information described below may be prepopulated. If it is not, you can enter the information manually.
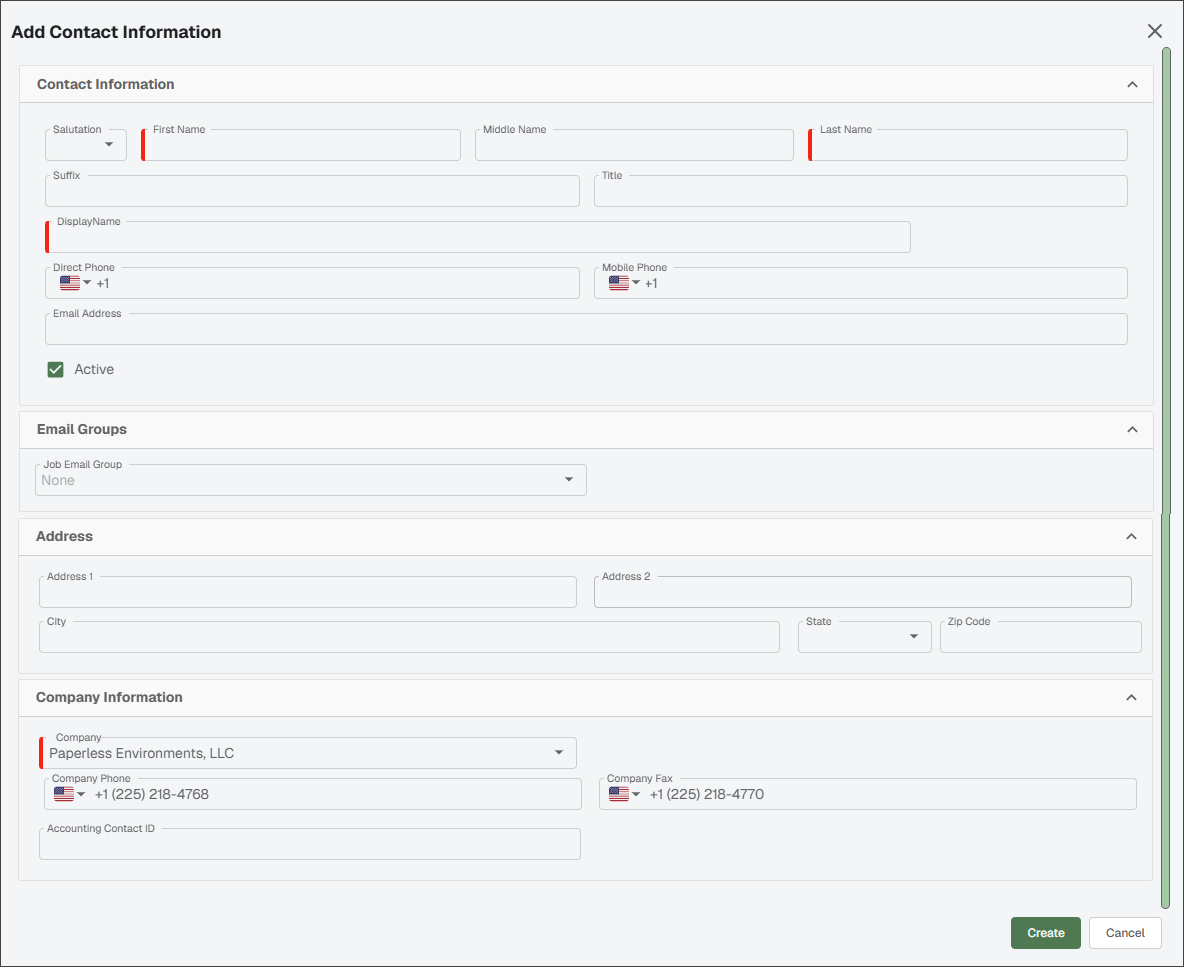
In the Contact Information section:
Manually enter the contact's name in the First Name and Last Name fields. These are required fields.
The Display Name field populates systematically, but can be edited if needed.
Enter other information such as salutation, suffix, title, phone numbers and email address. This information is useful for email and notification purposes.
Leave the Active check box selected to make this contact visible in the Address Book (as long as you are filtering by an Active contact status). If this contact should not be active, deselect the check box.
In the Email Groups section, click the dropdown to select an email group from the list. This ensures the new contact received any emails sent to that group.
In the Address section, enter the address information for the contact's place of business.
In the Company Information section:
Note
The Company, Company Phone and Company Fax fields are pre-populated with the contact's company-level details.
Select the company the contact is representing from the Company dropdown. This is a required field.
Enter the numbers in the Company Phone and Company Fax fields.
If the associated ID record did not prepopulate from the accounting system, you can enter it in the Accounting Contact ID field.
Click .
Complete the following steps to import contacts from a bridged accounting system or Address Book:
Note
To import contacts from an accounting system, the company vault must already be bridged to that system.
From the job's Contacts page, click .
An Import Job Contacts dialog similar to the following displays:
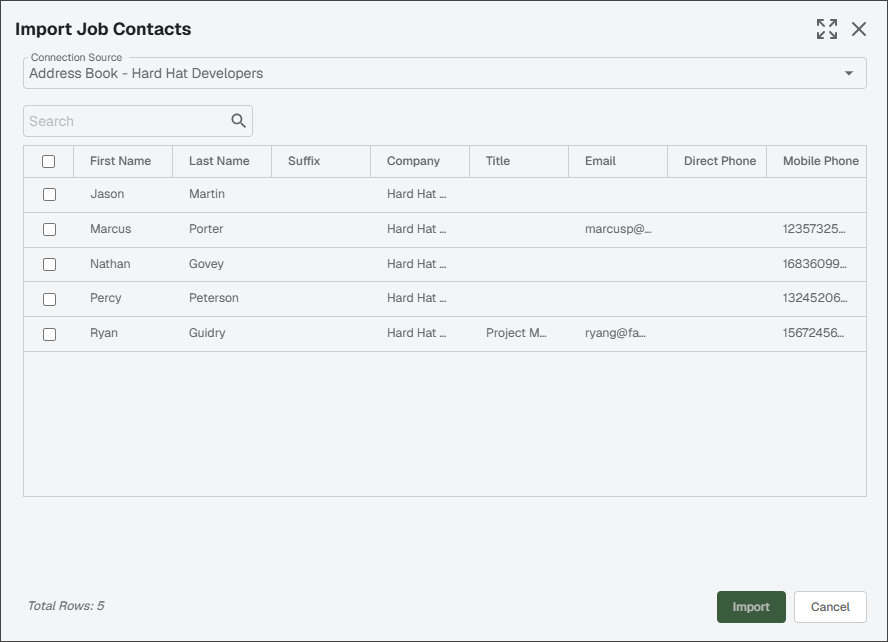
In the Connection Source field, you can select (which is the default) or . The grid updates based on which option you select.
Select the check boxes for the contact(s) you want to import into the Contacts page.
Click .