Vendors
Vendor information is accessed through the Jobs dashboard in ClearToPay™. Because vendors can be assigned at the job level or to other vendors (when working as another vendor's sub/tier vendor) they are created and managed using a hierarchy system. You can choose to add a primary vendor directly to the job, or you can add a vendor beneath another vendor, and so on. This tiered hierarchy is reflected in ClearToPay using indentations and breadcrumbs. Each vendor's compliance information is tracked by ClearToPay, and is reflected upward, meaning all tiers of vendors within a job must meet the established compliance requirements for the job to be considered compliant.
In ClearToPay, All Operations Vendors are handled differently than other vendors. An "all ops vendor" (if enabled in ) works as a subcontractor across multiple jobs. Rather than requiring job-specific insurance certificates, the general contractor may track All Operations Vendors as their own entity rather than on a job-by-job basis. However, if there is a reason to track them on the job level, such as differing coverage requirements, they can choose to do so.
Note
If your company has changed the labels used for jobs or vendors in ClearToPay™, these options follow your company's terminology. Job, sub-job and vendor are the default terms.
Complete the following steps to access a vendor's page:
From My Paperless, click .
In the ClearToPay™ navigation bar, click .
From the Jobs page, do one of the following:
Select a job from the list to access its vendors.
Click on (if enabled) to access those vendors.
Click .

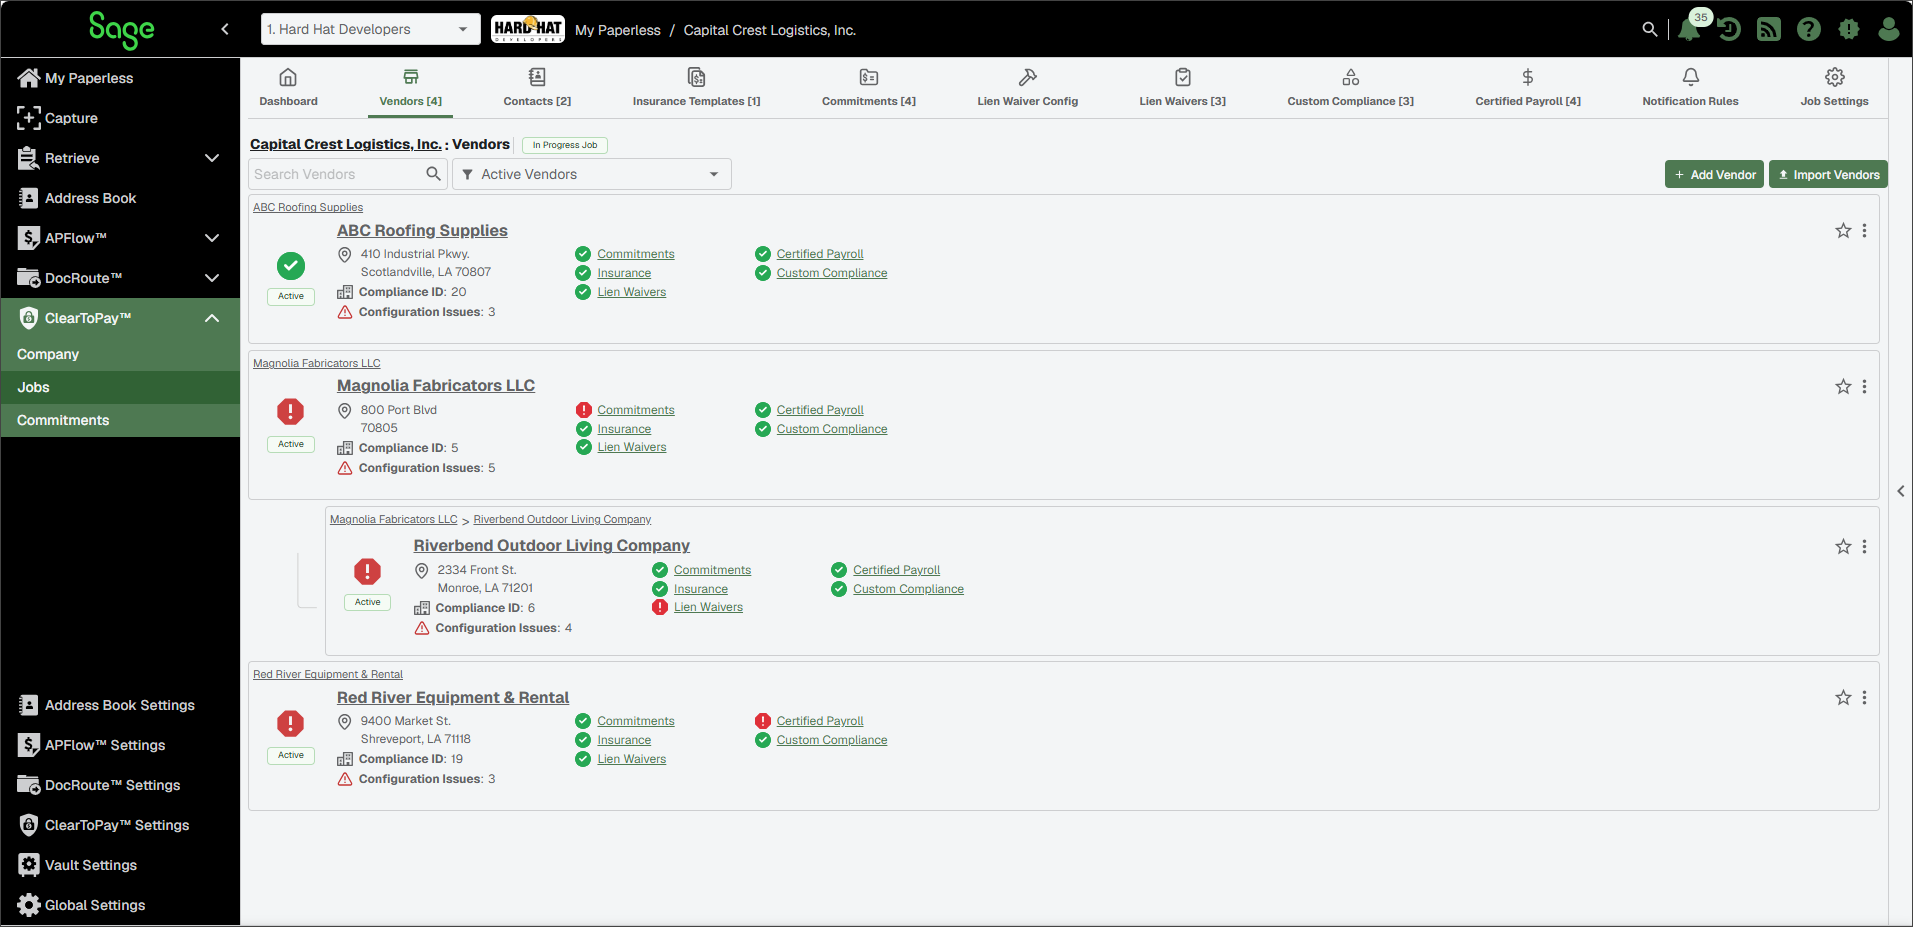
A page similar to the following displays. Vendors working as subcontractors for another vendor are indented beneath that vendor. This hierarchy is also indicated by the breadcrumbs along the top of each vendor entry.
From the Vendors page, you can perform the following tasks:

To search for a specific vendor, enter the vendor name or number in the Search Vendors field. Then, press
Enteror click the Search icon.
icon.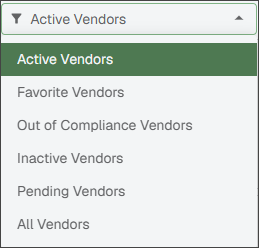
To narrow the list of vendors that display, click the dropdown to display filter options.

To add a new vendor to the job, click . For more information, see Add New Vendor.

To import vendors to the job, click . For more information, see Import Vendors.


Each vendor entry includes a primary icon that indicates the vendor's overall compliance.
The green check icon indicates the vendor (and all the vendors beneath it) are in compliance.
The red warning icon indicates the vendor (and all the vendors beneath it) are not entirely in compliance.
Smaller icons are also present to indicate the compliance for each vendor's commitments, licenses, certified payroll, insurance, lien waivers and custom compliance. Not all of these criteria apply to every vendor, but the icons let you know at a glance where issues exist.
Vendor Name and Compliance ID
Click the vendor name link within the grid to access that vendor's dashboard. For more information, see Vendor Dashboard and Navigation.
Vendors have an automatically generated ID number. A vendor number can also be added manually when the vendor is created or edited.
Status Indicators
Each vendor displays one of status icons shown to indicate the overall status of the job its associated with.
Active status means that the job is in-progress.
Closed status means that the job is complete.
Pending status means that the job has not yet started, but information is being assembled.
Completed Operations status means that the job is in the time frame when work has been completed but the job still needs to carry insurance to protect the customer from liability.


Click the Star icon for a vendor to indicate this vendor is a favorite. Vendors marked as favorite can be found using the Favorite Vendors filter.
To remove the favorite status, click the Star again.

The vendor breadcrumbs listed at the top of each vendor card indicate the hierarchy and where each vendor and tier falls in the list for this particular job.
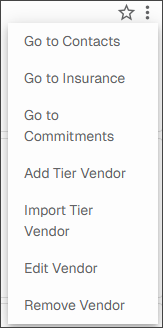
Click the vertical ellipsis
 to display a dropdown of navigable links pertinent to that vendor:
For more information on vendor contacts, see Vendor Contacts.
For more information on this vendor's insurance, see Vendor Insurance.
For more information on vendor commitments, see Vendor Commitments.
For more information on adding a tier vendor, see Add New ClearToPay™ Vendor.
For more information on importing a vendor or tier vendor, see Import Vendors.
For more information on editing an an existing vendor, see Edit Vendor Information.
For more information on removing a vendor from a job or vendor, see Remove a Vendor from a Job.
You can use the ClearToPay Vendor Dashboard page to access important vendor features using the icons located at the top of the page, review and edit vendor information or check on configuration issues.
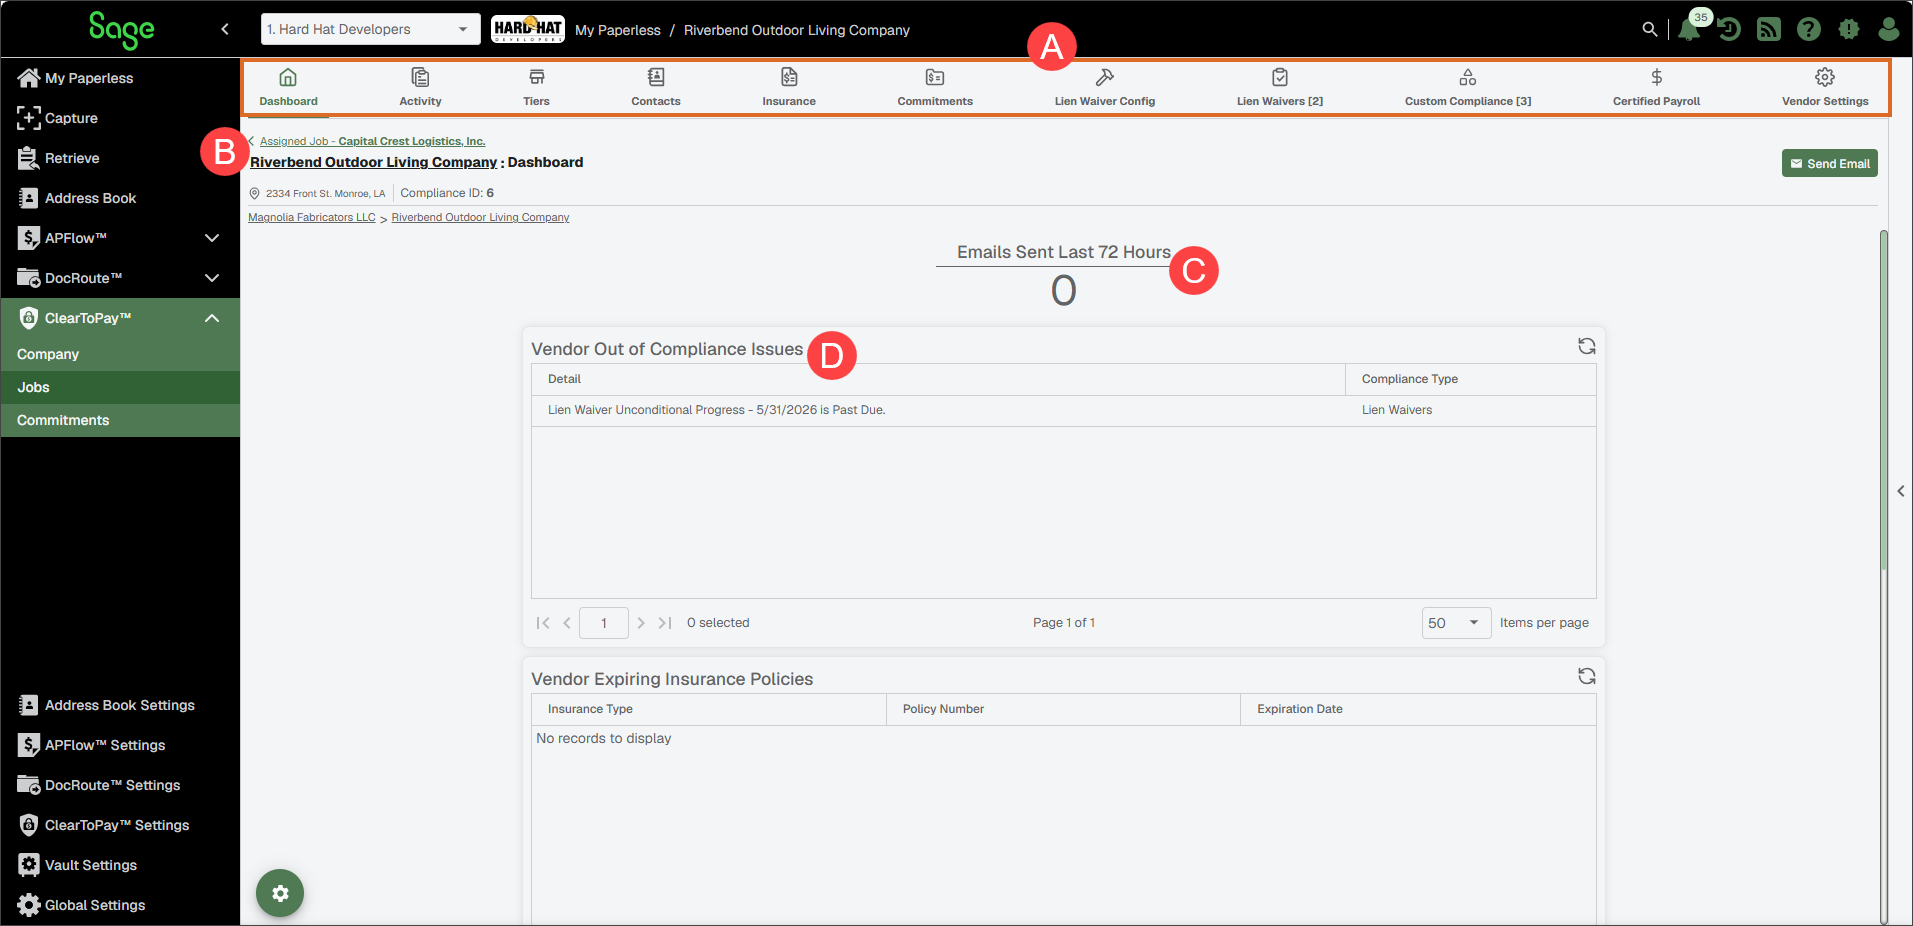
| A: Quick links to access vendor information and settings. |
| B: Vendor address and contact information. See Edit Vendor Information for detail on updating this information. |
| C: Configurable mini widgets. See ClearToPay™ Widgets for more information. |
| D: Configurable grid widgets. See ClearToPay™ Widgets for more information. The buttons in the grid widgets take you to the area of concern or open a page where you can view and address specific issues. |
ClearToPay™ Widgets
You can make modifications to the widgets that display on your various ClearToPay dashboards. ClearToPay provides various grid and mini widgets that help you quickly view and access relevant information like compliance issues, expiring policies, configuration issues and emails.
Just like other dashboards in Sage Paperless Construction, the system remembers your widget settings (by user, by widget, by vault).
To access the available widgets, click the Widget Configuration
 icon.
icon.The Select Widgets to Display dialog displays:
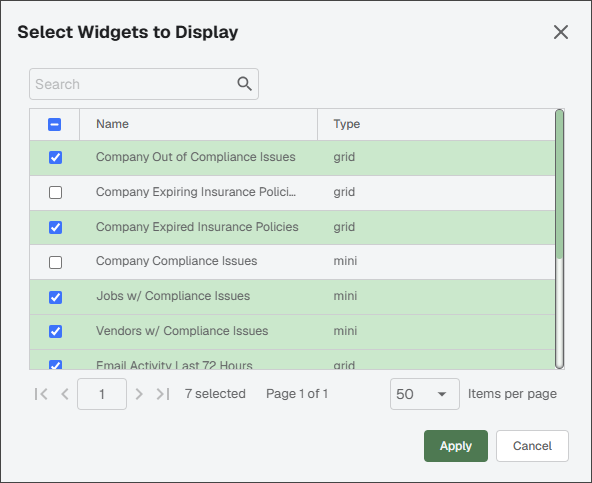
Select which widgets you want to display.
Note
The widgets that are available vary depending on if you are configuring widgets on the company, job or vendor dashboard.
Click .
Note
If you want to display all the listed widgets, click the check box in the header. This populates every check box with a checkmark.
To "unpin" a widget so that a particular widget does not display on your Dashboard page, remove the checkmark for that widget. Remember to click to save your changes.
For additional information on updating dashboard widgets in Sage Paperless Construction, see Use Widgets and Grids.
Click on any of the Refresh
 icons that display on each widget to refresh them individually.
To access the Edit Company Information dialog, do one of the following:
From the vendor dashboard: Click the Edit
 icon that displays when you hover over the vendor's name:
In the job's vendor list: Select the Vertical Ellipsis
> Edit Vendor.
In the Edit Company Information dialog, review the information in each of the sections and make any necessary updates.
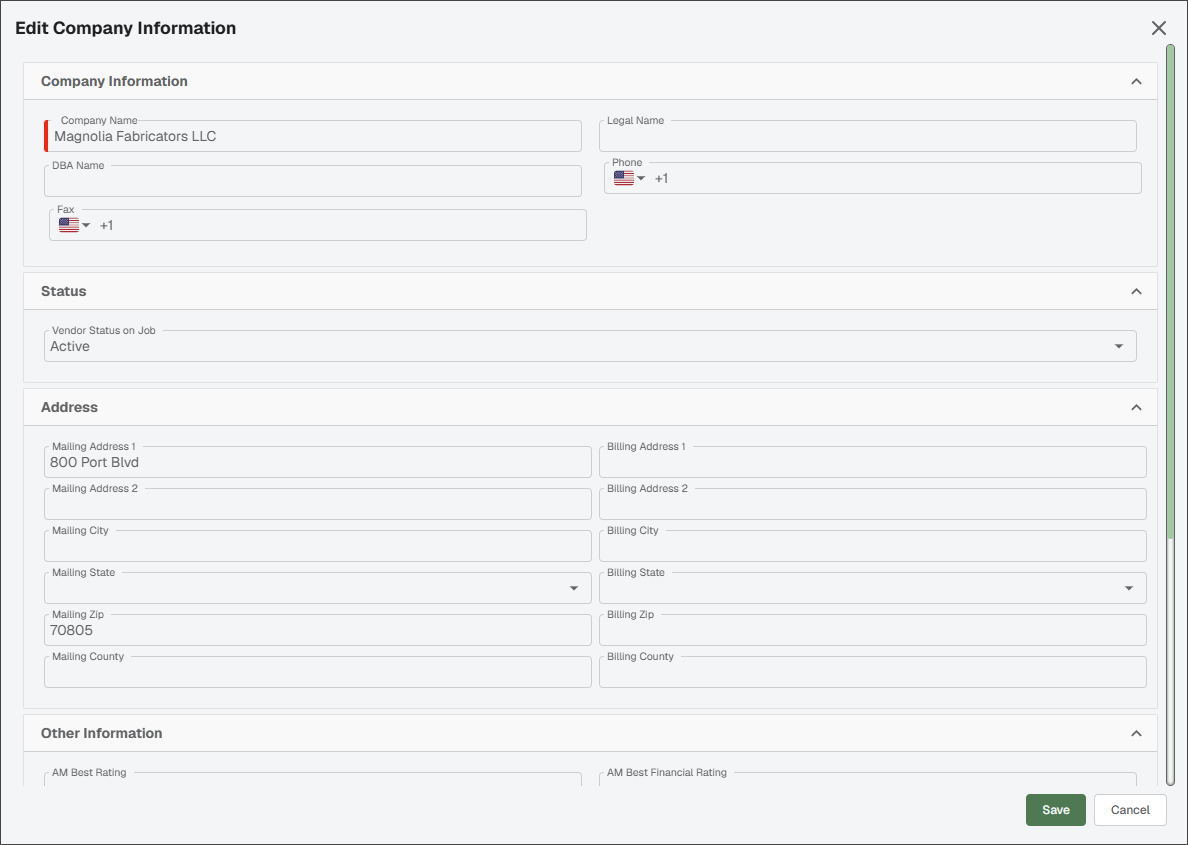
Click .
Use the Edit Company Information dialog to mark a vendor as inactive.
Note
Insurance policies are not tracked for inactive vendors.
Navigate to the vendor you want to inactivate.
To access the Edit Company Information dialog, do one of the following:
From the vendor dashboard: Click the Edit
icon.In the vendor card: Select the Vertical Ellipsis
> Edit Vendor.
From the Status dropdown, select .
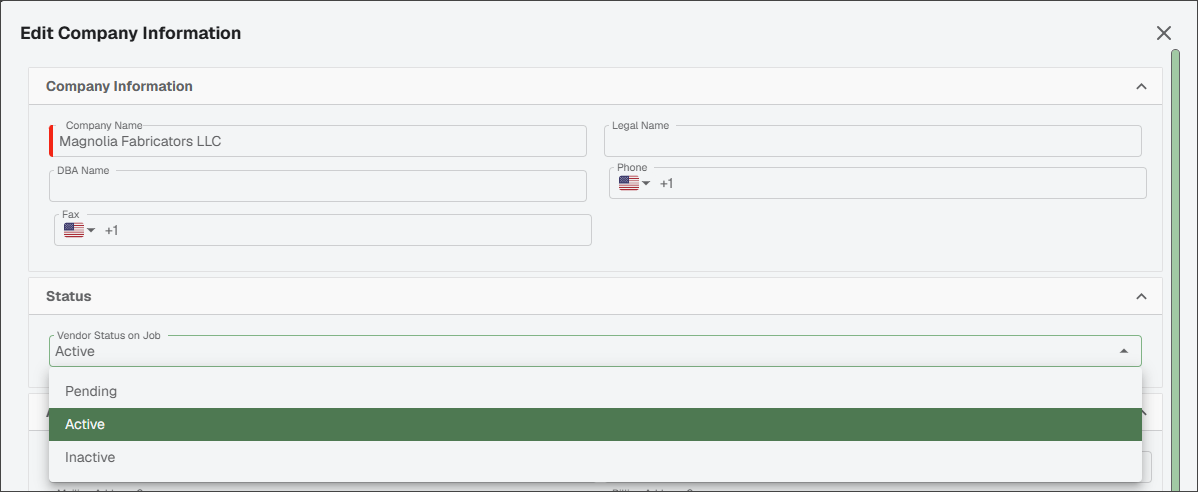
Click .
Complete the following steps to remove a vendor from a job:
Warning
This process severs the relationship between the job and its vendor. It also removes any record(s) associated with that vendor from Sage Paperless Construction, including contacts, insurance, waivers and custom compliance.
On the Vendors list page for a particular job, navigate to the vendor you want to inactivate.
Select the Vertical Ellipsis
> Remove Vendor.An Are you sure? dialog displays. If the vendor has data tied to this job, the dialog lets you know that it is going to be deleted as well.
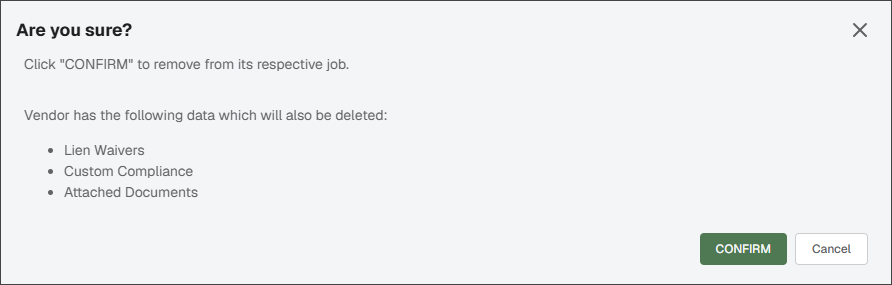
Click .