Vendor Certified Payroll
Certified payroll in construction is a mandatory weekly report for federal or state-funded projects, proving workers get at least the prevailing wages and benefits, using forms like WH-347, detailing hours, pay, deductions and fringes. Certified payroll is vital for compliance, avoiding penalties and ensuring fair pay under acts like Davis-Bacon.
In ClearToPay™, you can track records and notifications at the job and vendor level to ensure documentation is provided and received in a timely manner. These records can be created manually or automatically at the vendor level.
Note
ClearToPay does not provide the forms vendors need to generate their certified payroll documentation. When the certified payroll documentation is received prior to its due date, it must be marked as Received in ClearToPay for the vendor to be considered in compliance.
From My Paperless, click .
In the ClearToPay™ navigation bar, click .
From the Jobs page, select a job from the list to access its vendors.
Note
All operations vendors to do not track certified payroll.
Click .
Select the vendor whose certified payroll information you want to see.
Click .
A page similar to the following displays:
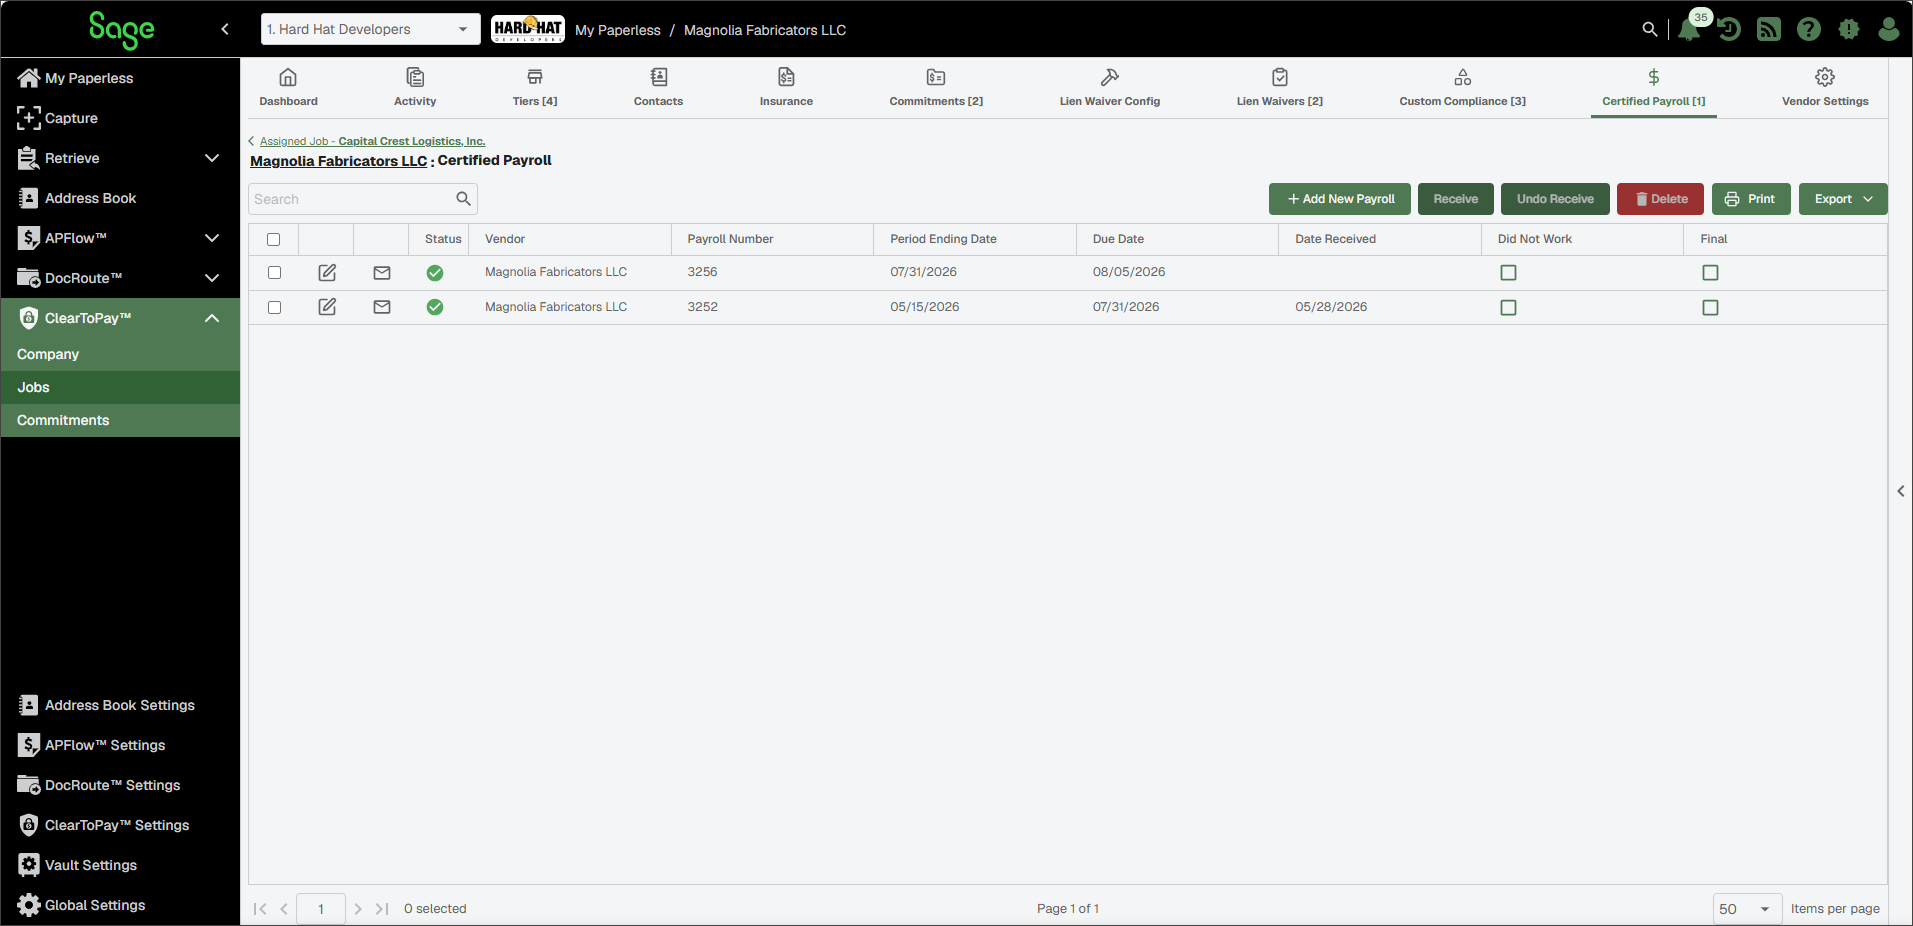
From the vendor's Certified Payroll page, you can do the following:
 | Search for a payroll record. |
 | To add a new payroll record, click . For more information, see Add Vendor Certified Payroll Record. |
 | Select one or more payroll records from the list, then click to apply the current date to the Date Received field, marking it as received. |
 | Select one or more payroll records, then click to clear the date on the selected record(s). |
 | Select one or more payroll records, then click to delete them from the system. |
 | Click to print the Certified Payroll grid. |
 | Click to export the grid information to Excel, CSV or PDF. |
 | Click Edit to make necessary updates to an existing record. See Edit Vendor Certified Payroll Record for more information. |
 | Click Email to select a template and send an email reminder. These templates are created and managed within . |
Did Not Work | Click Edit |
Final | Click Edit NoteOnce a record has been marked as the Final Payroll, users can no longer manually add future certified payroll records and automatic certified payroll records are no longer generated. |
Complete the following steps to add a new record for this vendor:
Note
If the final payroll has already been entered for this vendor, you cannot add additional records.
From the vendor's Certified Payroll page, click .
The Add New Payroll dialog displays:
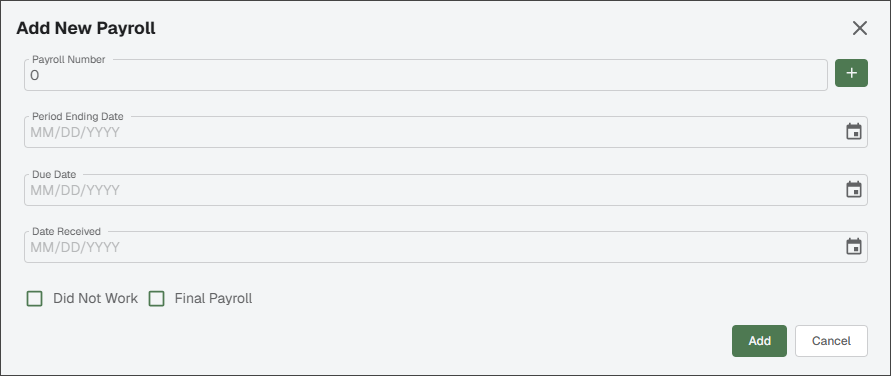
CIick the
 button to systematically fill in the Payroll Number, Period Ending Date and Due Date fields:
Note
Using the button pulls data from the following locations, which populates the fields noted above:
The value in the Certified Payroll As Of Date in Vendor Settings
Today's date
The value in the Certified Payroll Week Ending Day field, entered on the Job Settings page
The value in the Days Til Due field, entered on the Job Settings page
(Optional) If you choose not to use the
button, manually enter the information in the Payroll Number, Period Ending Date and Due Date fields.(Optional) If you have received the report from the vendor, you can enter the date you received it in the Date Received field.
Note
Typically, this is entered at a later time.
(Optional) Select the check box if the vendor did not work or is not going to work during the designated pay period.
Note
This is informational only as the vendor is still required to submit their report.
(Optional) Select the check box to mark this payroll record as the final payroll for this vendor.
Note
Once a record has been marked as the Final Payroll, users can no longer manually add future certified payroll records and automatic certified payroll records are no longer generated.
Click .
From the vendor's Certified Payroll page, find the record you want to edit.
Click the Edit
icon.In the Edit Payroll dialog, make any necessary updates.
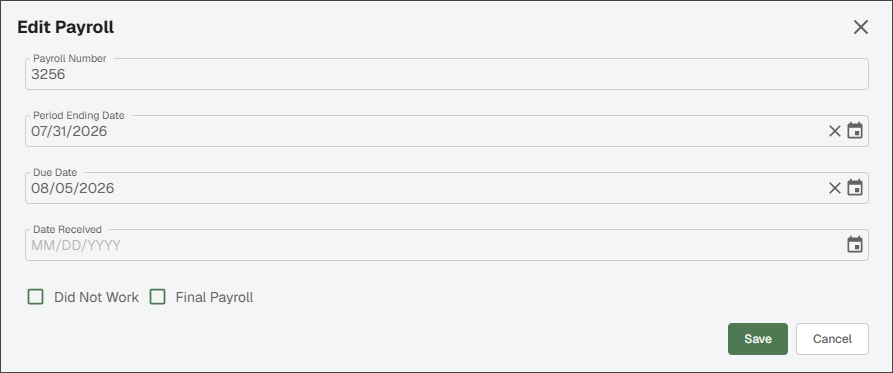
Click .