Invoice Entry Page Layout
Complete the following steps to access the Invoice Entry page in APFlow™:
From My Paperless, click .
From the APFlow™ navigation bar, click .
In the APFlow™ Queues field, use the dropdown to select the queue from which the Processor is entering invoices.
Note
For more information on OCR icons and validation details, seeOCR Icons and Validation.
The dropdown lists any user queue to which the Processor has security rights.
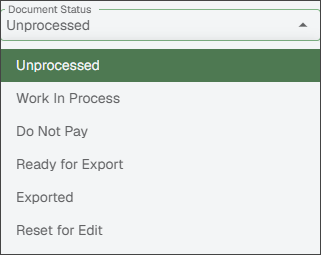
In the Document Status field use the dropdown to select .
Click on a row in the grid.
The document's image displays in the Viewer to the right of the APFlow™ Queues pane.
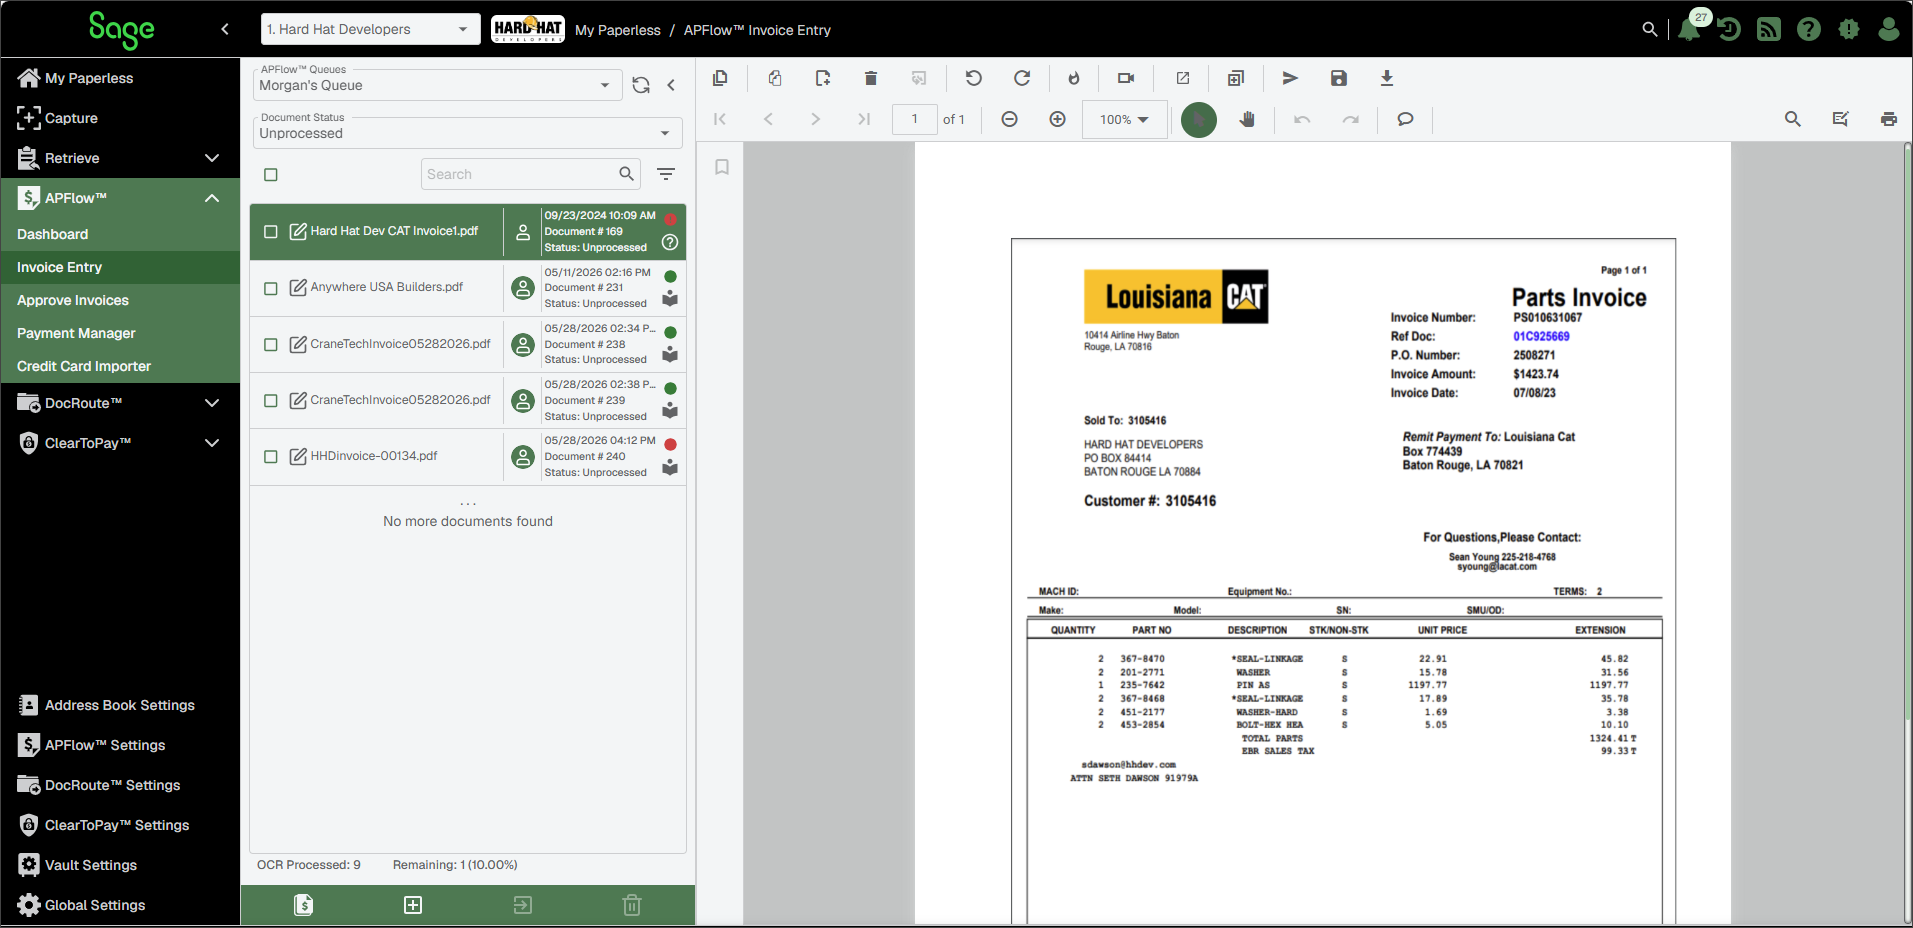
Click the Create New Invoice
 icon at the bottom of the APFlow™ Queues pane to generate a blank invoice template.
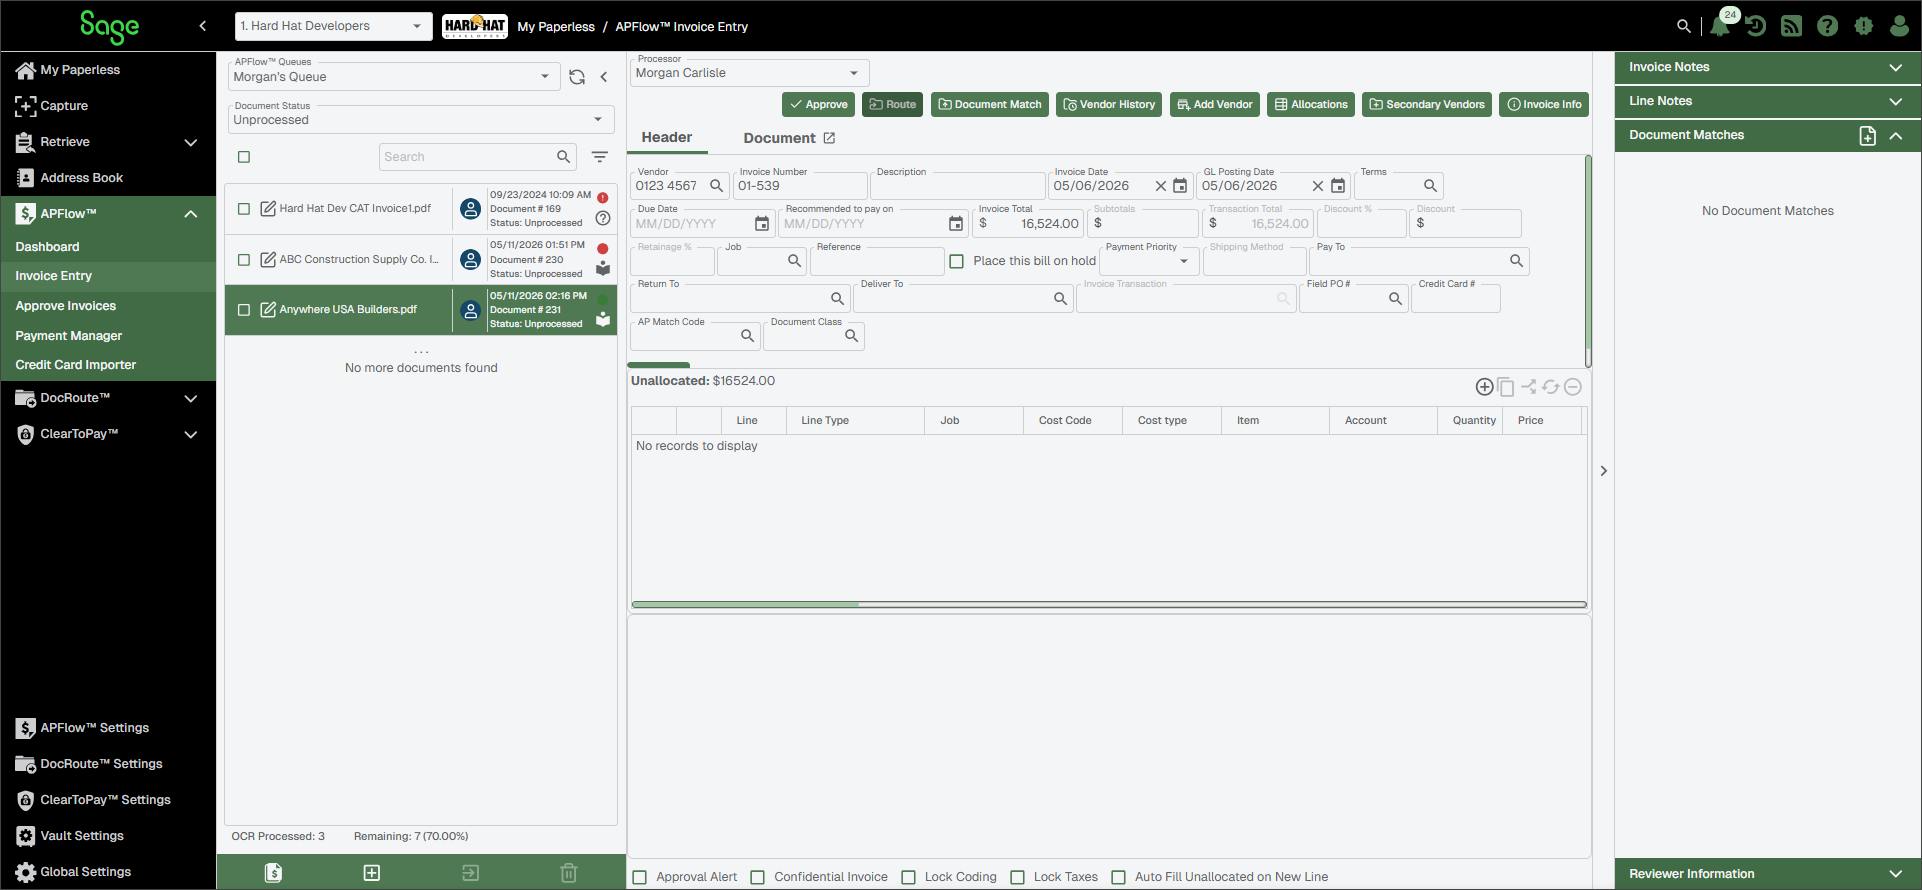
The document displaying in a Viewer is replaced by a blank invoice template.
On the Invoice Entry page, there is a sidebar to the right of the invoice area. For more information about the dropdowns included in Invoice Entry sidebar see How to Use the Sidebar in Sage Paperless Construction.
The middle pane identifies the active queue, the status of the documents and a list of those documents meeting that criteria.
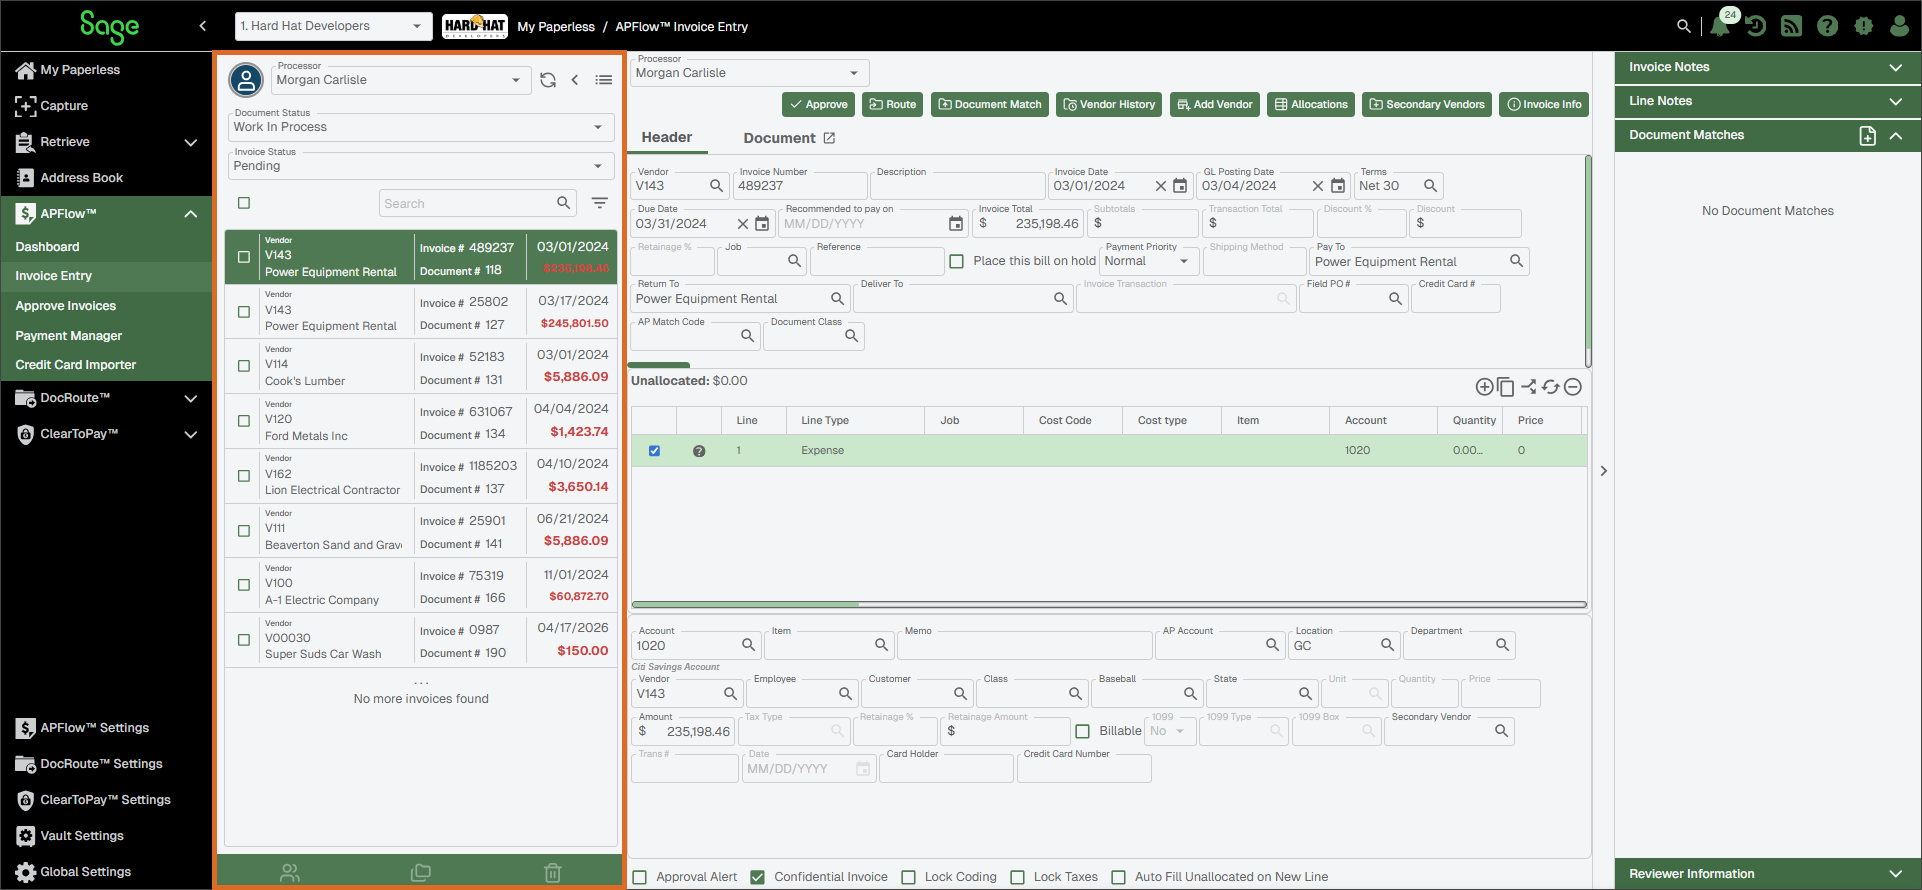
| The current Processor is identified here. Select a different Processor from the dropdown when necessary. NoteThis dropdown is only visible in the Work In Process document status. | ||
| The current Document Status is identified here. Click the dropdown to access the list of available statuses an invoice can move through. See Document Statuses for more information about each status. | ||
| The current Invoice Status is identified here. For more information, see Work In Process to read more about the field and its dropdown options. NoteThis field only displays when the Work In Process Document Status is selected. | ||
 | Click the Refresh List icon to reload and update the page. | ||
  | Use these icons to minimize and maximize the Queue (middle pane). | ||
 | Click this icon to access the Invoice Manager page if you are working on an invoice in one of the following document statuses:
NoteThe page that opens varies slightly based on which Document Status option you select from the dropdown. | ||
| You can click in the Search field and enter the first few letters of a vendor to locate it more quickly. | ||
| Click this icon to access the Sort By field. From this dropdown you can select the field from which to sort. NoteThe listed fields are based on your accounting system. This is per vault, per user. The list of documents in your Work In Process queue displays by the sort you select from this dropdown. The system remembers the sort you select. If you do not select a sort option, the Vendor (ascending) option are systematically selected. This way you are automatically sent to the top of the list. | ||
| Immediately above the icons located at the bottom of an OCR Queue is a number and a percentage. The number reflects the number of documents that your company has run through OCR. The percentage reflects the usage percentage according to your company's plan, so you know when you are about to reach—or have exceeded—your company's OCR plan limits. If your company has an OCR license, the OCR status of the document displays here. For more information on OCR status, see OCR Icons and Validation. | ||




The Invoice Entry page can have the following icons at the bottom of the queue:
Change Processor  | Click to display the Change Processor dialog and select a new processor from the list. | |
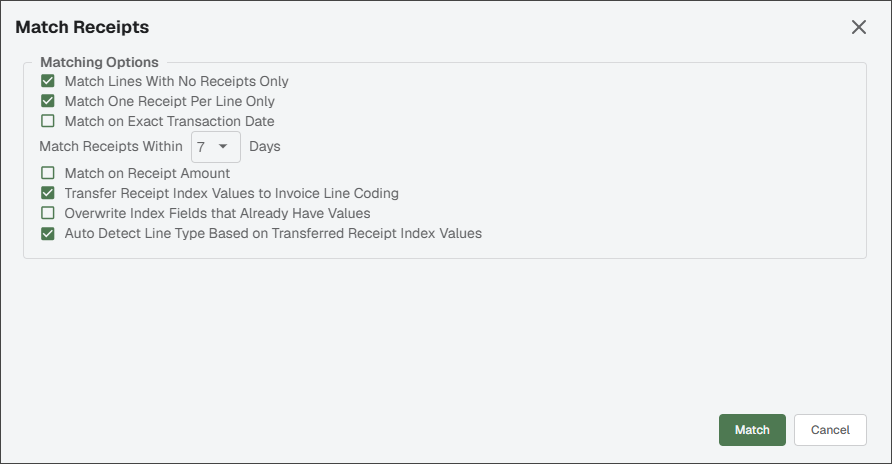
Match Receipts  | Click to display the Match Receipts dialog and select options as appropriate:
| |
Set to Exported
| Click to set the highlighted document to Exported. This allows the Supervisor to export the document again. | |
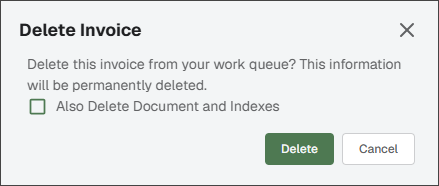
Delete Invoice  | Click to delete the highlighted document. The dialog that displays varies based on the invoice's current status. This allows the Processor to delete the invoice from their current queue and, if appropriate, from the Sage Paperless Construction system.
If you want to delete the document from which the invoice was created along with any related indexes, be sure to click to select the Also Delete Document and Indexes check box. |
The top of the Invoice Entry page displays the following buttons:
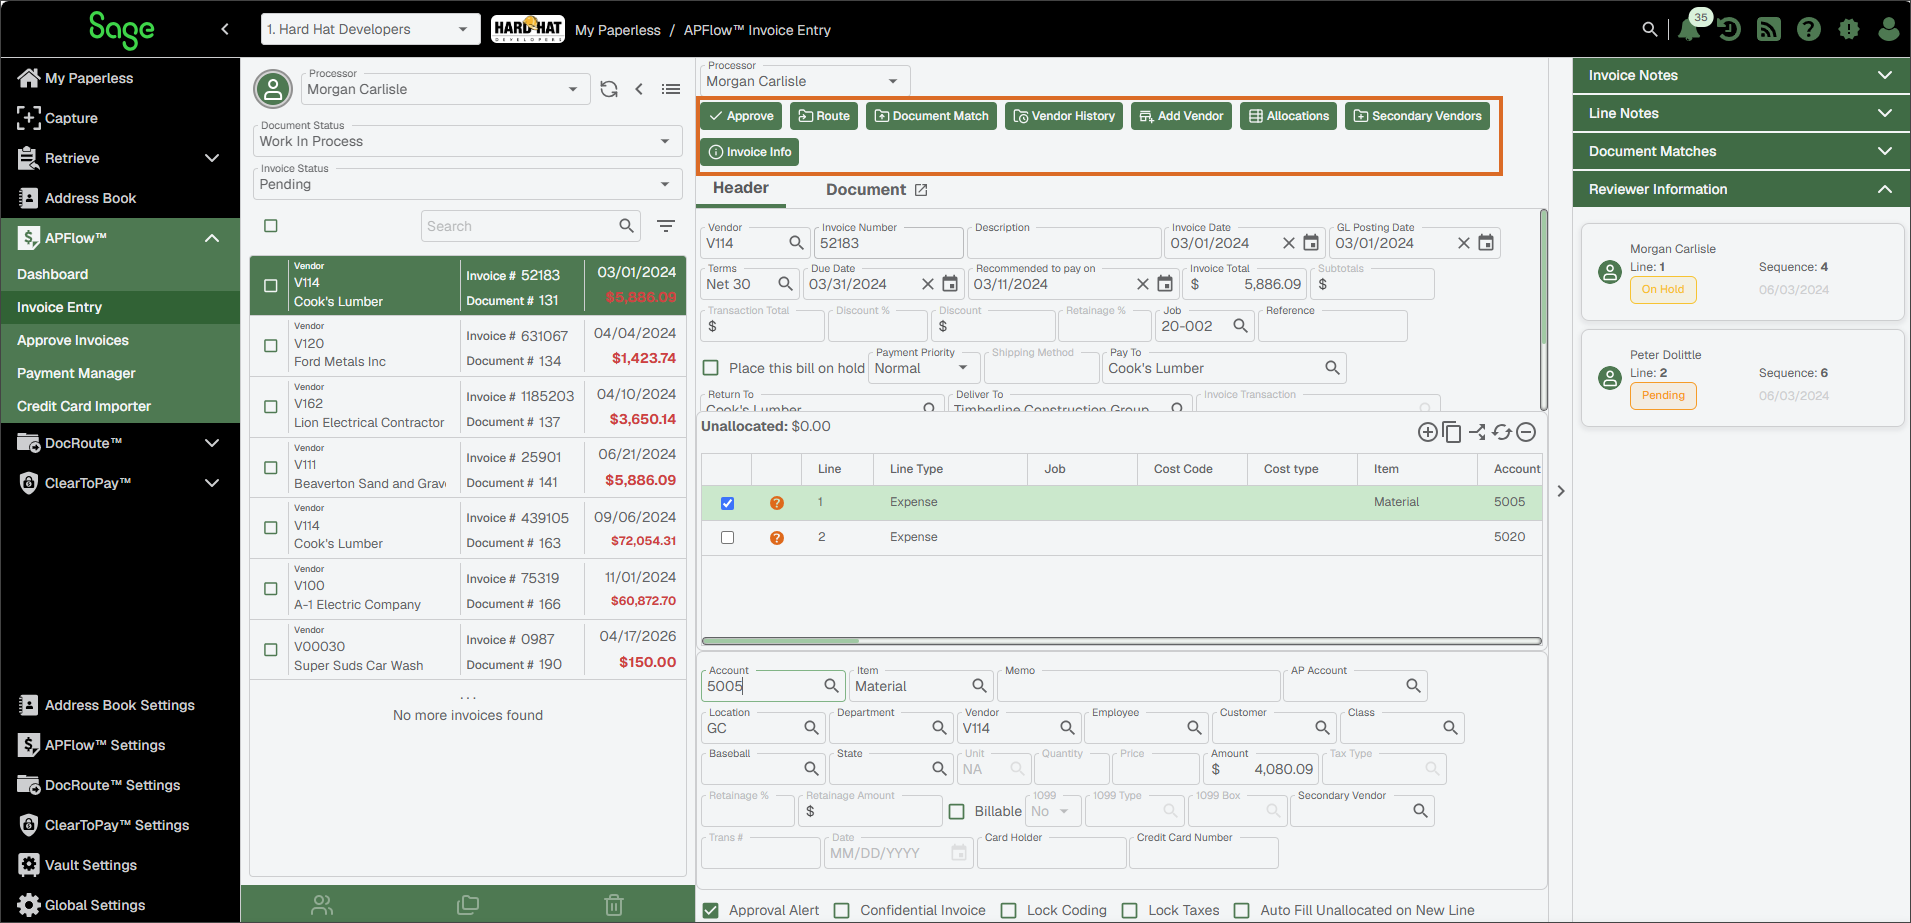
 | Click this button to approve the active invoice. This bypasses routing the invoice for approval. | |
 | Click this button to initiate the APFlow™ route process. See Invoice Routing for more information. | |
 | Click this button to open a Document Match page. The values entered on the entry page is invoice data. The system takes pieces of the invoice data to become document index data. Document matching is based on index data such as document indexes. For more information, see Match Documents in APFlow™. | |
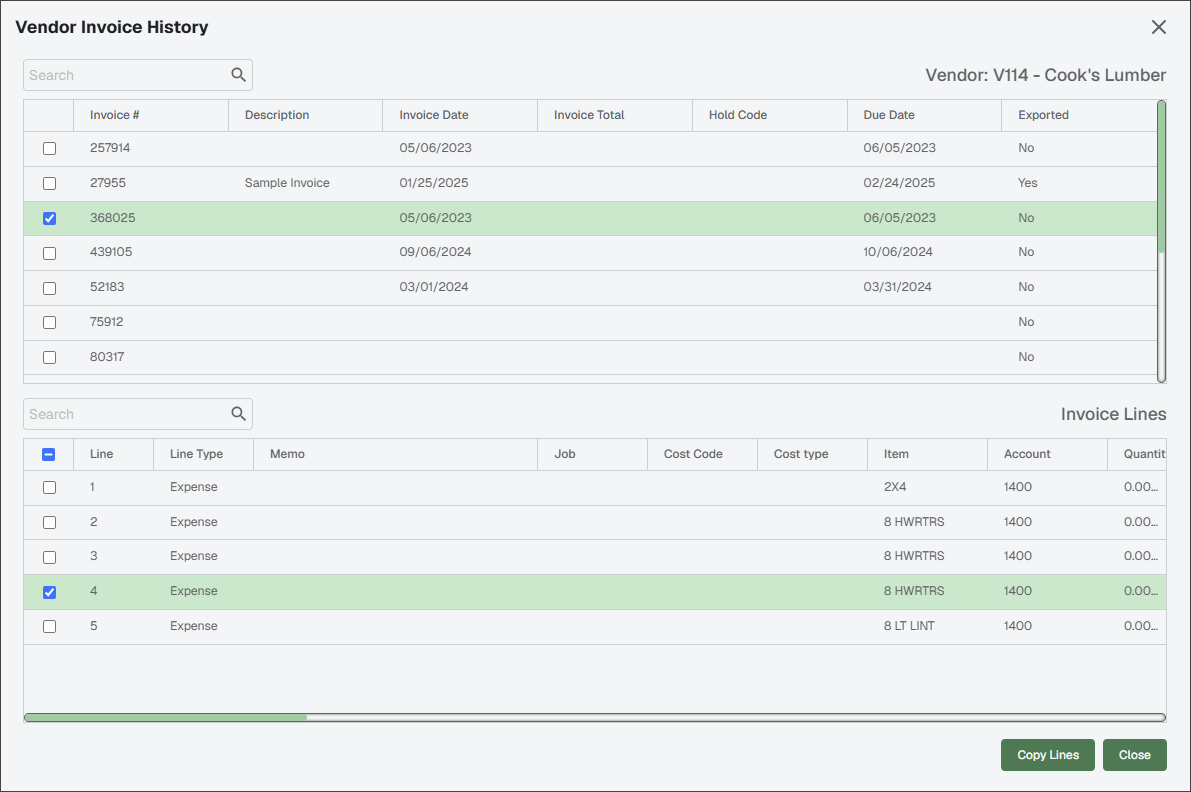
 | Click this button to open the Vendor Invoice History dialog. Past invoices for the vendor display.
Search There is a Search field where you can start to enter an invoice number to narrow the list. Not only can you filter on the Invoice # column entries, but you can also filter on the Description column entries. Copy Lines Processors can copy coding from lines on previously entered invoices to new lines on current invoices. Highlight an entry in the Invoice Lines grid and then click . | |
 | Click this button to access the Add Vendor dialog to add a new vendor that does not already exist in the bridged accounting system. | |
 | Click this button to manually select a specific template from a list or select to have the system identify and apply the correct amount or percentage-based coding. For more information, see Allocations. | |
  | This button is visible if you open Invoice Manager This is a toggle button, meaning that the label (and underlying functionality) changes depending on what action you are taking and where you are in the system. NoteYou can move an invoice into the Do Not Pay status from Work In Process, Ready for Export or Reset for Edit.
| |
 | Click this button to open the Manage Secondary Vendors dialog, where you can manually add, delete or search for these entities to ensure accurate line-level detail on credit card invoices. Secondary Vendors is used to manage and track the specific businesses or individuals from whom goods and services were purchased using a credit card. While the credit card company (e.g., American Express) is the primary vendor in the accounting system, secondary vendors represent the actual points of purchase, such as Home Depot or Exxon. For more information, see Secondary Vendors. | |
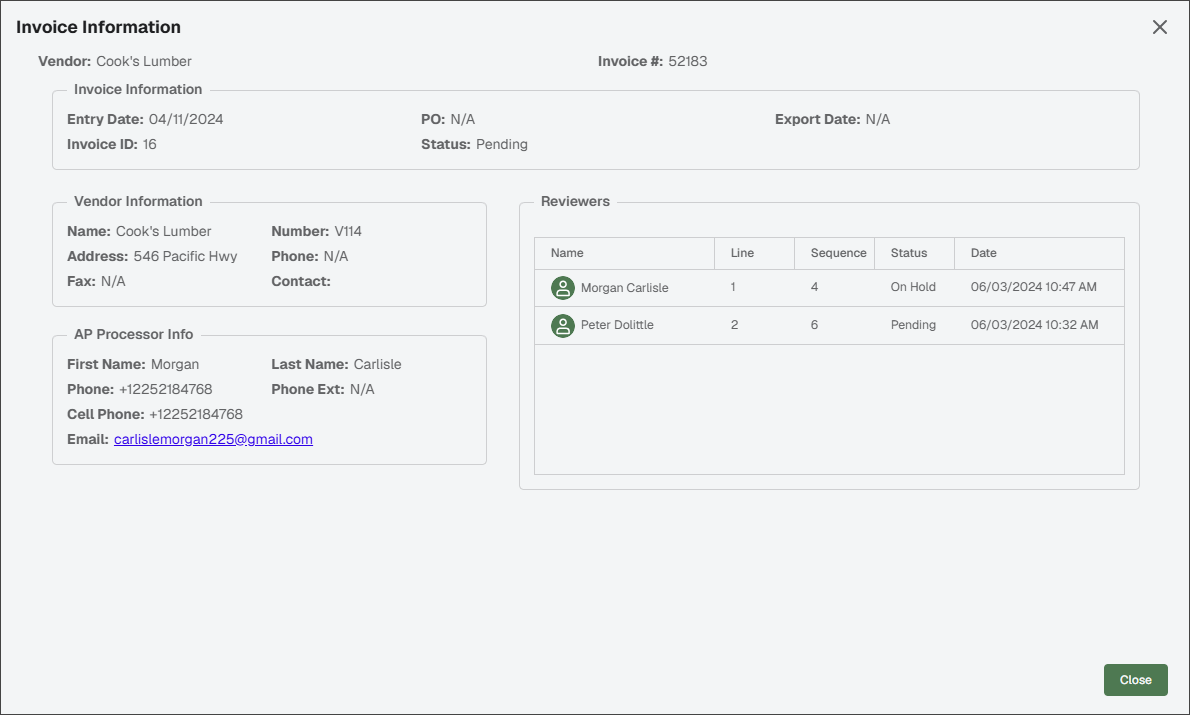
 | Click this button to display additional information about the invoice and the vendor. An Invoice Information dialog similar to the following displays:
Here, you can view information concerning the vendor, the Reviewer(s) and the Processor assigned to the invoice. The Processor and Reviewer(s) can click here to see who to contact should more information be needed as well as identify who took what action and when. NoteIf, while in Approve Invoices, you click for a specific line, the Status column identifies the associated reviewer and reflect that the line is On Hold. |
In Invoice Entry, you can toggle back and forth between views using the Header and Document tabs at the top of the page.
 |
Header Tab | Use this tab to enter the invoice details. |
Document | Use this tab to view the invoice document in the viewer. NoteThe invoice document also displays before you click the Next to the Document tab, click the Pop Out Document You can then manually move that Viewer window to a different monitor. This way you can view the invoice and the associated document simultaneously. With the Viewer window active, as you move from invoice to invoice, the image in the Viewer window automatically refreshes to display the associated image. |

Approval Alert | If selected, invoices display differently in Approve Invoices, usually designated by color coding. You are also required to enter an approval alert note which displays in the sidebar. |
Confidential Invoice | If selected, the document type of the invoice changes to Confidential. This is important because your company may have extra security for confidential invoices. |
Lock Coding | Generally, Processors enter the available information on an invoice, typically in the header, and then send the invoice off to Reviewers for any remaining coding. If Processors fully code the invoice and do not want the line coding modified, they can select to change the lines section to read-only. |
Lock Taxes | Instead of locking all line fields (Lock Coding), there may be times when those fields defined in each accounting system relating to taxes in Approve Invoices need to remain unchanged. Select this check box if those fields should not be modified. NoteThis coding option only displays for accounting systems where there are tax fields to be locked. |
Auto Fill Unallocated on New Line | If you click this check box, the next line you add to the invoice includes whatever unallocated monies remain. If you click this check box before you enter any lines, the first line of the invoice you enter includes the entire invoice total. NoteSage Paperless Construction remembers if you had this check box selected so the next time you access Invoice Entry, the check box display is the same. |
Columns in the lines grid can be resized by dragging  the column divider.
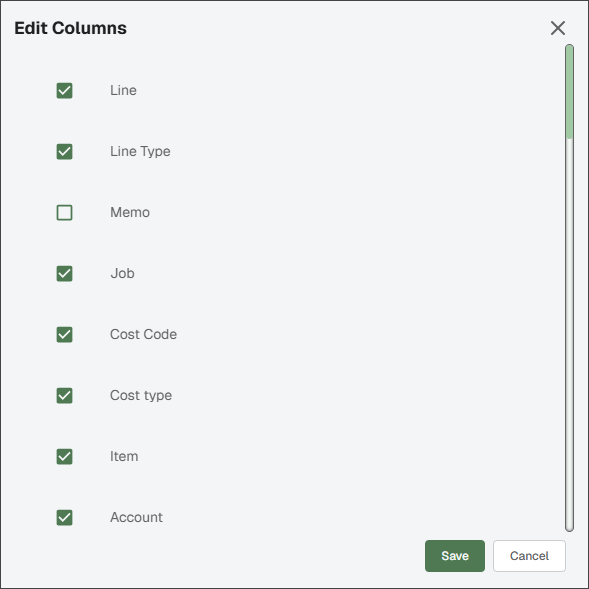
To show or hide columns, right-click anywhere in the grid and select .
 |
In the Edit Columns dialog, select columns to display or deselect the check boxes to remove them.
 |
Column widths and visibility settings are saved automatically.
The Invoice Entry page can be re-sized. As the page size changes (due to manual adjustments or monitor/screen size), the fields wrap so they remain visible.
Note
You can also collapse the sidebar to save screen space.
If the page re-sizes in a way that all fields can no longer fit on the page, a scroll bar displays in the entry section to allow you to scroll to the fields no longer visible. | |
Collapsed: 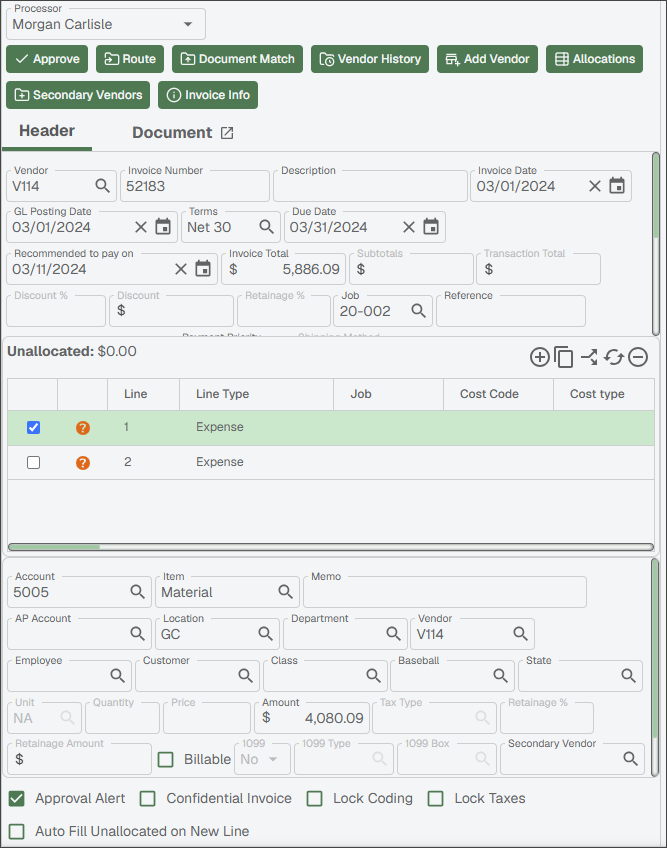 | Expanded: 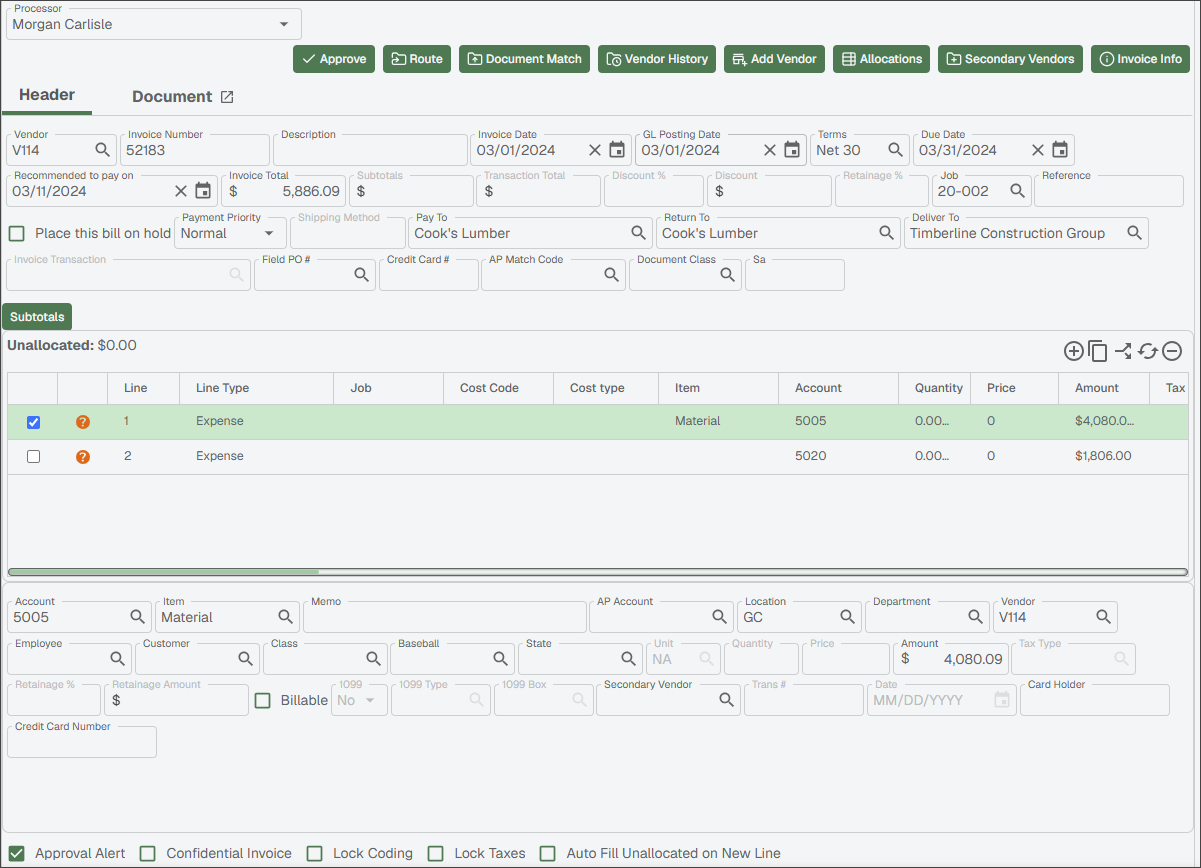 |
Navigate through the Invoice Entry page in a forward direction by pressing either the or key.
Document Statuses
An invoice can move through one or more statuses while in the Invoice Entry workflow.
From My Paperless, click .
From the APFlow™ navigation bar, click .
In the APFlow™ Queues field, use the dropdown to select the appropriate queue.
Note
My Queue should display as the default.
Use the Document Status dropdown to select the appropriate status.
Learn about each status in the sections below:
The Unprocessed document queue identifies documents that must be entered into the APFlow™ system for review and approval, or indexed as supplemental invoice documents such as receiving tickets and purchase orders.
Important
In addition to APFlow™ being licensed, the user must have Processor rights or APFlow™ is not visible in the left navigation bar.
The Work In Process document queue is the "work center" for the Processor. All invoices processed by the Processor, but not yet exported, can be managed here.
Takes the invoice out of routing without losing the information. Invoice marked as Do Not Pay does not display in Ready for Export. The Do Not Pay button displays when you click the Invoice Manager icon.
Important
As part of an audit trail, you can require the individual who marks the invoice as Do Not Pay to enter a note explaining their actions.
In there is a setting requiring a note immediately after marking an invoice as Do Not Pay. See APFlow™ Bridge Settings for more information.
If this dialog does not display, it may be because a bridge setting, Require Invoice On Hold Notes, is not selected. See Universal Bridge Settings for more information.
The Ready for Export document queue is where to select invoices ready for export and to produce the export file used by the accounting program to import the invoice data. However, this is not always true. For some accounting systems, Sage Paperless Construction exports into a file. For others, Sage Paperless Construction exports directly into accounting systems. The accounting system-by-accounting system is based on the export type. It is also configurable for some accounting systems.
The main Export pane contains a list of invoices that are fully approved by all assigned Reviewers. Relevant invoice information displays in the columns.
The Exported document queue is where users with Supervisor permissions can view previously exported invoices and their associated documents in an archival, read-only setting.
Important
If you do not have Supervisor permissions in APFlow™, this dropdown option does not display.
If an exported invoice is modified in your accounting system, you can make the same modifications in Sage Paperless Construction so the data is identical. As a Processor, you must have Allow Reset for Edit permissions. See APFlow™ Settings for more information.
On the Invoice Entry page with Exported Status selected, highlight the previously exported invoice that needs to be modified.
Note
To locate the appropriate invoice, use the Show Filter/Sort
 icon.
icon.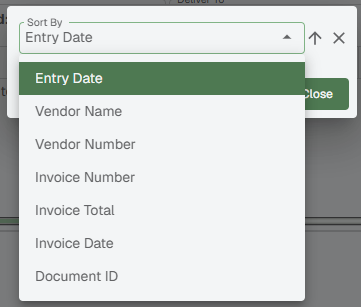
If you do not select a sort option, the Invoice Entry Date (ascending) option is systematically selected.
Click the Reset for Edit
icon that displays at the bottom of the pane.In the Document Status dropdown, select the status to view the invoice and make the appropriate modifications.
At the bottom of the pane, the Set To Exported
 icon displays.
Click it to move the invoice from the Set To Exported status back to the Exported status.