Setting up a Route in DocRoute™
Important
For information on creating and configuring the routing rules that are used during this procedure, see Add DocRoute™ Routing Rules. You must have System Administrator permissions to access DocRoute™ Settings.
From My Paperless, click .
In the DocRoute™ navigation bar, click .
A page similar to the following displays:
In the Queues pane, click .
A Create a Document Route page displays:
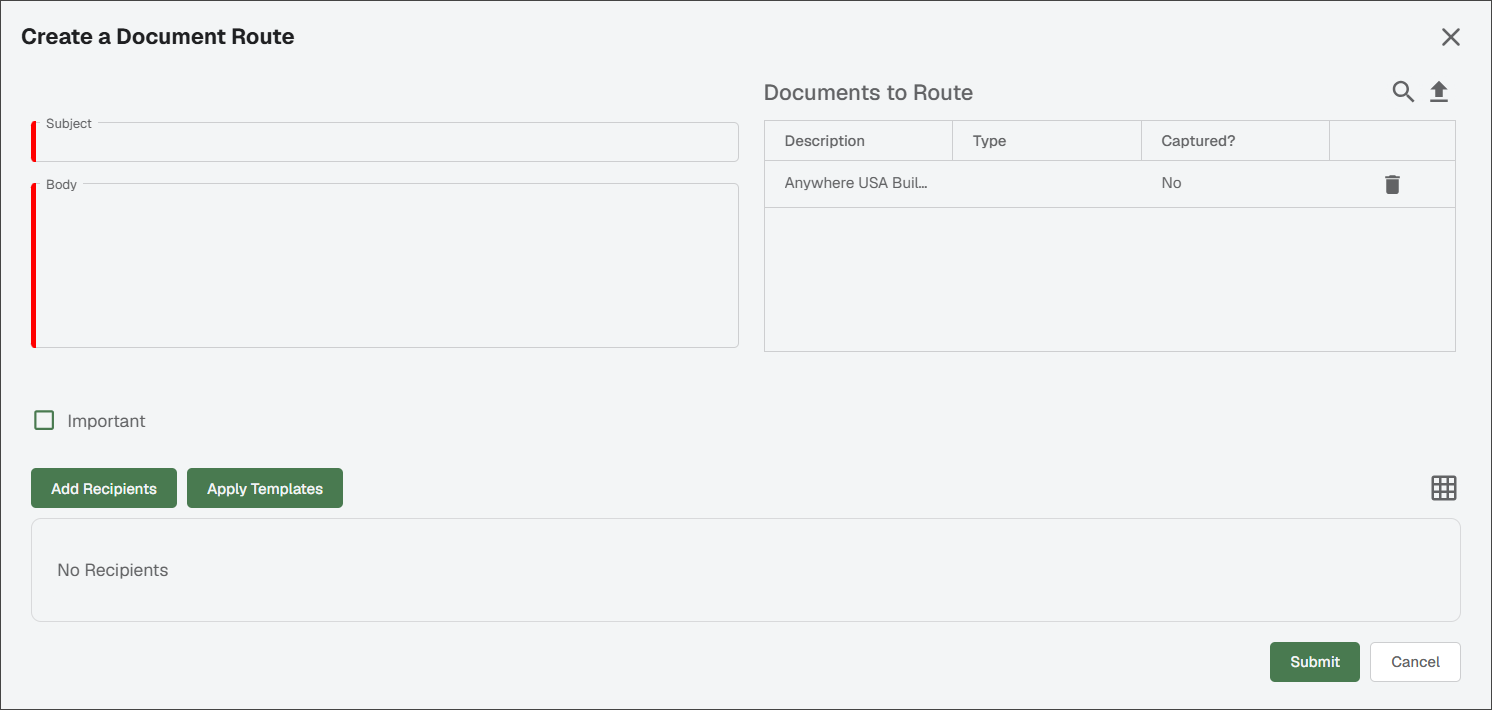
In the Subject field, enter an appropriate subject topic.
Note
For example, "Bertram Dam Project Invoices."
In the Body field, enter directions to the route recipients.
Note
For example, "Review and approve the attached project invoices. Be sure to update your tasks!".
Depending on the importance of the route, select the check box. This functions as a flag for greater visibility to those individuals to whom the document is routed. Otherwise, leave the check box blank.
Click .
The Add Recipients to Route page displays.
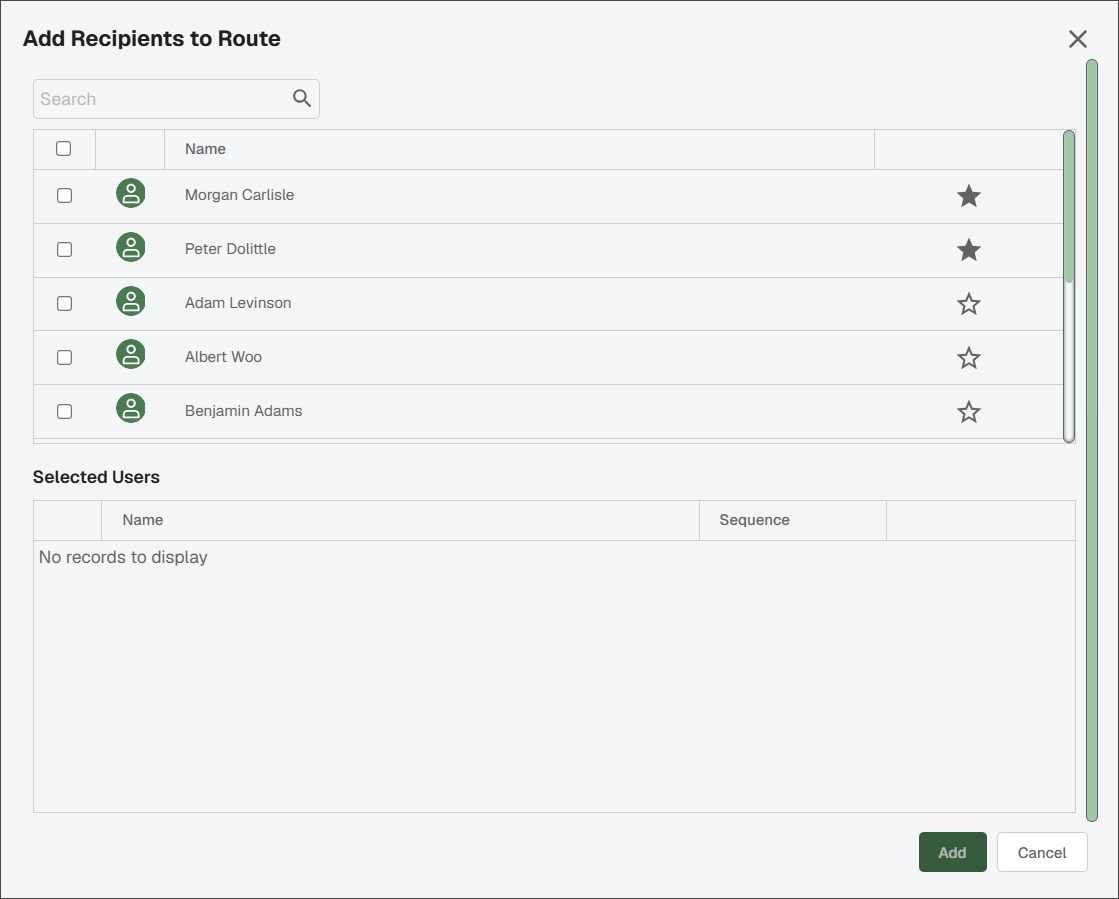
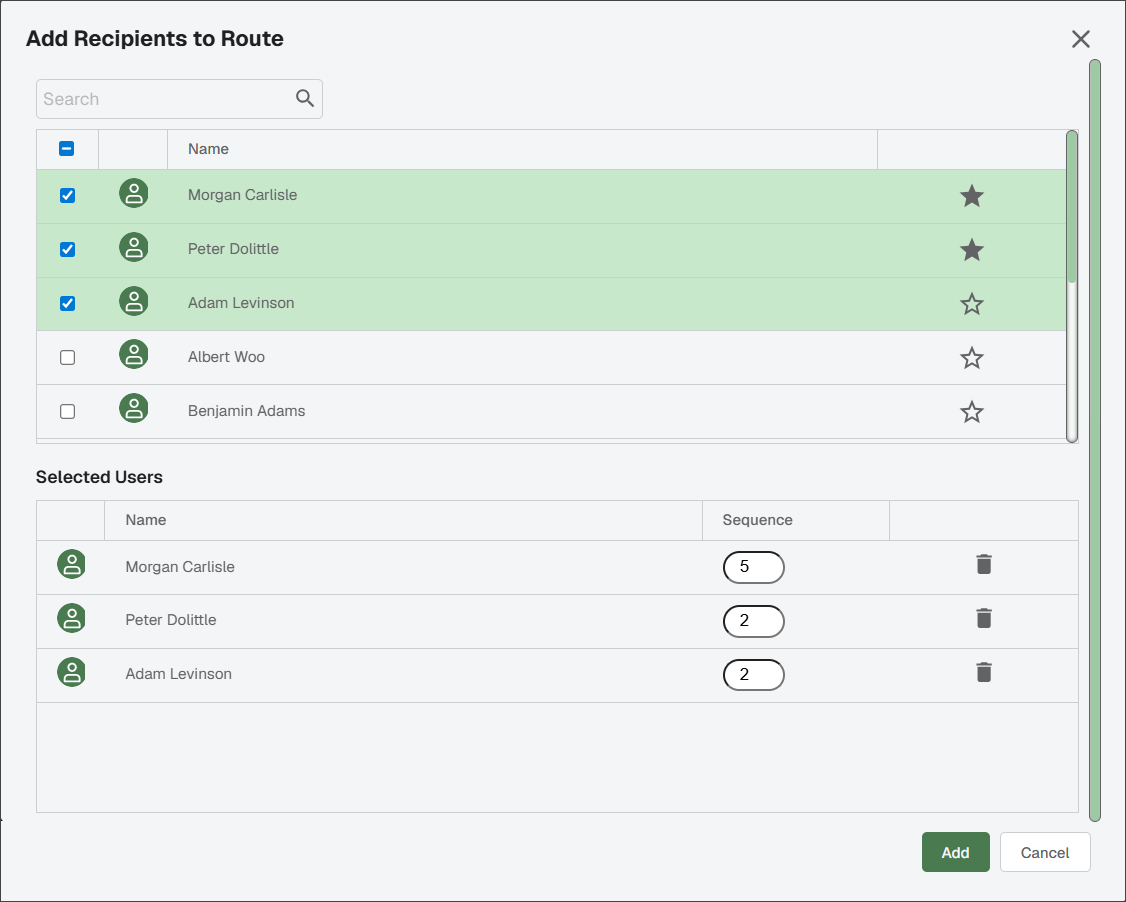
In the Paperless Users grid, select the individuals to whom the documents should be routed for review and approval.
The populated Add Recipients to Route page should resemble the following:
Note
When you hover over the Sequence column entries, an up/down option displays to aid in making changes to the sequence numbers.
Click .
If a previously created route template applies to this route, click .
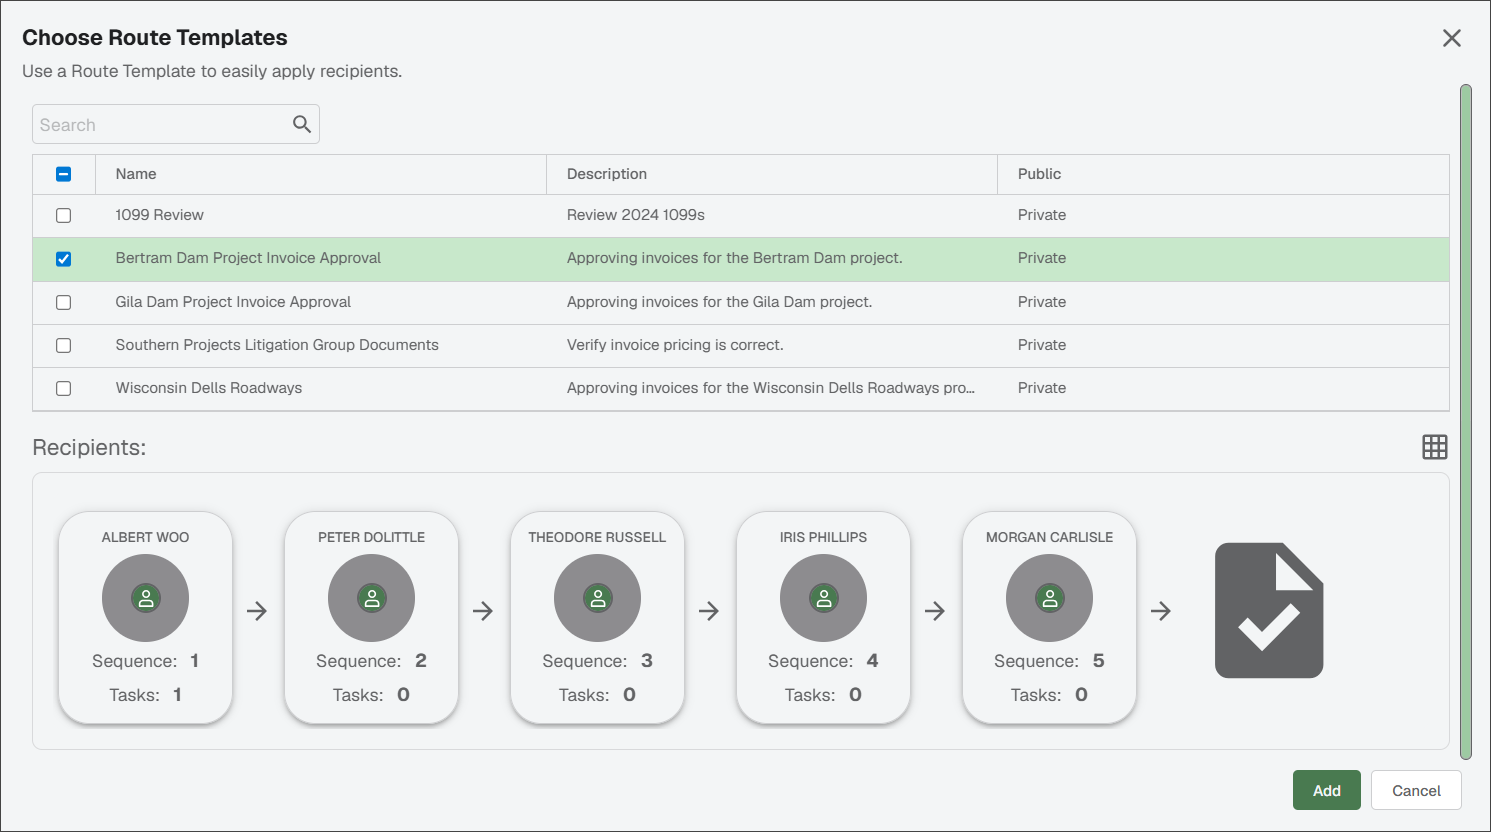
A Choose Route Templates page similar to the following displays:
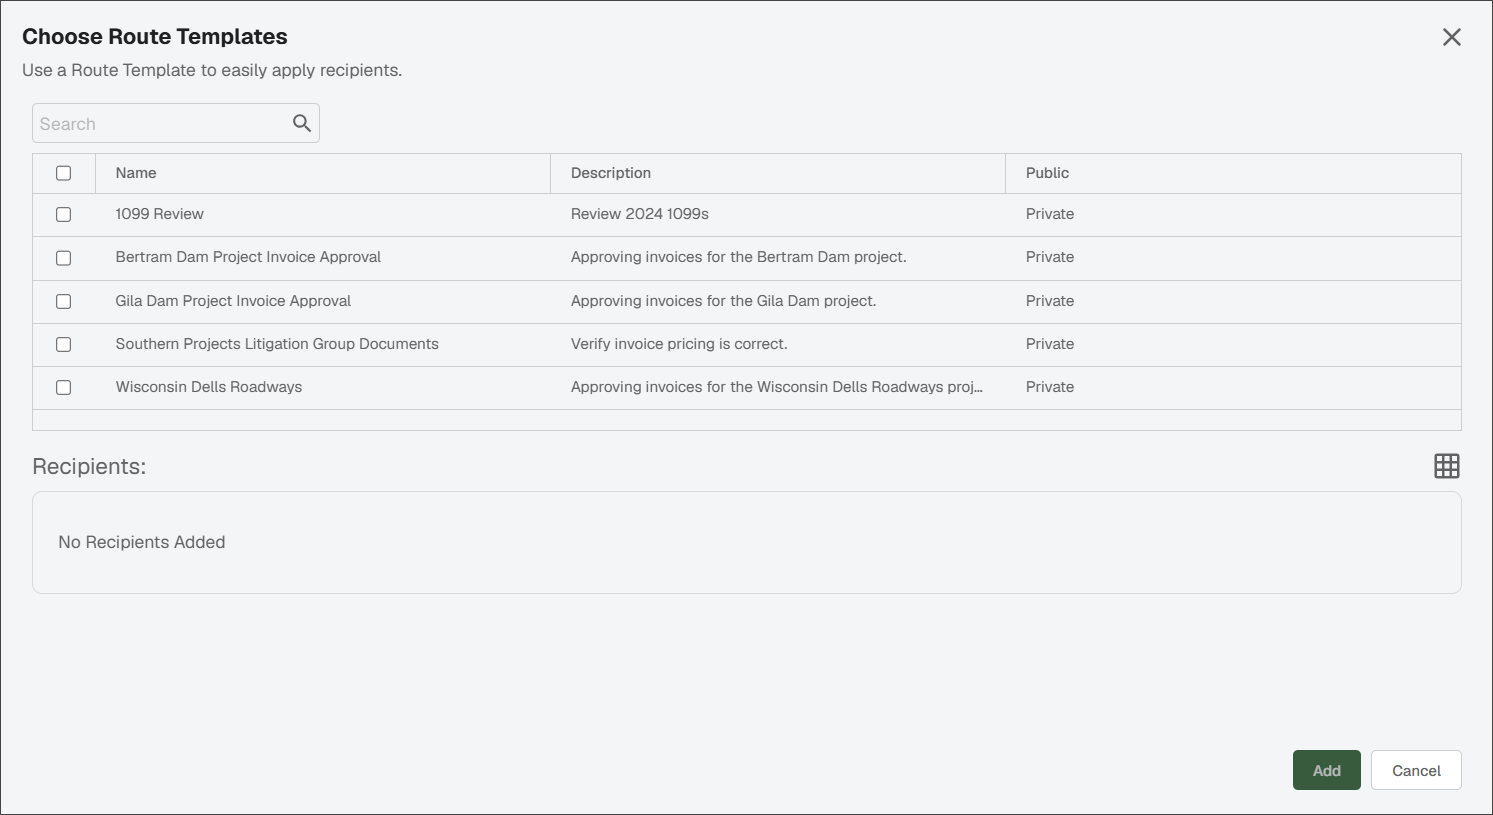
Click to select the .
The recipients associated with the route template you selected populate the Recipients pane.
Important
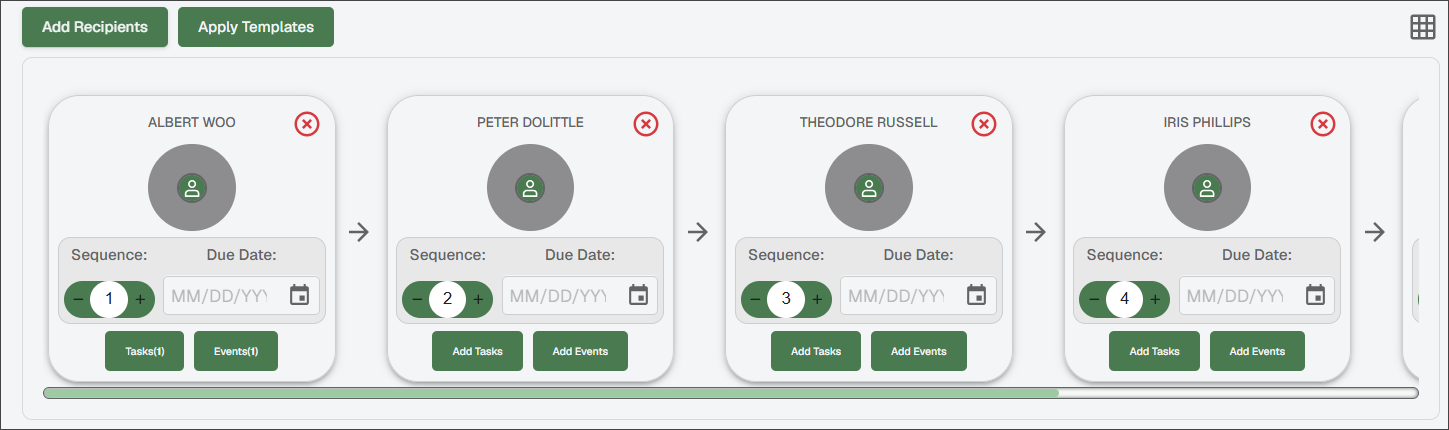
The same reviewer can display more than once in your route. When the route template was created, specific reviewers were identified and route sequences assigned. Those reviewers with their route sequences systematically display. If you manually add the same reviewer with a different route sequence outside the route template, that reviewer displays twice based on the order of their route sequences. Your sequence could resemble the following:
Click to assign the desired template to the route.
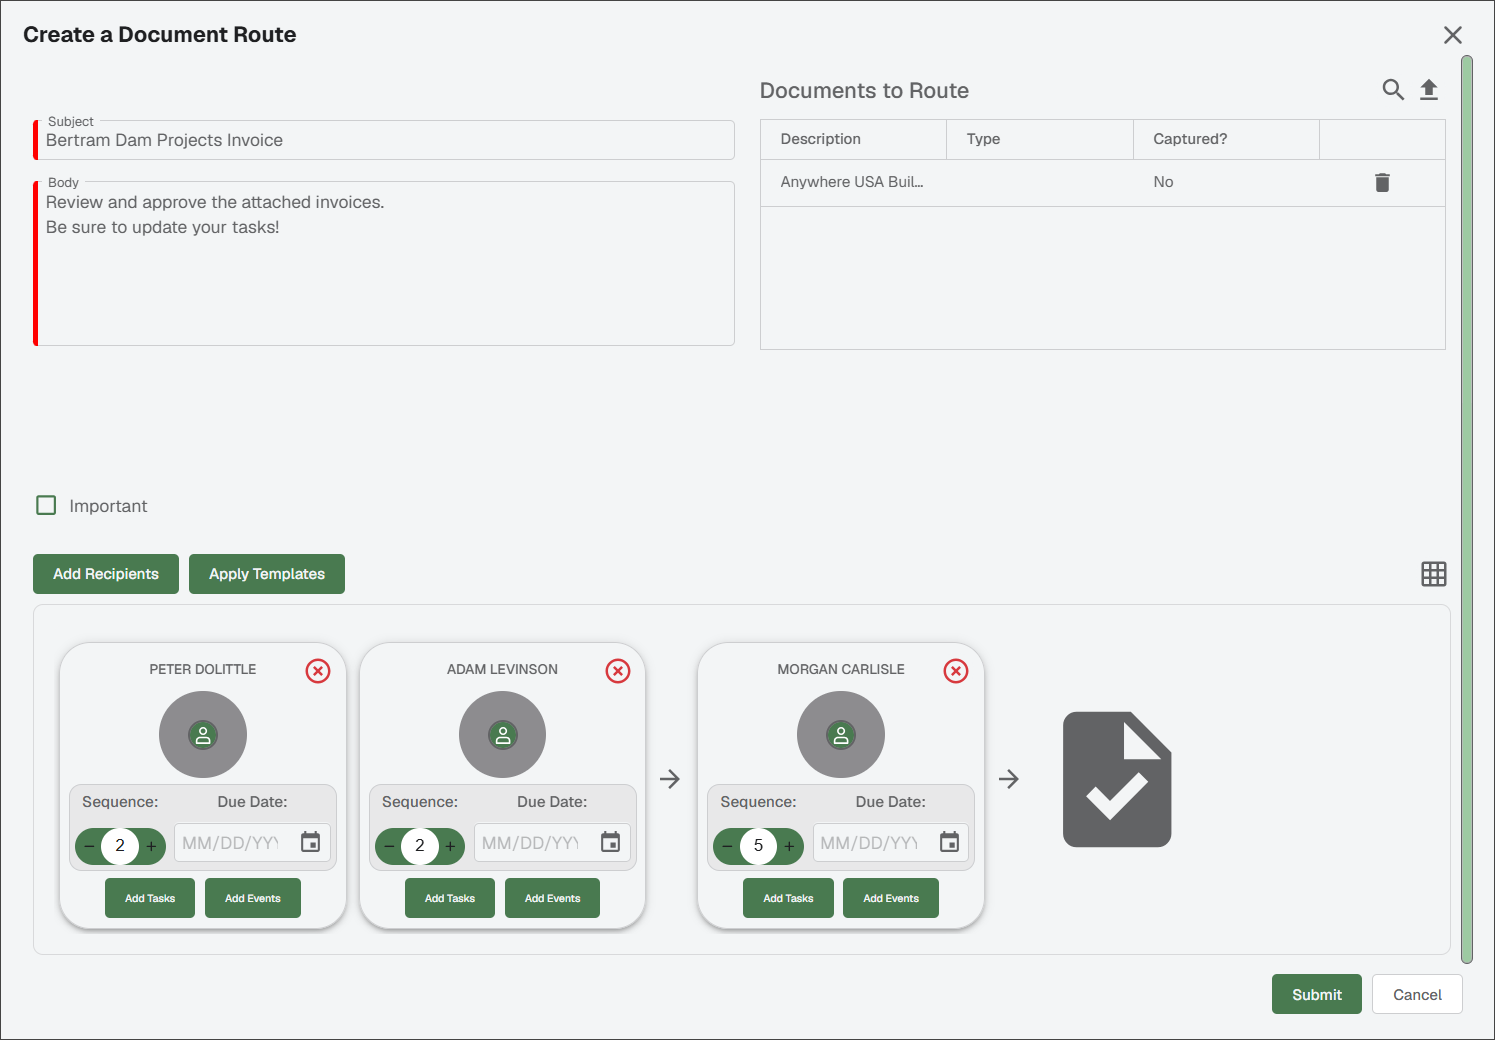
A partially completed Create a Document Route page displays:
Important
For the individuals to whom you are routing to receive a notification (by email or telephone) that a route has occurred, an event must be set up on each individual for every route. Otherwise, an entry shows in that individual's queue.
In the Documents to Route grid, search to locate the documents to be included in the route.
Click the Search
 icon.
icon.An Add Documents to Route page displays with the Criteria tab active:
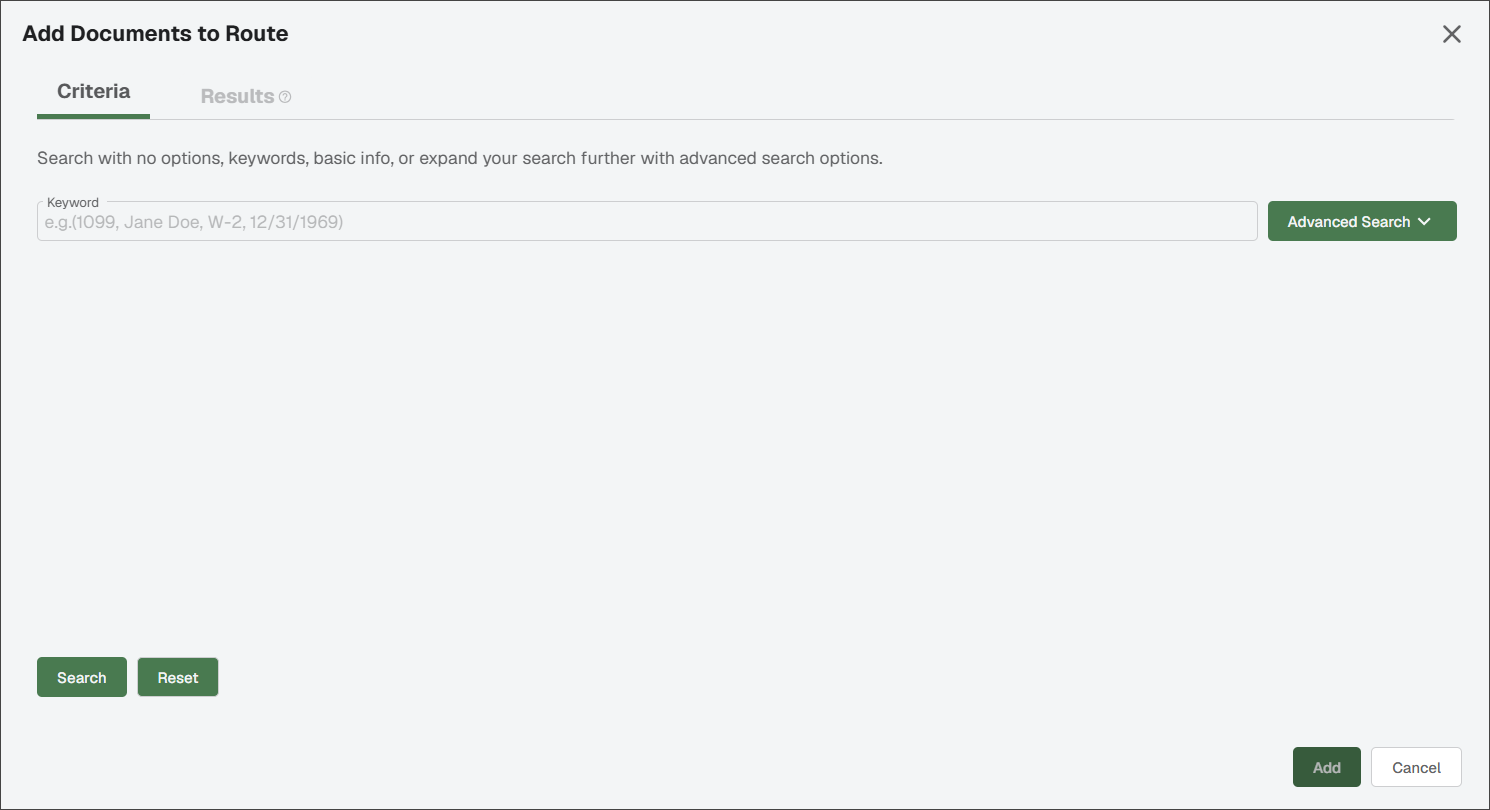
In the Keyword field, enter any appropriate search criteria to help narrow your search.
(Optional) Click the dropdown arrow to display additional fields to help narrow down your search.
The Criteria radio button within Search Options is selected by default. You can also select if you would like to narrow your search by document ID.
Note
If you select Specific Documents, your Advanced Search options are reduced to the Document IDs field. In this field you can enter specific identification numbers or leave the field blank to include all.
In the Document Type(s) field, use the dropdown to search for document type(s) to add to the current route. If using several index criteria in the search, an AND / OR option is available. AND allows the combination of several index criteria in the search. All index criteria must be met to return a result. OR allows any one of the index criteria to return a result.

You can scroll through the Indexed by User(s) list or start typing a name to populate the field and select one or more users. If you do not know who indexed the document(s) you are searching for, leave this field blank.
In the Indexed fields, click the calendar icons to select the date range.
In the Types section, select either , or . The Production radio button is clicked by default.
Click .
An Add Documents to Route page displays with the RESULTS tab active listing all documents that met the entered criteria:
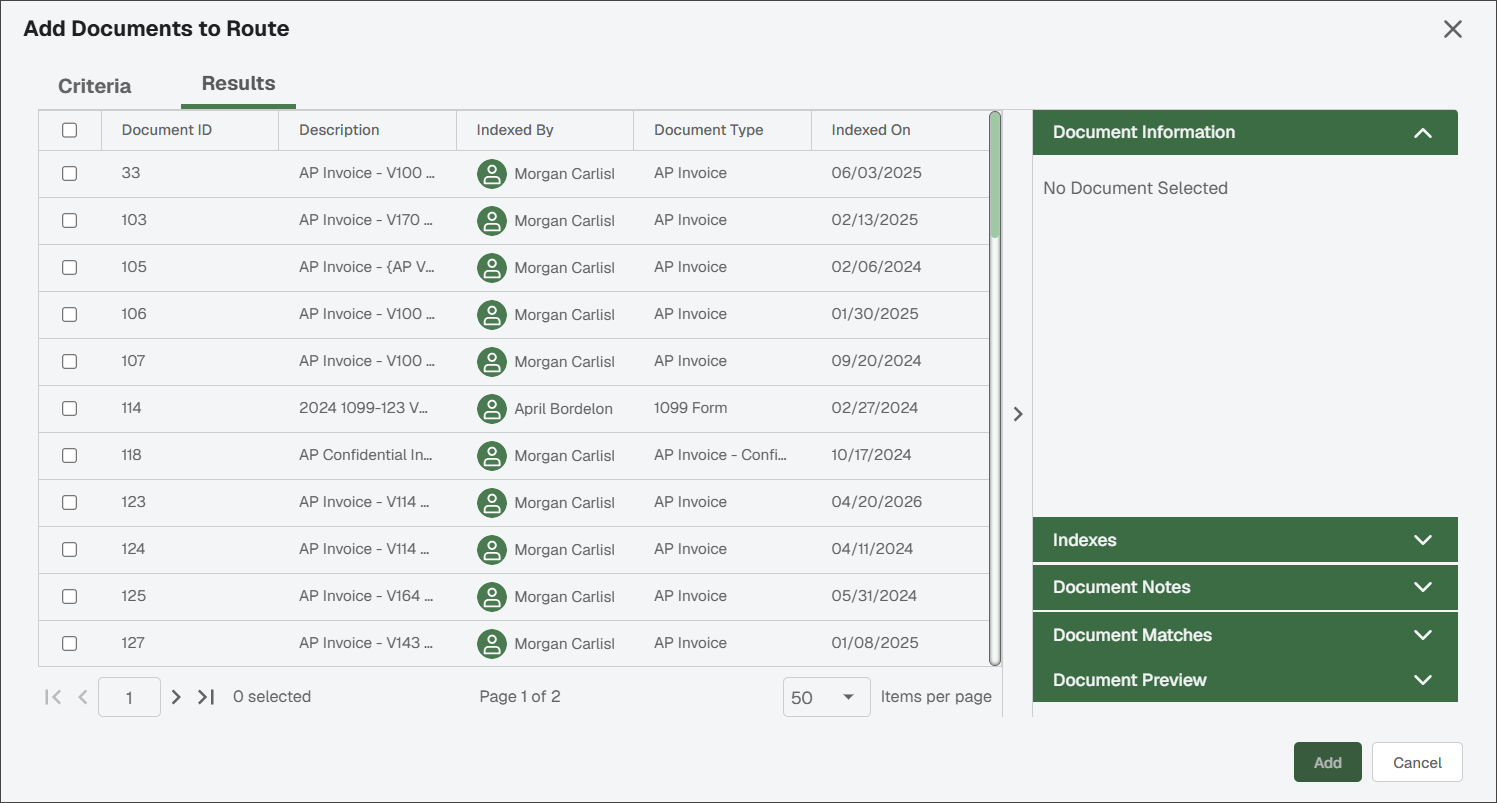
Select any document(s) to be included in the route.
Click .
The Create a Document Route page redisplays with all areas populated.
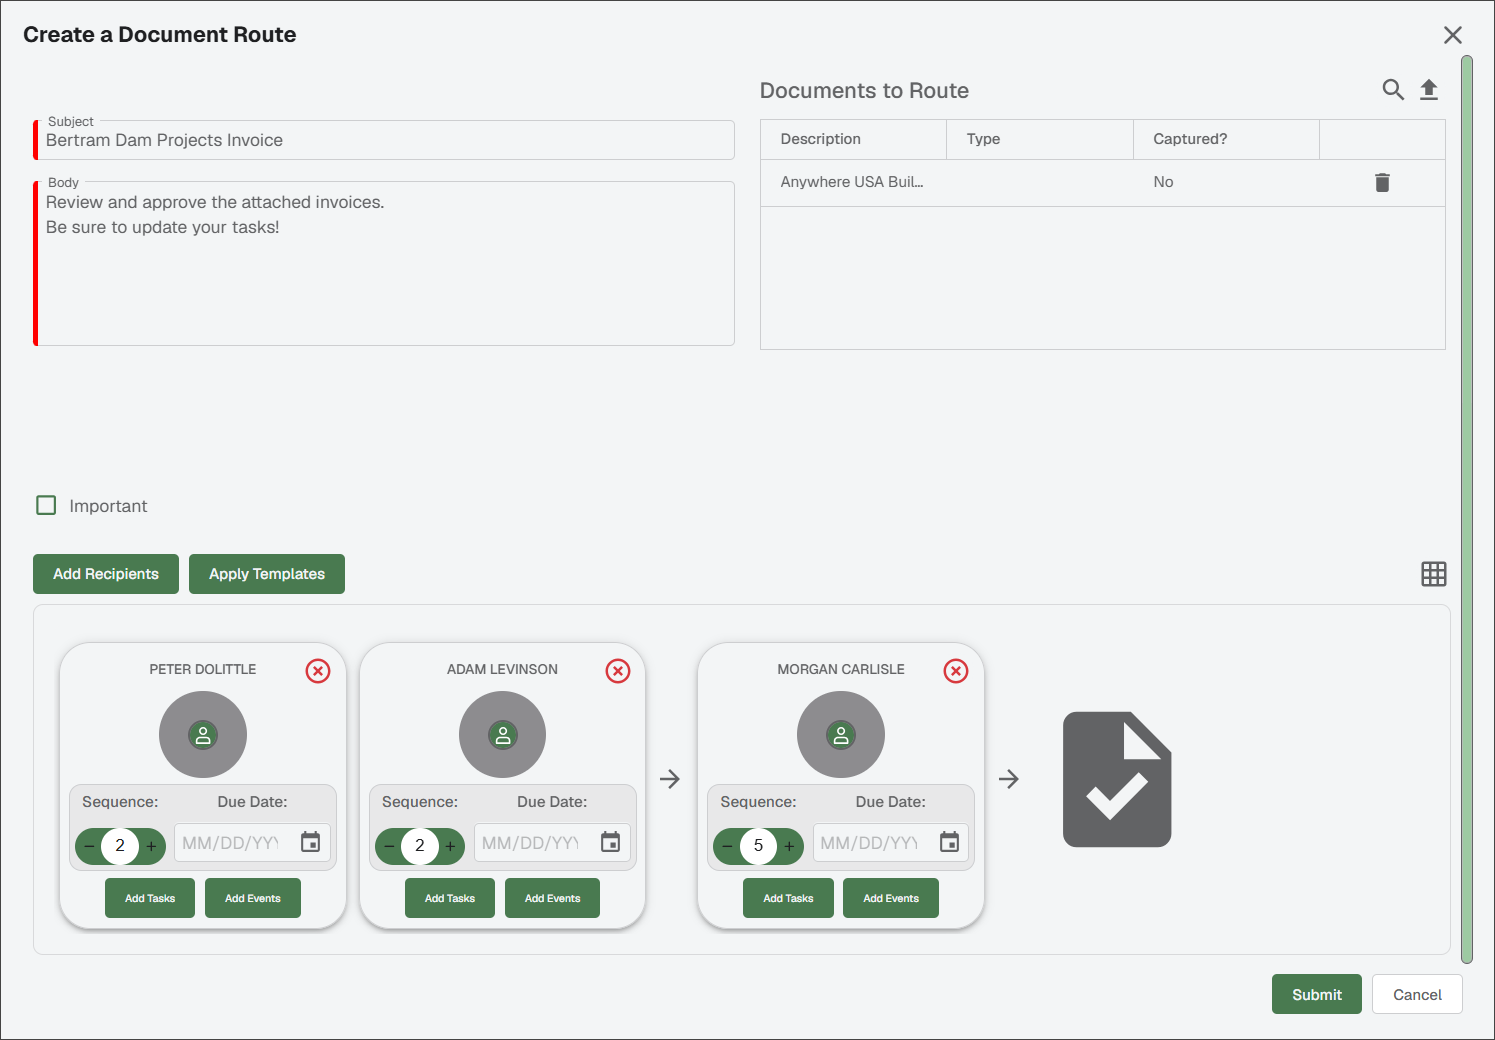
Click .
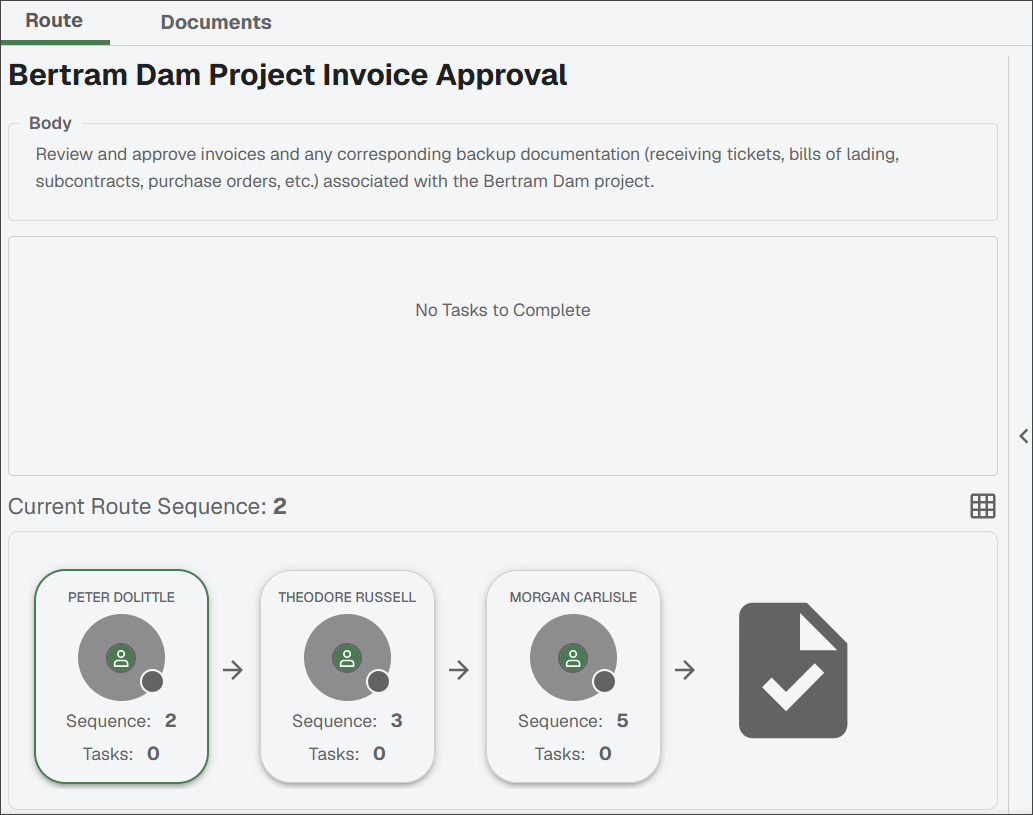
As the route moves through the sequence, the individual where the route is currently has their card highlighted. This provides a clear view of where the route may, or may not, be delayed.
Note
This location identifier is present on the card view only; not the grid view.