ClearToPay™ Queues
In ClearToPay, queues are configured to gather, review and route documents once they are submitted by vendors via the Portal.
ClearToPay workflows can incorporate numerous features found in Sage Paperless Construction, including using queues for document management. Like the other queues in the system, ClearToPay queues can be assigned to individual users or be monitored by groups of users.
Unlike other queues, no manual document indexing is required because ClearToPay is designed to handle indexing behind the scenes after a document is approved. As a result, there is no Index option in the sidebar, because the system knows what the document is and where it originated in the portal.
Important
Queues are only necessary if the ClearToPay Portal is enabled at both the company and job levels, and vendors are granted Portal access. See Configure the External Portal for more information.
Tip
It is recommended that you create one or more queues specifically for ClearToPay. The number and type of queues needed depends on your configuration and which compliance modules are enabled.
Complete the following steps to configure the queue(s) you want to use for ClearToPay document management:
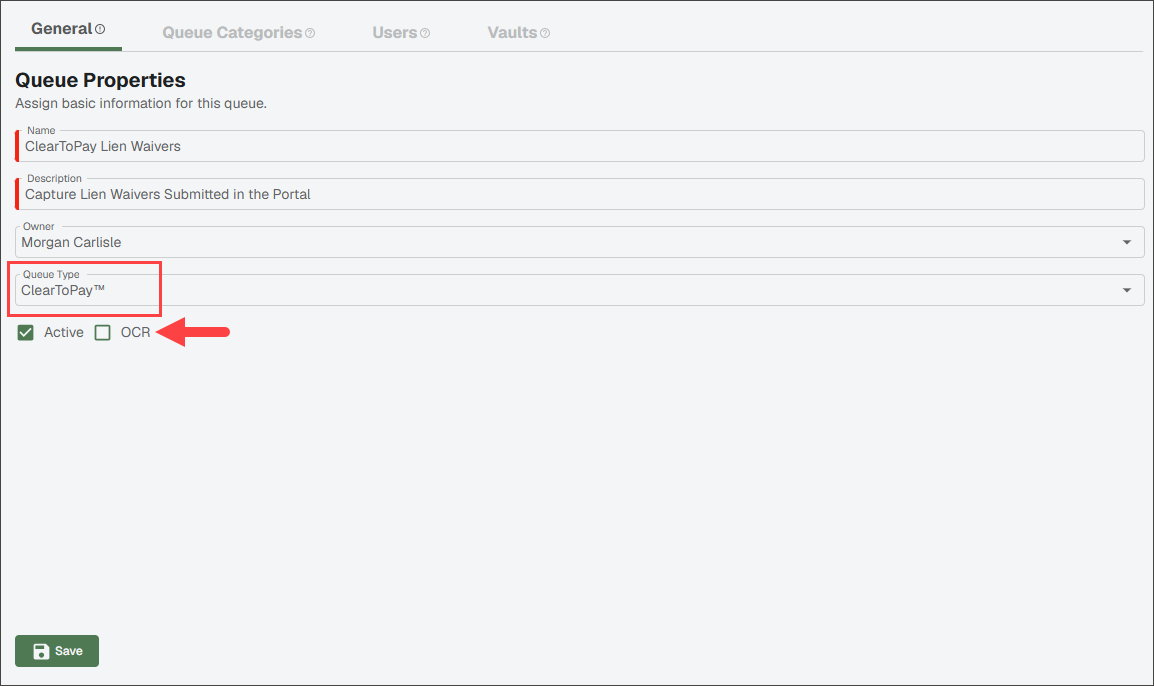
Create a new queue or edit an existing queue so that the Queue Type field is set to using the process described in Global Queue Configuration. If this queue is going to use OCR to systematically capture ACORD insurance certificate information, select the check box.
(Optional) If you selected the OCR check box in Global Settings, go to and select the correct OCR workflow for your queue, as described in Configure OCR Queues.
Complete the steps in Configure the External Portal to designate one or more queues for incoming vendor files. The list below includes all available options:
Note
If desired, you can use one queue for all vendor documents (unless you have implemented an OCR workflow for the Portal Insurance Download Queue, which can only be used for insurance certificates), or use an individual queue for each document type.
Portal Insurance Download Queue: Captures vendor-uploaded insurance certificates from Insurance tab in the Portal.
Portal Lien Waiver Download Queue: Captures signed lien waivers from Lien Waiver tab in the Portal.
Note
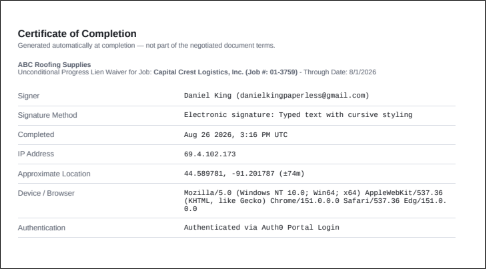
If a vendor electronically signs a lien waiver document in the Portal, a Certificate of Completion page is appended to the document that contains information about the signer, signature method, date and time of the signature, and the user's IP Address and device information.
Portal Certified Payroll Download Queue: Captures vendor-uploaded certified payroll records from Certified Payroll tab in the Portal.
Portal Miscellaneous Download Queue: Captures vendor-uploaded documents that do not fit the criteria above from Documents tab in the Portal.
Complete the following steps to access and use your ClearToPay queues:
From My Paperless, click .
In the Retrieve navigation bar, click .
From the Queue dropdown, select the ClearToPay queue you want to view.
A page similar to the following displays:
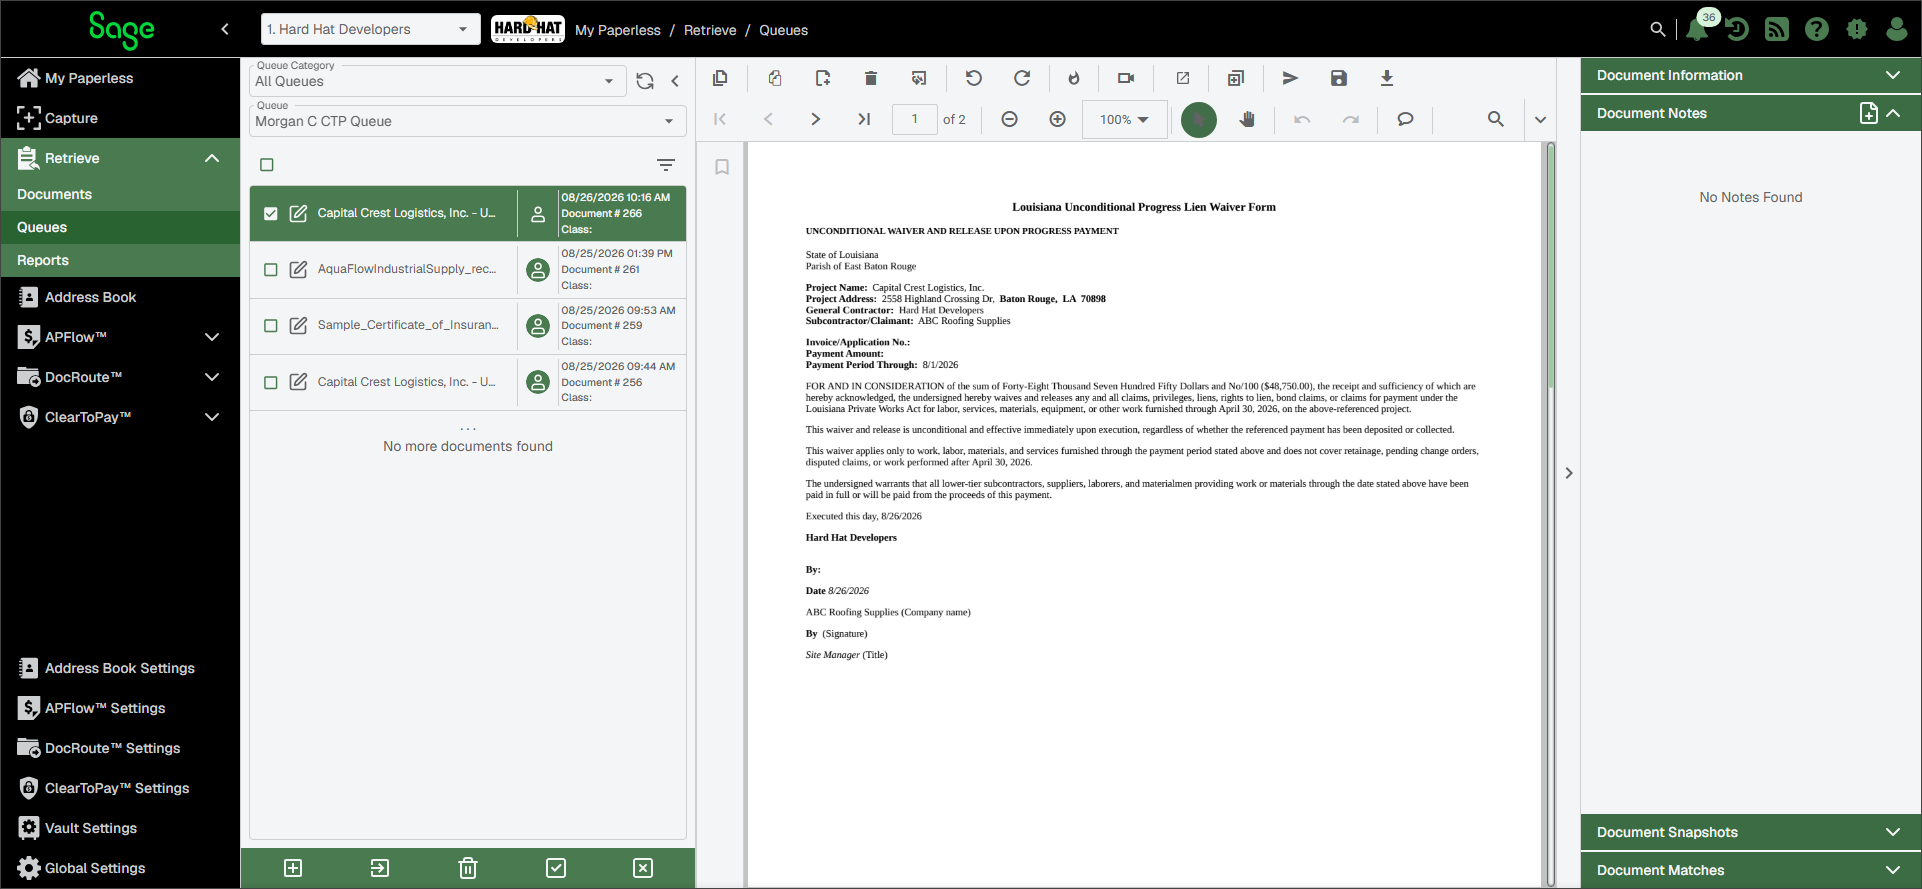
Queue Category | From the Queue Category dropdown, you can leave the default as All Queues or select a specific category to filter the options available in the Queue dropdown. | ||
Queue | From the Queue dropdown, select the ClearToPay queue you want to view. | ||
 | Click the Refresh List icon to reload the page and capture the most recent documents submitted by vendors. | ||
  | Use these icons to minimize and maximize the Queue (middle pane). | ||
| Click this icon to access the Sort By field. From this dropdown you can select the field from which to sort the items in the queue. NoteThe listed fields are based on your accounting system. This is per vault, per user. The system remembers the sort you select. | ||
| Several icons are located at the bottom of the queue to help you complete the tasks listed in the next table. If your company is using OCR to process documents uploaded to an insurance queue, there is an additional Add Insurance icon For more information on OCR statuses, see OCR Icons and Validation. | ||


ClearToPay queues can have the following icons at the bottom of the queue:
Add to Queue  |
| |
Push to Queue  |
| |
Delete from Queue  |
| |
Approve  | NoteThe Approve icon is only enabled for documents uploaded to the queue via the portal.
| |
Reject  | NoteThe Reject icon is only enabled for documents uploaded to the queue via the portal.
| |
Add Insurance  | NoteThe Add Insurance icon is only enabled if your company is using OCR to process documents uploaded to an insurance queue
|